---
title: Edumaps Handbook
language: en
generated: 2026-11-04T15:16:42Z
canonical: https://www.edumaps.de/help/handbook-en.md
faq: https://www.edumaps.de/en/faq
tutorials: https://www.edumaps.de/folder/1007/1/imhcphqc26/1guvtxkara
---

This handbook describes Edumaps on www.edumaps.de. It is generated automatically from the frequently asked questions (FAQ) and the tutorial maps. The servers for single German states and Switzerland (he.edumaps.de, nds.edumaps.de, nrw.edumaps.de, www.edumaps.ch) have their own user accounts and may differ in the available modules. Every section names the page it comes from under “Source”.

Terms: map / pinboard / board, column / path, box / card

## Frequently asked questions
Source: https://www.edumaps.de/en/faq

### My login does not work. What should I do?
Source: https://www.edumaps.de/en/faq#login

The respective error message will help you here.

- **Error: “User not found”**
  1. You entered the wrong username or email.
  2. The user account has not been created yet with this username or with the email provided.
  3. Check whether you are using the correct server. Edumaps is currently running on the following servers: Main server www.edumaps.de, Lower Saxony server with nds.edumaps.de, Hesse server with he.edumaps.de, North Rhine-Westphalia with nrw.edumaps.de as well as Switzerland server with www.edumaps.ch. Each server has a separate user database.
  4. As the case may be, your admin might have changed your email address or deleted your user account. Please contact your admin directly.
- **Error: “Incorrect password”**
  1. Check if the password was entered incorrectly. Show the entered password by clicking on the eye icon.
  2. If you forgot your password, go to the [Forgot Password](https://www.edumaps.de/user/forgot) page and have a password recovery link emailed to you.
  3. If you have a teacher or student account, please have your admin **reset the password**.
- **Note: “An Edumaps account with this email address already exists”**
  1. This message appears when logging in via a single sign-on (e.g. Edupool, VIDIS, IServ or moin.schule), if an Edumaps account already exists for the transferred email address.
  2. A form appears: Enter your Edumaps password there and click on “Link account”.
  3. After that, the single sign-on is connected to your existing account.
  4. If you no longer know your Edumaps password, have a new one sent to you via the [Forgot Password](https://www.edumaps.de/user/forgot) page.
- **For admin/teachers/students: I put the wrong email when setting up my account.**
  1. You can correct your email address. For this you log in directly with your username (not with your email).
  2. Then open the [My Account page](https://www.edumaps.de/user/account) and click on “Change email”.
  3. Enter the corrected email and click “Change Email”.
  4. Open the confirmation email in your inbox (at your mail service provider) and click the confirmation link.

**Note:**
If you have a student or teacher account, your admin (school admin) can use the [List of Accounts](https://www.edumaps.de/users/list) page to set a new email and a new password for your account.

### How do I report a technical problem (bug)?
Source: https://www.edumaps.de/en/faq#bug

We need the following information from you, so that we can check and fix the problem:

1. Link to affected page or map.
2. **What single steps** are necessary to create the problem?
3. What is the error message?
4. Which browser do you use on which device?
5. Optional: A screenshot that shows the problem. Ideally, create a short screen recording. You can upload the screen recording video directly to one of your maps and then send it to us.

If there is a problem with an account, we need a login and password or at least the email address.

### Why can I not open the map?
Source: https://www.edumaps.de/en/faq#mapaccess

There can be several reasons for this. The error message is your best guide.

- **Error: “This map can only be accessed with the correct link.”**
  The link is incorrect. Check whether the link is complete and correct.
- **Error: “Only members of the school may access this map.”**
  The user must belong to the same school as the map creator.
- **Error: “You do not have access to this map or the map has been deleted.”**
  Either the link is incorrect or the map has already been deleted.
- **Error: “Password not correct”**
  The map is password protected, and you have entered the wrong password.
- **Error: “Access is only for logged-in users”**
  You need to log in to access the map.
- **Error: “Map does not exist”**
  The map does not exist or has been deleted.

Also make sure that the maps and the users are located on the same server. For example, `www.edumaps.de` is a different server than `he.edumaps.de` and consequently has a completely different database and different maps.

### I cannot confirm my account because the email does not arrive?
Source: https://www.edumaps.de/en/faq#a150

You can change your email anytime in the [My Account page](https://www.edumaps.de/user/account). If your account belongs to a school (you can see this in the My Account page), the admin can also change your email at any time.

### Why have I not received the registration email or the email inviting a user to our school?
Source: https://www.edumaps.de/en/faq#a200

This may well be due to your email service. The email from our mail server may be blocked by your mail server as spam, before it reaches your inbox.

Please test an alternative email address from a different mail provider and see if the email arrives there. If so, the problem is your email server. Then contact your admin so our domain gets whitelisted.

Please also always check your spam folder to see if our email ended up there by mistake.

### I can no longer log in using single-sign-on. How can I log in to my account now?
Source: https://www.edumaps.de/en/faq#a250

If the single-sign-on (IServ, Edupool, Sesam, Schulportal, …) no longer works, then you can use [forgot password](https://www.edumaps.de/user/forgot) (with the email stored with your single-sign-on) to generate a password for your account. With your email and this password you can then log in as usual via the Edumaps login page. A single-sign-on is no longer required.

If you have not provided an email address for your account, please contact your school administrator. The admin can change the email address and password for your account.

### Do you need to log in to view a map?
Source: https://www.edumaps.de/en/faq#a300

It depends on the settings chosen by the map creator for the map link. In the map sharing dialog, you can set:

- Read map
- Edit map
- Access for registered users only

If “Access for registered users only” is not checked, then the map can be accessed anonymously. Only the link to the map is required for this.

### How do I share a map with my students?
Source: https://www.edumaps.de/en/faq#a400

To share a map, click on the blue share button at the top right [Icon: share-alt]. A link will then be displayed to you. You can distribute this link to all your students (or only to selected students).

If you want to distribute the map to a specific class (which you created under [Manage classes & groups](https://www.edumaps.de/users/usersets)), click on “Share Map” [Icon: share-alt] in view mode and choose “Share with Group” from the dropdown. In the dialog that opens, select the corresponding class from the dropdown. Each student will then receive a notification on Edumaps that a map has been shared with them. Each student will also find the map again on the [Received](https://www.edumaps.de/user/received) page.

As a reminder: If you select “My School (Read)” under “Publish” in the map settings, then all students at your school will see this shared map on the [“My School”](https://www.edumaps.de/maps/school) page and can access it.

### How can I share a map with different rights: editing for my colleagues, reading for my students?
Source: https://www.edumaps.de/en/faq#a500

The easiest way to do this is if all users are registered with Edumaps. Then you can create classes/groups and in the sharing dropdown [Icon: share-alt-square] simply select “Share with Group”. For one group with editing rights, for the other group with reading rights.

If you only want to share your map via link, this is also possible:
(1) Open the map sharing dialog and select “Edit”. Optionally, you can enable “Access only for registered users”. Copy the link and distribute it to your colleagues.
(2) To give students read-only access to your map, reopen the map sharing dialog and select “Read”. Copy the link and distribute it to your students.

For more information on access rights:

- [Tutorial: Distributing maps and access rights](https://www.edumaps.de/1047/1/siajhiablo/fv6nobr4hp)
- [FAQ: How do I share a map with my students?](https://www.edumaps.de/en/faq#a400)

### How can I share a map with teachers to edit via a link with login, while allowing students to view the map without login?
Source: https://www.edumaps.de/en/faq#a550

Share the map with your teachers as follows:

(1) Open the map sharing dialog and select “Edit”. Enable “Access for registered users only”. Copy the link and distribute it to your colleagues.

(2) To give students read-only access to your map, open the map sharing dialog again and select “Read”. Do not click the “Access for registered users only” checkbox. Copy the link and distribute it to your students.

More information on access permissions:

- [Tutorial: Sharing Maps and Access Permissions](https://www.edumaps.de/1047/1/siajhiablo/fv6nobr4hp)
- [FAQ: How do I share a map with my students?](https://www.edumaps.de/en/faq#a400)

### How do I share a map with a large group of teachers for editing?
Source: https://www.edumaps.de/en/faq#a600

If you want to distribute your map to a variety of teachers/colleagues, you have two options:

1. Via map link:
Click on the button to share the map [Icon: share-alt-square]. Set “Edit” and optionally “Access for registered users only”. Copy the link. You can distribute this link to your colleagues using the communication method you prefer (such as email or chat).
If you want to share the same map with students or other people who should have read-only access, open the map sharing dialog again and select “Read” and optionally “Access for registered users only”.

2. Via class sharing:
Create a group of all teachers (on the [Manage classes & groups](https://www.edumaps.de/users/usersets) page). Then go to your map, click on the button to share the map and select “Share with Group” in the dropdown. Select the group of teachers, then choose “Edit” as the access right and confirm. All teachers will now find the shared map on the [Received](https://www.edumaps.de/user/received) page. Additionally, all teachers will receive a [notification](https://www.edumaps.de/notifications).

Tip: It would be time-consuming if every teacher created their own group of teachers. You can save a lot of time here by using the admin account. With the admin account, you can create a group of teachers (under [Manage classes & groups](https://www.edumaps.de/users/usersets)). This group can then be adopted by all other teachers under [Predefined Classes](https://www.edumaps.de/users/usersets-admin). Changes to the group can then be centrally managed by the admin, keeping the group up to date.

### How do I share a map to a large group of teachers (but not students)?
Source: https://www.edumaps.de/en/faq#a650

If you want to distribute your map to a large number of teachers/colleagues but not to students, first create a group of teachers under [Manage classes & groups](https://www.edumaps.de/users/usersets).

Then go to your map and click on the “Share map” button [Icon: share-alt] and select “Share with Group” in the dropdown. In the dialog that opens, select the appropriate group from the dropdown. Each teacher will then receive a notification on Edumaps that a map has been shared to him.

Each teacher will also find the map on the [Received](https://www.edumaps.de/user/received) page.

Tip: You can create a group of teachers with the admin account (under [Manage classes & groups](https://www.edumaps.de/users/usersets)). This group can then be adopted by all other teachers under [Prepared Classes](https://www.edumaps.de/users/usersets-admin). The admin can make changes to the group centrally.

### How do I share a map with one group of teachers for reading and a second group of teachers for editing?
Source: https://www.edumaps.de/en/faq#a675

If you want to share your map only via a link, you can click on the blue “Share Map” button and choose “Link to Map” to retrieve two different links. Either “Read” or “Edit” - Enable the checkbox “Access for registered users only” to require a login. Otherwise, no login is needed to read or edit the map.

If you want to share the map directly with user groups instead of via a link, proceed as follows:

1. First, create two groups of teachers on the [Manage classes & groups](https://www.edumaps.de/users/usersets) page.
2. Then go to your map and click the “Share Map” button [Icon: share-alt] and select “Share with Group” from the dropdown. In the dialog that opens, select the first group of teachers from the dropdown. Additionally, select “Edit”. Confirm by clicking the OK button. Each teacher will then receive a notification on Edumaps that a map has been shared with them.
3. Click “Share Map” and “Share with Group” again. Now select the second group of teachers from the dropdown. Additionally, select “Read”. Confirm by clicking the OK button. This second group of teachers will receive a notification about the shared map, but these users only have read access.

It should be noted that every teacher can find the map on the [Received](https://www.edumaps.de/user/received) page (first group with editing rights, second group with reading rights).

### How can multiple teachers work on multiple maps that can be found centrally?
Source: https://www.edumaps.de/en/faq#a700

If you want many maps to be edited by several teachers and to be found centrally, there are two ways to set this up:

Option 1:
You use the page [My Folders](https://www.edumaps.de/user/folders), create a folder that contains your maps, and share the folder to all teachers. You can share the folder with editing rights so that the other teachers can also add maps.

Option 2:
You can share maps to appear on the [Received](https://www.edumaps.de/user/received) page of each teacher. To do this, proceed as follows:

1. First create a group of teachers under [Manage classes & groups](https://www.edumaps.de/users/usersets).
2. Then go to your map and click the Share Map button [Icon: share-alt] top right and select “Share with Group” in the dropdown.
3. Select your teacher group in the dropdown and confirm.
4. Now all teachers can find this map under [Received](https://www.edumaps.de/user/received).
5. Furthermore, all teachers will receive a [notification](https://www.edumaps.de/notifications) about the new map the next time they visit Edumaps.

Tip: You can create a group of teachers with the admin account (under [Manage classes & groups](https://www.edumaps.de/users/usersets)). This group can then be adopted by all other teachers under [Preset Classes](https://www.edumaps.de/users/usersets-admin). The admin can then make changes to the group centrally.

### How can my students find the link to a shared map again?
Source: https://www.edumaps.de/en/faq#a750

When a student is logged in, they can view all previously visited maps in the menu under “Maps & Folders” → [“Visited”](https://www.edumaps.de/user/maps-visited).

If the students are anonymous on Edumaps, visited maps cannot be found again.

If you have created a map and set its sharing to “My School (Read)”, the map will be displayed to all students under [“My School”](https://www.edumaps.de/maps/school).

Tip: If you work with multiple maps that you distribute, you can create a map where you centrally collect these maps. This (parent) map can then be distributed to your students.

If all students have an account, you can share a map with the students by selecting “Share with Group” in the map-sharing dropdown. The shared map will then appear in all students' [“Received”](https://www.edumaps.de/user/received) folder and they will receive a notification.

### What rights does the user have when editing without login?
Source: https://www.edumaps.de/en/faq#a800

If the user is not logged in and visits the map, he is automatically logged in as “anonymous”. As “anonymous” he can on the map:

- create new boxes (including material uploads)
- Edit boxes
- Anonymous cannot delete boxes
- Anonymous cannot change map data or column data, these are protected.

If the user is already logged in with an account and visits the map, he has full access to the map including changing/deleting columns and boxes. These changes also appear in the map history.

The map owner can track all changes in the map history and restore the previous state of changed boxes.

### How to delete your own map?
Source: https://www.edumaps.de/en/faq#a900

Open your map. Switch to editing mode by clicking on the red icon [Icon: pencil] in the upper-right. Then open the map menu by clicking on the icon with the three dots [Icon: ellipsis-v] (top right) and select “ [Icon: trash] Delete Map” from the dropdown.

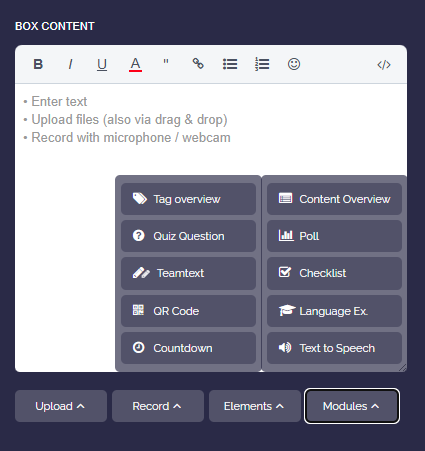
### What input options are available?
Source: https://www.edumaps.de/en/faq#a1000

In the box editor, many types of inputs are possible. See details under [Tutorial: Inputs and formatting in the box editor](https://www.edumaps.de/1003/1/e9o5ybwc3p/z960xa7v6r).

### What shortcuts are available in Edumaps? List of all keyboard shortcuts.
Source: https://www.edumaps.de/en/faq#a1100

You can find all keyboard shortcuts in the map: [Tutorial: Keyboard Shortcuts](https://www.edumaps.de/1084/1/4ztrw5fusl/3ggshiv0nr)

### Is there an easier way to navigate/scroll on the map?
Source: https://www.edumaps.de/en/faq#a1200

Yes. Hold down the `SPACE` key and drag with the mouse, or drag while holding the middle mouse button. Alternatively, hold down `CTRL` and `ALT` and move the mouse. This way you get a simple scrolling behavior like on a tablet/smartphone.

### Can I upload multiple files to a box at once?
Source: https://www.edumaps.de/en/faq#a1300

Yes, this is possible. To do this, select several files on your computer and drag and drop them into the box. Then these files are uploaded one by one.

### Why is the set font displayed correctly on PC/MAC, but not on some smartphones (Android/iPhone) and tablets (iPad)?
Source: https://www.edumaps.de/en/faq#a1400

We currently use fonts in the map editor that are standard on both Windows and Mac operating systems. Depending on the version, for example, only three fonts are available with Android (selectable with “Standard”, “Courier New” and “Times New Roman”). The other fonts are not rendered on Android.

If a font is missing on the mobile device, the device uses an existing font such as “Times New Roman”.

Tip: The “Raleway” font is available on all devices because we load it separately for our website.

### How can I copy a map?
Source: https://www.edumaps.de/en/faq#a1500

You can copy a map by clicking the three dots in the top right corner ( [Icon: ellipsis-v]) and choosing “ [Icon: clone] Copy”.

Copying a map creates a duplicate map that is only available to you. You can edit it as you like, the original remains unchanged.

### Why is the “Copy” option missing from the map menu?
Source: https://www.edumaps.de/en/faq#a1550

When you open a map while logged in, you have the map menu at the top right with the “Copy” option, regardless of whether you have read or edit rights.

If this option is missing, you are probably not logged in (anonymous visitor) or the map owner has disabled map copying in the map settings.

### How can I backup my map?
Source: https://www.edumaps.de/en/faq#a1600

In edit mode you find the “Export” in the map menu. This allows you to save the map as a JSON file and restore it in the future (via “Import Edumaps file”).

An alternative way is to create a backup of the map by making a copy of the map (“Copy” in the map menu). In this case, a corresponding note should also be entered in the map title (e.g. “Backup” or “Copy”).

### How can I copy a column from another map?
Source: https://www.edumaps.de/en/faq#a1650

Click on the three dots [Icon: ellipsis-v] next to the “Add Column” button and select “Copy column from map”. Then navigate to the map where the column is located. You will now see a red plus icon on the columns, select the column you want to copy. You will then be automatically redirected back to your map. There you will find the copied column with all the boxes.

### How can I start the audio recorder? An error message about the MediaRecorder is displayed in the browser.
Source: https://www.edumaps.de/en/faq#mediarecorder

With older versions of Safari, the MediaRecorder, which is necessary for recording microphone/audio in the browser, is disabled by default.

**MAC:** To activate the MediaRecorder in Safari on the MAC, you can proceed as follows:

1. Open Safari → Settings → Advanced.
2. Activate the option at the bottom “Show Developer menu in menu bar”.
3. Then go to Safari → Developer → Experimental Features and activate the “MediaRecorder” (tick checkbox).

**iPhone/iPad:** Activate the MediaRecorder in Safari on iPhone/iPad as follows:

1. Open Settings → Safari → Adanvanced → Experimental Features
2. Activate “MediaRecorder”.

### What does “Moodle course (mbz)” mean?
Source: https://www.edumaps.de/en/faq#a1800

With the function “Moodle course (mbz)” you can export your map directly as a Moodle course.

An `mbz` file will be created which you can import directly into Moodle. See also [Video: Export as Moodle course](https://www.edumaps.de/file?id=14924014269297090912.mp4&code=aegczhp).

The Moodle export is included in the Premium plan.

### I have created a map on my iPad but cannot find it under “My Maps”?
Source: https://www.edumaps.de/en/faq#a1900

In this case, you are not logged in to one of the devices or you are logged in with a different account. After logging in, the same maps are always displayed for each account.

### Is there a folder structure for organizing custom maps? How can I collect maps in a folder?
Source: https://www.edumaps.de/en/faq#a2000

You can collect as many maps as you like on the page [My Folders](https://www.edumaps.de/user/folders). Just create a folder and add maps to it. Or you can visit a map, then click the map menu and choose “Bookmark in Folder”. So you can collect and organize any maps in folders.

By the way, an alternative to folders is to use tags. Each map can be saved with tags. Then on the page [My Maps](https://www.edumaps.de/user/maps) you can click on a tag and only maps containing that keyword will be displayed.

### Can I embed a map as an iframe in an external website? Can I use iframes?
Source: https://www.edumaps.de/en/faq#iframes

The use of iframes is not permitted on Edumaps, as there are several reasons (especially security) against it:

1. Security Risks: If web pages can be embedded, the pages containing the iFrame can run their own code. For example, it is possible to overlay input fields with other input fields (invisibly) and to access data or to set malicious links (so-called [Clickjacking](https://en.wikipedia.org/wiki/Clickjacking)).

2. Usability: Most users use smartphones and tablets (currently around 60 % of global users), that is, small screens are often used. If the map is embedded, the iFrame takes up space. In addition, double scrolling (main page and also in the iFrame) is necessary.

3.Navigation: With an embedded iFrame, the “back” button of the browser cannot be used, because users cannot navigate back in iFrames. Instead, it navigates back from the embedding page.

4. Accessibility: Screen readers (used by visually impaired visitors) do not work with iFrames.

Solution: Simply use a link to your map. If necessary, generate a preview image to give your visitors an idea of the map.

If you would like to present your map on a monitor alongside other external content, you can place two browser windows next to each other. Alternatively, you can also put the external content on your map.

### Can I crop a photo I took directly from the photo function of the box editor?
Source: https://www.edumaps.de/en/faq#a2400

We do not offer a cutting function for photos. Alternatively you can:

1. Take a photo with your smartphone.
2. Crop the photo on your smartphone.
3. Upload the photo to your box.

### How can I share a map as a QR code?
Source: https://www.edumaps.de/en/faq#a2450

If you want the link to a map as a QR code, click on the blue “Share Map” button at the top right [Icon: share-alt-square] and select “Link to Map” from the dropdown. Then, a share link dialog will open, which also displays the QR code. Clicking on the QR code will open it as a larger image.

### How can I copy the QR code as a graphic when sharing the map?
Source: https://www.edumaps.de/en/faq#a2500

Right click on the QR code, then select “Copy image”. You can then paste the QR code into a Word document or similar.

### Can I use a GIF animation as a map background?
Source: https://www.edumaps.de/en/faq#a2600

Yes, that is possible. Simply click “Own picture” in the map editor and upload the GIF graphic. This is then displayed as an animated background.

### How can I put a GIF animation inside a box that plays immediately?
Source: https://www.edumaps.de/en/faq#a2650

First of all, it should be mentioned that Edumaps always generates still thumbnails of uploaded media. A thumbnail saves loading time because some GIFs require a lot of memory. In addition, many maps appear restless when several GIFs are playing at the same time.

However, if you want to see a GIF animation right in your box without having to click on a thumbnail, proceed as follows:

1. Upload the GIF file to your box. `UPLOAD1` appears.
2. Put a hash character `#` directly after the entry `UPLOAD1`, i.e. `UPLOAD1#`.
3. Save the box.
4. Reload the entire page in the browser and you will see the GIF start playing in the box immediately.

Note: You can also include links to external GIF files in the box content. These GIF files will also play instantly. Make sure that the link ends with `.gif`.

### How can I generate a thumbnail for a link?
Source: https://www.edumaps.de/en/faq#a2700

To create a preview image for a link, insert the link in the editor on its own line. Make sure there is no text on the previous line. A preview image is then automatically generated, which can take up to a minute. If you want a title under the preview image, write it directly on the next line after the link.

### Is it possible to change the preview image generated for a link and replace it with a custom image?
Source: https://www.edumaps.de/en/faq#a2800

To set a custom preview image, you can take a screenshot of the webpage and upload it into the box. Then, instead of a description, place the link directly below `UPLOAD1`. Also, put an exclamation mark in front of it (so `!LINK1`). This will link to the external webpage instead of the image. You can also add a title. Overall, it would look like this:
`UPLOAD1
!LINK1
My Title`

### How can I put checkboxes in the box content?
Source: https://www.edumaps.de/en/faq#a3000

To do this, you can set the symbols `▢` and `🗹` directly at the beginning of the respective line and thus create a list of checkboxes. Copy the symbols directly from here `▢ 🗹` or use the emoji dropdown directly in the editor.

Checkboxes can also be set with Markdown syntax (`[]` and `[x]`). In edit mode, you can then click on the checkboxes to check or uncheck them. The state of the checkboxes is saved in the box content.

### How can I reduce the size of my video? Maximum file size is exceeded.
Source: https://www.edumaps.de/en/faq#a3100

First of all: Large files make the server slow (especially processing/converting videos) and put a strain on the available bandwidth. At Edumaps we want all our users to enjoy an extremely fast website, therefore we must limit the upload size in the interest of all.

Many videos are not optimally converted. That means they are way too big for their size.

In order to downsize the video, it must be properly converted, for example to the “480p” image format (image size 852px × 480px). You may have video compression software directly on your PC/Mac computer for this purpose.

If you do not have any software or do not want to install anything, you can use an online video compression service. For example: [Freeconvert.com](https://www.freeconvert.com/video-compressor/download).

For **PC and MAC**, the free [HandBrake](https://handbrake.fr/downloads.php) is a good choice. Just install, start the program and then drag and drop the video file. Then select the template “General” → “Very Fast 480p30” from the “Preset” dropdown. Then click on the green “Start Encode” button, wait for the conversion (a few minutes) and your new reduced video file is ready.

For **Android** you can use any [video converting app](https://play.google.com/store/search?q=video%20converter&c=apps).

For **iPhone and iPad** you can use an app like [The Video Converter](https://apps.apple.com/us/app/the-video-converter/id893347665).

### Can you import Padlets to Edumaps?
Source: https://www.edumaps.de/en/faq#a3200

Yes, this is possible with just a few clicks. Instructions can be found on the [Padlet import](https://www.edumaps.de/import/padlet) page. The import from Padlet, TaskCards and Trello is included in the Premium plan.

### Why are ratings and comments not taken over when importing from Padlet?
Source: https://www.edumaps.de/en/faq#a3210

This data is not directly accessible via the Padlet API. Padlet only exports the columns and boxes, but not the other data.

### Why is the background not imported when importing a Padlet?
Source: https://www.edumaps.de/en/faq#a3220

The background is not passed by the Padlet API and therefore cannot be transferred. Please manually upload the background image into the imported map.

### Why are all boxes arranged in one column when importing from Padlet?
Source: https://www.edumaps.de/en/faq#a3250

Your padlet must have sections, these correspond to columns in Edumaps. If no sections are created, the export data does not include where which box is assigned to. Therefore, all boxes are placed in one column during the import.

### Why are not all files transferred when importing a Padlet?
Source: https://www.edumaps.de/en/faq#a3270

After you import a Padlet, it may happen that not all files are transferred from the Padlet server to Edumaps. This can have the following reasons:

1. The file format is not accepted by our server (e.g. ZIP files). See [Allowed file formats](https://www.edumaps.de/1005/1/ot2mrok).
2. The file is larger than 250 MB.
3. The file no longer exists on the Padlet server.

If such an error occurs, you can edit the box and upload the file manually.

If a video file is larger than 250 MB, convert the video to a smaller format, see [instruction here](https://www.edumaps.de/en/faq#a3100).

### Why does the message “Invalid API key” appear when importing Padlets?
Source: https://www.edumaps.de/en/faq#a3280

This indicates that on the [“Import Padlet”](https://www.edumaps.de/import/padlet) page, an incorrect value has been entered in the input field “Your Padlet Developer Key” at the bottom. You can find the developer key at Padlet.com on the [“Padlet-Developer”](https://padlet.com/dashboard/settings/developers) page. With the developer key you can import all pinboards that have been created directly by you. However, it does not apply to pinboards of other users.

If you are not using a developer key, please make sure that no value is entered in the input field “Your Padlet developer key”. You also need to add the user “Edumaps” as an admin for each individual Padlet pinboard.

### How can I import all Padlets from all teachers at once?
Source: https://www.edumaps.de/en/faq#a3290

For data protection reasons, each user must perform the import for their own content. Technically, the Padlet import is done individually, as often a large amount of data is transferred with just one Padlet.

### How can I place a description at the heading (as basic information for the map)?
Source: https://www.edumaps.de/en/faq#a3300

In the map settings directly below the title field you will find the field “Subtitle optional”, enter the additional text there that should appear below the heading.

### How can I sort the maps in my map list? Can I create directories?
Source: https://www.edumaps.de/en/faq#a3400

First it should be mentioned that maps are sorted chronologically, which means that the newest maps are at the top of the list.

To quickly find the desired map on [“My Maps”](https://www.edumaps.de/user/maps), you can use the small search box. It shows you the filtered maps when you enter the search term. All titles and tags of your maps are considered for the search.

It is also very helpful to assign **tags (keywords)** to each map. Then, in the map list, you can use the tag list next to the search field (it starts with “All”) to display only maps of a chosen tag.

Another alternative is to create a central map on which you store the links to your maps and thus determine the order yourself.

You can also create [folders](https://www.edumaps.de/user/folders) and collect your maps there. To create a sorting here, assign the map titles alphabetically or numbered accordingly.

### How do I turn off ads on YouTube videos?
Source: https://www.edumaps.de/en/faq#a3500

On the [Youtube support page](https://support.google.com/youtube/answer/132596?hl=en) you find the paragraph:

“Ads appear on brand safe sites: YouTube works diligently so that our advertisers' brands appear on sites that reflect our respective core values. Our systems closely evaluate websites and their content against various factors when finding out whether to turn on In-stream ads on YouTube embeds. These factors include a strict set of guidelines on content like adult imagery, violence, inappropriate and hateful language, and sites that promote infringement.”

There is therefore no way to switch off the advertisements in front of the videos (or above the videos) when YouTube is directly integrated. Youtube decides for itself whether to display an ad, provided the video owner has enabled ads.

So the recommendation for Edumaps: Upload your videos directly to Edumaps. This is **ad-free** and **data protection compliant**.

If the videos are from third parties, please check the copyright. If corresponding rights of use have been released, you can upload the video to Edumaps.

Basically it is recommend to use the Chrome extension [Adblock Plus](https://chrome.google.com/webstore/detail/adblock-plus-free-ad-bloc/cfhdojbkjhnklbpkdaibdccddilifddb) (or [Adblock for Youtube](https://chrome.google.com/webstore/detail/adblock-for-youtube/cmedhionkhpnakcndndgjdbohmhepckk?hl=en)), which suppresses all advertisements.

Websites that play YouTube videos via proxies and thus bypass advertising (such as www.video.link) are not recommended, Firstly, because these websites are very likely to be switched off and secondly, the IP and other browser data go directly to the operators of these websites, which violates privacy.

### Can it be displayed directly in the box who has registered via comment?
Source: https://www.edumaps.de/en/faq#a3600

If you want to see the names of users directly on the map, the rating function is available to you. To do this, simply activate “Ratings” in the box settings, choose the rating type “Answer” (with the options “Yes”, “Maybe” and “No”) and tell the students to rate the box with “Yes”. Then, in edit mode, click on the number of votes, and you will be shown which students have registered. Alternatively, activate “Likes” in the box settings, then the students click on the heart to signal that they have understood the content.

Alternatively, you can share the map with editing rights, and the students can enter their names in each box.

### How can I delete my account?
Source: https://www.edumaps.de/en/faq#a3900

You can do this directly in the [My Account page](https://www.edumaps.de/user/account), there under “Delete account”. If you are a customer, you will be informed also cancel the debit agreement with Paypal/Stripe before deletion.

### Can you recover a deleted account?
Source: https://www.edumaps.de/en/faq#a4000

A deleted account is irretrievably deleted. We adhere to the strict German data protection. Therefore, the deletion page also says “Deleting is final and cannot be undone!” and at the bottom of the page: “Final deletion of the account”.

### I cannot log in because I forgot my password.
Source: https://www.edumaps.de/en/faq#a4100

You can [reset your password here](https://www.edumaps.de/user/forgot) and [change it here](https://www.edumaps.de/user/password) after logging in.

### Where do I get an admin account (school admin)?
Source: https://www.edumaps.de/en/faq#a4200

- For school licenses, you have received the login to the admin account by email.
- If you have a district license, your education authority will have the login information for your school. Please then contact the responsible education authority.
- For state licenses, your school likely received an email with all login details. For example, in the state of Lower Saxony, emails from the Ministry of Education were sent to schools in February 2022.

### Can a second person log in as an admin with their own email address?
Source: https://www.edumaps.de/en/faq#a4300

No, this is not possible. Each school has one admin account with one email address. Each account is assigned an exact email. If you want a second person to have access to the admin account, then you can pass on the admin login data to this trusted person. However, this is your own responsibility.

### How many admin accounts can a school have? Are two admin accounts possible? How can the admin role or admin rights be assigned to several people?
Source: https://www.edumaps.de/en/faq#a4400

Each school can only have one admin account. An exact email is assigned to this admin account. Two school admins can technically not be provided. If you want several people to have admin rights, you must pass on the admin login to this trustworthy person (at your own responsibility). Furthermore, several users can use an admin account at the same time.

### Does the admin only have to create the teacher accounts or also all student accounts?
Source: https://www.edumaps.de/en/faq#a4500

All accounts (student accounts and teacher accounts) are created centrally via the admin account. Teachers cannot create student accounts. Teachers can put together their own classes or groups from all the students at the school.

### I have entered an incorrect email in the admin account, how can I change it?
Source: https://www.edumaps.de/en/faq#a4600

If you entered an incorrect email address in the admin account, you can change it as follows:

1. Login with your admin account.
2. View the [My Account page](https://www.edumaps.de/user/account).
3. There click on “Change email”.
4. Specify a new email and save.
5. Open the confirmation mail in your inbox (at your mail service provider) and click on the confirmation link. Be sure to also check the spam folder to see if the email ended up there.

If you wish, you can also assign a new password under “My Account”.

### How can I create student accounts? Can teachers create student accounts?
Source: https://www.edumaps.de/en/faq#a4700

You need an admin account to create student accounts. See also [Tutorials for Admin](https://www.edumaps.de/1008/1/bpk12qmwjr/zdo0glozn4).

All accounts are managed via the respective admin account (school account). Each school manages its own teacher and student accounts. Only admin accounts can create teachers and students, teachers cannot do this, otherwise multiple accounts would be created for the same student.

You received the credentials for the admin account by email when you purchased the school license.

### Is there a way to automate the assignment of students to classes? How can I assign student accounts to classes more quickly?
Source: https://www.edumaps.de/en/faq#a4800

Student accounts are created using an admin account. The admin account has access to the [Create Accounts](https://www.edumaps.de/users/create) page. When creating student accounts, you can enter a name and email as well as a class information.

On the [Create accounts](https://www.edumaps.de/users/create) page you find the section “Create via List (names/emails)” in the tab “List”. There you will see an option to create class names directly as classes/groups in Edumaps or add users to existing classes with the same name.

Note: Student name and class information will be displayed in the [List of Accounts](https://www.edumaps.de/users/list) page and in [Manage classes & groups](https://www.edumaps.de/users/usersets). You can also use the search there to quickly filter by class information. If you have entered a search term (the class name), a button “Add all” will appear, use this button.

Alternative: Class information by students
Each student can enter their class in the “Class/Group” field when setting up their account. You will then see this stored information on the [Manage classes & groups](https://www.edumaps.de/users/usersets) page, where you can quickly find the class using a search. For example, if you enter “7A” in the search field, only the students who have entered “7A” will be displayed. Now you can click on “Add” for each student or use “Add all” to add all students found to your group at once.

### How can I, as an admin, set multiple passwords when creating student accounts?
Source: https://www.edumaps.de/en/faq#a4900

It has proven effective for the school admin to set only a start password for student accounts when [creating accounts](https://www.edumaps.de/users/create). Upon the first login, a message appears prompting the student to set up the account, during which the student can set their personal password.

If a unique password is desired for each new account, simply activate the “Individual Passwords” option.

### How can I, as an admin, reset each student’s password to a random password?
Source: https://www.edumaps.de/en/faq#a4950

As an administrator, you can reset your students’ passwords as follows and provide new login credentials:

1. Reset passwords:

- Sign in with your admin account.
- Navigate to the [“List of all accounts”](https://www.edumaps.de/users/list) page.
- Find the relevant student account and click the pencil icon to edit the account details.
- Set a new password and save the changes.

2. Create login passes:

- After resetting the password, the option to create a login pass appears.
- Click “Print login card” to generate the login pass with the new login credentials.
- The login pass contains all necessary login data as well as a QR code that logs the student in directly.

Please note that resetting passwords and creating login passes must be performed individually for each student. A bulk operation is not currently available. For more information, see the [Admin Tutorial](https://www.edumaps.de/1008/1/bpk12qmwjr/zdo0glozn4).

### I have two accounts (duplicate account), how can I merge both accounts?
Source: https://www.edumaps.de/en/faq#a5000

If you have teacher or student accounts, the school admin can merge the two accounts. To do this, the school admin opens the page [Merge Accounts](https://www.edumaps.de/users/merge). There you will find instructions on how to merge the accounts.

If these are basic accounts, direct merging is not possible. However, you can transfer your data from the old account to the new account. To do this, follow these steps:

1. Log in to your old account and note down all the links to your maps that you want to transfer.
2. Then log out.
3. After that, log in with the new account.
4. Open all map links in your browser.
5. Click on the icon with the three dots in the upper right corner of each map [Icon: ellipsis-v] and select “ [Icon: copy] Copy” from the dropdown.
6. This will copy the respective map to your new account. All uploads will also be automatically copied to your new storage space.

Done. All your maps and their contents are now available in your new account.

Optional:

- If you wish to delete your old account, for example, to use your email for the new account, log in with your old account and delete it via the [My Account page](https://www.edumaps.de/user/account).
- Afterwards, you can use your email address for your new account. Simply select [Change Email](https://www.edumaps.de/user/email) in the My Account page.

### I have two accounts at a school and an institution, how can I centrally use both accounts?
Source: https://www.edumaps.de/en/faq#a5050

First of all, it should be mentioned that two accounts usually have different roles and access rights, use different single sign-ons, and often cover different scenarios. Therefore, we recommend using both accounts separately and not merging them.

To still be able to work with both accounts, you can simply use a shared folder. Create a [folder](https://www.edumaps.de/user/folders), click on the share button, and share the folder with the second account with editing rights. Now both accounts can access all maps in this folder.

### How can I create an IServ single-sign-on?
Source: https://www.edumaps.de/en/faq#a5100

This is possible with an admin account. After logging in, go to your [My Account page](https://www.edumaps.de/user/account). There you will find a button “Create single-sign-on to IServ” at the bottom. Click this one ([direct link here](https://www.edumaps.de/user/sso-iserv)). Then enter all the SSO data that you have created on your IServ instance in the mask. Here is a [Guide to IServ](https://www.edumaps.de/50/1/ybfs7741io) for Edumaps.

Your single-sign-on link (to be set within IServ) should look like this: `https://www.edumaps.de/sso/iserv?id=USERNAME` where `USERNAME` is to be replaced with the username of your admin account.

### Why am I logged in with a different account on the laptop than on the smartphone/tablet (single-sign-on)?
Source: https://www.edumaps.de/en/faq#a5200

The problem can actually only be that you are logged into one device with a different account than the second device. In the profile you can see your two different usernames. So you have to log in to the single sign-on provider (like IServ or Sesam) with the other login and then use the single sign-on link to Edumaps.

### How do I get a data processing agreement (AVV) with Edumaps?
Source: https://www.edumaps.de/en/faq#a5300

Like other providers, we also have an automated process for the AVV. Please use [this AVV page](https://www.edumaps.de/legal/avv) for this. The individual steps are described there. You must log in with your admin account to access the AVV page and make the necessary entries.

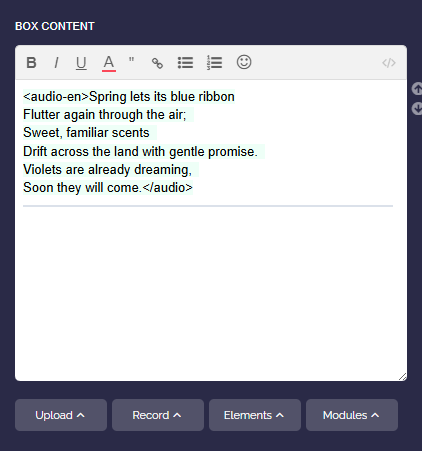
### Why do I see formatting symbols like asterisks in the box editor (source text)?
Source: https://www.edumaps.de/en/faq#a7000

In Edumaps, only a few characters necessary for formatting are used. This is the case, for example, for italics (`*italic*`). Those who work more intensively with Edumaps will set quotes with `>` and link words enclosed in brackets that contain the specified link. A short overview of the formats - there are only a few - can be found in this [small graphic](https://www.edumaps.de/img/template/editor-cheatsheet-en.png).

If you're not yet familiar with the formatting, please use the **editor bar**, which handles all the formatting for you.

Advanced users can find a list of additional formatting at: [Inputs and Formatting in Box Editor](https://www.edumaps.de/1003/1/e9o5ybwc3p/z960xa7v6r).

### Why is a full-featured WYSIWYG editor not used in Edumaps?
Source: https://www.edumaps.de/en/faq#a8000

We do not use a third-party WYSIWYG editor (“What you see is what you get”). Instead we have developed our own editor, which is light-weight and cleaner. Below are the technical reasons behind this decision:

1. A WYSIWYG editor would require at least an additional 300 KB to be loaded. Some editors even require up to 3 MB. This would extend loading times and make the lightning-fast Edumaps significantly slower.
2. Edumaps works with an editor text field that works in all browsers and requires no additional memory.
3. Many WYSIWYG editors do not function correctly on mobile devices and are not cross-browser compatible.
4. All known WYSIWYG editors generate unclean HTML code in the background (so-called “Code Bloat”).
5. HTML code can be susceptible to hacking attempts (script injections).
6. We use a Markdown-like syntax that is clean and lean, and also works in other Markdown editors.
7. External Markdown content can be directly inserted into our editor. This allows for simple transfers from other systems.

Further background information on the disadvantages of WYSIWYG can be found in this article: [“My pain building a WYSIWYG editor with contenteditable”](https://www.edumaps.de/media/2021-07-my-pain-building-a-wysiwyg-editor.pdf)

### Is there a way as an admin to see if and when the users are active?
Source: https://www.edumaps.de/en/faq#a9000

This is not implemented for data protection reasons. To see if your students have been working with a map, you can name the first box “Presence Box” (and enable the rating option). Choose the rating type “Answer” there, then each student can rate this box with “Yes”, “Maybe” or “No”. Alternatively, activate “Likes”, then the students click on the heart to signal that they have understood the content. This way you have a list of all students who have been active on your map.

### How can we manage teacher and student accounts and delete their data?
Source: https://www.edumaps.de/en/faq#a10000

Your school has an admin account for this purpose. You have received the login credentials from us directly by email. With the admin account, you can create new users (students/teachers), delete old user accounts including their data (provided the account no longer has any maps, otherwise you remove the user from the school), and change email addresses and passwords of existing users.

### How can I delete several student accounts at once (multiple deletion possible)?
Source: https://www.edumaps.de/en/faq#a11000

You can quickly delete several users one after the other with an admin account, the page [“Multiple Deletion”](https://www.edumaps.de/users/massdelete) is available for this purpose.

### Why does deleting user accounts during mass deletion take so long?
Source: https://www.edumaps.de/en/faq#a12000

When an account is deleted, the following are taken into consideration: All stored user data (name, email, etc.), all created maps including all columns and boxes and all contents, all uploads including audio and webcam recordings, all bookings, reservations, and certificates of participation, all likes and ratings of boxes, all posted comments, all entries to visited maps, all folders as well as saved maps and folders, all shortlinks, all single sign-on links. All uploads in other maps are anonymized. In addition, boxes that the user posted on maps of other users are anonymized. Mass deletion only offers accounts without maps. Maps in the trash are deleted along with the account.

This entire process takes time, and therefore deletion is only possible individually with time intervals.

### How can I hide certain columns from my class and only show them only at a certain time?
Source: https://www.edumaps.de/en/faq#a20000

In the column settings you will find the option “Show column from”. There you select the date and optionally the time from which the column should be displayed. Before that, the column is not visible. You can define this setting for each column individually.

### How can I hide the content of a box for a better overview?
Source: https://www.edumaps.de/en/faq#a21000

The box content can be hidden for each box. To do this, edit the box and click on “Collapse”.

### How can I change my username or the number in the username?
Source: https://www.edumaps.de/en/faq#a21100

User names like “edu.1234” cannot be changed, but real names can be entered directly in the [My Account page](https://www.edumaps.de/user/account).

### Can I protect my map with a password?
Source: https://www.edumaps.de/en/faq#a21300

Yes, you can assign a password in the map settings in the “Protect” section. All visitors to your map must enter this password in order to access the map. Only you as the map owner do not have to enter a password and can access it at any time without a password.

If you would like to prevent access to your map after a certain period of time, simply assign a new password.

Alternatively, you can click “Regenerate map link” in the “Protect” section of the map settings. If you regenerate the link to the map, the old map link will be invalid and all users who are already using this link will lose access to your map.

### Why can my students not read the comments of others?
Source: https://www.edumaps.de/en/faq#a21400

Comment access must be set to “All Users” for each box. Then all students can see the comments of each other.

1. To enable comments, edit the box and click “Comments”.
2. A dropdown appears. Change the visibility of comments from “Only me” to “All users”.
3. Save the box.

### My teachers cannot read the comments of other teachers?
Source: https://www.edumaps.de/en/faq#a21450

Comments can be activated for each box. Make sure “All Users” is selected in the dropdown.

1. Selection “Only me”: Only the map creator can read the comments.
2. “All Users” selection: All users with map access can read the comments.

Note: There is no distinction between teachers and students.

### How can I add a new box at the top of the column?
Source: https://www.edumaps.de/en/faq#a21500

To insert a box at the top, click directly in the area between the column title and the first box. If you hover over the area by mouse, “Add box here” will appear.

### The error message “Error composing block page” appears on the iPad of the student?
Source: https://www.edumaps.de/en/faq#a21600

If a student opens a map and gets the error message “Error composing block page” it is probably due to the parental controls of the device. Therefore, disable parental controls as this feature may block some keywords that are on the map you are viewing. To turn off parental controls, you need to go to the settings menu of your device and select Safari. Then select the Parental Control option. From there, you can set up different types of restrictions for your device. You can select “Allow all websites” and then click the “Always allow” button. In this way, you can easily access any website you want. Alternatively, you can also use Google Chrome as the browser instead of Safari, then this problem does not occur.

Note about the affected map: If there are more than 10 buttons/links with the same words on the map, this can lead to the iPad error. Simply change the text of the buttons/links.

### How can I make the comments on a box completely public?
Source: https://www.edumaps.de/en/faq#a21700

If you change the comment access from “Only me” to “All users”, this means that anyone who opens the map with the link can also view the comments. Additionally, any visitor can also comment.

### How can links to external websites be opened in the same window?
Source: https://www.edumaps.de/en/faq#a21800

To open links in the same tab, go to the map settings and open map extras. There, activate the option “Open links in same Tab”.

### Why are HTML files not displayed or rendered?
Source: https://www.edumaps.de/en/faq#a22000

HTML files are like containers in which you can store Javascript in addition to HTML markup. With Javascript, any user can execute malicious code (i.e. viruses and trojans) and harm your computer or easily spy on your data.

We take your security very seriously, this is why HTML files uploaded to Edumaps will not be rendered, but only offered for download directly to the computer.

### We have a license, but as a teacher I only have a limited basic account. How do I get a teacher account?
Source: https://www.edumaps.de/en/faq#a22200

Are you a teacher at a school but only registered with a basic account? Then there are two ways:

1. **Join code:** Ask your school admin for the school’s join code (format EDU-XXXX-XXXX) and enter it on your [My Account](https://www.edumaps.de/user/account) page. The school admin confirms your request with one click, after which your account is a teacher account of your school.
2. **Invitation:** Alternatively, the school admin can invite you directly by email under User Management → [Invite user](https://www.edumaps.de/users/invite).

Note: An account that manages student accounts of its own cannot join a school – please remove these accounts first.

After joining, you will have more storage space available, you can create your own groups/classes, create up to 1000 maps and share your own maps within your school. You can see whether your account is assigned to your school on your [My Account page](https://www.edumaps.de/user/account).

### Is there a way to book more storage (as a teacher with a school license or state license)?
Source: https://www.edumaps.de/en/faq#a22210

Check the [Upload Manager](https://www.edumaps.de/uploads) or your [My Account page](https://www.edumaps.de/user/account) to see how much disk space you currently have available. Depending on the license, all teachers have 5 GB or 10 GB at their disposal. If you need more storage, please contact your education authority. The superadmin can increase your storage in the [User Management](https://www.edumaps.de/users/superadmin). If you are not assigned to any education authority, please contact us.

### How do I get more storage space with a basic account?
Source: https://www.edumaps.de/en/faq#a22250

To get more storage space, you need the [Minimal or Premium plan](https://www.edumaps.de/en/plans). If you are a teacher at a school, your school or the responsible education authority may already have a license from Edumaps.

### How can I assign an existing account as teacher to my school?
Source: https://www.edumaps.de/en/faq#a22300

The easiest way: share your school’s join code with your teaching staff. You find it under User Management → [Invite user](https://www.edumaps.de/users/invite) and on your [My Account](https://www.edumaps.de/user/account) page. Teachers enter the code on their [My Account](https://www.edumaps.de/user/account) page. The requests then appear on the Invite user page and in your [notifications](https://www.edumaps.de/notifications), and you accept them with one click. With “Generate new code” you can replace the code at any time, e.g. if it has fallen into the wrong hands. Under “Joining” you decide whether requests need your approval (recommended) or whether teachers with the code join immediately.

**Invite directly**
To do this, follow these steps:

1. Log in with your admin account.
2. On the page [List of Accounts](https://www.edumaps.de/users/list) you find a blue button “Invite user”. Click the button which takes you to the [Invite Account](https://www.edumaps.de/users/invite) page.
3. Enter the email address of the user and choose whether he should become a “Teacher” or “Student” at your school. Important: The email must already be registered at Edumaps.
4. The user then receives an email with an access link.
5. If the user clicks the link in the email (he must be logged in to Edumaps), his account will be assigned to your school (including more storage and the specified user role).

### Where do I find my school’s join code?
Source: https://www.edumaps.de/en/faq#a22350

As school admin, you find the join code under User Management → [Invite user](https://www.edumaps.de/users/invite), where you can also copy it and generate a new one. It is also shown on your [My Account](https://www.edumaps.de/user/account) page under “Personal data”. Education authorities with a superadmin account see the code of each of their schools in the [List of Schools](https://www.edumaps.de/users/list) via “Show code”.

### How can I invite a user to my school if he does not have an account?
Source: https://www.edumaps.de/en/faq#a22400

A direct invitation is not possible. After registering, the teacher enters your school’s [join code](https://www.edumaps.de/en/faq#a22350) under [My Account](https://www.edumaps.de/user/account). Or just create a teacher (or student) account for them:

1. Log in with your admin account.
2. Go to “Create Accounts” under “User Management” in the menu.
3. On the [Create Accounts](https://www.edumaps.de/users/create) page, click the tab “List”.
4. Enter the email address of the user there, optionally with his name. Choose whether you want him to become a “Teacher” or “Student” at your school. Also set a password.
5. Click on the “Create user” button.
6. An account is created with the specified email address, being part of your school. The user can now log in.

### What happens to the user content when an existing license expires?
Source: https://www.edumaps.de/en/faq#a23000

When a license (of a school, education authority or federal state) expires, the corresponding accounts will be set to “Free”. The consequences:

1. Each account will be reduced to 10 MB of storage. Files that have already been uploaded are kept and are not deleted automatically. However, anyone who uses more than 10 MB cannot upload any further files until storage is free again or a new license exists.
2. However, the maps of the users are fully preserved, regardless of how many maps have been created.
3. The user structure (school/teacher/student accounts) is retained, if required. Otherwise the accounts will be deleted in accordance with data protection regulations.

Additional note: Every user can export their maps at any time and then import them again later. However, it is important to note that uploaded files are only imported if they are still available in the user storage.

If users require more than 10 MB of storage, they can get more storage when their school, the education authority or the federal state acquires a license, or if they privately acquire a license.

### How does the map import via JSON work? What happens to the files inside the boxes when I import a JSON file?
Source: https://www.edumaps.de/en/faq#a23500

Importing a JSON file always copies the files linked in the boxes into your account, your own files included. This applies to files from this server and from other Edumaps servers. The links then point to the copies, and the copies use your storage.

There is no option to keep the original links on import. If a copy fails, the original link remains.

If the files come from another Edumaps server, make sure they are not deleted from the origin server until the import is complete.

The structure of the file is described in the [JSON format documentation](https://www.edumaps.de/docs/json).

### How does creating a copy of a map work?
Source: https://www.edumaps.de/en/faq#a24000

When copying a map, the entire map is duplicated with all content and transferred to your account. The original map is retained.

Note that if the map is opened with read-only rights, only the visible paths and boxes will be copied. If the map is opened with editing rights, all paths and boxes will be copied.

For the files in the map, the copy dialog offers the option “Create a copy of files”, which is selected by default:

1. With the option, the linked files are copied into your account and use your storage.
2. Without the option, the copy keeps the original links. The files stay with the owner of the original map and are missing from your copy as soon as the owner deletes them.

### How can I transfer a map from one account to another account?
Source: https://www.edumaps.de/en/faq#a24300

Note down the link to the map of the first account. Then log in with the second account and open the map of the first account. Use the map menu at the top right and select “Copy”. This will copy the map to your second account. All linked files from the original map are also copied to the second account.

It is not possible to change the map owner directly.

Before copying, check in the map settings of the original map that the option “Disable map copying” is not activated, otherwise the menu item “Copy” will not appear for the second account.

Note: Interactive content such as poll results or student submissions is not transferred when copying. The copy starts with the content of the map without user data.

### How do I transfer several maps from one account to another?
Source: https://www.edumaps.de/en/faq#a24350

Maps cannot be moved between accounts. Instead, you copy each map into the target account. The copy is a separate map with its own link, the original stays in the previous account. Links you have already shared still point to the original.

How to proceed with many maps:

1. In the previous account, create a folder and move all maps you want to transfer into it. In the folder, set the access right of every map to “Edit”. Only then are hidden and password-protected columns and boxes copied as well.
2. Copy the share link of this folder.
3. Log in with the target account and open the folder link. You see all maps at a glance.
4. Open each map, click on the three dots [Icon: ellipsis-v] at the top right and select “Copy”. Confirm in the “Copy map” dialog. The copy appears under [My Maps](https://www.edumaps.de/user/maps) of the target account.
5. Afterwards, set the access right of the maps in the folder back to “Read” or delete the folder. As long as a map is listed there with “Edit”, anyone with the folder link can edit this map.

Note: Only one login per browser is possible, even across several tabs. If you want to have both accounts open at the same time, use a second browser or a private browser window.

If the accounts are on different Edumaps servers, use the [import of a map from another server](https://www.edumaps.de/en/faq#a181000).

Typical use cases: a school admin account has created maps that belong in a teacher account, or a teacher hands over their maps to a colleague.

You can find further notes on copying a single map, for example on the option “Disable map copying”, in the entry [on transferring a map to another account](https://www.edumaps.de/en/faq#a24300).

### How do I prevent my map from being copied? How can I block a map from being copied?
Source: https://www.edumaps.de/en/faq#a24500

If you do not want your map to be copied, go to the map settings. There, under “Protect”, you will find the option “Disable map copying”.

### Can you create geographic maps and set markers on them in Edumaps?
Source: https://www.edumaps.de/en/faq#a24900

Interactive maps are not integrated as a tool in Edumaps, as each mapping tool relies on external services such as Google Maps (maps.googleapis.com), which can lead to data protection issues. You can create interactive maps and world maps with free tools like [My Maps](https://www.google.com/maps/d/?hl=de) or [ScribbleMaps](https://www.scribblemaps.com/) and link them from Edumaps. However, it is your responsibility to ensure compliance with data protection regulations.

**A better data-privacy-compliant Alternative:**

1. Take a screenshot of the map on Google Maps.
2. Then open your Edumaps map in edit mode (or create a new map).
3. Click on the blue “Image” button at the top right.
4. Select your screenshot and it will automatically upload.
5. Then enlarge the image by dragging the [Icon: repeat] icon to the right.
6. Position your map image freely on your map.

Here is an example of a map with text fields, arrows and other graphics: [Culinary Journey Map](https://www.edumaps.de/1051/1/l0ju7i8d1e).

**You can:**

- place any images/photos freely on the map (scalable, rotatable).
- position any text fields freely on the map (rotatable, different colors).
- position any arrows freely on the map (scalable, rotatable, different colors).
- place several geographic maps next to each other or stack them on top of each other in different sizes.
- There are no limits to creativity.
- No external tool is required to render the geographic map (such as Google Maps or OpenStreetMap).
- This ensures full data protection.

### Where can I find the Edumaps logo as graphic?
Source: https://www.edumaps.de/en/faq#a25000

You can find logos of Edumaps in various versions in the following (for example, for advertising, press, and public relations):

- [Edumaps logo on white background](https://www.edumaps.de/img/logo/logo-labeled.png)
- [Edumaps logo without label](https://www.edumaps.de/img/logo/edumaps-logo.png)
- [Edumaps logo on white background (without box)](https://www.edumaps.de/img/logo/edumaps-logo-whitebg.png)
- [Edumaps on Laptop, Tablet and Smartphone](https://www.edumaps.de/img/template/edumaps-laptop-tablet-phone.png)
- [Edumaps logo black without label (SVG graphic)](https://www.edumaps.de/img/logo/edumaps-logo-black.svg)
- [Edumaps logo black with label (SVG graphic)](https://www.edumaps.de/img/logo/edumaps-logo-black-labeled.svg)
- [Edumaps logo white with label (SVG graphic)](https://www.edumaps.de/img/logo/edumaps-logo-white-labeled.svg)
- [Edumaps logo white for dark background (SVG graphic)](https://www.edumaps.de/img/logo/edumaps-logo-white-for-dark-background.svg)
- [Edumaps logo horizontal (white background)](https://www.edumaps.de/img/logo/edumaps-logo-labeled-horizontal-whitebg.png)
- [Edumaps logo horizontal (transparent background)](https://www.edumaps.de/img/logo/edumaps-logo-labeled-horizontal-transparent.png)

The font used for the letters under the logo is “Raleway” (SIL Open Font License).

### My students have registered at www.edumaps.de, but cannot log in to nds.edumaps.de?
Source: https://www.edumaps.de/en/faq#a30000

These are two different websites, which you can recognize by **www**.edumaps.de and **nds**.edumaps.de. This means that there are two different, separate data systems. Therefore, a login from one server cannot be used on the other server.

If your students are not yet able to log in to [nds.edumaps.de](https://nds.edumaps.de/) (Edumaps Niedersachsen Server), you have to give them corresponding student accounts. Student accounts can be created using an [admin account](https://www.edumaps.de/1008/1/bpk12qmwjr/zdo0glozn4), which should be available to your school management.

### How can I edit the title, permissions and background of my map later on?
Source: https://www.edumaps.de/en/faq#a31000

To change the data of a map later, proceed as follows:

1. Open your map in edit mode (click the red pencil icon in the top right corner).
2. Then click on the map title or the small orange pencil icon next to the title. Or click the map menu in the top right corner and choose “Settings”.
3. Now the map editor opens.
4. In the map editor you can change the title, change access rights, choose a different background or upload your own background.

### Why is the latex stretching outside the box?
Source: https://www.edumaps.de/en/faq#a32000

If you put dollar signs `$$` to insert latex, this will be rendered as a block and there are no automatic line breaks. To embed latex, choose inline latex with `\( x^2 \)` instead, line breaks are set automatically.

### How can I share just a single box with a student for editing, while other boxes are not displayed?
Source: https://www.edumaps.de/en/faq#a33000

First, go into edit mode, then:

1. Click on the three dots on the box and choose “Share” from the dropdown.
2. A sharing dialog will appear, where you can choose “Read” or “Edit” as access rights.
3. Make sure that the option “Only this box” is selected under “Display”. With “Entire map” the whole map would be visible.
4. Copy the link and distribute it to the respective student.

When the student accesses the link to the box, they will only see this one box. All other boxes will not be displayed.

Alternative: You can also use the “Share Columns” function in the map-sharing dropdown to distribute single boxes with different writing and reading permissions. To do this, place each box in its own column and then distribute the columns accordingly. See [this FAQ entry](https://www.edumaps.de/en/faq#a33500).

Tip: For group work, you can assign one box to each student, and as a teacher, see all your students' edits (incoming materials/solutions) in real time, accumulated in your own map.

### How can I distribute a single column to my students without showing other columns?
Source: https://www.edumaps.de/en/faq#a33500

To share a single column, use the “Share Columns” feature:

1. Click on the blue map share button and select “Share Columns”. Alternatively, open the menu of the column in edit mode and select “Share”.
2. The overview of the existing column links appears. Click on “New Link”.
3. In the dialog, select the appropriate column: The first click gives read rights, the second click write rights.
4. Click on “Continue”. Now you can give the link a title. You can also choose whether the visitor has to log in to access the map.
5. Click on “Generate Link”. Now you can copy the link and share it to the respective student.

If the student now opens the link, he will only see this column. All other columns are not displayed.

Tip: For group work, you can assign a column to each group and, as a teacher, see all edits of your students in real time in your own map.

### How can I create permissions for individual columns and assign a column to each group?
Source: https://www.edumaps.de/en/faq#a33550

You can generate a link for an individual column and then share just that one column with your students. See [FAQ entry above](https://www.edumaps.de/en/faq#a33500).

### How can I share several specific columns via link and hide other columns?
Source: https://www.edumaps.de/en/faq#a33600

You can share multiple columns by opening the map share dropdown [Icon: share-alt-square] and selecting “Share Columns”. Click on “New Link” in the overview. Then you can choose the columns you want to share with your students. Here you can individually set which column should be enabled for reading (first click) or writing (second click). Then click on the “Continue” button. In the next dialog you can give the new link a title and specify whether the visitor must be logged in to access the map. Then click “Generate Link” and the generated link will be displayed.

All links created can be edited afterwards and the column access can be changed. To do this, simply click on “Share Columns” and then, in the overview, click on the “Edit link” icon of the desired link.

### Which teacher and student data do I need in which format in order to create accounts for them?
Source: https://www.edumaps.de/en/faq#a36000

Please have a look at the [Tutorials for Admin Account](https://www.edumaps.de/1008/1/bpk12qmwjr/zdo0glozn4) first, where most things are explained.

Basically: You can only create teacher and student accounts with the admin account. This is done on the [Create Accounts](https://www.edumaps.de/users/create) page. Which data you need is directly shown on this page. You can create accounts anonymously (tab “Without names”) or with a name or email (tab “List”) or by using a CSV list (tab “CSV file”).

Please note that the logins for created accounts for Edumaps and Matheretter can be used at the same time.

### How to change an incorrect email address?
Source: https://www.edumaps.de/en/faq#a37500

If you entered an incorrect email with the registration, you can (while logged in) change it again. To do this, go to the page [Change email](https://www.edumaps.de/user/email) and enter your correct email address.

If the email is incorrect when creating a teacher or student account, the school administrator (admin account) can find the user in the [List of Accounts](https://www.edumaps.de/users/list) and change the email directly there. To do this, proceed as follows:

1. Login with admin account.
2. Go to page [List of Accounts](https://www.edumaps.de/users/list).
3. Find the user via search and click the pencil icon to edit.
4. Enter and save the new email address.

If required, you can also assign a real name and a new password when editing the user.

### How can I put only a single image on the map (without a visible box)?
Source: https://www.edumaps.de/en/faq#a39000

To do this, open your map in editing mode and click on the “Image” button at the top right. Select an image from your computer. The image then appears freely movable on your map.

Alternative: You can use a transparent box that only contains the image. The following steps are necessary:

1. Create a new box and upload your image or photo there.
2. Then edit the color of the box by clicking on the color box with the pen icon [Icon: pencil]. Select “Fill box” [Icon: window-maximize].
3. Then click again on the color field with the pen icon [Icon: pencil]. Now you will see a slider for the box color transparency.
4. Set full transparency by moving the slider all the way to the left.
5. Save the box. Now only the picture in the box is visible. All backgrounds are transparent.

### How are classes put together and assigned to teachers?
Source: https://www.edumaps.de/en/faq#a40000

Each teacher can create their own classes or groups on the [Manage classes & groups](https://www.edumaps.de/users/usersets) page. Classes created by teachers are not created “school-wide” and centrally, but are created by each teacher for their own account. You can also create any groups instead of classes (e.g. math remedial course).

It saves time if you use the admin account and create classes, because these will be available for all teachers on the page [Prepared Classes](https://www.edumaps.de/users/usersets-admin).

The maps can then be shared to the students in the specified classes/groups (“Share with Group”). Each student in the selected group will then receive a notification on Edumaps.

Classes or groups are created once and are available to the user in Edumaps and also in Matheretter.

### My students cannot open the map, it either shows a login prompt or an error. What should be done?
Source: https://www.edumaps.de/en/faq#a41000

Check whether the map link was created correctly. For access without login, “Access only for registered users” should not be checked. Otherwise, a login is necessary.

### I can not edit the map, what can be the reason?
Source: https://www.edumaps.de/en/faq#a42000

Please check the following:

1. Did you click the red edit button on the top right of the map and are you in edit mode?
2. Are you logged in with the correct account (which also has access to the map)?
3. Compare the account in the [My Account page](https://www.edumaps.de/user/account) with the name shown as the map creator (below the map title).
4. If you want to edit the map of someone else, is the map set with edit access?
5. Make sure that the columns and boxes are not set to “protected”. You can recognize this by the lock icon. Other users cannot add boxes to protected columns. Only the map owner can do this.
6. It may be due to your browser. Use a different device and see if it works.

### Why is no link preview (thumbnail) created for my link?
Source: https://www.edumaps.de/en/faq#a43000

If no link preview is generated, this can have several reasons:

1. The website does not exist.
2. The website does not exist anymore.
3. The link was entered incorrectly.
4. The link points to a website that can only be accessed with a login or password.
5. When opening the external link, the server responds with an unknown response code.
6. The link leads to a PDF that starts a download dialog instead of displaying the PDF in the browser.
7. The link is too long or contains too many parameters.

In some cases, generating the preview may take several minutes if many preview images are generated currently. Reload the page twice so that the updated preview image loads into the browser.

### Can you prevent or hide the cookie warning in the link previews (thumbnails)?
Source: https://www.edumaps.de/en/faq#a43500

Unfortunately, each page has different cookie warnings, so this cannot be implemented technically.

### How can I collapse all boxes resp. cards?
Source: https://www.edumaps.de/en/faq#a44000

To do this, open the menu of the “Zoom and Search” button (magnifier button) and click “Hide Contents”. Then all contents of the boxes are hidden. You can unhide all content at once by opening the menu of the “Zoom and Search” button afterwards and click “Show Contents”.

### How can I upload foreign file formats such as GoodNotes, Scratch or Worksheet Crafter?
Source: https://www.edumaps.de/en/faq#a45000

Direct uploading and embedding of third-party formats is not permitted for security reasons. Only file formats that can be displayed in the browser without executing code are permitted (for example MP3, MP4, PDF). For security reasons, we pack every third-party format as a ZIP file. This ZIP file can then be downloaded while logged in, whereby a clear warning message with a virus warning appears.

By the way, you can upload a variety of common formats, see map [Tutorial: File Formats for Uploads](https://www.edumaps.de/1005/1/05qmoy2).

### How can my map visitors download the provided ZIP files?
Source: https://www.edumaps.de/en/faq#a46000

For security reasons, downloading ZIP files is only allowed if the user is logged in. However, it is sufficient if the user visits the map and is logged in as “anonymous”.

Alternatively, you can create a student account and share this login with all your visitors. Ideally, each of your visitors has an account with Edumaps and can download the file directly.

### Welche Gefahren können ZIP-Dateien aufweisen?
Source: https://www.edumaps.de/en/faq#a46100

ZIP files can theoretically contain all kinds of files containing viruses, trojans or other malware. Therefore, we warn every user against downloading such files. We also show who uploaded the ZIP file so that the uploader is known and takes responsibility.

It is not clear from a ZIP file what content it contains. The contents would have to be unpacked and then checked with a current virus scanner. But even a virus scanner cannot ensure that the ZIP file does not contain an executable file that could potentially harm the computer. The contents of ZIP files can therefore be very dangerous. In addition to viruses, ZIP bombs are also possible, which bring the computer of a user to a standstill.

Potential dangers of ZIP files at a glance:

- Execution of malicious code
- Inclusion of malware
- ZIP bomb attacks
- File overwrite and file injection
- Exfiltration of sensitive data
- Zip Slip vulnerabilities

### Can I upload GeoGebra files (GGB)?
Source: https://www.edumaps.de/en/faq#a46500

Because GGB files can contain executable code, the files are packaged as a ZIP file for security reasons. When downloading, a warning message appears for the user.

Recommendation: Upload your GGB file to geogebra.org and share the link to the web application. You can set the visibility to “Shared with Link” so only the recipient can open it.

### I have uploaded a video file that I also need on another map? Do I need to upload the video again?
Source: https://www.edumaps.de/en/faq#a47000

You do not need to upload the video file again. All your uploads can be reused. Please proceed as follows:

1. Go to the [Upload Manager](https://www.edumaps.de/uploads) and find your file.
2. Right-click on the upload and select “Copy link address”.
3. Open your map and edit the corresponding box content by clicking on the orange pencil.
4. Paste the copied link into the editor.
5. The video will now also appear in this box.

Tip: If you are working in the same map, right-click on the upload within the original box, then select “Copy link address” and insert the link into the new box.

### How can I reuse images I have already uploaded (visible in Uploads), for example as a background or in new boxes?
Source: https://www.edumaps.de/en/faq#a47100

The easiest way is directly in the box editor: Click the upload button and select “My uploads” from the dropdown. There you will see all the files you have already uploaded. Click a file and it will be inserted into the box without having to be uploaded again.

Alternatively, go to the [“Uploads”](https://www.edumaps.de/uploads) page and click the link icon for the corresponding image. Copy the displayed link. Then switch to your map and edit the content of a box. In the box editor, simply paste the copied link and the image will appear.

Map backgrounds cannot be reused and must be uploaded separately for each map. When copying a map, the background graphic is copied as well.

Tip: If you are working within the same map, open the image in the original box, right-click the image, then select “Copy link address” and paste the link into the new box.

### How are usernames for student and teacher accounts structured?
Source: https://www.edumaps.de/en/faq#a48000

Usernames for student and teacher accounts are automatically generated. The username of the admin account (school) is used and a consecutive number is appended. For an admin account with example name `rw4455`, a student would be `rw4455.12` and a teacher `rw4455.t3`. The `t` is an indicator for teacher account.

### The message “This website is restricted and therefore cannot be opened.” appears on the iPad/iPhone?
Source: https://www.edumaps.de/en/faq#a49000

Unfortunately, this Apple error message is misleading. Here is a parental control from Apple behind it. Please change your iPad/iPhone settings and allow the Edumaps domain. In the Settings section, select Screen Time → Restrictions → Content restrictions → Web content → Always allow.

### The error message “Map does not exist” appears. What is the reason?
Source: https://www.edumaps.de/en/faq#a50000

If you are sure that the map exists and has not been deleted, then the link was accessed incorrectly. Please use only the links generated on Edumaps and make sure that the link remains unchanged. Also, do not use any short link providers or any other service that changes the link. Compare the link you see in the browser with the original link shown in the map share dialog.

### Why does it show that the column has been deleted?
Source: https://www.edumaps.de/en/faq#a51000

The column deleted message appears on a map when a column on the active map is deleted by another user. Go into edit mode, click on the three dots at the top right and select “History”. You can see who deleted the column in the change history.

### How to format a text field?
Source: https://www.edumaps.de/en/faq#a51200

You can add a text field to your map in format “stickerwall” in edit mode by clicking on the “Text field” button at the top right. A new empty text field will appear on the map. There you have the following formatting options:

1. “Change color of text field” [Icon: square-o] - Click on it and the color of the text field will change.
2. “Move text field” [Icon: arrows] - Hold down the mouse and move the text field.
3. “Delete text field” [Icon: trash] - Click on it and the text field will be removed.
4. The handle for rotating [Icon: repeat] - Hold down the mouse and rotate the text field.

For more information see the maps: [Tutorial: Arrows](https://www.edumaps.de/1014/1/wwi7z1fwup) and [Tutorial: Text Fields](https://www.edumaps.de/1071/1/9ios7o3n40)

### How do I share my map with my school?
Source: https://www.edumaps.de/en/faq#a51300

With an admin account or a teacher account, you can assign any map to your school, so that it appears under [“My School”](https://www.edumaps.de/maps/school) for all teachers and students of your school. In the map settings, select the option “My School (Read)” under “Publish”. Then save the map, so it appears on the “My School” page. This way, you can share any map with your school.

### Do students need their own account to view maps?
Source: https://www.edumaps.de/en/faq#a51400

In principle, a map can be accessed if you share the link with read permissions to your students. If access is to be possible without registration, make sure that “Access only for registered users” is not checked. If the map settings under “Publish” have “My School (Read)” enabled, this requires a login. More information is provided in this map: [Tutorial: Distributing maps with access rights](https://www.edumaps.de/1047/1/siajhiablo/fv6nobr4hp).

### How do I know if a map is public or private?
Source: https://www.edumaps.de/en/faq#a51500

Essentially, there are no public maps on Edumaps. Maps can only be accessed with the correct link. Additionally, it can be set whether a login is required to view the map. Further information is provided by this map: [Tutorial: Distributing maps with access rights](https://www.edumaps.de/1047/1/siajhiablo/fv6nobr4hp).

### What is the upload limit?
Source: https://www.edumaps.de/en/faq#a52000

The upload limit depends on the map owner. Depending on the account, the upload limit for the respective map is:

- 10 MB/file with plan “Free” (each registered user)
- 100 MB/file with plan “Minimal” (customers)
- 500 MB/file with plan “Premium” (customers)

⚠️ An upload limit of **10 MB/file** (webcam recordings up to 25 MB) applies to anonymous users (not loggedin), regardless of the map owner. If your students want to upload larger files, they must log in.

The following applies to school and state licenses:

- 100 MB/file for students
- 250 MB/file for teachers

If you use a different Edumaps server, there might be different limits.

Example 1: If the map owner is a teacher, all students and teachers who are logged in and visit his map can upload files up to 250 MB in size.

Example 2: If the map owner has booked the “Premium” plan, an upload limit of 500 MB per file applies to his map.

### My storage is full. How can I get more storage?
Source: https://www.edumaps.de/en/faq#a52100

Every user can add storage space to Edumaps. Simply navigate to the [order page](https://www.edumaps.de/en/plans) and place the order accordingly.

If all teachers in your school need more memory, you can purchase a [school license](https://www.edumaps.de/en/plans/schools).

### My students are anonymous on my map. How can we increase the upload limit of 10 MB?
Source: https://www.edumaps.de/en/faq#a52200

For anonymous users, there is an upload limit of 10 MB/file (webcam recordings up to 25 MB), regardless of the map owner. The main reasons for this limitation are:

1. Security: Bots can exploit the upload feature to overload the server (Denial-of-Service attacks).
2. Prevent abuse: Limiting the file size can help minimize the upload of illegal content, as such content is often hidden in large files.
3. Better user management: The limit allows only trusted, registered users to upload larger files, which enables better control and management of user activities.

In order for your students to upload larger files, simply create a larger number of user accounts (without names/emails), as a school admin on the [Create Accounts](https://www.edumaps.de/users/create) page. Then print the logins as login passes and give each student such a pass. This way, the student can scan the QR code on the login pass and is immediately logged in to Edumaps.

If the school admin account is not available to you, please contact the education authority responsible for your school.

### My plan allows uploads of up to 100 MB per file. Why do my students get the message that their file is too large (max. 10 MB)?
Source: https://www.edumaps.de/en/faq#a52500

In this case, the students are not logged in, but as “anonymous users” on your map. Anonymous users have a limit of 10 MB per upload (webcam recordings up to 25 MB). Student accounts have an upload limit of 100 MB per file. So your students would have to log in to upload larger files.

Hint: As a school admin, you can quickly create and distribute accounts for your students. Use the page [Create Accounts](https://www.edumaps.de/users/create) for this purpose. There, select the tab “Without names”, set a number, and click on “Create user”.

### How can I upload very large files into a box?
Source: https://www.edumaps.de/en/faq#a52700

If the file is larger than 500 MB (upload limit at Edumaps), you can zip the file directly on your computer and then upload the generated ZIP file. If it is a matter of very large files, you can also use an online storage service and post the link to the file in the box.

### I cannot upload videos into the boxes?
Source: https://www.edumaps.de/en/faq#a54000

If an error message appears, it will tell you what the problem with the video could be. Basically, videos can be uploaded. Simply drag and drop the video file onto the open editor or click on “Upload” at the bottom and use the “File” button there to upload the video file.

### Why can the uploaded video not be played?
Source: https://www.edumaps.de/en/faq#a54500

In rare cases, the uploaded video may have a codec that the converter does not understand, but still generates a supposed MP4 video (H264). In this case, the video cannot be played in the browser. Please convert the video with video software or use a free video converter online, for example: [Freeconvert.com](https://www.freeconvert.com/video-compressor/download) or [Convertfiles.com](https://www.convertfiles.com/convert/) and then upload it again to Edumaps.

### How can I hide an entire column from my students and only use it myself?
Source: https://www.edumaps.de/en/faq#a55000

If you want to use an entire column for yourself, including boxes within the column, and you do not want your students to see its contents, you can select the “Show column from” option and choose a date far in the future. This way the column stays hidden from your students.

Also note:

1. All boxes in the column are visible to all teachers in edit mode.
2. All boxes in the column are hidden from all students (edit mode and map view).
3. Any student who adds a box to the column in edit mode will always see that box as the box owner.

### How can I completely hide my box from other users?
Source: https://www.edumaps.de/en/faq#a55500

You can completely hide a box in the map view by clicking on “Visibility” in the box settings and then enabling “Hide box”. In edit mode, you will see the box, but the entire box is hidden in the map view.

### How can I rotate an image after I uploaded it?
Source: https://www.edumaps.de/en/faq#a56000

You can rotate the image directly in your [Upload Manager](https://www.edumaps.de/uploads). Find the image and use the rotate button [Icon: repeat], located just above the picture to the right.

### Why does the rotated image appear incorrectly oriented for some visitors?
Source: https://www.edumaps.de/en/faq#a56100

Each browser stores loaded images in its cache, so it does not have to load them again during the next visit. Edumaps also generally outputs all images as cacheable. Rotating an image is a special case.

Please note that if the image was loaded into the browser cache before the rotation, the browser has already saved it. Subsequently sending the image from our server cannot overwrite the previously cached image. This means your browser will continue to load the previous image and not the rotated one. The only solution is a hard reload with `Ctrl` `F5`.

### Are read-only maps copyable by the user with content so that the user can modify this copy?
Source: https://www.edumaps.de/en/faq#a57500

Yes, all content is copied into a new map. All uploads are also copied. The user then has an independent, completely new map for their use. Note: A map is read-only if you have distributed it with read permissions only.

### Is it possible to adjust the column width?
Source: https://www.edumaps.de/en/faq#a58000

The column width is set to 300 pixels so that mobile devices can correctly display the column and the boxes it contains. If a larger column width were allowed, the content on mobile devices would be out of the visible area. Note: More than 60 % of users use mobile devices nowadays.

However, if you want to change the default column width in your map, you can do this in the map editor in the “Extras” tab under “Fixed column width”. There you can set a value of 300 pixels to 1000 pixels for the column width.

### How can you display only teachers in the list of all accounts?
Source: https://www.edumaps.de/en/faq#a59000

To see only teacher accounts, simply enter “Teacher” in the search field on the “list of all accounts” page. Only teachers will then be displayed.

### How can you copy a box and its contents from another map?
Source: https://www.edumaps.de/en/faq#a60000

To copy boxes from other maps, follow these steps:

1. Open your map in edit mode.
2. Click on the three dots next to the “New Box” button (below the last box in the column).
3. Now click on “Copy box from map” in the dropdown menu.
4. Then navigate to the desired map.
5. To copy a box, simply click on the red icon [Icon: plus] at the top right of the respective box.

### Can the maps be switched to other languages like English or French?
Source: https://www.edumaps.de/en/faq#a61000

Generally, the Edumaps interface loads in the language of the browser. However, if the user wants to choose a different language for the Edumaps interface, they can click on the language icon in the main menu at the top right and choose “DE”, “EN”, “ES”, “FR”, “IT” or “RU” in the dropdown. Currently, the six languages German, English, Spanish, French, Italian and Russian are available.

For additional languages, you can use tools like Google Translator, which is available in browsers like Chrome. Right-click on the page and select “Translate to”.

### How can you cancel the fixed box height with scrollbars in timeline and sticker wall?
Source: https://www.edumaps.de/en/faq#a62000

Mentioned in advance: If boxes with a lot of content are displayed at full height (in the timeline or sticker wall), it may be that the boxes with the content exceed the screen and the overview is lost. This is particularly the case with smartphones and tablets. Therefore, there is a maximum height so that each box is still within the visible screen area.

If you still want a full box height, you can click on the “Extras” tab in the map settings and activate “Always full box height”. This means that no maximum height is set for the respective box.

### Why are text fields limited to 800 characters?
Source: https://www.edumaps.de/en/faq#a63000

Text fields are intended to hold short hints or notes and position them on the map. If you have very long texts, please use a box instead of a text field. You can freely position any box on a sticker wall. You can also customize the design of a box so that it looks like a text field. To do this, set a color for the box and then click [Icon: window-maximize] (“Fill box with color”), you also want to hide the box title.

### How to move a box on the corkboard?
Source: https://www.edumaps.de/en/faq#a64000

In the box menu, click on the three dots [Icon: ellipsis-v] and select “ [Icon: arrows] Move” from the dropdown. Now you can move the box anywhere on the map.

### How to move the boxes more easily on a large pinboard?
Source: https://www.edumaps.de/en/faq#a64500

If you have a very large pinboard and want to drag a box from the first to the last column, for example, it is helpful to zoom out with the browser view. This works with the zoom settings of the browser. In most browsers it can be done with the shortcut `Ctrl` `+` and `Ctrl` `-`. After zooming out, you can move the box to the desired position more quickly.

Tip: It is also very helpful to hide the contents of the boxes before you move your box, so that only the box titles are visible. This is possible via the shortcut `M` (or via “Hide Contents” in the menu of the “Zoom and Search” button).

### How to protect boxes from editing by other users?
Source: https://www.edumaps.de/en/faq#a65000

If you use a map in collaboration with your students and there is a risk that the map will be vandalized, you can ask your students to create each new box with the “Protect” option (in the box settings). This way, only you as the map owner and the box creator himself (i. e. the student) can change and delete the box.

### How can a teacher be transferred to another school?
Source: https://www.edumaps.de/en/faq#a66000

It is possible to move a teacher from one school to another school (on Edumaps). To do this, log in with the admin account of the school to which the teacher should go. Then go to “List of all accounts” and click on the “Invite user” button. You will be directed to the page [Invite User](https://www.edumaps.de/users/invite). Enter the email of the teacher there. S/he will then receive an invitation by email.

### How can I change the role of a student to a teacher or vice versa?
Source: https://www.edumaps.de/en/faq#a67000

To do this, log in with the admin account and go to the page [List of Accounts](https://www.edumaps.de/users/list). Find the user and click on the edit icon [Icon: pencil]. In the dialog that opens there is a dropdown where you can select the role “Student” or “Teacher”.

### How can I insert a new column between already created columns?
Source: https://www.edumaps.de/en/faq#a68000

To do this, click three dots [Icon: ellipsis-v] of the column next to which the new column is to be inserted, and select “ [Icon: plus-square] Insert Column Right” in the dropdown. The newly created column will appear to the right of this column.

### Is there a way to completely hide the box content (without a dropdown button)?
Source: https://www.edumaps.de/en/faq#a69000

If you want to hide the box content so that only the box title is displayed, open the box settings and select “Visibility”. Now click on “Hide box content” and save the box. Switch to the map view. Now you can see that the box content is no longer displayed.

Note: Box contents are automatically hidden if there is no content in the box (i.e., no text and no upload).

### How can you delete the likes (hearts) of a box?
Source: https://www.edumaps.de/en/faq#a70000

To delete the likes on a box, proceed as follows:

1. Click on the three dots near the box [Icon: ellipsis-v] and select “ [Icon: pencil] Edit” in the dropdown.
2. In the box settings, deactivate the option “Likes”.
3. Save the box. – Saving without likes activated will remove the likes completely.
4. Then go back to the box settings and activate the likes again. Now you will see “0” hearts for the box.

### Can I use likes to confirm participation or that something was read?
Source: https://www.edumaps.de/en/faq#a70100

Yes. Likes in Edumaps work like in chat apps: one click on the heart of a box is enough, a second click takes the like back. For the heart to appear, activate the option “Likes” in the box settings.

As the map owner, click the number next to the heart to see who liked the box. The list can be sorted by name or date. Names appear for students with their own account and for guests who entered a name. Likes without a name are only counted.

This is a quick way to collect a response without anyone having to write anything:

- “I have read the task”: students like the task box.
- “I’m in”: sign-up for a club, a trip or an appointment.
- Vote: create several boxes (option A, option B …), the option with the most likes wins.

Tip: write in the box what a like means (“like = read”) so it is clear to everyone.

### How can you delete the ratings (drop-down) for a box?
Source: https://www.edumaps.de/en/faq#a71000

To remove all ratings from a box, go to the box settings. There you deactivate the option “Ratings” and save the box. This will remove all ratings. Then go back to the box settings and activate the ratings again.

### How big are the webcam recordings that I can make on Edumaps?
Source: https://www.edumaps.de/en/faq#a72000

You can find the size of the webcam recording you have made directly in the [Upload Manager](https://www.edumaps.de/uploads). On average, a one-minute webcam recording is about 5 MB in size.

### How to keep the top menu bar visible?
Source: https://www.edumaps.de/en/faq#a73000

The menu bar is only hidden in map view mode. Simply click on the small arrow at the top and the menu will appear. The menu bar at the top is always displayed in edit mode.

### How can I change the font size of a map?
Source: https://www.edumaps.de/en/faq#a75000

The font size can be changed via the map editor in the “Extras” tab using the “Font size in boxes” and “Font size in column titles” settings. Alternatively, you can change the font family for the entire map in the map editor.

If you need a larger view, you can zoom in. To do this, use the zoom icon at the top right of the map view. If you want to make a sentence in a box larger, you can set a heading. To do this, simply put `#` at the beginning of the line.

The enlargement of the font size of words is possible by enclosing the word or words as follows: `<big>My large text</big>`. The larger font size can be used in map titles, column titles, box titles, and box contents.

### How must the CSV file be structured when creating accounts?
Source: https://www.edumaps.de/en/faq#a76000

All information can be found on the page [Create Accounts](https://www.edumaps.de/users/create). Click on the tab “CSV file” there and all the details will be displayed.

### If I re-import a CSV file to create accounts, will existing accounts be overwritten?
Source: https://www.edumaps.de/en/faq#a77000

During the CSV import, the server checks whether the name and email address already exist in the Edumaps user database. The name takes priority in this check (names must be unique). After uploading the CSV file, you receive a review report listing all changes in detail. No accounts are overwritten, existing accounts are updated in a targeted way.

If, for example, the email for “Max Muster” has changed, a corresponding notice appears. If the class has changed, the class label in the account is updated. If the option “Create the classes listed in the table as new classes” is enabled during the import, the student is also added to the new class. The student is never removed from the previous class, you do that under [Manage classes & groups](https://www.edumaps.de/users/usersets).

Existing classes are kept during the CSV import. Classes from the CSV file that do not exist yet are created as new classes. You can delete classes that are no longer needed at any time under [Manage classes & groups](https://www.edumaps.de/users/usersets).

Tip: If only the class names change at the turn of the school year, no CSV import is needed. Use the “School year change” function on the [Rename groups](https://www.edumaps.de/users/usersets-rename) page instead. All class names are automatically raised by one grade level (“7A” becomes “8A”). See also the tutorial at [Update accounts (e.g. school year change)](https://www.edumaps.de/1008/1/bpk12qmwjr/zdo0glozn4#update)

### Should the terms name/email be in the first line of the CSV file when creating accounts?
Source: https://www.edumaps.de/en/faq#a78000

The terms “Name, Email” should not be in the first line. The entry for the first user is expected immediately. For example “Max Muster,maxmuster@school.com”.

### Can you leave the initial password blank when creating accounts?
Source: https://www.edumaps.de/en/faq#a79000

A start password must be specified with at least 8 characters, otherwise no accounts will be created. Note: After the first login, the teacher accounts will be asked to initialize their account and set a new password. Each user can also change their password at any time in their [My Account page](https://www.edumaps.de/user/account).

### Can you see who added which box or column?
Source: https://www.edumaps.de/en/faq#a80000

Yes, each map has a so-called “history” where you can see which user made what changes. The map history is only available to the map owner.

You can open the map history in edit mode by clicking on the three dots in the top right corner [Icon: ellipsis-v] and select “History”. In the map history you can then see in detail who made which changes (box created, box edited, column created, column edited, box content edited, text fields/arrows added, …).

There you also have the option of inspecting the revisions for each box and restoring previous content.

### As a teacher, can I set up accounts for my students?
Source: https://www.edumaps.de/en/faq#a81000

The creation of new accounts is only possible centrally via the admin account (school admin). This prevents the creation of double accounts and other data conflicts. If you do not know the login for the admin account, please contact the institution responsible for you (e.g. responsible education authority or Ministry of Education).

### Can you activate comments and likes for all boxes at once? Can all boxes on a map have certain options activated?
Source: https://www.edumaps.de/en/faq#a83000

It is not possible to activate the comments and likes for all boxes at once inside a map. This setting must be made in each box separately. However, you can create a box when creating the map (activated comments and likes) and then duplicate the box via the box menu (three dots [Icon: ellipsis-v] at the top right of the box). This way the settings for each new box are the same as for the template.

### How can I conduct a survey with evaluation (feedback tool)?
Source: https://www.edumaps.de/en/faq#a84000

To do this, you can post the content of the survey in a box. Then activate “Ratings” in the box settings and select “Voting” in the dropdown. Now there are three options A, B and C to choose from. In edit mode, you can see a summary of who voted for which option. If you need more than three choices, use a second box (or more boxes) and add additional choices.

### Can I receive an email notification for activities on a map?
Source: https://www.edumaps.de/en/faq#a85000

If a change has been made to your map by a third party, you will always see a [notification](https://www.edumaps.de/notifications) directly on Edumaps, recognizable by the yellow number at the top right of the website. If you would also like to receive an email for activities or changes, click on the three dots at the top right in the map view and select “Follow map”.

### Is there a search function within the map to quickly find boxes?
Source: https://www.edumaps.de/en/faq#a86000

Yes, you can click on the search icon at the top [Icon: search-plus] and choose “Box Search” from the dropdown. Type your search term, and only the boxes containing that term will be displayed to you.

Tip: You can also search all boxes across all your maps at once. Go to the [“My Maps”](https://www.edumaps.de/user/maps) page and use the search bar “Search in x Maps” there.

### Can I hide and show a box with a single click?
Source: https://www.edumaps.de/en/faq#a87000

This is not possible with just one click. However, you can select the “Collapse” option in the box settings and then activate “Completely”. This allows the box content to be shown or hidden with a single click.

### How do I assign my students scheduled assignments?
Source: https://www.edumaps.de/en/faq#a88000

You can create one box per student or group of students. You can enter the deadline as text in the box title so that it is immediately visible.

### Is there a live chat within the map?
Source: https://www.edumaps.de/en/faq#a89000

There is no map-wide live chat. However, you can enable comments for a central box, making them visible to everyone, and use the comment function as a chat for discussions. Alternatively, you can create a team text where a chat is integrated.

### How can I conduct a forum discussion?
Source: https://www.edumaps.de/en/faq#a90000

There is no map-wide forum discussion. However, you can enable comments in a central box for everyone to see and then use the comment feature there for discussions. Alternatively, you can create a team text. There, a chat is integrated.

### How can you protect only the column title, but not the boxes, so that other users cannot edit the column settings?
Source: https://www.edumaps.de/en/faq#a91000

Open the column settings and click on “Protect”. There, activate the option “Column Titles Only”. Only the column title will be locked, but boxes can still be added and edited within the column. With this scenario, you can provide your students with a fixed structure (as with working on a Kanban board).

### Where can I find the privacy policy of Edumaps and a directory of processing activities?
Source: https://www.edumaps.de/en/faq#a92000

You can find the information under: [Privacy](https://www.edumaps.de/privacy) and [Processing agreement according to Art. 28 GDPR](https://www.edumaps.de/legal/avv). You can print out the pages directly as a PDF document using your browser. You can enter your school name in the AVV. You must log in with your admin account to access the AVV page and make the necessary entries.

### How can you delete ratings/votes and likes (hearts) from a box?
Source: https://www.edumaps.de/en/faq#a93000

You can delete existing ratings/votes for a box by deactivating the ratings and then saving the box. If you now activate the ratings again, there will be no more ratings.

You can delete existing likes (hearts) for a box by deactivating the likes and then saving the box. If you now activate the likes again, there are no more likes.

### IServ gives the error “Auth Error: The provider authorization_endpoint could not be fetched.”?
Source: https://www.edumaps.de/en/faq#a94000

This error occurs when the settings on your IServ server have been made incorrectly. Please check all entered links for typographical errors. Upper and lower case must be correct and unchanged in the link. If you cannot solve the problem yourself, please contact the education authority responsible for your school or your IServ support.

### How can multiple teachers read comments of a student at the same time?
Source: https://www.edumaps.de/en/faq#a95000

If you have set the comment settings to “Only me” (i.e. not for everyone), only you with your teacher account can read these comments. The following workaround is possible so that several teachers can view the comments:

1. Your teacher account is used by several teachers to login. Or:
2. You set the visibility to “All users”, but only share the single box to the student (in the box menu “Share”, in the dialog “Share box” the option “Only this box”).

### Can a registered or anonymous user download content from a box, even if only read access is granted for the map?
Source: https://www.edumaps.de/en/faq#a96000

Once a user or visitor has access to your map via the link you shared, they can view and also download the materials uploaded there. This applies regardless of whether read or edit access has been set.

However, you have the option to activate the “Hide download buttons” feature in the map settings under “Protect”, which will hide all download buttons.

### Can I restore deleted content or changed content in maps and boxes?
Source: https://www.edumaps.de/en/faq#a97000

Each map has a so-called map history, which records and lists all changes to your map in detail. You can open the map history in edit mode. Select the three dots [Icon: ellipsis-v] at the top right and in the dropdown click on “History”.

In addition, there is a revision history for each box. That means all changes to the box are tracked and you can restore old versions of the box with just one click. You can open the change history of a box (revisions) in edit mode. Click on the three dots [Icon: ellipsis-v] next to the box and select “Revision” from the dropdown. Then you come to a page that shows the different versions of the box over time. These are displayed in a timeline.

### Can a deleted map be restored?
Source: https://www.edumaps.de/en/faq#a97100

Yes, if it was deleted within the last 30 days, you can find the map in the [trash](https://www.edumaps.de/user/maps-trash). You can restore the map there.

### What is Content-Security-Policy (CSP)? What other security mechanisms are there?
Source: https://www.edumaps.de/en/faq#a98000

“Content-Security-Policy” is a security concept to prevent hacker attacks on a website. CSP regulates which resources can be loaded from which sources. If a hacker wants to inject an external script, it will not be executed because the loading of links to external websites is always blocked. The user is protected at all times. Edumaps is fully CSP compliant, see also [security report](https://securityheaders.com/?q=https%3A%2F%2Fwww.edumaps.de).

In addition, the following security mechanisms are active on Edumaps:

- Strict-Transport-Security: Let the browser use only HTTPS.
- X-Frame-Options: Tells the browser that setting iframes that include the website is not allowed. This protects users from attacks such as clickjacking.
- X-Content-Type-Options: Prevents a browser from determining the type of a resource on its own and forces it to stick to the type declared by the server. This prevents attacks that would convert non-executable resources into executable resources.
- Referrer-Policy: Controls what information gets transferred from one website to another website. With Edumaps, the data may only be exchanged on the same website. This avoids security risks and data protection risks.
- Permission-Policy: Controls which features and APIs of the browser can be used.

### How can I integrate a medium from Edupool into my map?
Source: https://www.edumaps.de/en/faq#a99000

To embed an educational medium from Edupool into your map, follow these steps:

1. Click on the “Media” button, which is located next to the “New Box” button.
2. A dialog will appear. Choose the button “Media library of your media center” (with the sub-line “Licensed media in Edupool”).
3. On the search page, you can now search for a medium.
4. At the top right of each search result, there is a red plus for copying [Icon: plus].
5. Click on the plus symbol, and the medium will be added to your map.

### How can I embed a box from another map onto my map?
Source: https://www.edumaps.de/en/faq#a101000

Embedding boxes from another map onto your own map is possible as follows.

1. Click on the three dots next to the “New Box” button [Icon: ellipsis-v] and select “Embed box from map”.
2. Navigate to the map that contains the box you want to embed.
3. Click on the red link icon [Icon: link] on the box.
4. Choose whether you want to link the box you are embedding to the map. This allows access to both maps.
5. Afterwards, you will return to your map.

Please note that only the box title and the box content will be embedded. Additionally, the calendar and reservations for the respective box will be embedded. However, likes, reviews, bookings, and comments will not be embedded for technical reasons.

### How can I embed a column from another map onto my map?
Source: https://www.edumaps.de/en/faq#a102000

Click the three dots [Icon: ellipsis-v] next to the “Add Column” button and select “Embed column from map”. Then navigate to the map where the column is located. You will see a red plus icon next to the columns, select the column you wish to embed. You will then be automatically redirected back to your map, where you will find the embedded column with all its boxes.

Please note that in the embedded column, only box titles and contents are displayed, but not likes, ratings, bookings, and comments.

### How to fully color a box?
Source: https://www.edumaps.de/en/faq#a104000

To fully color a box, proceed as follows:

1. Edit the box by clicking on the three dots [Icon: ellipsis-v] and select “ [Icon: pencil] Edit” from the dropdown.
2. Below the box title you will see a color picker. Click on the color box with the pen icon on the far left.
3. Another color selection appears. To the right there is a “Fill box” checkbox. Activate it.
4. The box is now fully filled with the selected color.

### How to make the background of a box transparent?
Source: https://www.edumaps.de/en/faq#a105000

To make a box transparent or semi-transparent, do the following:

1. Edit the box by clicking on the three dots [Icon: ellipsis-v] and select “ [Icon: pencil] Edit” from the dropdown.
2. Below the box title you will see a color picker. Click on the color box with the pen icon on the far left.
3. Another color selection appears. To the right there is a “Fill box” checkbox. Activate it.
4. Click the pencil icon again. A slider now appears with which you can set the transparency.
5. If you move the slider all the way to the left, the background of the box becomes completely transparent.

### Can I set up recurring bookings?
Source: https://www.edumaps.de/en/faq#a106000

Recurring bookings are not possible with the booking tool, only one appointment per box resp. course. Here you would have to reset the booking time at the beginning of each next period. Tip: You can quickly delete existing participants in a booking by deactivating the bookings, save the box, and then edit it again and activate the bookings.

### Can you change the spacing between boxes on a pinboard?
Source: https://www.edumaps.de/en/faq#a108000

The vertical box spacing in a pinboard is set to 30 pixels. If you want to change the defined box spacing in your map, you can define a value for “Box spacing bottom” in the “Extras” tab in the map editor.

Alternative: You can use the “Sticker Wall” map format for arbitrary distances. There you can arrange the boxes anywhere on the map and create individual distances.

### Can you change the spacing between columns on a pinboard?
Source: https://www.edumaps.de/en/faq#a108500

The column spacing in a pinboard is set to 50 pixels. If you want to change the specified column distances in your map, you can define a value for “Column Distance right” in the “Extras” tab in the map editor.

### How can I collapse or hide the box content?
Source: https://www.edumaps.de/en/faq#a109000

If you create a new box (or edit an existing box), you will find the option “Collapse” in the box editor. Activate the checkbox and the content of the box will be collapsed.

### Can we transfer content from TaskCards to Edumaps, or how can we import a TaskCards board into Edumaps?
Source: https://www.edumaps.de/en/faq#a110000

Yes. Edumaps provides a [TaskCards importer](https://www.edumaps.de/import/taskcards): Paste the link to the board there. The import via the link also transfers attachments (images, PDFs, audio, video, Office files) in their original size. For private boards, use the share link (share icon in TaskCards). Boards on your own TaskCards instances (for example *schoolname.taskcards.app*) are also supported. Uploaded HTML files are imported as ZIP archives for security reasons.

TaskCards’ captcha protection can at times block retrieval by Edumaps servers. The importer page then switches to the file upload automatically: Save the open board with the free SingleFile browser extension and upload the saved file there. “Back to the link import” takes you back to the import via the link. You can also reach the file upload at any time via “Alternative way”. This method imports texts, links, images (in the preview size used by TaskCards) and videos. TaskCards does not export PDF and Office files. They are listed after the import and can be uploaded manually.

Note on the right to switch providers: The TaskCards terms of use (dSign Systems GmbH, version of May 4, 2026) govern switching providers in § 11 “Wechsel und Datenportabilität” (Switching and data portability). TaskCards customers can switch providers. TaskCards also supports third parties authorized by the customer during the switch and provides the exportable data in a common format. If the import via the link stays blocked for a longer period, your school, as a TaskCards customer, can invoke this clause and ask TaskCards to allow retrieval by Edumaps or to export the boards including all attachments.

Columns are converted into columns, cards into boxes, and timeline boards into timeline maps. Card colors and collapsed cards are imported as well. Comments are not imported. The board's background image is also not imported and can be set again in the map settings in Edumaps. For boards with many videos, the import automatically continues in several steps.

In Edumaps, you can export your own content at any time and back it up independently.

### I used my email for the school admin account, how can I use my email for a teacher account?
Source: https://www.edumaps.de/en/faq#a111000

An email cannot be used for two different accounts. You need to set a new email address for the school admin account. To do this, log in and use the [Change email](https://www.edumaps.de/user/email) page. When this is done, you can create a teacher account with your personal email.

### Can an email already associated with a teacher account be used for the school admin account?
Source: https://www.edumaps.de/en/faq#a111500

An email cannot be used for two different accounts. You must first assign a new email address for the teacher account. To do this, log in and use the [Change email](https://www.edumaps.de/user/email) page. When this is done, you can use the now free email address for the school admin.

Tip: If you do not have a second email available, simply use a pseudo-address or that of your secretariat.

### How can you display the photos on a map like a slide show?
Source: https://www.edumaps.de/en/faq#a112000

An automatic playback of the photos on your map is possible. To activate, proceed as follows:

1. Open an image on your map by clicking on it.
2. The image can be seen in the popup.
3. Next press the `P` key on your keyboard.
4. Now the photos of the maps are played one after the other.

Press `P` again to stop the automatic playback.

### How can I add a box to a specific location on the sticker wall?
Source: https://www.edumaps.de/en/faq#a113000

To create a box in a specific location, double-click where you want the box to appear. If you then save the box, you will see the box at the clicked position.

### What is the maximum number of maps I can create?
Source: https://www.edumaps.de/en/faq#a114000

Depending on your tariff, a maximum of:

- 5 maps (Free)
- 100 maps (Minimal)
- 1000 maps (Premium)

### What is the maximum number of columns, boxes, arrows, and text fields that I can create in a map?
Source: https://www.edumaps.de/en/faq#a115000

In one map, these are the maximum ppssible items:

- max. 100 columns per map
- max. 500 boxes per map
- max. 300 arrows per map
- max. 300 text fields per map

The maximum number of boxes per column is determined by the maximum number of boxes per map.

### How can you revoke or reset access rights to a map?
Source: https://www.edumaps.de/en/faq#a116000

Basically, once a map link has been shared, anyone with that link has access to the map. If you now want to revoke access from all users, you can click on “Regenerate map link” in the “Protect” section of the map settings. If you regenerate the link to the map, then the old map link will become invalid (the access code changes) and all users who have already used this link will lose access to the map. Of course, you must then inform the relevant people about the new link.

### Can a teacher be enrolled at several schools, for example on a partial secondment?
Source: https://www.edumaps.de/en/faq#a117000

Basically each email address can only be assigned to one account. If you need a teacher account at a second school, you will need to create a second account with a different email address. A pseudo-mail address can also be used.

### How can I prevent an anonymous user from making changes to my map?
Source: https://www.edumaps.de/en/faq#a118000

Anonymous visitors have editing rights only if you have shared your map with editing rights without requiring login. To prevent anonymous editing, you must activate “Access only for registered users” in the map sharing dialog. Then only registered users can work on your map, and you can see in the map history which user changed what.

Alternatively: If anonymous users should only read, then simply select “Read” as the access right in the map sharing dialog.

### Is it possible to only allow text fields and disable boxes in a map?
Source: https://www.edumaps.de/en/faq#a119000

If editing rights have been granted, boxes can also be added. Alternatively, you can design the boxes itself as text fields. Just hide the title of the box in the box settings, then you have the same functionality as with the text fields.

### How to create a timeline with boxes above and below the timeline?
Source: https://www.edumaps.de/en/faq#a120000

With the map format “Timeline”, boxes are always automatically arranged above the timeline. If you would like to have one box above and the next box below, there is the following workaround. Create a map in the Sticker Wall format. Then drag a long arrow from the far left to the far right. Tip: Hold down the `Shift` key to align the arrow. After that, create your boxes and put them at the top and bottom of the arrow.

### How can the teachers in our school always use the same background and box color for new maps?
Source: https://www.edumaps.de/en/faq#a122000

To always have the same background for new maps, simply create a map as a template and provide it to your teachers. The steps are as follows:

1. Create a new map with the desired background and a colored box as a template.
2. Set the map sharing to “My School (Read Only)”. Save the map.
3. Now, all your teachers can find the map under [“My School”](https://www.edumaps.de/maps/school), open it there, and copy it via the menu at the top right (“Copy”).
4. The copied map can then be edited by the teacher as a new map.
5. The existing colored box can be duplicated, so the color is retained for new boxes.

### How to prevent the asterisk * formatting character from being recognized for bold or italics?
Source: https://www.edumaps.de/en/faq#a123000

To prevent an asterisk `*` from being used for formatting, simply precede the asterisk with a backslash `\`, i.e. `\*`. Then the asterisk is only rendered as text and not recognized as a formatting command.

### When I store a map in a folder, which access rights apply to the map?
Source: https://www.edumaps.de/en/faq#a124000

When you store a map in a folder (via the map menu “Bookmark in Folder”), the map link used to access the map is saved. This means, if you access the map with editing rights and then save the map in the folder, the map will be saved with editing rights.

If you are in a folder and click the “Add map” button and then choose “My Maps”, you can decide, by clicking the red cross on one of your maps, whether the map will be stored with reading rights or editing rights.

### When trying to register, the error message appears “Email already belongs to an account”?
Source: https://www.edumaps.de/en/faq#a126000

The error message means that the email address is already registered with Edumaps. You may have created a list of students via the school admin account and thus already assigned the e-mail address. Or a third person has registered using your email address. Then please go to the [Forgot password](https://www.edumaps.de/user/forgot) page and enter your email. You will then receive an email with which you can assign a new password. Then you can use this new password to log in. The other user then no longer has access.

### If we as a school buy a school license, can students create their own maps?
Source: https://www.edumaps.de/en/faq#a127000

Yes, students can create maps too. So every student in your school if the account is assigned to your school.

However, there are the following limitations:

- Each student can create a maximum of 100 maps.
- Each student has 50 MB of storage for uploads (across maps). This is sufficient for audio recordings (usually 100 - 200 KB) and webcam recordings (usually 5 - 10 MB).
- The booking module cannot be used.

### When registering, an error message appears and registration is not possible?
Source: https://www.edumaps.de/en/faq#a128000

Registration can fail if the email domain does not exist. In that case, check the spelling of your email address.

Registration can also be temporarily blocked if too many registration attempts were made within a short time (anti-spam protection). Wait a few minutes, reload the page and try again.

### When logging in, the error message appears that the limit of registrations has been reached. Is there a maximum number of learners per institution?
Source: https://www.edumaps.de/en/faq#a129000

500 registrations per hour are possible per IP address. This is anti-spam protection from bots. There is no maximum number of logins per institution.

### Can different access rights be set for entire folders (editing and reading)?
Source: https://www.edumaps.de/en/faq#a130000

Yes, folder rights can be assigned differently. Select one of your folders from the [“My Folders”](https://www.edumaps.de/user/folders) page. If you click on the blue Share button in the folder and select “Link to Folder”, you see a link with reading rights. If you select “Edit”, a new link will appear. This link gives other users editing rights to your folder. These users can remove maps from the folder and add new maps to the folder.

### Is it possible to display the participants of all courses in one map as a CSV file at once?
Source: https://www.edumaps.de/en/faq#a131000

Yes, you have the option to export the entire participant list of all courses on a map.

1. To do this, go to edit mode.
2. Click on the three dots of the map menu at the top right [Icon: ellipsis-v] and select “Export”.
3. In the dialog that opens, select “Participants of all Bookings (csv)”.

The export contains the course name, email, real name, institution and user name of the participants.

### When I export the participant list as a CSV file and then open it, why is each record displayed in a single column or cell?
Source: https://www.edumaps.de/en/faq#a131100

The export uses the standard CSV format with the comma as the delimiter. If you open the CSV file in a text editor, you can see the delimiters. Depending on the software you use to open the CSV file, the delimiter is set automatically or offered as an option. If you use Microsoft Excel 365, you need to set the delimiter to “Comma” in the CSV import dialog. In LibreOffice Calc, under “Separator Options”, the “Comma” option must be enabled. Google Sheets automatically detects the delimiter.

### Can we blacklist an email address, so it is not misused?
Source: https://www.edumaps.de/en/faq#a132000

To prevent an email address from being used by others, proceed as follows:

1. Log in with your admin account.
2. Go to the [Create Accounts](https://www.edumaps.de/users/create) page.
3. Click on the tab “List”.
4. Enter the email address (to be protected) and create a new account.

Now the e-mail address can no longer be used by others, since each e-mail can only be used once for one account throughout the system.

### If an account was created via the Edupool single-sign-on, can teachers change the password on Edumaps and then log in directly?
Source: https://www.edumaps.de/en/faq#a133000

Yes, the password can be changed in Edumaps directly in the [My Account page](https://www.edumaps.de/user/account) and the standard login page can be used. The teachers can still continue to log in using the Edupool SSO. The single-sign-on does not transmit passwords, but a verified user ID that works independently of passwords. Both login methods are therefore possible.

### Can uploaded files be shared only for reading and playing, but locked for download?
Source: https://www.edumaps.de/en/faq#a134000

Technically, it is unfortunately not possible to prevent the download of files and other content. Once a file (video, audio, PDF, etc.) is loaded into the memory of the browser, a user can download it, even if the download button is not displayed.

However, Edumaps provides an option that allows you to hide the download buttons. To do this, go to the map settings and open “Protect”. Check the “Hide download buttons” box there.

### Can we setup the booking module so that only users who are already registered can book the course?
Source: https://www.edumaps.de/en/faq#a135000

No, the booking module has no such setting. Many customers wanted people without an existing account to be able to book as well. This is why “Book with email” is offered next to “Login with account”. It creates a basic account for the person, which they confirm with a checkbox in the booking form. A booking without any account is not possible, because cancellation, certificate of participation and reminder email are tied to the account.

Tip: Share the link to your map with the option “Access for registered users only”, then only logged-in users can open the map and book.

### Can the registration page changed, so it requires the real name in addition to the e-mail address?
Source: https://www.edumaps.de/en/faq#a136000

We strictly adhere to data protection, in particular to the principle of data economy. When registering, only the most necessary information (email and password) is requested.

### How can I transfer my admin account to another user?
Source: https://www.edumaps.de/en/faq#a137000

A neutral, non-personal e-mail should always be used for admin accounts so that the login can be easily passed on. If you used your personal email, log in with the admin account and change the email in the [My Account page](https://www.edumaps.de/user/account).

### How can I add another subtitle to the map title?
Source: https://www.edumaps.de/en/faq#a138000

To add another small heading to the title, you can open the map settings and, directly below the title field, insert another heading in the field “Subtitle optional”. Alternatively, you can create a line break in the main heading with `\\` and use the second line for a second heading, where smaller text can be achieved with `<tiny>Small heading</tiny>`.

### How to quickly move a column from right to left?
Source: https://www.edumaps.de/en/faq#a140000

To do this, open the column menu by clicking on the three dots. Now instead of clicking “Move” you can just use your keyboard and press the cursor key to the left `←` several times in a row. This way the column is moved very quickly to the left.

### Is it possible to add subfolders to the folders?
Source: https://www.edumaps.de/en/faq#a141000

Yes, it is possible to add more folders to a folder via the “Add folder” button. For other structures, you can create a central map and link folders and maps from there.

### Why do we not receive confirmation emails for our accounts?
Source: https://www.edumaps.de/en/faq#a142000

The Edumaps email server normally runs smoothly. It is therefore important to check where the problem could lie. Points to clarify:

- Have you checked your spam folder?
- Can you receive other emails?
- What are the blacklist and spam filter settings of your email server?

To test, you can create an account with an email that is not from your server. For example Gmail or GMX. If the confirmation email arrives at this account, the problem lies with your mail server.

### Are the login details resp. account details synchronized between the different servers?
Source: https://www.edumaps.de/en/faq#a142500

No. Each server runs independently and has its own user database. For example, if you register at www.edumaps.de and then at nds.edumaps.de, then two different accounts are created on two different servers, even if you have used the same email address.

Note: An exception is the respective Matheretter instance, which forms a unit with Edumaps (i.e. www.edumaps.de and www.matheretter.de share the same user database). Note to admins: Edumaps and Matheretter consist of one system. Accounts only have to be created once and are available for both (same logins).

### How can you make the column title and box title bold or italic? Are line breaks possible in the title?
Source: https://www.edumaps.de/en/faq#a143000

In the column settings and in the box settings you can also format words in the input field for the title. Here it is possible to set bold and italic with asterisks. Line breaks are also possible with two backslashes. See details in the tutorial [“Entries and formatting in the box editor”](https://www.edumaps.de/1003/1/e9o5ybwc3p/z960xa7v6r#p16670).

### How to make words bold or italic and insert line breaks in the map title?
Source: https://www.edumaps.de/en/faq#a143500

In the map editor, you can also make words bold or italic in the title input field. For bold, put two asterisks `**` before the word and after the word. For bold, put one asterisk `*` before the word and after the word. Line breaks are possible with two backslashes `\\`.

### How to change the font size of the text in a box?
Source: https://www.edumaps.de/en/faq#a144000

You can set the font size of the boxes for the entire map in the Map Editor under the “Extras” tab, in the “Font Size in Boxes” section.

In addition, you can set the font size for individual words. There is a simple syntax for this:

Increasing the font size of words is possible by enclosing the words with: `<big>My large text</big>`.

Decreasing the font size of words is possible by enclosing the words with: `<small>My small text</small>`.

For very small print, you can use: `<tiny>Very small text</tiny>`.

The font size change can be applied to map titles, column titles, box titles, and box contents.

### How can you move multiple boxes at the same time?
Source: https://www.edumaps.de/en/faq#a145000

Moving/sorting boxes is technically complex because other users could also add boxes at the same time and boxes could be moved at the same time. Therefore we only allow sorting of single boxes. This would also affect real-time map updates for all active users. Therefore, only one box can be moved per user.

### How can I add a custom background image to a map?
Source: https://www.edumaps.de/en/faq#a146000

If you create a new map, you will find a selection of background images at the bottom of the editor. To the right of them there is a button “Custom Image”, click on it. Now you can select a graphic file from your computer. Please note that files are only accepted in JPG, PNG, GIF and WebP format.

If you have an existing map and would like to change the background image later, open the map settings (either by clicking on the map title or click on the three dots [Icon: ellipsis-v] at the top right and select “Settings”). You can now upload a new background image in the map settings.

### What are the image dimensions in pixels if I want to insert my own background image into the map?
Source: https://www.edumaps.de/en/faq#a146500

You can choose any size for the background graphic. For example, 1200 px wide by 800 px high. All backgrounds are displayed responsively, meaning they dynamically adjust to the width or height of the respective device depending on the window.

### How are background images scaled? Are fixed sizes possible? How can I see the entire image?
Source: https://www.edumaps.de/en/faq#a147000

Background images do not have a fixed size. The size always depends on the screen on which the map is displayed. Background images are always adjusted to the screen size or the size of the browser window. Fixed sizes for backgrounds are not possible.

Note that if you place arrows or text fields on elements of a background image (like arrows on a tourist map), they will no longer point to the same locations on other screen sizes. The reason is that the background image adjusts and changes size.

### Can H5P content be uploaded to a map?
Source: https://www.edumaps.de/en/faq#a148000

H5P is based on HTML, Javascript and iFrame embedding, both of which we cannot allow for security reasons. Therefore, H5P files are automatically packaged as ZIP files when uploaded. These ZIP files are then available for download with a warning.

If you like to provide interactive H5P, please paste the link to your external H5P content into the box. If the link preview does not appear properly, you can also add your own [preview image](https://www.edumaps.de/en/faq#a2800).

### Why is the preview image for my link not displayed?
Source: https://www.edumaps.de/en/faq#a149000

For new links, generating the preview takes up to a minute. Please wait. If the preview image does not appear, please perform a hard reload in which all images are reloaded. For a hard reload you can use the key combination `CTRL` + `SHIFT` + `R`. If the preview image is still not displayed, please check the error message, which is located directly at the location of the preview image. You may have entered the link incorrectly. Click on the link, to make sure the website is rendered correctly in your browser. There are also websites or servers that block the generation of preview images. If the preview appears incorrect, it may be due to media content that will be reloaded later in the rendering process. We have no influence on that.

### How can I display a box only at a specific date?
Source: https://www.edumaps.de/en/faq#a150000

To display a box with “Appears on dd.mm.yyyy” and hide the box content in the map view, open the box settings and click on “Visibility” at the bottom. Then click on “Show box from”. Enter the date there and optionally the time.

### What is the difference between Admin and Superadmin?
Source: https://www.edumaps.de/en/faq#a151000

Superadmin accounts are usually assigned to education authorities, which then have access to all schools assigned to them. The rights of the superadmin are:

- Can edit school, teacher and student accounts on the [User Management](https://www.edumaps.de/users/superadmin) page (change names, change emails, change passwords).
- Access to [List of Accounts](https://www.edumaps.de/users/list).
- Access to [Activated Accounts](https://www.edumaps.de/users/activated). Accounts are considered activated if the account has created at least one map, otherwise not.
- **Distribute maps to schools:** The entry “Media center” appears in the menu under “Maps & Folders” for schools and their teachers. When creating maps, the superadmin can specify the types of schools to distribute to.

For the user types at Edumaps, see also [Map: Edumaps User Roles](https://www.edumaps.de/1045/1/4y1o9tu).

### Can emails be linked automatically, i.e. converted into mailto links?
Source: https://www.edumaps.de/en/faq#a152000

To automatically link emails, go to the map settings, select map extras, and activate the option “Automatically link emails”. Then, open the map view, and all email addresses will be displayed as links. Please note that we do not allow direct linking with mailto and additional parameters, as this could potentially pose a security risk. See [Details here](https://www.edumaps.de/media/2020-08-18-email-clients-vulnerable-to-attacks-via-mailto-links.pdf).

### Why can I not set tel-links in the box content?
Source: https://www.edumaps.de/en/faq#a152500

We do not allow `tel:+123456` links because they could cause security issues. For example, phishing attacks are possible. This means attackers could use tel:-links to trick users into calling a phone number that leads them to disclose sensitive information. Moreover, there are privacy issues. The careless inclusion of phone numbers could expose personal information or lead to harassment. Technically, a denial-of-service attack is also possible. This means attackers could continuously call the phone number and cause an overload.

### As a teacher, can I edit student feedback (comments) later on?
Source: https://www.edumaps.de/en/faq#a153000

Once a comment has been submitted, it cannot be edited again. We orient ourselves towards common chat systems that do not allow the editing of posts of other users.

Alternative: The student can delete their comment and post it again. Or the teacher can post a correction to the comment. The teacher can delete any comment at any time in the comment history.

### Can you hide the date and time in the booking module?
Source: https://www.edumaps.de/en/faq#a154000

Hiding the booking element below the box is not planned. Please note: The date and time are used by our server to send a reminder email to the participants 24 hours before the course date. Therefore, this information should also be included. In addition, you can immediately see when the course takes place without having to search for this information in the box contents.

### Can all participants in all boxes of a map be reset at once?
Source: https://www.edumaps.de/en/faq#a155000

A global reset of all participants is not possible. Solution: Make a copy of your map. Existing bookings will not be carried over to the copied map.

### What access rights do the maps have in a folder that I share for editing?
Source: https://www.edumaps.de/en/faq#a156000

The access right always refers to the folder, not to the contained maps. For the maps in the folder, the following applies: the access right with which the map was added to the folder applies. The access right of a map is independent of the access rights of the folder into which it was placed.

If you need different access rights, such as maps for reading for your students and maps with editing rights for your colleagues, please create two folders for this purpose. In the student folder, place all maps with reading rights (using the “Add map” button). In the teacher folder, place all maps with editing rights.

### How can I make a selected number of maps available centrally?
Source: https://www.edumaps.de/en/faq#a157000

You can achieve this by using a central [folder](https://www.edumaps.de/user/folders). Place the maps of your choice in this folder. You can then link the folder in your platform (such as Moodle or another LMS). The advantage of this approach is that you can delete maps from this folder or add new ones without the link to the folder changing.

### Why can I not comment, rate or like an embedded box?
Source: https://www.edumaps.de/en/faq#a158000

With embedding only the box content is embedded in the existing box, but not the associated comments, likes or ratings. This has technical reasons.

### Why do students end up on the Matheretter login after scanning the QR code?
Source: https://www.edumaps.de/en/faq#a159000

If you want to go from Edumaps to Matheretter with automatic login, you have to be logged in to Edumaps, visit the map directly and then click on the Matheretter link (a so-called deep link). Only then can Matheretter understand that it is a user who comes from Edumaps and automatically logs in to Matheretter. If you print out the map with QR codes, there is no information about who the user is and that they come from Edumaps. We therefore recommend sharing the map directly instead of printing it out.

### Why does the direct login not work with the IServ password?
Source: https://www.edumaps.de/en/faq#a160000

Edumaps and IServ are two separate systems. This means your IServ password only works on IServ. If you would like to use the Edumaps direct login page, you must use the Edumaps password. If you do not know your password, you can renew it using [“Forgotten password”](https://www.edumaps.de/user/forgot). Your IServ login can be used via the IServ single-sign-on. Here you log in to IServ, IServ sends your basic data to Edumaps and you are then logged in to Edumaps.

### What happens if two users edit the content of a box at the same time?
Source: https://www.edumaps.de/en/faq#a161000

If two or more users edit the same box content, the changes will not be visible in real time. The changes to the box contents are only propagated after saving.

This means that if user A makes a change to the box content and user B is working on the box at the same time, and now user A saves, user B receives the message that the box content has changed. If user B now saves his box content, he will overwrite the box content set by user A.

To ensure that no content is lost, we have built in a revision history for each box. All versions of a box are saved and can be accessed and restored at any time. To view the history, go into edit mode, then at the box click on the three dots [Icon: ellipsis-v] and select “Revision”. There is a “Restore” button under each box.

### How can I restore a deleted column?
Source: https://www.edumaps.de/en/faq#a162000

When deleting a column, the boxes it contains are deleted separately and at the end the column itself. These are independent events. Therefore, a column cannot be restored directly.

However, you can open the map history and restore the deleted boxes there. In edit mode, click on the three dots at the top right [Icon: ellipsis-v] and select “History”. You can then restore any deleted box, a new column will be created in each case.

### Why do I no longer see notifications about changes to my map?
Source: https://www.edumaps.de/en/faq#a163000

Basically, another user has to make a change at your map for you to receive notification of the map change. You will not see notifications for your own edits.

Furthermore:

- Only the map owner receives notifications about changes to their maps.
- Map changes include: Add/edit/delete box or box contents, change box position, sort boxes, copy box to map, Add/edit/delete column, sort column, Add/edit/delete arrow, add/edit/delete text box.
- If the map owner visits the Notifications page, the changed maps are displayed. The next time they visit, these maps will no longer be visible.
- So changes are only displayed once. The notifications will then be removed.
- They must be on the same server. Notifications do not go from, for example, www.edumaps.de to he.edumaps.de.

### Can classes or groups also be created with students from other schools?
Source: https://www.edumaps.de/en/faq#a164000

Classes or groups can only be created with users within the same school. Putting together a group with users from different schools is not possible, primarily for data protection reasons.

### Can I share maps with students from other schools?
Source: https://www.edumaps.de/en/faq#a165000

Yes, this is possible directly via the map link. If the students from the other school access the map, they can click on the three dots at the top right and select “Bookmark in Folder”. This allows students to save any maps they want.

If you want to have more control, you can alternatively create a folder and store the map(s) there. Share this folder with the students via a link. Students can then click the star in the top right to save the folder to their account (the folder then appears on the [“Received”](https://www.edumaps.de/user/received) page). You can make changes to the folder and delete it at any time.

### How can you make the corners of the boxes not round but angular?
Source: https://www.edumaps.de/en/faq#a166000

To do this, open the map editor and click on the “Extras” tab. There you will find an input field for “Rounding box corners”. Enter the value `0` there.

### I have a new single-sign-on account. How can I link this new SSO account to my Edumaps account?
Source: https://www.edumaps.de/en/faq#a168000

To link a new single-sign-on to your Edumaps account, follow these steps:

1. Log in using your old single-sign-on.
   If this is not possible, use the direct login page.
   If you do not know your password, reset it using [Reset password](https://www.edumaps.de/user/forgot).
   If you have not provided an email address for your account, please contact your school administrator. He can change the email address and the password for your account.
2. Once logged in, go to the [Single-Sign-On Management](https://www.edumaps.de/user/sso-connect) page.
3. Remove the previous single-sign-on by clicking on the red trash icon [Icon: trash].
4. Next, go to the website of your SSO provider and log out there.
5. Go back to [Single-Sign-On Management](https://www.edumaps.de/user/sso-connect). Click on the button of the SSO provider (e.g. “IServ” or “Edupool”) and log in to the provider with your new SSO account.
6. You will then be automatically redirected back to Edumaps and the new SSO connection will be linked to your Edumaps account.

### Why are not “Schüler und Schülerinnen” and “Lehrer und Lehrerinnen” used in the German text?
Source: https://www.edumaps.de/en/faq#a169000

On our website we use the generic masculine because it includes all people regardless of gender. It also keeps the texts shorter and easier to read, which is a significant advantage on an extensive platform like Edumaps. In addition, the use of gender language with special characters is prohibited in the state administration and at public schools in Hesse.

### Can I use the background images on Edumaps for other purposes?
Source: https://www.edumaps.de/en/faq#a170000

All background images we use (i.e. the templates in the map editor) can be used freely, including commercially. The images come from Pexels (see [License](https://www.pexels.com/license/)).

### Do courses get marked “finished” automatically after a certain period of time?
Source: https://www.edumaps.de/en/faq#a171000

A course can only be finished manually by clicking on the “Finish” button. This button will only be displayed one hour after the scheduled start of the course. If a course is shown as finished, you or another editor have clicked the end button.

### Will people who have not registered an account also receive a certificate of participation by email?
Source: https://www.edumaps.de/en/faq#a172000

Yes. If someone makes a booking via e-mail, a basic account is created for this person. The person receives an e-mail with the booking confirmation. This e-mail contains no password, but a link with which the person confirms their e-mail address and, if needed, sets a password of their own.

Once the e-mail address is confirmed, this user will also receive an e-mail with a link to the certificate of participation, when you click the Finish button in the box.

If no e-mail arrives, either the e-mail address is incorrect, the e-mail address has not yet been confirmed, or the e-mail sent by our mail server is rejected by your mail server or ends up in your spam folder.

### How can a completed course be activated again (box is marked with “Finished”)?
Source: https://www.edumaps.de/en/faq#a173000

Completed courses are marked with “Finished”. If you want to remove the termination notice, do the following: Set the booking time of the box to the future and save the box, now the course is activated again and is no longer considered finished. You may need to reload the page for the changes to be visible.

The termination can also be removed if you deactivate the booking option, save the box and then activate the booking option again.

### When a user books a course via email, he is automatically logged in, other times he is not. What is the reason?
Source: https://www.edumaps.de/en/faq#a173500

There are two situations when a visitor (who is not logged in) books a course. First, they already have an account with Edumaps. Second, they do not have an account with Edumaps yet. The standard procedure is that if they have an account, they click on “Book” for the course and then choose the “Login with account” button. If they choose the “Book with email” button instead, they are directed to the “Sign up for Booking” (register) page. There, they enter their email and name. At this point, our system could block the registration with a message stating that a user account already exists. However, instead, we proceed with the course booking for this user and enroll them in the course. Logging in must not occur here, as it would pose a significant security risk.

In this case the user receives the booking confirmation by email, provided their email address is confirmed. If the visitor does not have an account yet, a basic account is created and they are then logged in in this browser.

### Why is the booking option not displayed?
Source: https://www.edumaps.de/en/faq#a174000

The booking option is available to all users. However, the booking module appears deactivated in the box settings only for student accounts and anonymous users. Please check which user role you are logged in with.

### Why other editors cannot change the map title, background image, and map access rights?
Source: https://www.edumaps.de/en/faq#a176000

The editor for the map data is only available to the map owner. If this were not the case, other editors could, for example, set the access rights to “Read with Login”. and thus immediately exclude all other editors from editing the map.

### How can the boxes be collapsed to a certain part of the box, for example, one third?
Source: https://www.edumaps.de/en/faq#a177000

Partial collapsing of boxes is possible. Open the box settings and select “Collapse”. Then activate the “Partly” option.

### Why does the comments page open in a new tab and not as an overlay in the same window?
Source: https://www.edumaps.de/en/faq#a178000

In order to display the comments correctly in the overlay, a minimum browser width of 700 pixels is required. If this is not available, the comments will be opened in a new tab. Probably you are using your tablet/iPad in vertical mode, which results in a smaller browser width. Turn your tablet/iPad horizontally so that the browser width is larger.

### How can you display the URLs for uploads and links as well as all color codes in the box editor?
Source: https://www.edumaps.de/en/faq#a179000

If you use the shortcut `Ctrl` + `Shift` + `S` in the editor, all URLs for uploads and links as well as all hexadecimal color codes will be displayed. Alternatively, click on the button with the code icon (“Syntax on/off”) in the box editor toolbar.

### My maps have changed and the contents of the boxes is incomplete, why is that?
Source: https://www.edumaps.de/en/faq#a180000

Open your map in edit mode. Click on the three dots [Icon: ellipsis-v] at the top right and select “ [Icon: history] History” in the dropdown. With the map history you can see which user made which changes. By the way, you can find all of your maps under [My Maps](https://www.edumaps.de/user/maps).

### How can I transfer a map from one server to another server (including files)?
Source: https://www.edumaps.de/en/faq#a181000

Open your map on the first server. Click the blue “Share map” button at the top right and copy the link to the map. Next, navigate to the second server, select “Create map” in the menu and then “Import map”. In the dialog, click on “Import by link” and paste the map link on the following page. Confirm, and the entire map including all files will be imported to the second server.

### Can individual words be written in a smaller font size?
Source: https://www.edumaps.de/en/faq#a183000

Yes, this is possible by enclosing the word or text as follows: `<small>My small text</small>` The smaller font size can be used in map title, column titles, box titles, and box content.

For very small print, you can use: `<tiny>Very small text</tiny>`.

### How can you hide the participant count on the map from visitors?
Source: https://www.edumaps.de/en/faq#a184000

To do this, open your map in edit mode and access the map settings. Click on the “Extras” tab. There you will find the option “Hide number of participants”. Activate the option. Next, switch to the map view. Now you can see that all participant numbers are no longer visible.

### How can I set the same color as map background for all maps?
Source: https://www.edumaps.de/en/faq#a185000

You can transfer the exact color from one map to another map. The following steps are necessary for this:

1. Open your map in edit mode and go to map settings.
2. Click on the small pencil [Icon: pencil] next to the color selection circle.
3. A dialog opens that shows a color code such as `#FFAA77`. Copy this color code.
4. Now create a new map (or edit an existing map) and go to the map settings.
5. Click on the small pencil [Icon: pencil] next to the color selection circle.
6. In the dialog that opens, paste the copied color code `#FFAA77`. Confirm by clicking on the OK button.

Now you have transferred the color of one map to the other map.

### How can I hide a specific text field from other visitors?
Source: https://www.edumaps.de/en/faq#a186000

You can hide a specific text field from visitors by entering `/hide/` in the first line of the text field. This text field gets then hidden in the map view. Note that the text field is always visible in edit mode.

### What happens to the account if a teacher changes the school or the district?
Source: https://www.edumaps.de/en/faq#a187000

It is possible to transfer a teacher from one school to another school (on Edumaps). To do this, log in with the admin account of the school the teacher should go to. Then go to the [“List of all accounts”](https://www.edumaps.de/users/list) page and click on the “Invite user” button. You will then come to the [“Invite User”](https://www.edumaps.de/users/invite) page. There you can enter the email of the teacher. The person will then receive an invitation via email.

Should the teacher move to a school that does not have an Edumaps license, he could book a [subscription](https://www.edumaps.de/en/plans) himself or his new school could purchase a [school license](https://www.edumaps.de/en/plans/schools). It should be noted that every user can export their maps at any time, even without a license.

### Is it possible for stickerwalls to link boxes permanently by arrows?
Source: https://www.edumaps.de/en/faq#a188000

Dynamically linking boxes with arrows is not currently planned.

### Is every change to the box and its content saved in the change history?
Source: https://www.edumaps.de/en/faq#a189000

If you edit a map, the change is saved as a revision and can be restored.

### What is a Teamtext?
Source: https://www.edumaps.de/en/faq#a200000

A Teamtext is an online document where any number of users can write together in real time. Here, ideas can be compiled, tasks can be worked on, or brainstorming sessions can be held. You can also create breakout rooms by setting up a separate Teamtext document for each group and distributing it accordingly. Collaborative work including chat is thus made incredibly easy.

You can add the Teamtext module to any box. To do this, open the box editor by clicking on the orange arrow. In the editor, you will find the menu “Modules” in the lower area, the “Teamtext” button is located there.

Teamtext is powered by [Etherpad Lite](https://github.com/ether/etherpad-lite), which is hosted by us. We do not have access to the source code and cannot make any changes to it.

### How to share a Teamtext document with read-only permissions?
Source: https://www.edumaps.de/en/faq#a201000

A Teamtext can be shared with read-only access by clicking on the share button and activating “Read only”. You will then be shown a new link. Copy this link and distribute it or post the link to your map.

### How can you export a Teamtext as a PDF?
Source: https://www.edumaps.de/en/faq#a201500

Open the Teamtext document in your browser. Then select “Print” in your browser menu and then select the browser-built-in PDF printer. The keyboard shortcut for this is: `Ctrl` + `P`

### Why can tables not be created in Teamtext (Etherpad)?
Source: https://www.edumaps.de/en/faq#a201600

Unfortunately, we had to disable the table plugin because it led to complete data loss for several users. The revision history was also destroyed for many users as a result. Please use an external program for tables. Etherpad or Teamtext is currently not suitable for this purpose. Please note that Etherpad is external software that we host on our server. However, we do not have access to the source code.

### How can I share a map with my school while also allowing third parties to edit or read it?
Source: https://www.edumaps.de/en/faq#a202000

If you want to share a map with all students and teachers of your school, select the option “My School (Read)” under “Publish” in the map settings. If you want teachers to be able to edit the map, additionally enable the checkbox “Teachers can edit map”.

Sharing with anonymous users: If you have chosen the map sharing option “My School (Read)” and also want to share your map with third parties who are not registered with Edumaps, you can do so as well.

1. Click on the blue Share Map button and select “Link to Map” in the dropdown.
2. Choose “Edit” and do not enable the checkbox “Access only for registered users”.
3. Copy the link and distribute it to third parties.

### Can I set a background color for the text and also specify the text color?
Source: https://www.edumaps.de/en/faq#a203000

Setting the background color and text color for the same text is not possible. You can either set the text color or the background color for text. However, at Edumaps we have implemented a feature that determines the brightness of the background color you have set and automatically sets the text color to white or black.

### How can you revoke the sharing of a map with a group/class?
Source: https://www.edumaps.de/en/faq#a204000

To withdraw the sharing of a map with a group/class, proceed as follows:

1. Open your map.
2. Click on the blue share button and select “Share with Group”.
3. The dialog that opens will show you at the bottom at what time you shared the map with which class.
4. To the right of the sharing entry, you find a red cross. Click on it, and the sharing will be revoked.

### How can I see an example or preview of a certificate of participation?
Source: https://www.edumaps.de/en/faq#a205000

To see a preview of the certificate of participation (i.e. the confirmation of a participated booking), you can proceed as follows:

1. If the course time is not in the past, temporarily set the course time in the past. Then reload the map.
2. In the course you will find the “Finish” button. Click on the button.
3. A dialog appears with: “All participants will receive an email with a certificate of participation (preview)”.
4. Click on “Preview” and you will be shown a preview of the certificate of participation for your course.

### What are anchor links and how to use them for navigation?
Source: https://www.edumaps.de/en/faq#a206000

You can use anchor links (jump text fields) to create navigation within a map. To do this, put self-nameable anchor links in your boxes and link them, for example, via a table of contents in a box.

Instructions for creating anchor links (example with table of contents):

1. Open the box you want to link with the box editor.
2. Click on the menu “Elements” and select “Anchor link” there.
3. As an example, `!#anchor` is inserted in the box contents.
4. Rename the anchor as desired, for example `!#start1`. Make sure that the anchor word is a continuous word and that the `!#` characters always precede the word (without spaces, write everything in lower case).
5. Save the box.
6. Now open the box with the table of contents (via the box editor).
7. Write a new text entry in your table of contents.
8. Mark the text entry with the mouse and click on the “Insert link” button with the symbol [Icon: link].
9. Now enter your self-named link with hash characters, for example `!#start1`. Save the box.

If you now click on the link you have set, the map will scroll to the linked box and the box will flash three times.

See also: [Tutorial: Anchor Links](https://www.edumaps.de/1061/1/hixq9fn7t2) as well as Example Map: [Table of contents with anchor links](https://www.edumaps.de/1053/1/m6ky7flm1l)

### Can multiple anchor links be placed within a box?
Source: https://www.edumaps.de/en/faq#a207000

Yes, you can place as many anchor links as you want in the contents of a box.

### Can you register users with emails from the .schule domain and create students with such emails?
Source: https://www.edumaps.de/en/faq#a208000

Yes, this is possible. Student emails are not checked for suspected spam when they are created via the school admin. Only the official registration page is used to check whether the email and the specified domain exist. Domains with `.schule` or other types of domains are accepted.

### How can I, as a school administrator, regenerate the list of created accounts with the QR codes for direct login?
Source: https://www.edumaps.de/en/faq#a209000

The QR codes of the login cards contain a login token, not the password. A new login card can be generated at any time: Edit the account in the [List of Accounts](https://www.edumaps.de/users/list) and select “Print login card”.

When creating many accounts, the note in the dialog still applies: Download the CSV file and print the list immediately, because the collected list of all QR codes can only be regenerated with the CSV file.

### As a course instructor, how can I add multiple students to a course later?
Source: https://www.edumaps.de/en/faq#a210000

You can add students using their email addresses.

1. Access your map in private mode of your browser (i.e. not logged in).
2. Now click on the “Book” button in the box.
3. Select “Book with Email” and enter email and name of your student.
4. The confirmation “Course successfully booked” then appears.

This way you can add your students to the course later yourself.

### Why can other map editors not finish the courses on the map?
Source: https://www.edumaps.de/en/faq#a211000

Completing courses is only available to the map owner. There are application scenarios where several students are allowed to edit a map and could potentially set courses to completed.

### How to center text and headings?
Source: https://www.edumaps.de/en/faq#a212000

Aligning text and headings is currently not possible. If this feature is requested more often, we will look forward to implementing it.

### How can you insert your own QR code?
Source: https://www.edumaps.de/en/faq#a213000

You can insert a link as a QR code by using the editor to edit the box contents by clicking on the menu “Modules” and selecting “QR Code”. Then enter the link and confirm.

If you would like to set a text as a QR code instead of a link, enter directly into the editor: `{qrcode:My text here}` - this will immediately be converted to a QR code.

Tip: You can find the QR code generator at [QR-Code Generator](https://www.edumaps.de/qrcode).

### Can you assign the same color to all boxes on a map at once?
Source: https://www.edumaps.de/en/faq#a214000

This can only be done later individually per box. However, when you start creating a map, you can create a box with a specific color as a template and then simply duplicate it. To duplicate, use the box menu (three dots [Icon: ellipsis-v] at the top right of the box) and select “Duplicate”.

### When linking a YouTube video, is the preview image loaded from Youtube.com and thus the IP passed on?
Source: https://www.edumaps.de/en/faq#a215000

When a YouTube link is placed in a box, our server automatically loads the preview image from Youtube.com and saves it on our server. This means that when the user accesses the map, the preview image is loaded from the Edumaps server and not from an external website. Data protection is therefore fully guaranteed.

### Are QR codes generated using an external service or does my link remain secret from third parties?
Source: https://www.edumaps.de/en/faq#a216000

Every QR code graphic on Edumaps is generated directly in the browser using Javascript. The QR code can be created with `{qrcode:LINK1}`. This means that the link you provide will be converted directly into a graphic by your browser when the map loads. There is no request to an external server. In fact, there is no request for the graphic at all.

### What does accessibility mean for a website?
Source: https://www.edumaps.de/en/faq#a217000

In general, website accessibility includes measures such as the use of semantic HTML structures, alternative texts for images, clear and understandable content, easy navigation via keyboard (without mouse), texts in sufficiently large fonts and stronger color contrasts for better readability.

In Germany, the “Barrierefreie-Informationstechnik-Verordnung (BITV)” regulates how websites are designed to be accessible. It sets the standards for accessibility and is based on the requirements of the “Behindertengleichstellungsgesetzes (BGG)” (Disability Equality Act). In addition to private companies, public bodies are also obliged to ensure that their websites and digital services are accessible.

Edumaps follows WCAG 2.1 level AA, the standard referenced by EU accessibility law (EN 301 549): keyboard operation, screen reader labels, sufficient contrast, scalable text and reduced motion on request. We test the platform regularly with automated tools and improve it continuously.

### What can you do if there is a map in an account that a school urgently needs, but the teacher is not available (e.g. hospital)?
Source: https://www.edumaps.de/en/faq#a218000

The school administrator can set a new password for the affected user account and then use this to log in. However, the consent of the teacher must be given beforehand. It is also important to ensure compliance with data protection.

It is helpful to collect all important maps in a [folder](https://www.edumaps.de/user/folders) that all teachers in the school can access at any time and store their maps there.

### I work with two teacher accounts at two different institutions, how can I make my maps available to all students?
Source: https://www.edumaps.de/en/faq#a219000

You can centralize all your maps in one folder and manage them with two different accounts. To do this, proceed as follows:

1. Go to [My folders](https://www.edumaps.de/user/folders) and click on the blue “Create new folder” button at the bottom.
2. Give the folder a title (example “Material primary school”).
3. Place all of your maps that you want to share with your students in this folder.
   - You can add a map directly to the folder using the “Add map” button. Then paste the link there.
   - Alternatively, you can visit the respective map and select “Bookmark in Folder” from the dropdown in the map menu. Then select the folder in the dropdown and confirm.
4. Now you can give the second account editing rights to the folder. Proceed as follows:
   - Open the central folder.
   - When sharing folders, click on “Share with User” and activate the “Edit folder” checkbox in the dialog.
   - Enter the username of the second account and click “OK”.
   - Now you can also manage the central folder with the second account and add any map.
   - Next, add your maps from the second account to the central folder.
   - You can then send the link to the folder to your students.

### How can I prevent maps from being copied?
Source: https://www.edumaps.de/en/faq#a220000

You can disable map copying in the map settings. In the “Protect” section you will find the “Disable map copying” option.

### A box is supposed to be made available for editing. However, the user cannot edit the box. What do we need to set?
Source: https://www.edumaps.de/en/faq#a221000

Whether a box can be edited or not depends on the generated link to the map. The link must be created with editing rights. Furthermore, the column in which the box is located must not be protected from editing.

### How can other editors change the map title and background?
Source: https://www.edumaps.de/en/faq#a222000

Changing the map title and map background is only available to the map owner.

### Why ist the spell checker not working in the box editor?
Source: https://www.edumaps.de/en/faq#a223000

We had to disable the spell checker for the text area of the editor. The reason for this is that the placeholders (like `LINK1` or `UPLOAD1` etc.) would be reported as errors, however, these must remain unchanged and are essential for the editor to function properly.

### What does “Partly” mean when collapsing in the box settings?
Source: https://www.edumaps.de/en/faq#a224000

If you activate “Collapse” in the box settings and choose “Partly” there, the box will not be shown with its full contents in the map view, but only with a short excerpt (70 pixels height). This means your visitors can see a small part of the content, but are not overwhelmed by the entire box content.

### Why are blank lines inserted when pasting copied text into the box editor?
Source: https://www.edumaps.de/en/faq#a225000

If you copy a multi-line text and paste it into the editor, we automatically set line breaks as new paragraphs, so that the formatting is correct and paragraphs are separated from one another. However, this does not happen when it is a list. If you want to insert the text unchanged, instead of using the key combination `Ctrl` `V` you can simply press the key combination `Ctrl` `Shift` `V`. This will paste the text directly from the clipboard as is.

### The iPad keyboard covers half of the screen while editing, how can I improve this?
Source: https://www.edumaps.de/en/faq#a226000

The floating keyboard of the iPad can shrink the keyboard so you can see more of the screen. See [Apple instructions](https://support.apple.com/en-us/111789). Make the keyboard smaller by squeezing its edges with two fingers. Press and hold the gray line “–” to move the keyboard around the screen.

The “Split Keyboard” option takes up significantly less space than the standard on-screen keyboard of the iPad. You can enable the keyboard by going to: Settings → General → Keyboards → Split Keyboard. To split the keyboard, either pull the left and right sides of the keyboard apart with two fingers, or tap and hold the keyboard button in the bottom right, then select “Split”.

The other option is to use a Bluetooth keyboard. Virtually any Bluetooth keyboard works with iPad, iPhone, and tablets. When this keyboard is active and connected, no on-screen keyboard will be displayed, allowing the entire screen to be used for content.

Last alternative: Rotate the iPad and switch to the vertical view. This way, the keyboard takes up less space on the screen.

### Can star ratings for boxes be enabled?
Source: https://www.edumaps.de/en/faq#a227000

Star ratings for evaluating boxes are not yet planned. In the box settings, you can enable “Ratings” and select “Assess” from the dropdown menu. Now boxes can be rated as “Good”, “Average”, and “Poor”. As the box owner, you can then click on the number of voters to see the details of all assessors in the opening dialog. You will also find the average value of all assessments at the bottom left of the detail window, including a representation in the form of stars.

### Can external links be displayed in overlays via iframe so that students do not leave the website?
Source: https://www.edumaps.de/en/faq#a228000

Opening external websites in an overlay is unfortunately disadvantageous for several reasons:

- Accessibility: Content within iframes may not be accessible to all users, particularly those using assistive technologies such as screen readers. This can create barriers for users with disabilities and impair their ability to access information on your website.
- Privacy and Cookie Policies: Embedding external content in iframes may result in the privacy and cookie policies of the external website not being properly enforced. This can lead to compliance issues and compromise the privacy standards of our website, especially if the external website collects personal data or uses cookies.
- Usability: In general, users expect external websites to load in a new tab or directly in the current tab. Displaying them in an overlay is not standard practice.
- Security Risks: Embedding external content via iframes can pose security risks, especially if the external website is not trustworthy. Therefore, iframes to external sources are completely blocked in Edumaps.
- Smartphone Display: On smartphones, the available screen size is too small to display external websites as overlays.
- Additional Scrollbars: Embedding external websites via an overlay causes additional scrollbars, which can impair the user experience by complicating navigation or disrupting the visual flow of the page. Users may need to switch back and forth between the scrollbars of the iframe and those of the page itself to see the entire content, leading to an unpleasant and inconsistent user experience. These extra scrollbars can also affect the appearance of the embedded page.
- Browser Compatibility: Different browsers may render and interpret iframes differently. This can lead to inconsistencies in display and behavior, especially concerning the handling of CSS styles, Javascript interactions, or support for specific HTML5 features.
- Interaction Limitations: In some cases, external webpages within iframes may include interactive elements such as forms or buttons. Interacting with these elements within the iframe can be problematic because communication between the iframe and the main page may be restricted.

### How can I assign my own alternative text for an uploaded image?
Source: https://www.edumaps.de/en/faq#a229000

Basically, the caption below `UPLOAD1` is set as alternative text for images. However, there is also the option to define [image tooltips](https://www.edumaps.de/1003/1/e9o5ybwc3p/z960xa7v6r#b48518) via `UPLOAD1{Text}`. This text is then also set as alternative text (`<img alt="Text">`) for the corresponding image.

### Gamification: How can I progressively reveal boxes when visitors click on anchor links?
Source: https://www.edumaps.de/en/faq#a230000

To reveal or display boxes one by one, you can proceed as follows:

1. Create a map and activate the “Reveal Mode” option in the map extras. This will only display the first box in the map when the map is loaded.
2. Link the boxes one after the other using [anchor links](https://www.edumaps.de/en/faq#a206000). That means Box 1 points to Box 2, then Box 2 points to Box 3, and so on.
3. Now distribute your map in read mode.

Now you can call the link in the browser and click through the boxes one by one. The boxes will be displayed one after the other.

### How do I log in to Edumaps as a teacher in Hesse (Schulportal Hessen)?
Source: https://www.edumaps.de/en/faq#a231000

Hesse has a state-wide license, Edumaps is available to you as a teacher free of charge. The easiest way is via the Schulportal Hessen:

1. Log in to the Schulportal Hessen as usual.
2. Open the Edumaps tile there. On the first click, your Edumaps account is created automatically and linked to your school.
3. After that you can start right away, a separate registration is not necessary.

If the Edumaps tile is not yet visible for you, it has to be activated once by your school's Schulportal administration. Contact the responsible person at your school for this.

Alternatively, your school admin can create a teacher account on he.edumaps.de and hand you the username and password.

### How do I get more space under the heading to position a sticker there?
Source: https://www.edumaps.de/en/faq#a232000

Currently, there is no option to influence the spacing below the map title. Alternatively, instead of using a text field for your note to the students, you can place a signature beneath the heading. To do this, input the following after the map title: `Map title \\ <small>Here is my note</small>`. Another option is to place a box within the first column that contains your note. You can make the box look like a sticker by fully coloring it and hiding the box title.

### Can we access and use Edumaps on a Smart TV?
Source: https://www.edumaps.de/en/faq#a233000

Yes, this is possible on most Smart TVs. Simply use a browser on the device and access our website there. If your Smart TV does not have its own browser, you can install a browser app. For example BrowseHere (TVWeb Browser), Puffin TV Browser or Chrome, if available.

### Can you assign a text color for map titles, column titles and box titles and set a colored background for words?
Source: https://www.edumaps.de/en/faq#a234000

Yes, this is possible for advanced users by enclosing the word in curly brackets and then write down the color code in [hexadecimal](https://www.edumaps.de/1003/1/e9o5ybwc3p/z960xa7v6r#b48525). As an example: `{my word}**{**#00F}` becomes my word.
To set a background color for a word, simply add a hash character to the end of the hexadecimal code. As an example: `{my word}**{**#AAF#}` becomes my word.

### How to make text colored?
Source: https://www.edumaps.de/en/faq#a234100

For text inside a box, you can open the editor, select the text and then click the color icon. Choose the color you want and the text will be colored.

For colored text in the map, column, or box titles, you must specify the color using the following notation: Example: `{my colored text}**{**#00F}` - This will be displayed as my colored text. The color code `#00F` is just a number that represents the red-green-blue values of a color. The most commonly used colors can be found here: [Color codes in hexadecimal](https://www.edumaps.de/1003/1/e9o5ybwc3p/z960xa7v6r#hexcolor).

### Where can I find the AI assistant to generate content?
Source: https://www.edumaps.de/en/faq#a235000

To open the AI assistant, go into edit mode and click the three dots next to the “New Box” button. A dropdown will open, where you will find the “New Box ᴬᴵ” entry. Click on the entry, and the assistant will open. Generate any content and then add it directly as new boxes to your current map.

If you do not need the function to insert AI content as boxes, you can also call the AI assistant directly here: [AI Assistant](https://www.edumaps.de/ai).

### Can images be generated with the AI assistant?
Source: https://www.edumaps.de/en/faq#a236000

We use the text mode via the service “Azure OpenAI Service” from Microsoft and cannot generate images. The processing takes place in EU data centers (server location Sweden). Fundamentally, there is still a question about the added value of an artificial image for the learning process. For generating artificial images, we recommend using specialized image generators from other providers such as Midjourney, DreamStudio, Craiyon, or Adobe Firefly.

### As a school from Lower Saxony, can I use Edumaps without the Moin School single sign-on?
Source: https://www.edumaps.de/en/faq#a237000

Yes, every school has received an admin account from the Ministry of Education. With this admin account you can create teacher accounts. With teacher accounts, direct logins are possible without single sign-on.

### By logging in via Moin-Schule, new accounts are created again and again, resulting in duplicate accounts. How can we get around this?
Source: https://www.edumaps.de/en/faq#a238000

With Moin SSO you should always log in to the same Edumaps account. If this is not the case, Moin-Schule is passing a different user ID with the single sign-on. Only if the user ID is different, a new account is created.

If such problems occur, we recommend the direct login. To do this, your school administrator must create a teacher account for you. Or you can use the page [“Reset Password”](https://www.edumaps.de/user/forgot) while logged in, set a new password and then use your email and password for the direct login in the future (instead of the Moin SSO).

### I receive the error message “Access denied” when using SSO Moin-Schule?
Source: https://www.edumaps.de/en/faq#a238100

The “access_denied” error is generated by the Moin-Schule server. Possible reasons include: Either your account at Moin-Schule has not been activated, or Edumaps is not activated for your school on the Moin-Schule platform. Make sure that both systems, Edumaps and Matheretter, are activated for your Moin-Schule account. If it still does not work, please contact the Moin-Schule support at support@moin.schule.

### When using Single Sign-On with Moin-Schule, is a new account created every time?
Source: https://www.edumaps.de/en/faq#a238200

With the Single Sign-On Moin-Schule, a person ID (“pid”) is passed. According to Moin-Schule, this ID is unique per person and is used by Edumaps to identify the user. If a student registers anew, this person ID will be different. If the ID remains the same, no new account is created; the user is logged into the existing Edumaps account. Please verify the data on the site of Moin-Schule.

Alternative solution: Assign a password to the user account of the student (in the list of all accounts) and let them use manual login on Edumaps.

### When logging in with the SSO Moin-Schule, I am logged in as a student, although I am a teacher?
Source: https://www.edumaps.de/en/faq#a238300

If you receive the role “Student” at Edumaps, then the data at Moin-Schule is set to student. Please check your settings on the Moin-Schule website, especially the release of role attributes. You can later upgrade your Edumaps account to “Teacher” by using the admin account, accessing the page [List of Accounts](https://www.edumaps.de/users/list). Find your account, click Edit, and change the role.

### How can you move several boxes in a row?
Source: https://www.edumaps.de/en/faq#a239000

Multiple moves can be activated as follows:

1. First, click on the three dots on a box and select “Move” in the dropdown.
2. Now you can move several boxes on the map one after another.
3. To end the multiple moving, simply click on one of the red handles on the boxes.

### Can the multi-sort mode be activated permanently?
Source: https://www.edumaps.de/en/faq#a239500

The multi-sort mode does not need to be switched on: It starts automatically as soon as you choose “Move” on a box.

### Where can you find the Edumaps QR code generator?
Source: https://www.edumaps.de/en/faq#a240000

You can find the QR code generator at this link: [QR-Code Generator](https://www.edumaps.de/qrcode).

### How can I plan a parent conference day with Edumaps?
Source: https://www.edumaps.de/en/faq#a241000

You can use the [Template: Parent Conference Day](https://www.edumaps.de/1054/1/fvafw81k7m) for a parents evening or a parent-teacher conference. Open the map. Then click on the three dots in the top right and select “Copy”. You can then change the copied map as you wish and enter your times.

### How can I sort quickly like a Kanban board?
Source: https://www.edumaps.de/en/faq#a242000

For this, you can use the multiple sort feature. The multiple sort can be activated as follows:

1. First, click on the three dots on a box and select “Move” in the dropdown.
2. Now you can move several boxes on the map one after another.

### I have a subscription but cannot create teacher accounts?
Source: https://www.edumaps.de/en/faq#a243000

Only an admin account can create teacher accounts. This is not possible with a private account. A [school license](https://www.edumaps.de/en/plans/schools) is required for this. However, private accounts can create student accounts that are then associated with the account.

### Which single sign-on systems (SSO) can Edumaps already connect?
Source: https://www.edumaps.de/en/faq#a244000

Edumaps currently offers single sign-ons to:

- Bildungsmediathek NRW
- Bildungsserver Sachsen-Anhalt
- DiLer
- Edulog (Switzerland)
- Eduplaces
- Edupool Hessen
- Hessisches Schulportal
- IServ
- moin.schule
- Sesam (BaWü)
- Univention
- Vidis
- WebUntis

### How to create polls?
Source: https://www.edumaps.de/en/faq#a245000

You can add a survey module to a box by opening the menu “Modules” in the box editor and selecting “Poll”. Now you can create any survey you like. See also [Tutorial](https://www.edumaps.de/1086/1/xmgkv25gxf/f3u6hrdh5m).

To enable simple voting with only 3 options, A, B, and C, for a box, proceed as follows:

1. Open the box settings by clicking on the three dots on the box, select “Edit”.
2. Enable the “Ratings” option.
3. Select the “Voting” option instead of “Assessment”.
4. Then click “Save”.
5. Now polls are enabled for this box.

### Can the admin block the changing of student names?
Source: https://www.edumaps.de/en/faq#a246000

Due to data protection, we are not allowed to block the name change. Every user must be able to change and delete their data at any time.

### Can student accounts be placed in a trash can instead of immediately deleting them?
Source: https://www.edumaps.de/en/faq#a247000

Due to data protection, we are not allowed to deactivate or archive student accounts, otherwise the student would no longer be able to access their user data.

If you want to remove the student from the current students list, the admin can remove the user from the school. The student can then delete themselves at any time. The student can be added back to the school list at any time using the [“Invite User”](https://www.edumaps.de/users/invite) feature.

### How many maps can a teacher account create and how many maps can a student account create?
Source: https://www.edumaps.de/en/faq#a248000

The maximum number of maps for teacher accounts is limited to 1000 maps. The maximum number of maps for student accounts is limited to 100 maps.

### Can students also create maps?
Source: https://www.edumaps.de/en/faq#a249000

Yes, student accounts can also create maps. Simply click on “Create Map” at the top of the main menu.

### Can additional fonts be integrated?
Source: https://www.edumaps.de/en/faq#a250000

We currently offer 17 fonts that you can select under “Font” in the map settings. 10 of those fonts are pre-installed on Windows, Mac, and Ubuntu operating systems and are displayed correctly. For the others, we load font libraries. If a font is to be displayed that is not available on the operating system of the user, it will not be rendered.

### Which fonts are recommended for elementary students and for dyslexia?
Source: https://www.edumaps.de/en/faq#a250100

The fonts “OpenDyslexic”, “Atkinson Hyperlegible”, “Lexend”, “Tiresias”, and “Comic Sans” are particularly suitable for students with dyslexia.

1. Open Dyslexic: This font was specifically designed for people with dyslexia.

2. Lexend: This font was designed to increase reading speed and accuracy.

3. Atkinson Hyperlegible: Designed by the Braille Institute Library, this font offers excellent clarity and readability, making it useful for people with a variety of visual and reading impairments, including dyslexia.

4. Tiresias: This font was developed for clear readability. It is often used in public transport systems to convey information clearly and distinctly.

5. Comic Sans: Although often criticized, Comic Sans is relatively easy to read due to its rounded letters and clear shapes, even for children with reading difficulties. It is included in many Microsoft products and is therefore widespread.

### How can I remove files from a box (I have editing rights)?
Source: https://www.edumaps.de/en/faq#a251000

To delete a file, simply delete the text `UPLOAD1` from the editor. Then the file is no longer in the box. By the way, you can find all your uploads separately in the [Upload Manager](https://www.edumaps.de/uploads).

### How is it possible for the superadmin to grant a teacher an admin account?
Source: https://www.edumaps.de/en/faq#a252000

Admin accounts cannot be transferred to teacher accounts. Admin accounts are central accounts primarily intended for managing other users.

If you are superadmin, you can search for the admin account in the [User Management](https://www.edumaps.de/users/superadmin). Once you have found the admin account, you can set a new password (to do this, click “Edit”). Write down the admin account username (e.g. “he4569”, you will see the name in the first column). Send the username along with the new password to the person who will manage the admin account.

### Why do you have to be logged in to make a reservation?
Source: https://www.edumaps.de/en/faq#a253000

If we allowed anonymous visitors to book your reservation calendar, there would be a high risk of spam, where theoretically hundreds of entries could be added to your calendar. It is therefore essential to register a user account beforehand.

### How do you create a line break to the next line and not to the line after next?
Source: https://www.edumaps.de/en/faq#a254000

By default, the box editor jumps to the line after next when you press `Enter`, as it expects a new module. However, if you use `Shift` + `Enter` (or `Alt` + `Enter`), you will go directly to the next line. This creates a line break.

### Does Edumaps offer a calendar for organizing my class?
Source: https://www.edumaps.de/en/faq#a255000

Yes, this is possible in several ways. Either through your own [user calendar](https://www.edumaps.de/1062/1/jj3nem387d/utmny9e9vk) or through the [calendar of a box](https://www.edumaps.de/1059/1/1p018vc669/nt5sn3ix90).

If you want to plan a week, a map might also be directly useful for this purpose. Take a look at this example map: [Example: Primary School Weekly Plan](https://www.edumaps.de/1011/1/l264ny59nd/p26109lvv4).

### Why does the screen automatically scroll up on a smartphone when you move to the next column to the right?
Source: https://www.edumaps.de/en/faq#a256000

The automatic scrolling up is an Edumaps feature for smartphones. As soon as you move to the next column, it automatically scrolls up because otherwise, the user would be lost in the column context. Tip: You can activate “Scroll columns” in the map settings under “Format”, then the scrolling up is automatically disabled.

### Is it possible to upload Office documents that can be filled by all users?
Source: https://www.edumaps.de/en/faq#a257000

You can use the teamtext module for shared texts and filling out texts. Siehe [What is Teamtext?](https://www.edumaps.de/en/faq#a200000)

### Can we organize equipment rental via Edumaps?
Source: https://www.edumaps.de/en/faq#a258000

Yes, this is exactly why the reservation module is available for each box. See tutorial: [Tutorial: Create and manage Reservations](https://www.edumaps.de/1055/1/ft1ljjpa0p).

### I have several user accounts with Edumaps. How can I save different maps centrally?
Source: https://www.edumaps.de/en/faq#a260000

To help you better organize your maps, the “Bookmark in Folder” feature is available for each map. This saves a map directly to one of your [folders](https://www.edumaps.de/user/folders) (e.g. Favorites). You can create and manage the folders as you require. If maps are only released within the school (under [“My School”](https://www.edumaps.de/maps/school)), you actually have to use two different accounts for editing/reading. For all other access rights, you can save and manage the maps using folders.

### How do you prevent anonymous participants from editing the map or changing boxes?
Source: https://www.edumaps.de/en/faq#a261000

To do this, activate the “Access only for registered users” checkbox in the map-sharing dialog. See also [Tutorial: Distribute maps with access rights](https://www.edumaps.de/1047/1/siajhiablo/fv6nobr4hp). Or you can share the map via a map link that only allows viewing.

### When loading a PDF it says “This content is blocked. Contact the site owner to resolve the issue.”?
Source: https://www.edumaps.de/en/faq#a262000

This message can occur if the browser settings have been changed. Basically, all PDFs are loaded in an iFrame, which can cause problems with some browsers. To solve the problem, check the permissions of your browser, see [hints here](https://support.google.com/chrome/answer/114662?hl=de&co=GENIE.Platform%3DDesktop).

### Can I send an email to the class when new information is available on the map?
Source: https://www.edumaps.de/en/faq#a263000

If you want every student to receive an email (once a day) whenever you publish new content on your map, then each student must follow the map. For this, the student opens the map view, clicks on the three dots in the top right corner and selects “Follow map”.

Tip: Your class will also receive a notification when you share your map with the class. For this, use the blue “Share map” button in the top right corner and select “Share with Group” from the dropdown.

Otherwise, reminders to your class to check the map again must be sent manually via existing communication channels.

### Is there a list of all applications of Edumaps?
Source: https://www.edumaps.de/en/faq#a264000

Yes, you will find a variety of Edumaps applications on the map: [Use Cases of Maps](https://www.edumaps.de/1015/1/fycfmsz). In the first box, you will find a summary that provides you with an overview.

### The map on the computer looks different (editing status) than the map on the smartphone/tablet?
Source: https://www.edumaps.de/en/faq#a265000

Perform a reload of the page. Regardless of the browser cache, the page will always be fully reloaded. If you still see two different versions after reloading, it must be a different map. Please check if both URLs were exactly the same. Or one browser might be displaying the map in a view mode (e.g., with hidden boxes) and the other browser displayed the map in editing mode (where all boxes are typically shown). Additionally, check if your internet connection is working perfectly.

### How can my colleagues find my maps more quickly?
Source: https://www.edumaps.de/en/faq#a267000

To provide information centrally, you can create a folder that you then share with your colleagues. You can add new maps to this folder at any time, and your colleagues will find all the maps centrally located in this place. Alternatively, you could also create a central overview map and link all other maps from there.

### What is the difference between columns and boxes?
Source: https://www.edumaps.de/en/faq#a268000

In a pinboard, columns are arranged vertically. Boxes are placed into these columns. In a timeline, a column is horizontal (meaning “row”) and the boxes are arranged from left to right. In a sticker wall, there are no columns, as all boxes can be freely positioned. This means a column is a higher-level structural element in which boxes are sorted.

### Can you hide a medium (image/audio recording/video) behind a spoiler?
Source: https://www.edumaps.de/en/faq#a269000

Yes. See [Spoiler example](https://www.edumaps.de/1003/1/e9o5ybwc3p/z960xa7v6r#spoiler).

### Can you define sections in a box and then collapse and expand them?
Source: https://www.edumaps.de/en/faq#a270000

Currently the solution would be to create a separate box for each section and collapse the box. Also the spoiler function can be used within a box.

### I exported a CSV from Trello, how can I import the board into Edumaps?
Source: https://www.edumaps.de/en/faq#a271000

A CSV file from Trello cannot be imported into Edumaps as CSV. Every CSV file - like every spreadsheet - has its own structure with a defined arrangement of data records. Use the [Trello importer](https://www.edumaps.de/import/trello) instead: paste the link of your public board there or upload the JSON export of the board (in Trello: board menu > Print and Export > Export as JSON).

### Can I link an uploaded file to an image?
Source: https://www.edumaps.de/en/faq#a272000

This is currently not possible. The preview images for each file are generated automatically.

### How can I put a widget on the home screen of my iPhone/smartphone that shows the contents of a box?
Source: https://www.edumaps.de/en/faq#a273000

The widget app [Widget Web](https://apps.apple.com/us/app/widget-web/id1522169352) is available for Apple devices such as iPad and iPhone. To do this, take the single box link, i.e. the link that is loaded when you click the magnifying glass icon at the bottom of the box.

On Android smartphones, HTML cannot be displayed on the home screen widget. Here you can find the app [Widgetify](https://play.google.com/store/apps/details?id=com.binarysmith.webclipwidget.ad&hl=en_US&gl=US), which generates a screenshot of the website at intervals you specify and then shows it as an image on the home screen.

### Where can I find the Edumaps short link generator?
Source: https://www.edumaps.de/en/faq#a274000

You can find the link generator [here](https://www.edumaps.de/shortlinks).

### Can a trash can be introduced where all deleted boxes go if you accidentally delete them?
Source: https://www.edumaps.de/en/faq#a275000

You can restore any deleted box in the map history. You can find the map history at the top right of the map menu under the “History” entry.

### Is there a display of which user uploaded a document and when?
Source: https://www.edumaps.de/en/faq#a276000

Each box has a change history, where you can see which changes were made by whom and at what time. You can also restore previous revisions of the box contents. You can access the change history by clicking on the three dots on the box and selecting “History” in the dropdown.

### Links to external websites are displayed with preview images. How can I create a pure text link?
Source: https://www.edumaps.de/en/faq#a277000

In general, the following applies: If a link stands alone on a line, a preview image will always be generated. If a link is placed within text (i.e., not at the beginning of a line), it is rendered only as a text link and no preview image is generated. A simple dash before it is enough, or for example “Here is the link: https://…”. If the link itself should stand alone on a line, you can place an exclamation mark before the `https`, for example `!https://www.externeseite.de`. This forces the link to be displayed as a text link. See also [Tutorial: Inputs and Formatting in the Box Editor](https://www.edumaps.de/1003/1/e9o5ybwc3p/z960xa7v6r).

### All uploads are displayed with preview images. How can I create a pure text link to the file or document?
Source: https://www.edumaps.de/en/faq#a277100

An upload is inserted in the box editor as `UPLOAD1` and is rendered with a preview image in the preview mode. If you do not need a preview image but want to link specific text to the upload, place an exclamation mark before and after `UPLOAD1` and then write the text to be linked below or after it. Example: `!UPLOAD1! My Example`. This displays the text “My Example” as a text link and links to the uploaded file.

Alternatively, you can place curly brackets around `UPLOAD1` and insert the text as follows: `{My Example PDF}{UPLOAD1}`. This links the text “My Example PDF”.

If the link with `https…` should stand alone on a line, you can place an exclamation mark before the `UPLOAD1`, i.e. `!UPLOAD1`. This displays the link directly.

### How can I prevent image files from being compressed automatically? How do I upload all my photos without resizing them?
Source: https://www.edumaps.de/en/faq#a278000

By default, uploaded images are resized to a maximum width of 1800 pixels or a maximum height of 1000 pixels. To upload a photo at its full image size, open the map settings and select the option “Always upload images uncompressed” under Extras. Tip: If you want to make several images available for others to download, you can alternatively create a ZIP file containing all the photos on your computer and then upload it.

### My account is no longer working. I can neither log in nor access my maps. What is the reason?
Source: https://www.edumaps.de/en/faq#a279000

First, check all the information at [“My login does not work”](https://www.edumaps.de/en/faq#login). If none of the solutions work and the error “User not found” continues to appear, your account has probably been deleted. Please contact your school admin and ask if accounts were deleted.

Note that deleted accounts cannot be restored as we delete all data immediately and irreversibly. We adhere to strict data protection. Deleted means deleted.

### Why does our video not play on iPhone and iPad with Safari?
Source: https://www.edumaps.de/en/faq#a280000

If the video file does not play, it is likely that a video codec has been used that cannot be played by Safari or Quicktime. One solution is to convert the video file with an external program and then upload it again. For iPhone and iPad, you can use an app like [The Video Converter](https://apps.apple.com/us/app/the-video-converter/id893347665).

Another solution is to simply use a different browser like Chrome to play the videos.

If it is about video recordings, you can alternatively use the webcam recording in the Edumaps box editor, just open the editor, click on “Record” and select “Webcam”.

### When adding boxes to a sticker wall, the boxes overlap. How can this be prevented?
Source: https://www.edumaps.de/en/faq#a281000

When you have a sticker wall and click on “New Box”, a box is added at a random position in your currently visible area. If all users are at the top left with their smartphones and add boxes, the boxes will gather in this area. One solution is to simply scroll to the right or down and add new boxes there. This way, you achieve a better distribution of boxes on your sticker wall.

Alternatively, you can select the pinboard format. Here, there are no overlaps, as the boxes are arranged one after the other.

### Can student accounts be created without providing an email address, but with specifying the class?
Source: https://www.edumaps.de/en/faq#a283000

If you create student accounts and also want to specify the class, an email address must be provided for each student account. However, you can use dummy email addresses for this purpose. Real email addresses are not required. The email addresses do not need to be reachable.

### Can arrows and text fields be attached to boxes so that their position adjusts when a box is expanded?
Source: https://www.edumaps.de/en/faq#a284000

The positions of arrows and text fields are fixed relative to the global map. It is not possible to change the reference system to a box. You can use the map format “sticker wall” to also fix the boxes to the global map.

### How can I give a presentation with Edumaps where each box appears as an individual slide?
Source: https://www.edumaps.de/en/faq#a285000

You can give a presentation (as known from PowerPoint) by clicking on the zoom icon [Icon: search-plus] at the end of a box. This opens the box in single view in large format. In the single view, you will find buttons in the top right to navigate to the previous or next box. This way, you can give your presentation and present all your media.

### Why am I prompted to initialize my account after Single-Sign-On?
Source: https://www.edumaps.de/en/faq#a286000

If you see a popup on the homepage asking you to initialize your account, it means that no email address was provided during the Single-Sign-On process. In this case, only a dummy email address has been stored for your Edumaps account. This means that if Single-Sign-On (SSO) stops working in the future, you will not be able to access your account. Therefore, it is important that you have a way to log in directly to your account at any time and request a new password at any time. For this, you need to provide a valid email address.

### How can I embed my box calendar into an external calendar (like Outlook, Apple, or Google Calendar)?
Source: https://www.edumaps.de/en/faq#a287000

You can embed any of your box calendars into an external calendar like Apple and Google Calendar. As the map owner, you will find an “iCalendar Link” below the box calendar. Click on the link, and the iCalendar link will be displayed. Copy the link and then integrate it into your Apple or Google Calendar.

### How can I quickly upload and share images?
Source: https://www.edumaps.de/en/faq#a288000

The quickest way to share photos and images is by clicking on “Create Map”, entering a map title, and then saving. Next, click on the blue “Image” button at the top right (next to the “Text field” button). Now you can choose your image to upload, and the image will be ready immediately.

### I cannot register on the Hessen server. How can I, as a state employee in Hessen, log in?
Source: https://www.edumaps.de/en/faq#a289000

An admin account is available for each school. The login for this admin account is provided by the education authority responsible for your school in Hessen. This admin account can then create a teacher account for you. Alternatively, you can use Single Sign-On via Edupool. The login is done through the Edupool of the Hessen education authorities. If you already have an Edupool account, log in to Edupool with it, go to “Tools”, and select “Edumaps” from the dropdown menu. If you are the administrator of your school and use IServ, you can also set up an [IServ SSO](https://www.edumaps.de/50/1/ybfs7741io).

### How long does it take for Google Calendar to adopt changes from my Edumaps calendar?
Source: https://www.edumaps.de/en/faq#a290000

If you have integrated a calendar (e.g. user calendar or box calendar) into Google Calendar via iCalendar link, any changes will appear in Google Calendar after about 12 to 24 hours. We have no control over this time interval, as Google determines the update interval.

### I want to delete my account but do not remember my password to confirm the deletion. What should I do?
Source: https://www.edumaps.de/en/faq#a291000

In these circumstances, proceed as follows: 1. Log out. 2. Go to the [Reset Password](https://www.edumaps.de/user/forgot) page. 3. Request a new password to be sent to you.

### How can I hide boxes containing solutions from editing students in edit mode?
Source: https://www.edumaps.de/en/faq#a292000

In general, you cannot hide boxes from other editors in edit mode. However, in the box settings under “Visibility”, you will find the option “Hide box”. There you can activate the checkbox “Hide from students in edit mode”.

Alternatively: You can also add a spoiler to your solution box. This way, the answers can also be hidden in edit mode.

### I accidentally canceled my subscription. How can I withdraw my cancellation?
Source: https://www.edumaps.de/en/faq#a293000

To do this, you can simply place a [new order](https://www.edumaps.de/en/plans) at the end of the term. Your subscription and term will then be automatically extended.

### How can boxes posted by students be hidden and only released after review by the teacher?
Source: https://www.edumaps.de/en/faq#a294000

There are scenarios where a “Check and Approve” function is useful (such as post moderation). For example:

- Protect individual work results from being copied
- Political discussions
- Avoiding insults

As a solution, it is recommended to share individual columns. To do this, click the blue button at the top right to share the map [Icon: share-alt-square] and select [“Share Columns”](https://www.edumaps.de/1047/1/siajhiablo/fv6nobr4hp#b8869) from the dropdown. Each student can then be assigned their own column and post their content there.

After review, the teacher can release or make the respective box visible by moving the box to a column visible to all students. Alternatively, the teacher can release the map link at the end of the exercise, giving all students full access to all boxes.

### Why is the text indentation not working for me?
Source: https://www.edumaps.de/en/faq#a295000

If the text is not indented despite you having placed two spaces before the text, please check if the text stands alone, meaning without any text in the line before it. Indented text applies to an entire paragraph and must be set before the first text in the first line.

### How can you change the generated link for sharing a map?
Source: https://www.edumaps.de/en/faq#a296000

The links for sharing a map cannot be set manually. However, you can use the [short link generator](https://www.edumaps.de/shortlinks) to create your own links. There, enter the link to your map under “External Link” and your desired part of the URL under “Desired Slug (short link)”.

### Do parents need an account to view a map, as they cannot open the map and are being asked for login details?
Source: https://www.edumaps.de/en/faq#a297000

If you are working on the map alone (without colleagues), you can set the map access right to “Read without Login”, then the map can be accessed without a login. However, if you are working on the map together with colleagues and the access right is already set to “Edit with Login”, you can use the “Read-only link” to share the map and distribute this to the parents. All access rights are explained here: [Access Rights and Sharing Maps](https://www.edumaps.de/1047/1/siajhiablo/fv6nobr4hp)

### I have already registered with my personal email address. Now it does not work to register with my work email?
Source: https://www.edumaps.de/en/faq#a298000

What error message appears? See instructions under [My login does not work. What to do?](https://www.edumaps.de/en/faq#login) The school admin can generally edit all user accounts and emails, as well as create new accounts.

### Can I also download the QR code as a file so that I can insert it into presentations?
Source: https://www.edumaps.de/en/faq#a299000

Yes, the QR code can be saved by right-clicking. Then select “Save image as” in the context menu. On mobile devices, hold your finger on the QR code, then a menu for saving the image will also appear.

### Where can we find the template for our record of processing activities (data protection) to comply with the GDPR requirements?
Source: https://www.edumaps.de/en/faq#a300000

See Appendix 4 under [Data Processing Agreement according to Art. 28 GDPR](https://www.edumaps.de/legal/avv#verver).

### Can my colleagues, with whom I have shared a map (with editing rights), also share this map with their created classes?
Source: https://www.edumaps.de/en/faq#a301000

Sharing with classes using the “Share with Group” function is reserved for the map owner, and only the classes created by the owner can be selected.

Solution using folders:

1. Each teacher creates their own [folder](https://www.edumaps.de/user/folders).
2. In the folder, they click “Add map” and insert the link to the map (be sure to use the “Read only rights” link).
3. Then they click the blue share button in the folder and select “Share with Group”.

Alternative solution: If the map is final, your colleagues can make a copy of the map and then share their own map with their own classes.

### Can the admin account work like a user or should the admin account be separated from the user account?
Source: https://www.edumaps.de/en/faq#a302000

School admin accounts should primarily be used for managing user accounts. School admins can create maps that are made available to all teachers and students (setting with access right “My School”). These maps can then be found in the menu under “Maps & Folders” in [“My School”](https://www.edumaps.de/maps/school). For all other tasks, separate teacher accounts should be used.

### Can you create a teacher account for me at my school?
Source: https://www.edumaps.de/en/faq#a303000

For data protection reasons, we are not allowed to create or register accounts within the responsibility of a school. Please contact the school admin responsible for you.

### Why can I not register directly via email on external servers (like those in Lower Saxony and North Rhine-Westphalia)?
Source: https://www.edumaps.de/en/faq#a304000

On external servers, direct email registration is not possible. Usually, there are Single Sign-On solutions (such as Moin-Schule or Edupool) or the school admin creates teacher and student accounts for direct login.

### How can I generate a preview image from a linked PDF?
Source: https://www.edumaps.de/en/faq#a305000

If your link points to an external PDF, you can download the PDF and upload it to your box. This will automatically generate a preview image on our server.

### Why is the book button still visible even though the course time is already in the past?
Source: https://www.edumaps.de/en/faq#a306000

Booking a course is possible up to one hour after the start time. This allows users who join the course a little later to still sign up. Booking a course that is more than one hour in the past is no longer possible.

### Why do I not see the finish button for the bookings of the box?
Source: https://www.edumaps.de/en/faq#a306100

The “Finish” button is displayed to the map owner as soon as the specified course start is more than one hour in the past. If you do not see the finish button, you are logged in with a different account (or anonymously). Once the course is finished, a “Finished” note appears.

### How can I insert a new column at the very front?
Source: https://www.edumaps.de/en/faq#a307000

Hover your mouse over the empty area to the left of the first column. The “New Column” button will then appear. Click the button to insert a column right at the front.

### Due to changes in SSO, new accounts are being created. How can we keep the old accounts?
Source: https://www.edumaps.de/en/faq#a309000

If you use new SSO accounts, new users will indeed be created in Edumaps. To continue using the data from the previous accounts, it is possible to merge the old and new accounts using your school admin account (see [FAQ here](https://www.edumaps.de/en/faq#a5000)). The previous teacher account must then be merged with the new teacher account.

### Why can my students not insert images into the box?
Source: https://www.edumaps.de/en/faq#a310000

There is an upload limit, but it only applies to very large files. In some cases, cookies may be blocked on students’ devices; then an upload is technically not possible. Send us the link to your map and the displayed error message so we can investigate the issue.

Ensure also that neither the column nor the box is protected and that the correct map link with editing rights has been opened.

### Sharing with users via email does not work, the error appears: User not found?
Source: https://www.edumaps.de/en/faq#a311000

Please check if the email address was entered correctly. Make sure both users use the same server. Alternatively, share your map not using the email address, but rather via the username. Each user can find their username in their [My Account page](https://www.edumaps.de/user/account).

### How can I share a map with a group with read-only rights and with a user within the group with editing rights?
Source: https://www.edumaps.de/en/faq#a312000

The following steps are necessary:

1. Click on the blue share map button [Icon: share-alt-square] and choose “Share with Group” in the dropdown.
2. Select the group/class, choose “Read” and confirm.
3. Now all members of the group/class will receive a notification, and the map will appear under [“Received”](https://www.edumaps.de/user/received) for them.
4. To give editing rights to a single person (who is in the group) next, use the blue share map button again and click “Share with User” in the dropdown. Enter the username or email, choose “Edit” and confirm.
5. Now the map will appear for this user under “Received” with editing rights.

### I have no internet connection while on the go and would like to use the map offline?
Source: https://www.edumaps.de/en/faq#a313000

For laptop: Enter edit mode, click on the three dots of the map menu at the top right, and select “Export” from the dropdown menu. There, choose the entry “Offline Map (html)” (available with Premium as well as with every school and state license).

For iPhone/iPad, you can save the map offline by opening the map in the Safari browser and selecting “Add to Reading List”, see [Apple article](https://support.apple.com/en-us/108970). This is also possible for [Chrome iOS](https://support.google.com/chrome/answer/7343019?hl=en&co=GENIE.Platform%3DiOS).

For Android, you need to install an external app (or enable the “Read Later” feature in Chrome). For example, the app [Offline Browser](https://play.google.com/store/apps/details?id=it.nikodroid.offline&hl=en). This app downloads the entire map page, including images. Please note that the app only makes images available offline, and other media such as videos/audio/PDFs are not downloaded.

### There was a change in school administration, how can I become an admin now?
Source: https://www.edumaps.de/en/faq#a314000

Please contact the previous admin user and ask for their login credentials. After logging in, go to the [My Account](https://www.edumaps.de/user/account) page and change the email address. We recommend always using the official email address of the school administration and never personal emails.

### Is it possible to share the map without my name appearing? How can I hide my name?
Source: https://www.edumaps.de/en/faq#a315000

The name displayed under the map title is the name you assigned in your profile. If you change the name in your profile, the updated name will appear under the map title. Alternatively, you can hide the map title (see Map Settings under “Extras”), and the map title along with your name will no longer be displayed.

### Why do the maps in the map list have the same preview image instead of a preview of the actual map?
Source: https://www.edumaps.de/en/faq#a316000

This is due to technical reasons. If we created a preview image for each map, it would be server-intensive and significantly increase loading times for all users. The background images are kept very small: for 100 maps in the map list, for example, if 5 background images are set, that results in 5 requests (about 500 kB). With real preview images, there would be 100 requests for the visitor and about 100 * 100 kB = 10 MB. With an internet speed of 500 kB/s, our current variant results in 1 second loading time, while the real preview would take 20 seconds to load.

### Why do the linked maps in my boxes all seem to have the same preview image (a page with a book background)?
Source: https://www.edumaps.de/en/faq#a317000

Technically, these are different preview images. The issue is that the server creating screenshots of websites cannot log in. Therefore, the user (in this case, the server) is redirected to the login page with the book background. If you use a read-only link for the map in the box, the screenshot server can read the map without logging in.

### How can we collapse and expand multiple boxes at once for better overview?
Source: https://www.edumaps.de/en/faq#a318000

You can press `M` on the keyboard. Alternatively, open the menu of the “Zoom and Search” button (magnifier button) and then select “Hide Contents” or “Show Contents”.

### Is it possible to print the contents of a map in book form, where each column is a chapter and boxes are subchapters with their contents?
Source: https://www.edumaps.de/en/faq#a320000

You can download any map in Markdown format. You can then use one of the free Markdown editors to design your book. However, there is no automatic table of contents available at this time.

### If a user changes their email, do they still have access to the maps shared with them?
Source: https://www.edumaps.de/en/faq#a322000

Yes. User IDs are used in the database to identify users in relation to shared maps.

### How can you see the name of the creator and the last editor for a box?
Source: https://www.edumaps.de/en/faq#a323000

In edit mode, you can see the name of the creator or the last editor by hovering over the box title and waiting briefly. A tooltip will appear, showing the name and creation or edit date, as long as the box was not created by the map owner themselves. The tooltip for a new box shows the box creator with “Created by”. The tooltip for an edited box shows the last editor with “Edited by”.

### Are the content data of the created maps transmitted unencrypted (data protection)?
Source: https://www.edumaps.de/en/faq#a324000

We use HTTPS connections for all communication. This means that the data is encrypted during transmission between the client (web browser) and our server. The HTTPS protocol uses SSL/TLS to ensure this encryption. Therefore, all content data is encrypted during transmission. This protects the data from eavesdropping and unauthorized access by third parties during transmission.

### Is it possible to use the Edumaps platform in other countries like the USA and Sardinia?
Source: https://www.edumaps.de/en/faq#a326000

We have no restrictions regarding the location of our visitors. Anyone can use Edumaps, whether from Europe, America, or another continent, regardless of the country. Please use our main server at www.edumaps.de and no other servers.

### Can you collapse or expand multiple selected boxes in a column with one click?
Source: https://www.edumaps.de/en/faq#a327000

Collapsing or expanding selected boxes with one click is not possible. You can individually hide the box contents for each box and thus keep the box permanently collapsed, see box settings.

### How can we download images and videos when there is no download button?
Source: https://www.edumaps.de/en/faq#a329000

For photos and videos, right-click on the photo/video and select download. On smartphones and tablets, press and hold the photo or video until the download dialog appears.

### How can you allow the downloading of photos on the map?
Source: https://www.edumaps.de/en/faq#a329500

The download of photos and videos is not limited. To download photos to the computer, the user can open the photo and right-click on it. Then, a context menu with “Save image as” appears. On smartphones and tablets, the user can open the photo and hold it for about 2 seconds, then a download dialog appears.

### When creating student accounts, I receive errors when importing students with name, email, and class but no email address?
Source: https://www.edumaps.de/en/faq#a330000

Many administrators use student email addresses to ensure uniqueness and avoid duplicates with the same name. We recommend using dummy email addresses, such as “student1@myschool.de”, “student2@myschool.de”, and so on. Another advantage: If you repeat the student data import next year and the emails match, the new class designations are applied to the accounts. With the option “Create the classes listed in the table as new classes”, the students are also added to the new classes, they are not removed from the old classes. If only the class names change at the turn of the school year, use the “School year change” function on the [Rename groups](https://www.edumaps.de/users/usersets-rename) page instead (see also [Re-importing a CSV file](https://www.edumaps.de/en/faq#a77000)).

### When reloading Teamtext (Etherpad) in the background, the JAWS screen reader jumps to the beginning and reads with a slight delay?
Source: https://www.edumaps.de/en/faq#a331000

Unfortunately, we have no direct control over Etherpad, as this open-source software is developed by others. You can report such issues directly to the developers [here](https://github.com/ether/etherpad-lite/issues).

### I use different Single Sign-Ons, how can I link multiple SSO with my Edumaps account?
Source: https://www.edumaps.de/en/faq#a332000

The [Single Sign-On Management](https://www.edumaps.de/user/sso-connect) is available for this purpose (found in the My Account page). After logging in with the first Single Sign-On provider, go to this page and select another Single Sign-On.

### We have activated bookings for a box. Who can view the participant list of the course?
Source: https://www.edumaps.de/en/faq#a333000

Viewing all participants is possible for all editors in edit mode, as long as they are not anonymous and logged in. See also [Tutorial: Create and manage Bookings (Courses)](https://www.edumaps.de/1046/1/clof1fu).

### Can you link two different SSO accesses from the same provider to an Edumaps account?
Source: https://www.edumaps.de/en/faq#a334000

For different Single-Sign-On providers, you can access the [Single-Sign-On Management](https://www.edumaps.de/user/sso-connect) in the My Account page. However, if it is the same provider, merging Single-Sign-Ons would only be possible through the school admin, who can use the [Merge Account](https://www.edumaps.de/users/merge) function for this purpose. When merging, the existing SSOs are combined. However, we recommend actually maintaining two accounts on Edumaps in such cases to avoid other issues. Note: Multiple accounts can manage and share maps centrally in folders.

### My students have deleted content and posted disruptive content, how can I prevent vandalism?
Source: https://www.edumaps.de/en/faq#a335000

You can view deleted content through the map history. There you can also access the change history for the deleted boxes and restore previous states. We generally recommend that each student gets their own login and that the map is set to “Edit with login”. This way, anonymous vandalism is not possible, and you can always track who changed and deleted what by name.

Tip: For group work, each student can create a column and protect it. Subsequently, only the student and the map owner can create and edit boxes within this column.

### How do my colleagues receive a notification when something new is posted on the map?
Source: https://www.edumaps.de/en/faq#a336000

To receive notifications about new boxes on a map, you can follow a map. To do this, click on the three dots at the top right in the map view and select “Follow Map” from the dropdown menu. You will now receive notifications directly on Edumaps via the yellow bell in the main menu. Additionally, our server checks once a day which users should be informed about new content and sends out an email notification.

### Is the map zoom also available in edit mode?
Source: https://www.edumaps.de/en/faq#a338000

Yes. The map zoom (50 % to 200 %) is available both in the map view and in edit mode. You will find it behind the magnifier icon in the top right corner. The editing panel on the left always stays at its normal size, so it remains easy to read and to use. Boxes, arrows and text fields can be moved as usual while the map is zoomed. Alternatively, use the direct browser zoom. Simply hold `Ctrl` (or `Cmd` on Mac) and scroll the mouse wheel.

### How can I zoom out from the map view on mobile phones and tablets?
Source: https://www.edumaps.de/en/faq#a338100

For technical reasons, it is not possible to zoom out with two fingers when the map is first loaded. However, you can zoom out by clicking on the zoom search icon [Icon: search-plus] in the top right corner and selecting `50 %` from the dropdown menu. Afterwards, you will see the map zoomed out/reduced, and you can zoom in and out at will with two fingers.

### How can I first give my students editing rights via a link and then downgrade them to read-only rights?
Source: https://www.edumaps.de/en/faq#a339000

If you are working with links and not by sharing to classes, you can also achieve the desired scenario. To do this, open the map settings and click on the “Allow editing via read link” option under “Protect”. Then click on the blue Share button [Icon: share-alt] and copy the link with access rights “Read”. When your students open this link, they can edit the map. If you later want to revoke the editing rights, go back to the map settings and deactivate the option “Allow editing via read link”. So the read link only grants read-only rights as usual.

If you use the “Share with Group” function, you can first share with editing rights, and later simply share again with read rights. This overwrites the previous sharing.

### Why do students not see a dropdown with all sharing options like teachers do when sharing maps?
Source: https://www.edumaps.de/en/faq#a339500

Students do not see a dropdown with “Share with Group” and “Share with User” and “Share Columns”. Reasons for this are: Students cannot create classes/groups. Only teachers are allowed to share directly with individual users (colleagues). Sharing column groups is reserved for teachers and administrators only.

### Why does my iPhone say “Your password was detected in a data leak and may be compromised”?
Source: https://www.edumaps.de/en/faq#a340000

There are two possibilities: 1. If you store passwords for websites on your iPhone, the iPhone automatically detects weaknesses. For example, passwords that are easy to guess or used multiple times. 2. Your password was included in a known data leak. It is quite possible that you had a Trojan on your computer that intercepted your logins with passwords published on the Dark Web.

However, the message does not mean that the data leak originated from the provider. At Edumaps, we store all passwords hashed in our database, which means that the password is never in clear text, such as “password123#”, but instead “$2y$10$HgMaeNXOJbez/xU0HS5HJOxoZGhvMxT”. Thus the password is always protected.

In any case, you should change your password and assign a stronger one that includes special characters and uppercase letters.

Tip: You can find data leaks directly on the website [haveibeenpwned.com](https://haveibeenpwned.com/). Simply enter your email address there, and you will be shown if your email address appears in a data leak.

### Why are arrows displayed above the boxes and not below them?
Source: https://www.edumaps.de/en/faq#a341000

The arrows overlaying the boxes is by design. Boxes and freely placed images on the map are overlaid by arrows. The reason is that arrows point to elements on the map and therefore need to be in the foreground.

### I used the Edupool SSO and am associated with the wrong school, how can I change schools on Edumaps?
Source: https://www.edumaps.de/en/faq#a343000

If you are using the Edupool Single Sign-On, you need to change the school affiliation directly on Edupool. Reason: With Single Sign-On, the school is verified, and your Edumaps account is assigned according to the transferred school. The assignment to the school is made with each use of the Edupool SSO. This means that if the teacher is assigned to “School A” on Edupool, then they will also be automatically assigned to this school on Edumaps when using the Edupool SSO. All manual changes in the user database on Edumaps are overwritten with each Edupool SSO. This means you need to change the teacher association in Edupool, and the teacher must use the Edupool SSO again. Then the assignment should be correct.

If your teacher account is one manually created by the school admin, the other school admin can transfer your account to the other school using the [“Invite User”](https://www.edumaps.de/users/invite) function.

Please note that we are not allowed to change your school affiliation for privacy reasons.

### How can I give multiple workgroups write access to only one assigned box on a shared map?
Source: https://www.edumaps.de/en/faq#a344000

This is possible with the [Share Column Group](https://www.edumaps.de/1047/1/siajhiablo/fv6nobr4hp#columngroup) feature. Create multiple columns and then a box in each column. Afterwards, you can create multiple column links. Each column link is assigned only one column, which represents the respective workgroup. Then send each workgroup their corresponding column link, which contains the box to be edited.

Tip: You can change the column links at any time afterwards and unlock additional columns or change access rights per column.

### Why is a basic account created when a student anonymously books a course via “Book with email”?
Source: https://www.edumaps.de/en/faq#a345000

A basic account is created because, for data protection reasons, we are not allowed to create a student account and assign it to a school. Additionally, it is not guaranteed that it is indeed a student. It could, for instance, be a spam bot.

### Why is a medium not displayed when searching in the Edupool mediatheque?
Source: https://www.edumaps.de/en/faq#a346000

Check if the medium's signature has been activated by the superadmin in the [media management](https://www.edumaps.de/search/media-admin). If the signature is not there, the medium will not be displayed in your search.

### Why was the feedback button removed from the box editor?
Source: https://www.edumaps.de/en/faq#a347000

Unfortunately, we had to remove the feedback button again. The reason: Some teachers thought they could allow private feedback and simultaneously use the comment function separately in the same box to conduct a discussion. However, technically, the blue feedback button directly opens the comment page and does not allow a separate thread. Since scenarios that are not intended arise from this, we had to remove the feedback button.

### Why is my audio file not playing?
Source: https://www.edumaps.de/en/faq#a348000

Please test it in this [map](https://www.edumaps.de/1005/1/c1g5yt7t1t#b60957) to see if you can play the audio file. If the audio file does not play, there is probably an issue with your browser. Is the latest version installed? If the audio file plays correctly, then there is probably an issue with your uploaded file. For example, using the MP2 codec can cause problems. You would need to convert your file to the MP3 codec and then upload it again. You can find many websites online for this purpose. Just search for “convert to MP3 online”.

### How can my students find a column group shared by the teacher again?
Source: https://www.edumaps.de/en/faq#a349000

When your students access a column group, they will find a bookmark icon [Icon: star-o] at the top right. If the student clicks on it, they can select a folder where the column group should be bookmarked (the simplest option is in the “Favorites” folder). After confirmation, the student can find the column group in the respective folder under [“My Folders”](https://www.edumaps.de/user/folders).

### Is there a push function so that we are automatically informed about changes on a map?
Source: https://www.edumaps.de/en/faq#a350000

You can achieve this through the [Follow Map](https://www.edumaps.de/1079/1/vahlwdap0i) function. Your users open the map, then click on the three dots and select “Follow Map” from the dropdown. With new content, users receive an email once daily.

### I do not see the pricing page of Edumaps?
Source: https://www.edumaps.de/en/faq#a351000

The pricing pages are only displayed on the main server www.edumaps.de. Not on other servers. You can access the pages here: [Prices for schools](https://www.edumaps.de/en/plans/schools) and [Prices for individuals](https://www.edumaps.de/en/plans). If you are logged in as a student or teacher, the “Prices” entry will not appear in the main menu either.

### How can you fix the top column bar so that the column name always remains visible?
Source: https://www.edumaps.de/en/faq#a352000

You will find this option in the map settings under “Format”. There you activate the option “Scroll columns”.

### How can one protect a box with a password?
Source: https://www.edumaps.de/en/faq#a353000

You can hide the box content and make it visible only after entering the correct password. To do this, open the box settings and click on “Protect”. Then select the “Password protection” option and set a password. Save the box. After that, switch to the map view and you will see that a password input field appears, and the content is displayed only after entering the correct password.

### Can students only see the next station once they have solved the previous one?
Source: https://www.edumaps.de/en/faq#a353500

Yes, with password-protected boxes: the solution to the previous task (a word or a number) is entered as the password of the next box. Whoever has solved the task unlocks the next station on their own with it. If the teacher wants to check the work first, the password is shared after the check, or the next box is unlocked for everyone at a set time via “Show box from”. There is no automatic if-then link between boxes.

More information:

- [FAQ: How can one protect a box with a password?](https://www.edumaps.de/en/faq#a353000)
- [FAQ: How can I display a box only at a specific date?](https://www.edumaps.de/en/faq#a150000)

### Where can I see which classes/groups I am assigned to?
Source: https://www.edumaps.de/en/faq#a354000

Groups created by teachers are private and protected. Groups created by admins can be viewed on the [Predefined Classes](https://www.edumaps.de/users/usersets-admin) page (including all members). This means that only predefined classes/groups set up by the admin should be used, as they are visible to all teachers at your school.

### Can we, as a publisher, publish a created map in one of our works (digital and print)?
Source: https://www.edumaps.de/en/faq#a355000

If a person creates a map, that person is the creator and holds all usage rights for the content on that map. Edumaps does not have copyright on it. Therefore, the person can directly permit your publishing house to use it, with no need for Edumaps to be consulted.

Notes:

- Please pay attention to which media have been uploaded onto the map and check their license rights.
- Ensure that the Edumaps logo does not appear, only the map itself. The Edumaps logo is copyright protected and may only be published by us.
- All background images provided by Edumaps are from Pexels and are free to use, both commercially and privately.
- We would appreciate it if there is a note stating “Created with Edumaps” when the map or its depiction is published in your work.
- Tip: You can generate a QR code for each map by clicking on the blue share button and incorporate it into your work. This way, the map can also be accessed digitally.

### We want to publish our joint map and place all the names of authors under the title?
Source: https://www.edumaps.de/en/faq#a356000

In the map settings directly below the title field you will find the field “Subtitle optional”. Enter the desired names here. This text will then appear directly below the map title.

### How can you change the line with the name of the map creator under the map title?
Source: https://www.edumaps.de/en/faq#a356500

In the map settings directly below the title field you will find the field “Subtitle optional”. Enter the name or group name you want here. This text will then appear directly below the map title, where the name of the map creator is displayed. Additionally, you can hide the name of the map owner. To do this, open the map settings under “Protect” and activate the checkbox “Hide map owner”.

### My map is protected with a map password, yet sometimes I can access the map without a password?
Source: https://www.edumaps.de/en/faq#a357000

When you are logged in as the map owner, you never need to enter a password. Map owners always have full access to their own maps. When a user has correctly entered the map password, it is stored in their browser for 3 days. If the user accesses the map again during this period, they do not need to enter the password again. Stored map passwords are also deleted upon logging out, meaning the entries in the browser cache are deleted.

### How can I add my own logo to the certificate of participation?
Source: https://www.edumaps.de/en/faq#a359000

You can add your own logos to the top right corner of the certificate of participation by uploading the logo graphic into the box. You can find all the details in the [tutorial](https://www.edumaps.de/1046/1/mtp976esa8/ee2qawxllh#logo).

### Is it possible to set limitations for rental systems and calendar bookings (booking only during specific periods or with 2-hour slots)?
Source: https://www.edumaps.de/en/faq#a360000

The calendar module is intended to remain flexible. Constraints are not currently planned. However, you can use an informative text within the box to indicate your individual booking modalities.

### How can I link an existing manually created account with a Single Sign-On (SSO) account?
Source: https://www.edumaps.de/en/faq#a361000

Follow these steps. It is important to follow this exact order:

1. Log in to Edumaps with your manual account.
2. Then, open the page of your Single Sign-On provider (such as Edupool or Univention).
3. Log in there and click on “Edumaps” (in a tile or dropdown).
4. You will now be redirected to Edumaps, where the message will appear that you can link your manual account with the SSO provider.
5. Click on the “Link Account” button. You may need to enter your Edumaps password for confirmation.

Afterwards, the Single Sign-On is linked to your manual account.

### Are all participants in a course automatically informed by email if I cancel the course?
Source: https://www.edumaps.de/en/faq#a362000

An automatic email is not sent by Edumaps, as this would lead to mass emails and our mail server would be blacklisted. Also, the function could be misused to generate mass emails. Instead, proceed as follows: Access the list of all participants. To do this, click on the participant counter on the box. This list shows you all email addresses. Now you can copy the emails and send a message to all participants using your email program.

Tip: If all courses on your map are canceled, you can export a CSV list of participants from all courses. You can find this CSV export in the map menu under “Export”. Then you can open the CSV file and copy the column with the emails.

### How can I display the pinboard or timeline in full screen in the browser?
Source: https://www.edumaps.de/en/faq#a363000

Use the keyboard shortcut `F11` built into most browsers, which displays the website in full screen (without the browser address bar). Return to normal mode by pressing `ESC`.

### How can we conduct an anonymous poll without students having to log out?
Source: https://www.edumaps.de/en/faq#a364000

For anonymous polls, you can simply open the link to the map in a private browser window.

### How can I zoom into an image?
Source: https://www.edumaps.de/en/faq#a365000

When you click on an image that has been uploaded into a box, the image opens in an overlay. On a smartphone, you can then zoom in with your fingers and move the view. On a computer, you can zoom in with the mouse wheel and then move the view by holding down the mouse button.

### How can you set the column title for all columns to be two lines high?
Source: https://www.edumaps.de/en/faq#a366000

You can insert a blank line in single-line column titles by adding `\\` at the end. This creates a line break, thus making a single-line column title display as two lines.

### How do I copy an entire box or an entire column?
Source: https://www.edumaps.de/en/faq#a367000

You can learn how to copy boxes and columns from other maps in these [tutorials](https://www.edumaps.de/folder/12/1/xbc5c17a6n/58un8bsaoz). To copy boxes and columns on the same map, click the three dots on the box or column and select the option “Duplicate”.

### How can I add more information such as speakers to a certificate of participation?
Source: https://www.edumaps.de/en/faq#a368000

You can create your own short descriptions to add any information you want. See [Short description for participation certificate](https://www.edumaps.de/1046/1/mtp976esa8#description) in the tutorial.

### How can I fully archive my map?
Source: https://www.edumaps.de/en/faq#a369000

You can use the offline export for archiving. See [tutorial](https://www.edumaps.de/1066/1/1pub713maq/ticgrlk5gg#htmlexport).

### How can I enlarge the font when printing a map?
Source: https://www.edumaps.de/en/faq#a370000

This can be done directly through the print dialog of the browser. In the additional settings, you will find the option “Scale” with the value “100”. Set this value to “200”.

### How can I display a full-size image in a box and not a thumbnail?
Source: https://www.edumaps.de/en/faq#a371000

Displaying the image in full-size instead of a thumbnail in a box is possible. To do so, follow these steps:

- Upload the image. It appears as `UPLOAD1`.
- Place a hash `#` directly behind `UPLOAD1`.
- With `UPLOAD1#` the image will be rendered in full size.
- Save your box.

### How can I position a logo next to the map title?
Source: https://www.edumaps.de/en/faq#a372000

In principle, it is not advisable to place a logo graphic next to the title, as most visitors access the map via smartphone and, due to the small screen width, there is not enough space for the display. However, you can place a small logo at the top left of the map or to the right of a short map title.

Alternative solutions:

- Place the logo graphic in the first box on the map.
- Use a background image that contains the logo.
- Place a logo at the end of the map.

### Why can I only make 5 requests with the AI module?
Source: https://www.edumaps.de/en/faq#a373000

The AI module incurs costs that are not covered by our pricing. Therefore, it is available for testing with 5 requests for private accounts in the Free and Minimal plans. Further requests are not possible there. With Premium as well as with teacher and school accounts there is no limit.

### When I open a PDF on the iPad, can I no longer exit the full-screen mode with the PDF view?
Source: https://www.edumaps.de/en/faq#a374000

This is an iPad-specific issue. Possible solutions:

- Use the back gesture: Try swiping from left to right across the screen with one finger. This should lead to the previous screen.
- Show the top bar: Tap the screen once to see if the top menu bar appears. This often works to display the controls, including a button to close the PDF.
- Use the multitasking bar: You can swipe up with four or five fingers simultaneously to open the multitasking display, then close the app that is displaying the PDF or switch to another app.
- Restart the browser: Press the home button (or on newer iPads, swipe up from the bottom edge) to return to the home screen, and then reopen the browser. This should close the open PDF file.

### Why are PDFs being downloaded directly in Safari instead of displaying a preview in the browser?
Source: https://www.edumaps.de/en/faq#a375000

If your Safari browser downloads PDFs instead of displaying them, you need to change your Safari settings to use the integrated PDF reader in Safari. To do this, click on “Safari” in the menu bar at the top and select “Preferences”. Then go to the “Websites” tab. Scroll down on the left side to “Plug-ins”. If a PDF reader like “Adobe Acrobat” is active there, it should be deactivated. Also, make sure no other PDF plug-in is active. If no PDF plug-in is active, Safari should display PDFs as a preview by default.

### How can we import or integrate existing external calendars into a calendar on Edumaps?
Source: https://www.edumaps.de/en/faq#a376000

You will find the “Import calendar (ics)” button below the calendar on the right. Click the button, and you can upload an ics file. “ics” stands for “Internet Calendaring and Scheduling Core Object Specification (iCalendar)”. It is a file format for sharing calendar information. In almost every external application, you can export the calendar as an ics file.

### How can we download a calendar from Edumaps as an ICS file or integrate it externally?
Source: https://www.edumaps.de/en/faq#a377000

You will find the “iCalendar Link” button on the right below the calendar. Click the button, and the iCalendar link for the current calendar will be displayed. Copy the link and open it directly in the browser. This will start the download of the ICS file. Instead of downloading the calendar, you can directly integrate the link into most external applications.

### How can I create a table in a box?
Source: https://www.edumaps.de/en/faq#a378000

Use the menu “Elements” in the box editor and select “Table”. A template for a table will then be inserted, which you can fill with your data. See also the tutorial: [Creating Tables](https://www.edumaps.de/1003/1/e9o5ybwc3p/z960xa7v6r#tables).

### How can we use the Single Sign-On of Univention?
Source: https://www.edumaps.de/en/faq#a379000

For applying for and using Edumaps at Cologne schools, an ID Broker connection (UCS) should be available.

- Cologne schools that have not yet applied for an ID Broker connection (UCS) for their school can do so via the Helpdesk in the City of Cologne's intranet. This application is usually submitted by the school management.
- Cologne schools that already have an ID Broker connection (UCS) can apply for integration of Edumaps via Netcologne's (ITS) ticket system.
- Link: https://ticket.netcologne-its.de/index.php

For queries regarding the ticket system, the following email address can be used: servicedesk@netcologne-its.de Teachers can log in via the UCS portal using their UCS credentials. The Edumaps tile will appear in the UCS portal after integration.

### How can we activate WebUntis single sign-on?
Source: https://www.edumaps.de/en/faq#a379500

To use single sign-on from WebUntis to Edumaps, you need to activate the “Edumaps” app in WebUntis. To do this, proceed as follows:

- Log in to [WebUntis.com](https://webuntis.com/) with your WebUntis admin account.
- Click on “Administration”, then on “Platform”.
- Click on “Add application”. Search for “Edumaps” and click “Save”.
- Edumaps will then be available to all your WebUntis users.

### Where can I see when a box was created?
Source: https://www.edumaps.de/en/faq#a380000

To see the creation date of the box, open your map in edit mode and click on the three dots on the box. In the dropdown that opens, select “History”. You will then see all edits of the box (revisions). Under the heading, you will find the creation date with “Box created on”.

Alternatively, you can select “History” in the map options (click on the three dots in the top right corner). There you will find the complete history of the map with all creation dates of the boxes.

### Can classes also be created with a Premium Account?
Source: https://www.edumaps.de/en/faq#a381000

Yes, classes can be created with the Minimal or Premium plans and with Admin Accounts.

### I have problems with formatting in a box?
Source: https://www.edumaps.de/en/faq#a382000

For better editing (when there are many formatting elements), it is helpful to display the syntax. This way, you can see the formatting marks that have been set. To do this, click on the button with the code icon (“Syntax on/off”) in the box editor toolbar. Afterwards, all formatting marks will be displayed and you can see where formatting overlaps or is not set correctly.

### If I leave my current school or authority, can I keep my maps?
Source: https://www.edumaps.de/en/faq#a383000

Yes, your maps will remain as long as your account is not deleted. At the end of your time at the school or authority, you can click “Leave school” in your [My Account page](https://www.edumaps.de/user/account) options; after that, the admin will no longer have access to your account. The admin will also no longer be able to delete your account.

Tip: Export your maps in the Edumaps-JSON format and in the offline format so that you always have a backup copy. These can be imported into a new account whenever needed.

### How can I continue using Edumaps after changing schools?
Source: https://www.edumaps.de/en/faq#a384000

When changing schools, there are several ways to continue using Edumaps:

1. New school has an Edumaps license: After leaving your previous school (option “Leave school” on your [My Account page](https://www.edumaps.de/user/account)), your account is no longer assigned to any school and can join the new school with its join code, which you also enter on your My Account page. Alternatively, the school admin can [invite your user account](https://www.edumaps.de/users/invite) and assign it to the school as a teacher account.

2. New school does not have an Edumaps license: If the school acquires a school license, then point 1 applies. Otherwise, you can select “Leave school” in the options of your [My Account page](https://www.edumaps.de/user/account). Afterwards, your account will be downgraded to a basic account. To then have more storage space and use all features without restrictions, you would need to purchase a [Premium Account](https://www.edumaps.de/en/plans).

### Can you prevent votes from being clicked multiple times?
Source: https://www.edumaps.de/en/faq#a385000

You can activate the restriction to a single selection by clicking the survey module in the dropdown in the box editor and then selecting “Single choice” instead of “Multiple choice”. This way, only one answer can be selected in the survey, not multiple.

To prevent anonymous users from voting multiple times (which is possible if the person uses several browsers), you would need to share the map link with “Access for registered users only”. This would require all voters to register and verify via email beforehand.

Technically, it is unfortunately not possible to uniquely identify anonymous visitors if they use different browsers.

### If I duplicate a fully collapsed box, why is the resulting box not collapsed?
Source: https://www.edumaps.de/en/faq#a386000

The new duplicated box is displayed with its contents expanded so that the content can be edited directly. In most cases, this is the desired scenario.

### Content suddenly seems to be no longer available, could data be lost?
Source: https://www.edumaps.de/en/faq#a387000

It cannot be completely ruled out technically that - in very rare cases - data loss may occur. This can be due to an unstable internet connection, possibly a server restart, or other reasons. To find out which boxes have been created and deleted, you can use the map history. This will quickly give you an overview of all changes on your map (who edited what and when). In some cases, you can determine here how the data was lost, specifically by looking at entries like “Box deleted”. By the way, deleted boxes can be completely restored by clicking on the icon with the circular arrow in the map history.

You can create a backup of your maps at any time. Use the “Export” function in the map menu for this or create a copy of your map.

### Will a drawing function be implemented for the boxes, since our students write with a digital pen on a tablet?
Source: https://www.edumaps.de/en/faq#a388000

A module for making drawings or handwritten notes is not planned. Instead, we recommend downloading and using an app specialized in drawing from the Play Store or App Store. Afterwards, you can export an image file from the drawing app and upload it to your box.

### How can I add two appointments at the same time in the user calendar?
Source: https://www.edumaps.de/en/faq#a389000

To do this, go to the week view and, for example, set the first appointment to 17:00. Then set the second appointment to, for example, 16:00. Now move the second appointment with the mouse to 17:00. Or you can edit the second appointment and enter the time in the input field.

### How can I show a message to every visitor who is currently viewing my map?
Source: https://www.edumaps.de/en/faq#a391000

For this purpose you can use a popup message that you find in the box editor. You can place it in any box. See [tutorial here](https://www.edumaps.de/1003/1/e9o5ybwc3p/z960xa7v6r#popup).

### How can I undo the connection of my account to a single sign-on after linking it?
Source: https://www.edumaps.de/en/faq#a392000

Go to the [Single Sign-On Management](https://www.edumaps.de/user/sso-connect) page. There you will find all single sign-ons linked to your account. Now you can click the delete icon next to the active SSO, and the connection will be removed.

### How can I regenerate the Teamtext links when duplicating maps so that students receive empty Teamtext documents?
Source: https://www.edumaps.de/en/faq#a393000

Links are not changed when maps are duplicated. They remain fixed. In the Teamtext module, a fixed link is also generated and placed in the box. This cannot be directly changed when duplicating the map. You will need to edit the boxes and manually set the new links yourself. Tip for quicker editing: To create a new Teamtext link, it is enough to simply add a number or a letter to the end of the existing link in the box.

### How can you place curved/bent arrows between boxes?
Source: https://www.edumaps.de/en/faq#a394000

When you add a new arrow using the “Arrow” button at the top right of the map, this arrow is always straight. To use curved arrows, you can download appropriate arrow graphics with a transparent background from the internet and then add them using the “Image” button. Afterwards, you can adjust the position, size, and rotation of the arrow graphic on your map.

### How can I transfer my maps from the existing account to the new account when changing schools to another federal state (different server)?
Source: https://www.edumaps.de/en/faq#a395000

If you would like to switch from a server like `www.edumaps.de` to another server such as `nrw.edumaps.de`, you can transfer your maps as follows:

1. Note down all links to your maps on www.edumaps.de.
2. Log in to nrw.edumaps.de.
3. Click on “Create map” and select “Import map”.
4. Then, in the dialog, select the option “Import by link”.
5. Paste the first map link and confirm.
6. The import takes place automatically, including all files.

In this way, you can transfer or import all data when you change schools.

The same procedure should be followed, for example, if you want to move from a private account on the main server to a teacher account on a state server.

### How can I limit the view of the box calendar to the time period 8:00 to 16:00 (instead of 24 hours)?
Source: https://www.edumaps.de/en/faq#a396000

Open the box settings and enter the start and end hour (e.g. 8 and 16) under “Bookings and Calendar” at “Time period of a day”. Save the box. The calendar then only shows the times from 8:00 to 16:00.

### Is it possible to assign a task to an external person using their email address?
Source: https://www.edumaps.de/en/faq#a398000

Users must be registered, otherwise it is not possible to assign a task. The assignment is done via the Edumaps username. Since other features depend on the user ID, bypassing registration is not possible here. However, with an admin account, you can quickly create an account with the corresponding email address – and then assign the task.

### What should I do when the error message appears: “The map owner's storage is full. No further uploads are possible.”?
Source: https://www.edumaps.de/en/faq#a399000

When a user uploads a file to a map, the file is placed in the map owner's storage. As a result, the map owner's storage usage increases. The available storage is limited for each user. If the storage limit is exceeded, further uploads are blocked by the server.

To check the storage usage, the map owner can open the [“My Account”](https://www.edumaps.de/user/account) page. There, the total storage space and remaining space are listed.

The **available storage spaces** depend on account type and license:

- Storage for teacher accounts: 5 GB or 10 GB (depending on server)
- Storage for student accounts: 50 MB
- Storage for basic accounts: 10 MB
- Storage for private accounts with a plan: Minimal: 1 GB, Premium: 10 GB (main server only)

**Possible solutions:**

- **For basic account at a school:**
  If you are a teacher at a school but only have a basic account and are not assigned to a school, the school admin can [invite your account to the school](https://www.edumaps.de/users/invite) as a teacher account, or the teacher enters the school’s join code on the [My Account](https://www.edumaps.de/user/account) page. This way, you will receive the storage of a teacher account.
- **For student account:**
  If you are a teacher but only have a student account, the school admin can upgrade your account to a teacher account via the [List of Accounts](https://www.edumaps.de/users/list). This way, you will receive the storage of a teacher account.
- **For teacher account:**
  Regional education authorities that provide Edumaps to their schools have the option to individually allocate more storage space to certain accounts.
- **For basic account without a school:**
  If you are not affiliated with any school, you can book a [premium plan](https://www.edumaps.de/en/plans) and thus increase your storage.

### We link to a map of a user. How can we ensure the link remains available if the user deletes the map or their account?
Source: https://www.edumaps.de/en/faq#a400000

There are several options:

Solution 1: Link from your maps to a folder you have created and place the required maps there.

Solution 2: You can use the admin account (or create an additional account) where you publish all maps intended for everyone. Then link to these maps.

Solution 3: You can use the [short link generator](https://www.edumaps.de/shortlinks) to create links that you use on your maps. Later, you can edit the corresponding short link and change the target as needed.

### How can I copy maps from one Edumaps server to another (e.g., from nds.edumaps.de to nrw.edumaps.de)?
Source: https://www.edumaps.de/en/faq#a401000

This is possible as follows:

1. Click on “Create Map” in the sidebar.
2. Select “Import Map”.
3. In the dialog, choose the option “Import by link”.
4. There, paste the link to the external map. The import will be carried out automatically.

### I have several accounts through different single sign-ons. How should I handle this?
Source: https://www.edumaps.de/en/faq#a402000

There are several solutions for merging duplicate accounts:

Option 1: The best solution is for the school admin to merge both accounts. For this, the admin uses the page [Merge accounts](https://www.edumaps.de/users/merge). Both accounts must be assigned to the same school in Edumaps. If this is not the case, the admin must use [Invite users](https://www.edumaps.de/users/invite), or the teacher enters the school’s join code on the [My Account](https://www.edumaps.de/user/account) page.

Option 2: Link the single sign-on with your account. In other words: you log in (directly or with a single sign-on) and then use the second single sign-on. You will then be shown an option to link the SSO. However, maps will not be transferred if they were already created in the SSO account you are trying to link.

Option 3: On the “My Account” page you will find the [Single sign-on management](https://www.edumaps.de/user/sso-connect). There you can select the respective single sign-on and automatically link it to your current account. Delete the duplicate account and then use your existing account to perform the SSO link. Make sure that the SSO has not been used before.

Option 4: You only use direct logins and avoid single sign-on solutions, to prevent duplicate accounts and the associated administrative effort for the school admin.

### How do I get an invoice for my subscription as a private customer?
Source: https://www.edumaps.de/en/faq#a403000

**Credit Card:** After payment, you will automatically receive a confirmation email from Stripe. This email also contains the automatically generated invoice.

**Paypal:** After payment, you will receive a confirmation email from PayPal. This contains all relevant information (amount, product) and usually serves as a replacement for an invoice.

If you need an invoice directly from us, please send us an email with your full name and billing address. We will then issue an invoice and send it to you by email.

Please note: Invoices are generally issued collectively once a year to keep administrative work to a minimum. Exception: If you cancel your subscription, we will issue a final invoice.

### Can the map formats Pinboard and Timeline be combined so that columns can be placed at the front?
Source: https://www.edumaps.de/en/faq#a404000

Unfortunately, this is not possible. Only one of the map formats can be selected at a time.

### How can we protect the map from students and parents, so that only teachers can access the map?
Source: https://www.edumaps.de/en/faq#a405000

You can restrict access to teachers only. To do this, open the map sharing dialog, click on the three dots at the top right, and select “Access for teachers only” in the dropdown. Another alternative to protect maps is to set a map password.

If a map link was accidentally shared with students, you can regenerate the map link. The previously issued map link will then be invalid. To do this, open the map sharing dialog, click on the three dots at the top right, and select “Regenerate links” in the dropdown.

### How can I quickly switch from the admin account I have access to, to my personal (teacher) account?
Source: https://www.edumaps.de/en/faq#a406000

To switch between your admin account and your personal teacher account, you need to log out from one account and then log in with the other account. A direct switch function between different accounts is not available.

### How can students complete tasks on shared maps and submit solutions?
Source: https://www.edumaps.de/en/faq#a407000

To ensure that each student can work on the tasks individually, it is recommended to share the map with read-only rights and have students submit their answers via the comments function. This way, individual solutions remain hidden from other students.

Alternatively, you can create a separate copy of the map for each student and share it individually with editing rights. This enables students to work on the tasks independently without seeing the solutions of others.

Another option is to share the map with editing rights and ask students to enter their answers in separate, protected sections or boxes that are only visible to you as the teacher. In this way, students can complete the tasks without their solutions being visible to others. In particular, the option “Share Columns” can be used here, ensuring that students cannot see each other's individual solutions.

### What rights apply to the saved map when I follow a map?
Source: https://www.edumaps.de/en/faq#a408000

When you follow a map, you will find this map again on the page [My followed maps](https://www.edumaps.de/user/maps-followed). There, maps are always linked with read-only rights. Never with editing rights. Use the “Follow map” function only to receive notifications about new boxes. If you want to save a map (also with editing rights), then choose the function “Bookmark in Folder”.

### When parents book parent-teacher meetings for siblings, how can we distinguish by their names?
Source: https://www.edumaps.de/en/faq#a409000

A separate account should be created for each child, and the booking should then be made with these accounts. This avoids confusion and ensures clarity.

### How can the course provider inform participants about the cancellation of a course?
Source: https://www.edumaps.de/en/faq#a410000

The announcement of the cancellation must be made by the teacher themselves via email. The names and emails of the participants can be exported as a CSV file for this purpose. To do this, click on the participant icon and select “CSV export”.

### Why are there no push notifications?
Source: https://www.edumaps.de/en/faq#a411000

Push notifications are technically difficult (require service worker or app) and would create additional load for the server. Instead, we display notifications directly on the website at [New Activities](https://www.edumaps.de/notifications), where the latest activities relevant to you are listed, sorted by category.

### Is there a faster and more convenient way to assign students to a class/group?
Source: https://www.edumaps.de/en/faq#a412000

You can use the search field on the [Manage classes & groups](https://www.edumaps.de/users/usersets) page for this. Search for a class name (provided the student has entered it in the notes field under “My Account”) or for parts of names. Then click the “Add all” button and all student accounts shown are assigned to the currently selected class/group.

### Can we integrate Edumaps into our learning management system via an LTI interface?
Source: https://www.edumaps.de/en/faq#a413000

LTI stands for Learning Tools Interoperability and is a way to integrate external applications into a learning management system (LMS) such as Moodle, Itslearning, or Microsoft Teams. With LTI, external services like Edumaps can be used directly within the LMS, without users having to log in twice or create separate accounts.

An LTI interface can therefore be used for single sign-on (users log into the LMS and are automatically signed in to the connected tool) and for course and user provisioning (the LMS passes information such as course ID, role (teacher/student), or names to the tool).

Please contact our support team if you require an LTI implementation.

### I have two accounts on two different servers (www.edumaps.de and nrw.edumaps.de), how can I transfer the maps?
Source: https://www.edumaps.de/en/faq#a414000

Since Edumaps is operated on different servers, the user accounts on www.edumaps.de and nrw.edumaps.de are separate. However, there is an easy way to transfer maps from one server to another.

1. To do this, click on “Create Map” in the menu and then select “Import Map”.
2. Next, choose the option “Import by link”.
3. Here you can now enter the link to the map on the external server and confirm.
4. The map will then be copied from one server to the other.

### Which AI does the AI function use, and how is data protection compliance ensured?
Source: https://www.edumaps.de/en/faq#a415000

The AI function in Edumaps currently uses OpenAI’s GPT models via a server-to-server interface. The data protection compliant deployment “OpenAI Azure” is used. The involved servers are located in Sweden (Europe). Data is not used for training purposes.

In relation to data protection requirements, the following points apply:

- All data is processed exclusively within the European Economic Area (EEA).
- No personal data such as names, email addresses, or content from user accounts is transmitted to OpenAI. No personal data is stored by OpenAI.
- Data transmission is encrypted via a secure server-to-server interface.
- Edumaps only transmits the text necessary for the respective request and never personal user data such as names, IP addresses, email addresses, or content from user accounts.
- The transmitted data is explicitly not used for training AI models.

Under these conditions, and when the service is used within the EEA, the use of the AI function is currently compliant with the requirements of the General Data Protection Regulation (GDPR).

### How can I convert my teacher account to an admin account? Can we create a second admin account?
Source: https://www.edumaps.de/en/faq#a416000

Converting a teacher account into an admin account is not possible. Each school or institution has access to only one central admin account. The login credentials for the admin account were provided to you upon acquisition of the school license, or by your education authority, or by the ministry of education (for state licenses).

See also [How many admin accounts can a school have?](https://www.edumaps.de/en/faq#a4400)

### Who is the admin of our school?
Source: https://www.edumaps.de/en/faq#a417000

To determine the responsible administrator, it is recommended to contact your school directly. If you already have a teacher or student account, you can find the contact email of the admin directly on the [My Account](https://www.edumaps.de/user/account) page.

### How can I add a text to the booking confirmation email that is not publicly visible on the map?
Source: https://www.edumaps.de/en/faq#a418000

In the booking confirmation, besides the box title (course title), the first 500 characters of the box content are also sent. Here, you can add a text comment to the box content (with `//` at the beginning of the line). This text will be hidden in the map view but will be included in the booking email.

### How can I distribute a map to several students so that each student receives their own map to work on individually, and not everyone works on the same map?
Source: https://www.edumaps.de/en/faq#a419000

To provide each student with their own copy of a map for individual editing, you can proceed as follows:

1. Duplicate the map: Create a separate copy of the original map for each student. To do this, click on the three dots at the top right and select “Copy”.
2. Then, for each individual map copy, generate the map sharing link. Click on the blue “Share map” button at the top right and select “Link to map”.
3. You can then copy the link and QR code from the map sharing dialog and share them with the respective student.
4. Alternatively, you can share the map directly with the student if the student is registered with Edumaps. To do this, click on the blue “Share map” button and select “Share with User”. Then enter the email or username.

### How can I protect a column with a password?
Source: https://www.edumaps.de/en/faq#a420000

If you want to hide the content of a column and only unlock it with a password, you can use the password function.

1. To set the column password, open the column settings.
2. Activate the “Protect” option and select “Password Protection”.
3. Enter your desired password there. Save the settings.
4. Result: In the map view, all boxes in this column are hidden and a password input field appears below the column title. Only after entering the correct password will the boxes in the column be displayed.

### Is there an alternative to assigning columns to students without using column group links?
Source: https://www.edumaps.de/en/faq#a421000

Basically, we recommend using column groups, since you can also name each generated link with the respective student's name. Alternatively, you can assign an individual password to each column and then share the map with your students centrally. Afterwards, you can give each student their column password. In fact, this has the advantage that you do not need to create new column groups after duplicating a map.

### Do we have a legal obligation to provide an imprint if we, as a school, publish a bulletin board?
Source: https://www.edumaps.de/en/faq#a422000

Whether an imprint is required depends on whether it is a “business-like telemedium usually offered for a fee”. See imprint obligation in the Telemedia Act / TTDSG / § 5 TMG. Schools are not considered commercial providers, but public institutions are often still required to provide an imprint as soon as they publish content on the internet that goes beyond purely private communication.

If you make a bulletin board publicly accessible, you should provide an imprint. However, if you only share bulletin boards within your school (not publicly), an imprint is not required.

Our recommendation: As a school, link to the central imprint of your website. Simply place the imprint link in the first box of your bulletin board or as text below the map title (see map extras).

### How can a column be password-protected even in edit mode?
Source: https://www.edumaps.de/en/faq#a424000

This feature is currently not implemented.

### Where can I get a certificate of participation after a course has taken place?
Source: https://www.edumaps.de/en/faq#a425000

If you participated in a course, organized by a teacher using Edumaps, you will automatically receive an email with your certificate of participation as soon as the teacher completes the course. For this, the user must click “Finish” in the box.

### Why can I currently not access the AI module (Lower Saxony server)?
Source: https://www.edumaps.de/en/faq#a426000

We are currently in discussions with the Lower Saxony Ministry of Education and are investigating the requirements for further use of the AI module.

### What does the person icon with the number (“All views”) in the map list mean?
Source: https://www.edumaps.de/en/faq#a428000

The number counts how many times the map has been opened, including your own views. Who opened the map is not recorded. So that repeated reloading does not drive the number up, opening the map again in the same browser right afterwards is not counted. Only an access from another device or browser counts again. Your PC and then your smartphone therefore count as two views. The number is a rough guide, not an exact count of people.

### What is included in the free basic version of Edumaps?
Source: https://www.edumaps.de/en/faq#a429000

A free basic account can create up to 5 maps. Storage volume is limited to 10 MB. The upload limit per file is 10 MB. User management is not available (student accounts and classes cannot be created). The booking module, rental module, and AI module are not fully available.

### How can students take on an assignment (e.g. project) created by a teacher?
Source: https://www.edumaps.de/en/faq#a430000

The student can use the comment function of the box and leave a comment with their name. This counts as an expression of interest. Afterwards, as a teacher, you can check whether the student may receive this assignment and enter their username into the assignment module. This counts as an assignment confirmation. The assignment will then appear for the student in the list of all assignments.

### I am a teacher at two schools, how can I use Edumaps for both schools?
Source: https://www.edumaps.de/en/faq#a431000

To use Edumaps at two institutions, you need separate user accounts for each institution. Since Edumaps manages distinct user accounts for each institution, you cannot access the specific functions and data of both organizations with a single account. Please contact the administrators of both institutions to ensure that you receive a separate user account for each organization. With these separate accounts, you can then use the respective functions and data of each institution.

Tip: Use [folders](https://www.edumaps.de/user/folders) to centrally collect and manage maps for both user accounts.

### How can I set the allowed booking time before the course starts (e.g. booking up to 24 hours before the course begins)?
Source: https://www.edumaps.de/en/faq#a432000

To do this, edit the box and, at your desired time, enable the “Protect” option and there select “Full protection”. After that, booking is no longer possible. You do not need to deactivate the booking system; otherwise existing bookings would be lost.

### Where can participants in my courses view all their booked courses?
Source: https://www.edumaps.de/en/faq#a433000

An overview of all bookings can be found by every user under [My bookings](https://www.edumaps.de/user/bookings).

### Can additional selectable options for appointments be added to the booking system?
Source: https://www.edumaps.de/en/faq#a434000

A separate box must be created for each desired booking option.

### Can I receive an automatic email with all participants in my course?
Source: https://www.edumaps.de/en/faq#a435000

This email feature is not provided. As the map owner, you can view your course’s participants at any time by clicking the participant counter and export them as a CSV file. Users in edit mode can also open this participant list.

### In which country are the servers of Edumaps located, and who provides the hosting?
Source: https://www.edumaps.de/en/faq#a436000

All Edumaps servers are located in the Falkenstein data center (Germany), which is operated by Hetzner Online GmbH. Hetzner Online GmbH is a subcontractor of Edumaps and, as a German quality provider, is distinguished by strict compliance with all German data-protection regulations in accordance with the GDPR. Hetzner guarantees adherence to all appropriate technical and organizational measures (TOM), ensuring that data processing is GDPR-compliant.

### How can I turn individual boxes into a course?
Source: https://www.edumaps.de/en/faq#a437000

To convert a box in Edumaps into a course, enable the booking system for the relevant box. To do this, open the box settings and select the “Bookings and Calendar” tab. There, click “Booking system” and set the course start time. Optionally, you can also set the maximum number of participants and define a price payable via PayPal. After saving the box, the course is activated and participants can register via the “Book” button on the box. See also [tutorial with screenshots](https://www.edumaps.de/1046/1/mtp976esa8/ee2qawxllh).

### Can multiple boxes be combined into a course within a map and then made bookable?
Source: https://www.edumaps.de/en/faq#a438000

Technically, an entire map cannot be booked as a course. Only a single box at a time. To reflect your scenario, you can create a complete course map and then link it in a central booking map inside a single box. You can make this box bookable. In this way, a complete course can be booked via one box. You can also place several comprehensive courses side by side and make them available for booking.

### What happens to bookings if I delete a map with bookable boxes?
Source: https://www.edumaps.de/en/faq#a438500

When you delete a map, the bookings of its bookable boxes are not removed immediately, but from that moment on they disappear from the personal calendar and the calendar subscription (iCal) of the people who booked. As long as the map can still be restored (30 days), the bookings come back with the map. Only when the map is permanently deleted are the bookings deleted as well. Certificates of participation for events that have already been completed are not affected and can still be accessed.

Edumaps does not send an automatic cancellation to the people who booked. If you delete a map with active bookings, please inform the participants yourself, ideally before deleting it, using the participant list of the box. The same applies to changes to the date or location of a bookable box.

### Is there a history for calendar entries?
Source: https://www.edumaps.de/en/faq#a439000

This feature is not currently planned.

### How many files such as images and videos can I upload at once?
Source: https://www.edumaps.de/en/faq#a440000

To maintain server performance, there are technical restrictions that make it necessary to limit the number of files uploaded at the same time. Currently, there is a limit of 30 files that you can upload in one go (for example via drag and drop or by multi-selecting in the file dialog).

### Is there an app for Android smartphones or iPhone?
Source: https://www.edumaps.de/en/faq#a441000

An Android app or iOS app is currently not planned. However, you can create an “Add to Home Screen” shortcut from your mobile browser. This will create an app icon, and you can open Edumaps directly with one click.

### We collect boxes on a central archive map; how can we transfer the boxes with one click?
Source: https://www.edumaps.de/en/faq#a442000

You can use Copy Mode for this. Open your archive map, click the dropdown next to “New Box”, and choose “Copy box from map”. This activates Copy Mode for boxes. Then open any maps in your browser tabs and copy the desired boxes. See also [Tutorial: Copy Boxes from other Maps](https://www.edumaps.de/1073/1/4qjuhw8dpj/p2omobcqk8).

### I want to share a map with all colleagues for editing, where some columns are protected, but one colleague should be allowed to edit one of these columns?
Source: https://www.edumaps.de/en/faq#a443000

For this case, proceed as follows:

1. Share the map with edit rights to your colleagues using “Share with Group”.
2. One column should now be editable only by a specific teacher.
3. For this, the teacher opens the map and creates a column. They then set this column to “Fully” protected.
4. Now only the map owner and the teacher themself as the column owner can edit this column.
5. All other colleagues have no edit rights for this column.

### How can a user, after booking a course with an email address, change their class name?
Source: https://www.edumaps.de/en/faq#a443500

If a user books by providing an email address, an account is created for them automatically. This account has the real name: “Name | Class”. To change the name, the user must log in with their email. When booking for the first time, the login details were sent to the user. Afterwards, they can change the details on the [My Account](https://www.edumaps.de/user/account) page. Alternatively, the school admin can invite the user to the school via their email address and then edit the name or the class. Other solutions are not possible for security reasons.

### Do shared links or QR codes have an expiration date or a validity period?
Source: https://www.edumaps.de/en/faq#a444000

Shared Edumaps links - including all links that have been generated as QR codes - are permanently valid. Links/QR codes only lose their validity if, for example, the linked map is deleted.

### A teacher has changed schools and has a new Edumaps account at the new school; how do you merge the old account with the new account?
Source: https://www.edumaps.de/en/faq#a445000

For both accounts to be merged, both user accounts must belong to the same school. For this, the school admin of the new school must [invite the user](https://www.edumaps.de/users/invite). Afterwards, the school admin can [merge the accounts](https://www.edumaps.de/users/merge).

If the teacher no longer has access to the old email address and therefore cannot accept the invitation link, the old school admin must change the email address of the old user account so that the invitation email can be delivered. If this is not possible either, please contact your education authority (superadmin), which can make this change for you.

### We are a private company, how can we obtain a commercial license for using Edumaps?
Source: https://www.edumaps.de/en/faq#a446000

Depending on the size of your company, there are several options:

If you are a sole proprietorship, a [private subscription](https://www.edumaps.de/en/plans) may be sufficient, offering extensive features (such as up to 100 maps (Minimal) or 1000 maps (Premium), creating student accounts, increased storage space).

If you are a medium-sized company or a large enterprise, you can consider a [school license](https://www.edumaps.de/en/plans/schools), which is specifically designed for educational institutions. This license allows you to create up to 10,000 student accounts and offers 5 GB of storage for each teacher or user. All Edumaps features are available.

Please note that the pricing pages of Edumaps are only displayed on the main server www.edumaps.de. If you are logged in as a student or teacher, no “Pricing” entry will appear in the main menu either.

For further information or individual advice, you can [contact our support directly](https://www.edumaps.de/en/contact).

### How can I add a map to my dashboard?
Source: https://www.edumaps.de/en/faq#a447000

You will see a map in your dashboard if you:

- add the map to your favorites, it will then appear in the “Favorites” section,
- visit the map, it will then appear in the “Visited” section,
- follow the map, it will then appear in the “Followed” section.

To add a map to your favorites, open the map and click the three dots at the top right. In the menu, choose “Bookmark in Folder” and then “Favorites” in the dropdown.

Alternatively, you can go to the [Favorites](https://www.edumaps.de/user/favorites) page and click the “Add map” button at the top right there. Then choose “Insert map link”, enter the map link and confirm.

However, we recommend working directly with the “Maps & Folders” → “Favorites” menu to quickly find important maps again or, if there are many maps, to use folders.

### How can I assign a task to two people?
Source: https://www.edumaps.de/en/faq#a448000

A box containing a task can always be assigned to only one user. To assign a task to two users, you can duplicate the box (with the same content) and then assign the duplicate to the second user.

Alternatively, you can assign the task to one main responsible user and name the other participants in the text of the box. This is useful when several users work together on a single task.

### How can I, as superadmin, publish a folder instead of a map on the “Media center” page?
Source: https://www.edumaps.de/en/faq#a449000

To do this, it is recommended to create a map that contains a link to the folder. You can then share this map for the “Media center” page.

### We are using the Fully Kiosk Browser app and are getting the error “Too many login attempts (LPW-5)”?
Source: https://www.edumaps.de/en/faq#a451000

This problem occurs when the browser does not save the login cookie and reloads regularly. As a result, with every reload it tries to log the client in. However, after a certain number of login attempts, the Edumaps server blocks access because it assumes a spam bot.

As a rule, you do not need a reload for Edumaps, because changes are displayed automatically. Changes are transmitted automatically and almost in real time. A manual reload is unnecessary.

For the “Fully Kiosk Browser” app, you also need to make sure that these settings are disabled:
1. “Delete Cache on Auto Reload” (off)
2. “Delete Cookies on Auto Reload” (off)
3. “Clear Cache After Each Page” (off)
4. In addition, a value should be set for “Fake User Agent String” (for example “Internet Explorer 11”).

### Why are freely movable images, arrows and text fields only available in the stickerwall format and not in the pinboard format?
Source: https://www.edumaps.de/en/faq#a452000

In the pinboard format, boxes are arranged in columns and move dynamically (for example when new columns or boxes are added and depending on the screen width). Freely movable arrows and text fields, on the other hand, are always positioned relative to the entire map (“globally”) and cannot, for technical reasons, be anchored to boxes or columns.

This leads to the following problems:

- If a new column is added at the front, the arrows remain at their old global positions and point to the wrong column.
- If a new box is inserted at the top of a column, all arrows below it shift relative to their target boxes and point to the wrong content.
- On large displays, the column width is automatically increased for better readability. The boxes move further apart, but the globally positioned arrows and text fields do not – they then no longer point to the correct elements.

The positions of arrows and text fields are defined with respect to the global map. Changing the frame of reference to a box is not possible. Only in the “Stickerwall” map format are all elements (boxes, arrows, text fields, etc.) positioned globally, do not change their positions and therefore do not cause positioning issues.

Only in the “Stickerwall” map format are all elements (boxes, arrows, text fields, etc.) positioned globally and do not move relative to one another. For this reason, freely movable images, arrows and text fields can be used there in a stable and reliable way, but not in the pinboard format.

### How can I keep a grade book in Edumaps?
Source: https://www.edumaps.de/en/faq#a453000

At the moment there is no dedicated module for this. However, you can insert a table into a box via the Tools dropdown and use it as a simple grade book. In the columns, enter e.g. the students' names, assignments/exams, grades and, if required, comments. Also use the double column width to give the table more space, and create a separate box for each class or subject if needed. When keeping a digital grade book, please observe the data protection and retention policies in force at your school.

### How can I change my name and will any maps be lost?
Source: https://www.edumaps.de/en/faq#a454000

You can change your name on the [My account](https://www.edumaps.de/user/account) page. Changing your name does not cause any maps to be lost.

### Why can my colleagues not delete boxes?
Source: https://www.edumaps.de/en/faq#a455000

First check whether the map link is configured with editing rights. When opening the link, the red Edit icon must appear in the top right. If your colleagues open the link and switch to edit mode and cannot delete boxes, but can make other changes, this is probably because they are not logged in, but are editing anonymously. For security reasons, anonymous users are not allowed to delete boxes or columns. To do this, logging in with a user account is required. We always recommend creating a separate teacher account for each teacher. This allows unrestricted editing, and the map history shows you exactly who made which change.

### Can groups and classes from Eduplaces be synchronized with Edumaps?
Source: https://www.edumaps.de/en/faq#a456000

Automatic synchronization of groups and classes, as offered in the paid Eduplaces version, is currently not available. At the moment, groups still have to be created manually. We may add this feature in the medium term.

### Can my students edit their comments after they have been submitted?
Source: https://www.edumaps.de/en/faq#a457000

Submitted comments cannot be edited or deleted by students afterwards. Teachers also cannot edit existing comments directly, but can only delete them.

If you want your students to correct their submissions in comments linguistically, you could ask them to write the texts in a box on a separate map and post the link to the box as a comment. You can then revise and correct this box (by the way, in the box history you can see both text versions). Another alternative is to delete incorrect comments and ask the students to post the comment again after correction.

### How can I create a line break within a cell of a table?
Source: https://www.edumaps.de/en/faq#a458000

You can create a line break within a table cell by using two backslashes `\\`.

### Why can I not uncheck the option when sharing folders that only registered users can edit the folder?
Source: https://www.edumaps.de/en/faq#a459000

Folders can only be edited by registered users so that ownership of content and permissions is clearly assigned. While maps within a folder can be edited publicly, access to the entire folder – for example, to delete maps – requires a login. This ensures that only identifiable (registered) users can make fundamental changes to the folder and that content is not lost unintentionally. Unlike maps, folders do not have a version history.

### How can I get more information about the course I booked on a map?
Source: https://www.edumaps.de/en/faq#a460000

When you book a course on a pinboard, you can see additional information (such as dates, location, and schedule) directly in the box you are booking. If no additional information is provided, you will most likely receive it directly from the responsible school or organizer by email. Check the pinboard to see whether any relevant notes are provided there.

Edumaps only displays the booking status. All details are provided by the organizer on the pinboard. Please check your email inbox, including your spam folder, to see whether you have received a message from the provider. If you have not received an email, please contact the school or provider directly so you can get further details.

### Why is my uploaded SVG file not displayed as a preview thumbnail?
Source: https://www.edumaps.de/en/faq#a461000

For security and reliability reasons, no preview thumbnails are generated for SVG files. SVG is an XML format and can contain active content in addition to graphic data (e.g., scripts, links, embedded objects, event handlers, or external URLs for images/fonts). When rendering, this can lead to unwanted effects – such as loading external resources or executing active elements in certain viewing contexts.

In addition, server-side conversion of SVG to a raster image (preview thumbnail) is not always reliable. Complex SVG features such as filters, masks, clipping, or blend modes are not fully supported depending on the file and renderer. A preview may also fail if the SVG file is invalid or incomplete (invalid XML/SVG syntax), does not contain clear size information, or is very large and therefore exceeds processing limits.

SVG files can be uploaded, but in Edumaps they are not rendered inline for security reasons, and are only provided as a download. If you need a preview, please also upload a PNG or JPG version.

### Are the server capacities sufficient if 1200 students access my map at the same time?
Source: https://www.edumaps.de/en/faq#a462000

We use a high-performance server. Several thousand simultaneous accesses are no problem.

### We would like, as a teacher training seminar, to create maps where the seminar is the owner, so that the seminar’s maps remain preserved even when people change?
Source: https://www.edumaps.de/en/faq#a463000

This scenario is often implemented by teacher training seminars and schools by using functional accounts. The relevant maps are created centrally via these accounts, and then staff members are invited with the appropriate permissions. In this way, the teacher training seminar’s infrastructure remains permanently in place – regardless of whether individuals leave the seminar. You can also use the functional account to copy existing maps and make them centrally available there.

### Is it possible to reinsert an image that was mistakenly removed from a box from the upload library back into the corresponding box?
Source: https://www.edumaps.de/en/faq#a464000

You can reuse any uploaded file. Open the box editor of the box in question, click the upload button and select “My uploads” from the dropdown. Click the image there and it will be inserted back into the box.

Alternatively, go to the page [My uploads](https://www.edumaps.de/uploads) and click the link icon (small paperclip) next to the image. A dialog will then be displayed; copy the link and paste the link into the box editor. Make sure that the image link must be on its own on a single line. The image will appear. Alternatively, you can open the image, right-click on it, and choose “Copy image address” from the context menu. You can then paste this link into the box editor.

### How can I refresh a link preview if the content of the website has changed?
Source: https://www.edumaps.de/en/faq#a465000

Website previews are renewed after 9 months. If you want to force a new preview, you can modify the link by appending a hash character. For example: Instead of `https://www.edumaps.de/` you can write: `https://www.edumaps.de/#1`

### Why is the user no longer listed in the list of all users at our school?
Source: https://www.edumaps.de/en/faq#a466000

If the user is no longer listed, this may have various causes:

- The user deleted their account themselves.
- The admin deleted the user account.
- The user removed themselves from the school (via “My Account”).
- The admin removed the user from the school.

If you use the email again and the error appears that the email address is already in use, then the user was removed from the school. When removed, the account is detached from the school and downgraded to a basic account with less storage.

To delete the account afterwards, you must log in manually and then delete the account yourself via “My Account”. If you no longer know the password, you can reset it [here](https://www.edumaps.de/user/forgot).

### How can I paste content from the clipboard into the map?
Source: https://www.edumaps.de/en/faq#a467000

To do this, open Explorer (Finder) on your computer. Click the file and use the shortcut `Ctrl` + `C`. Then go to your map in edit mode and use the shortcut `Ctrl` + `V` to paste the file (photo/video/document). A new box containing the file will be created automatically.

### Can an external website be embedded live into a map?
Source: https://www.edumaps.de/en/faq#a468000

For security reasons, this is not possible. See [details here](https://www.edumaps.de/en/faq#iframes).

### How can a text field be added to a pinboard (not a sticker wall)?
Source: https://www.edumaps.de/en/faq#a469000

We generally advise against placing text fields and arrows on pinboards, as they are positioned globally and may shift in the layout. One way to do this anyway is: Switch the map format to sticker wall. Add text fields. Then switch the map back to pinboard format.

### How can existing folders be moved into other folders?
Source: https://www.edumaps.de/en/faq#a470000

Direct moving is not possible. However, you can open the folder and select “Add folder” at the top right. Then add the desired folder. Each folder can be placed into any number of other folders.

### Can users who are not the creator of the map also be given permission to share column groups?
Source: https://www.edumaps.de/en/faq#a471000

Sharing column groups is only permitted for the map owner.

### Why can the user not find the folder shared with them on the “Received” page?
Source: https://www.edumaps.de/en/faq#a471500

There are three possibilities in this case:

- The folder was not shared with the user.
- The sharing was revoked.
- The user removed the folder from the “Received” page

Solution: Share the folder with the user again.

### How can I reset a poll in a box as an admin?
Source: https://www.edumaps.de/en/faq#a472000

Click on the counter and an overview of all users who voted will open. There you can now delete each user. If you want to delete all votes at once, it may be useful to delete the box and then recreate it.

### How can the text be hidden in a text-to-speech input?
Source: https://www.edumaps.de/en/faq#a473000

Simply place an exclamation mark before the text. Example: `<audio-de>!My spoken text</audio>`

With two exclamation marks the text is additionally shown as a revealable solution below the play button. This is useful for dictation exercises: students listen to the text and can then reveal the solution themselves. Example: `<audio-en>!!Autumn is here.</audio>`

### Why can’t I see the visited map on the “Visited Maps” page?
Source: https://www.edumaps.de/en/faq#a474000

If you visited the map without being logged in, the map will not appear under “Visited Maps”. Another possibility is that you opened the map using a column group link. Visited column groups are not stored under “Visited Maps”, as they are a special type of link with separate permissions.

### If I leave my school, how can I transfer my account and all content to another one?
Source: https://www.edumaps.de/en/faq#a475000

In this case, you do not need a second account. On the [My Account](https://www.edumaps.de/user/account) page, you can select the option “Leave school” from the “Options” dropdown. Your account will then be removed from the school’s access and converted into a basic account. You can then upgrade this basic account yourself by purchasing a Premium subscription. If your new school has a school license with Edumaps: after leaving, your account is no longer assigned to any school and can join the new school with its join code on your [My Account](https://www.edumaps.de/user/account) page. Alternatively, that school can invite you directly. Either way, your account is upgraded back to a teacher account.

### How can I represent recurring room occupancy using the lending system or the booking module so that free rooms can be booked individually?
Source: https://www.edumaps.de/en/faq#a476000

Recurring appointments cannot currently be set up directly. For room bookings, it is important that you create a separate box for each room.

For room bookings, it is recommended to use the lending module, select the “Week” view in the settings, and restrict the bookable times accordingly. This way, only the times you have specified can be reserved. Alternatively, if you have a smaller number of bookings, you can create a map with boxes (for example, as a template for one month), where each box contains a bookable time slot. You can then duplicate this map and adjust it for the following month. You can then link all reservation maps from one central map.

### How can I provide the tables of contents of multiple maps centrally so that a quick jump to the respective boxes of the other maps is possible?
Source: https://www.edumaps.de/en/faq#a477000

To do this, create a central map. There, embed the box containing the table of contents of each other map. By embedding, the anchor links within the box are changed so that they point directly to the other map. In this way, you can build a navigation with different levels.

### How can I insert media from our licensed media library directly into a map?
Source: https://www.edumaps.de/en/faq#a478000

You have several options for inserting media from the licensed media library into a map:

1. **Via the map:**
   Open your map and click the **“Media”** button next to the **“New Box”** button. Then select **“Licensed Media Library”**. Search for the desired medium and then click the red plus icon to add the medium to your map.
2. **Directly via the licensed media library:**
   Open the licensed media library directly, search for the desired medium, and copy the link. Enter the link into a box using the box editor.
3. **From an existing box:**
   If you have already created a box containing text, click the three dots on the box and then click “Media Search” with the search icon. Select “Licensed Media Library”. Edumaps will then suggest suitable media for you to embed.

### Why do files remain stored even though I have deleted the associated boxes?
Source: https://www.edumaps.de/en/faq#a479000

When you delete a box, the files used in it are not automatically deleted. The reason is that files may also be reused elsewhere, for example in other maps, via links, or outside Edumaps.

Deleting boxes and deleting files are therefore handled separately. This prevents files that are still needed elsewhere from being removed accidentally.

However, you can remove files that are no longer needed in bulk. To do this, use the option **“Show unused files”** on the “Uploads” page. There you can have files that are no longer used deleted automatically. Please note, however, that some files may appear to be orphaned or no longer needed and could still be used on other maps. If you remove the file, the red notice “File deleted” will appear on the other maps.

### How can I increase a user’s storage space as a super admin?
Source: https://www.edumaps.de/en/faq#a480000

As a super admin, you can adjust a user’s storage space in the user administration.

1. Open the user administration.
2. Search for the desired user.
3. Click the edit icon.
4. In the field “Storage”, select the desired value from the list, for example **10 GB**.
5. Save the change.

The user will then have the newly entered storage space available.

There is no fixed total storage for your education authority or school. The displayed values are per-user limits and only prevent individual accounts from uploading files without restriction. You can therefore raise the limits as needed.

Note: Teachers created or invited by the school admin or superadmin automatically receive the school's default storage (5 GB or 10 GB depending on the license). Self-registered accounts have 10 MB.

### I have left my school. Can I also join a new school?
Source: https://www.edumaps.de/en/faq#a481000

Yes, you can join a new school.

If your new school already has an Edumaps license: after leaving your previous school, your account is no longer assigned to any school and can join the new school with its join code, which you enter on your [My Account](https://www.edumaps.de/user/account) page. Alternatively, the school admin of the new school can invite you as a teacher account and assign you to your new school.

If you want to leave your previous school, you can do so in your account under “My Account” using the “Leave School” option. Your account will remain active. Your maps will also remain available as long as the account is not deleted. After leaving the school, the previous admin will no longer have access to your account.

If another teacher account has already been created for you at the new school, the accounts can be merged under certain conditions. To do this, both accounts must first belong to the same school. The school admin of the new school can then merge the accounts.

### Do contents created with AI generally have to be labelled?
Source: https://www.edumaps.de/en/faq#a482000

That depends on how and where the contents are used.

For normal internal school work materials, no special labelling is usually required. However, if AI-generated contents are published or addressed to the public, labelling may be necessary or advisable. This applies in particular to contents on topics of public interest as well as to artificially generated or manipulated image, audio, or video contents.

As a simple rule of thumb: If content is publicly distributed and readers might assume that it was created entirely by a human, it should be made transparent that AI was used.

For legally sensitive publications, the specific labelling obligation should be assessed on a case-by-case basis.

### Is there a technical maximum limit for simultaneous course enrolments?
Source: https://www.edumaps.de/en/faq#a483000

Simultaneous booking by several hundred people is technically possible, even if participants are distributed across different courses in parallel.

A scenario with several hundred participants enrolling in several courses at the same time is therefore generally not a problem.

### Can I set a fixed start time for bookings?
Source: https://www.edumaps.de/en/faq#a484000

A fixed booking window with a start and end time is currently not directly available as a separate function. However, you can represent this scenario using the visibility settings of boxes.

**Workaround 1: Information box and separate booking box**

1. Create a first box with all information about the course.
2. Additionally create a second box used exclusively for booking.
3. Set this second box so that it only becomes visible at the desired time.
4. Note in the information box when booking will be enabled on the pinboard.

**Workaround 2: Duplicate the box and replace it based on time control**

1. Create a first box with all information about the course.
2. Duplicate this box.
3. Activate the booking module only in the second box.
4. Set the first box so that it is visible until the desired time.
5. Set the second box so that it becomes visible from the desired time onward.

For users, this makes it appear as if the same box becomes bookable from a certain time. Technically, however, these are two separate boxes: one box without booking and one box with booking activated.

### Can we as a school use Edumaps as a document storage system for sensitive documents?
Source: https://www.edumaps.de/en/faq#a485000

Edumaps is not intended as a classic document storage system for sensitive or confidential administrative documents. The platform is primarily designed for teaching materials, organization, pinboards, assignments, calendars and collaboration.

Files in Edumaps may — depending on sharing settings and use — be accessible to other people, for example if links are shared or content is made available to groups. For particularly sensitive documents, we therefore recommend using a protected file storage system provided for this purpose by the school authority, the state or the respective institution.

If such files are nevertheless to be used in Edumaps, they should be encrypted locally beforehand, for example as an encrypted ZIP file with password protection. The password should be shared separately via another communication channel. However, this is less convenient than the normal upload via drag & drop.

This applies in particular to personnel files, special needs assessments, health data, confidential parent communication, legal cases, grade lists and comparable documents requiring special protection. For such documents, Edumaps should only be used if the school has first checked that this is compatible with its internal guidelines, data protection requirements and sharing settings.

### Can several newly created teacher accounts be invited together?
Source: https://www.edumaps.de/en/faq#a486000

Yes, there is a shared way: your school’s join code. As school admin, you share the code with your teaching staff, and the teachers enter it with their own account on the [My Account](https://www.edumaps.de/user/account) page. You then confirm the requests on the [Invite user](https://www.edumaps.de/users/invite) page with one click (see also [“Where do I find my school’s join code?”](https://www.edumaps.de/en/faq#a22350)).

If you create the teacher accounts yourself instead, a CSV file containing the login details is then offered for download. This file should always be downloaded and stored securely, as it forms the basis for passing on the logins. Each teacher logs in with their own login and password, which are listed in the CSV file. The login details can then be passed on to the respective teachers, for example by email or via an internal school distribution list. Important: Please make sure that each teacher receives only their own login details, so that misuse is prevented. Edumaps does not send invitation emails containing passwords, as passwords should generally not be sent by email for security reasons.

### How can I revoke or end students’ editing rights for a map?
Source: https://www.edumaps.de/en/faq#a487000

The basic question here is: How did you share the map?

If you gave the **map link** to your students, you can open the map settings and click the option “Regenerate map link” at the very bottom under “Protect”. This makes all previously shared links invalid, so they can no longer be used to open the map.

If you did not share the map via link, but directly with a class/group using the blue **Share button**, click the blue Share button once again and select “Share with Group” again. In the lower section, you will see the existing shares. There you can revoke the share using the red cross.

### What happens to our maps if we change the source system in moin.schule (e.g. from DaNiS to IServ)?
Source: https://www.edumaps.de/en/faq#a488000

**In short:** Maps created in Edumaps are not automatically deleted when the source system in moin.schule is changed. However, the decisive factor is whether your users arrive in Edumaps with the same unique identifier after the change.

**In detail:** A deletion announced in connection with a moin.schule connector change (e.g. from DaNiS to IServ) initially affects the previous user accounts in moin.schule itself. The maps created in Edumaps and their contents are stored with us and generally remain assigned to the existing Edumaps user accounts. Edumaps accounts are not deleted simply because data is cleaned up or resynchronized in moin.schule. Deletion in Edumaps only takes place through an explicit administrative action.

What you should definitely check: Before the change, clarify with moin.schule or IServ whether the previous user identities or unique IDs will be retained when changing the source system or whether they will be newly generated.

**IDs are retained:** Your users log in as usual after the change and see their previous maps.

**IDs are newly generated:** From Edumaps’ perspective, your users are recognized as new users the next time they log in. The previous maps are then not visible in the new login, although they still exist.

**What should you do if the IDs change?** In this case, the existing Edumaps accounts must be assigned to the new accounts by the school admin account in Edumaps. For this, the previous account is manually merged with the new account in each case. You can find instructions here: [Merge accounts](https://www.edumaps.de/1008/1/bpk12qmwjr/zdo0glozn4#merge).

### How can I sign out of all devices I am logged in on at the same time?
Source: https://www.edumaps.de/en/faq#a489000

Open the [“My Account”](https://www.edumaps.de/user/account) page and select the “Sign out of all devices” option from the “Options” dropdown. This will end your active logins on all devices, including the device you are currently using.

### Can I create a learning path or weekly plan where students can tick off tasks (check-off function)?
Source: https://www.edumaps.de/en/faq#a489100

Yes, various functions can be used for ticking off tasks:

1. Tick off each box using the rating dropdown (you will then see an overview of all users)
2. Use the comment function of the box (the student can comment with “done”; also suitable for submitting materials)
3. Tick off each box using the Like button (as the map owner, click the number next to the heart to see who liked the box, see [this FAQ entry](https://www.edumaps.de/en/faq#a70100))
4. Checklist function: Create a task list in a box that each student can tick off individually. As a teacher, you can see which students have completed which items. This lets you run a learning plan with a per-student completion status (see [tutorial on checklists](https://www.edumaps.de/1162/1/b69pzgpq3uzu/4372nj9g7afu)).

For these options, one task should correspond to one box. Each student should also have their own account in order to track the names.

Collapsing boxes cannot be controlled individually for each student. The “Collapse” function in the box settings applies to the entire map for all visitors.

An alternative would be to duplicate the map for each student (with editing rights). This allows each student to document their work process in their own boxes and collapse boxes individually via the box settings. A good option for smaller groups.

Tip: You can share a map with your students either via a link or directly with a class. When sharing with a class, students receive a notification and can find the map under [“Received”](https://www.edumaps.de/user/received) (each student needs their own account for this).

### Can I receive free access to Edumaps as a trainee teacher?
Source: https://www.edumaps.de/en/faq#a489200

Unfortunately, we do not offer a special free premium access for trainee teachers. However, there are two ways to use Edumaps free of charge:

1. If your training school already has a school, education authority or state license, you can usually use Edumaps through this license. The best option is to ask directly at your school.
2. You can create a free account at any time and try out Edumaps.

You can find an overview of our plans on the [pricing page](https://www.edumaps.de/en/plans).

### What happens to an account when it is removed from a school?
Source: https://www.edumaps.de/en/faq#a490000

When you remove a student or teacher from the school, this account is downgraded to a basic account. This means that the user no longer has access to the “My School” or “Media Center” page. In addition, they can no longer access licensed media.

### How will I be informed about changes to a map if I have different accounts?
Source: https://www.edumaps.de/en/faq#a491000

If you use multiple Edumaps accounts (e.g. school, education authority, and training), you do not need to regularly log in to each account to keep up with updates. There are two options:

1. Follow maps (email notification)
In each account, you can specifically follow individual maps – meaning only those maps for which you want to be informed about changes. See [tutorial](https://www.edumaps.de/1079/1/vahlwdap0i/6fpa5kwfkr). You will then receive one daily summary email with all followed maps that contain new boxes. We deliberately chose a daily summary instead of one email per change – this keeps your inbox manageable.

2. Use multiple browsers in parallel
Use two different browsers and stay logged in with a different account in each browser. This allows you to keep an eye on all accounts in parallel without constantly having to log out and back in. You will then see the notifications via the envelope icon on Edumaps directly when switching between the browser windows.

### Can you specify a color or category for events when importing an ICS file?
Source: https://www.edumaps.de/en/faq#a492000

Colors and categories from ICS files are currently not evaluated when importing into Edumaps. Although the iCalendar format includes technical properties such as categories and, in some cases, color information, these are not supported consistently by calendar programs.

Instead of categories, we generally recommend using tags. If we receive further requests, we may develop a tagging system for calendar events in the future.

### Why does a page for account linking (single sign-on) appear when logging in via an external platform?
Source: https://www.edumaps.de/en/faq#a493000

If you open Edumaps via an external platform, Edupool, VIDIS, IServ or another single sign-on service, Edumaps may first display a page for account linking or for confirming the existing Edumaps account. This page is not an error, but a necessary security step. Edumaps must ensure that the access from the external platform is really linked to the correct Edumaps account.

The reason is as follows: At schools, computers, tablets or browsers are sometimes used by several people. It may therefore happen that one teacher is still logged in to Edumaps while another teacher then uses the external platform. In this case, Edumaps must not automatically link the platform account to the Edumaps account that is still open. For technical reasons, Edumaps cannot always clearly determine whether the person currently logged in to the external platform is also the same person who is still logged in to Edumaps in the browser. That is precisely why the account linking is not carried out silently in the background, but must be confirmed deliberately.

The account linking therefore protects against access from an external platform being accidentally linked to the wrong Edumaps account. This is especially important because such a link may later allow direct login without entering the password again.

If the displayed account details are correct, you can confirm the linking or click “Continue”. After that, Edumaps will usually recognize your access automatically again, so this intermediate step normally does not appear at every login.

Please check the following in particular on the account linking page:

- whether the displayed Edumaps username belongs to you,
- whether the displayed real name is correct,
- whether the displayed email address matches your account,
- whether you have really logged in to the external platform with your own access.

If the displayed data does not belong to you, please do not click “Continue” or “Link account”. Instead, first log out of Edumaps and then start the login via the external platform again. The page may also appear again if you use another device, cookies have been deleted, the browser is used in private mode or another Edumaps account was previously logged in in the same browser.

At first glance, this additional confirmation may seem like an unnecessary intermediate step. However, it prevents accounts from being linked incorrectly on shared devices. In this way, Edumaps protects your content, your personal data and access to school user accounts.

### How do I merge duplicate admin accounts that were automatically created through single sign-on with the original admin account?
Source: https://www.edumaps.de/en/faq#a494000

The situation: With some single sign-on platforms (SSO), we automatically create a school account (admin account) if the transmitted school identifier does not yet exist in our system. The teachers and students themselves always get teacher or student accounts through SSO, logging in to an admin account via SSO is not possible. The usernames differ from the other names of the manually created admin accounts. In addition, the accounts are usually not assigned to any super admin and therefore cannot be found in the user management of super admins.

First step: Contact us so that we can assign the duplicate accounts to your super admin. After that, these admin accounts will be accessible to you.

To link automatically created admin accounts (duplicate accounts) with the original admin account, proceed as follows:

1. Log in with your super admin account.
2. Then open the [User Management](https://www.edumaps.de/users/superadmin). If needed, you will find the usernames of the schools in the [List of Accounts](https://www.edumaps.de/users/list).
3. Find a duplicate school, click Edit and cut the identifier out of the “Edupool SSO” field (and save it temporarily in a text editor if necessary), then save the dialog.
4. Open the original account of the school, click Edit, and paste the identifier into the “Edupool SSO” field, then save.
5. All SSO logins with this SSO identifier will now use the original account.

Optional: Enter “Delete” as the name of the duplicate school account. This makes it clear that this account is no longer used.

Important: If teacher accounts are assigned to the duplicate accounts, you must assign the teachers to the original school.

1. [Open user management](https://www.edumaps.de/users/superadmin)
2. Find the teacher (using the “Belongs to” dropdown)
3. Edit the teacher account
4. In the edit dialog, select the correct school in the “Select school” field and save.

This allows you to transfer teacher accounts from one school to another school.

### Microsoft Copilot cannot access our map. How can we analyze the map?
Source: https://www.edumaps.de/en/faq#a495000

It may be that Microsoft Copilot has a protection mechanism against automated requests. A reliable workaround is to export the map as an Edumaps JSON file and then upload this file directly to Copilot. This gives Copilot all the necessary information.

Alternative method: Click the three dots at the top right of the map and select “Change Content ᴬᴵ”. You can now enter your prompt (e.g. “Analyze the map with regard to … and output your analysis.”). A new map containing the analysis will then be created.

### How can I restrict editing functions so that only photos or videos can be uploaded?
Source: https://www.edumaps.de/en/faq#a496000

If you choose “Gallery” as the map format, you can also tick the “Photo mode” checkbox. Only the upload button for photos and videos will then appear in the map. This makes the map especially suitable for situations in which students should only upload media without using further editing functions.

### Can I insert a vertical line or separator on a pinboard?
Source: https://www.edumaps.de/en/faq#a497000

A freely insertable separator is currently not available for pinboards. As an alternative, you can use freely placeable arrows in the sticker wall format. There, the arrowhead can also be removed, creating a simple line.

An important note about display: On small screens such as smartphones, only one column is visible at a time. A vertical separator between two columns is not visible there and therefore has no visual separating effect.

### Can I search for emojis in Edumaps by keyword?
Source: https://www.edumaps.de/en/faq#a498000

There is currently no built-in emoji search directly in Edumaps. However, you can use a site such as https://emojipedia.org/, search for the desired emoji there and then copy it into Edumaps.

### How can I move boxes or columns?
Source: https://www.edumaps.de/en/faq#a499000

Boxes can already be moved. To do this, click the three dots on the box and select “Move”.

Columns currently cannot be freely moved using drag & drop. Via the menu of the column and “Move”, a column can be shifted to the left or right. You can also insert new columns in specific places:

If you want to insert a column at the very beginning, move the mouse to the left of the first column. The “New Column” button will appear there.

If you want to insert a new column between two existing columns, click the editing dots on the left column and select “Insert Column Right”.

A multiple selection for moving several boxes or columns at the same time is not currently available.

### Can Edumaps perform an AI search in view mode?
Source: https://www.edumaps.de/en/faq#a501000

If by “AI search” you mean an internet search, meaning that the AI researches external websites and includes the results in the map, this is currently not possible in Edumaps. For data protection reasons, we use the AI module in an isolated environment via Azure OpenAI. The AI receives only the content from Edumaps that is required in each case and has no free internet access.

If, however, you mean an AI-supported search within the contents of the opened map, you can use the “Analysis ᴬᴵ” module for this. There, you can ask freely formulated questions about the current map or enter your own instruction. It does not necessarily have to be a classic analysis.

If you mean a general search across all boxes of the map, this function is already available. To do this, click the search-plus symbol at the top right and select “Box Search”.

### How can we continue using the existing info-mail map for the next school year without all colleagues having to follow a new map again?
Source: https://www.edumaps.de/en/faq#a502000

You can copy the previous info-mail map, rename this copy, for example, to “Archive”, and then clean up the original info-mail map for the new school year. This means deleting all existing columns and starting again with an empty map. The advantage is that the existing “Follow map” entries remain assigned to the original map. The teaching staff would therefore not have to follow the map again.

### When a map is copied, are the existing “Follow map” entries also transferred to the copied map?
Source: https://www.edumaps.de/en/faq#a503000

No, the existing “Follow map” entries are not transferred to the copied map. They remain assigned only to the original map.

### Is there an export function for individual boxes that contain notes, minutes or records, for example as a PDF or DOCX file?
Source: https://www.edumaps.de/en/faq#a504000

You can open an individual box in the single-box view. To do this, click the diagonal double arrow at the bottom right of the map view. You can then print the box using your browser’s print function or save it as a PDF. This is currently the easiest way if only one individual box is needed. If you would like to continue editing the content in Word, you can either select the box content with the mouse, copy it and paste it into Microsoft Word or convert the saved PDF file into a DOCX file using a suitable program.

### Is Edumaps a school administration system (grades, absences, timetable)?
Source: https://www.edumaps.de/en/faq#a505000

No. Edumaps is the workspace for teaching and collaboration: materials, tasks, pinboards and calendars for projects. Grade management, absences, timetables and parent communication stay in your school administration system (e.g. WebUntis, EduPage, SchILD). Edumaps complements these systems and can be connected to them via single sign-on and class synchronization.

### How are map and folder links protected against brute-force attacks?
Source: https://www.edumaps.de/en/faq#a506000

All maps and folders are secured by automatic brute-force protection. Repeated failed access attempts, for example through wrong links or wrong passwords, lead to a temporary block of further attempts. This effectively prevents systematic guessing of access data. In addition, map and folder links consist of randomly generated character strings that cannot be guessed.

### We are switching our single sign-on (e.g. from moin.schule to IServ). What happens to the existing maps?
Source: https://www.edumaps.de/en/faq#a507000

In Edumaps, each single sign-on login is a separate user account. Someone who has logged in via moin.schule so far therefore has a different Edumaps account than when logging in via IServ, even if it is the same person.

The maps are not deleted during the switch. However, they remain tied to the previous accounts. If users only log in via the new single sign-on from now on, they will not see their old maps there at first.

The solution: The school admin uses the function [Merge accounts](https://www.edumaps.de/users/merge) in the school administration. This merges the previous accounts with the new accounts so that all maps are available in the new account. The easiest way to match accounts is by real name, provided it was transmitted by both login methods. The merge has to be done manually by the school admin.

Our recommendation: Carry out the merge before the old logins are deleted. This way nothing is lost and all users keep access to their content.

### How can a pinboard I created as a teacher appear as a pinboard of the education authority?
Source: https://www.edumaps.de/en/faq#a508000

Proceed as follows:

1. Share the pinboard from your teacher account with the education authority's account (Share → Share with user). Alternatively, open the map directly via the read link.
2. Log in with the education authority's account.
3. There, create a copy of the shared pinboard via the map menu at the top right (“Copy”).
4. The copy then belongs entirely to the education authority's account and can be published from there as desired.

Important: Only the copying makes the education authority the owner of the pinboard. As long as the map is only shared, it remains assigned to your teacher account. Your original pinboard remains unchanged, later changes to one version do not affect the other.

### Can a map (e.g. school program) display the school name instead of the teacher's name?
Source: https://www.edumaps.de/en/faq#a509000

Yes, this can be achieved with two settings directly in the map:

1. Hide the teacher's name: Open the map settings and activate the option “Hide map owner” under “Protect”. The owner's name will then no longer be displayed at the top left.
2. Show the school name: Enter a subtitle for the map, for example the name of your school. It will then appear at the top of the map.

Both can be set individually for each map.

### How can I permanently move a pinboard from one folder to another (e.g. for archiving)?
Source: https://www.edumaps.de/en/faq#a510000

Pinboards (maps) can be stored in several folders at the same time. When you remove a map from a folder, it is not deleted but only taken out of that folder. It remains in all other folders and under “My maps”.

To move a map, first add it to the target folder and then remove it from the original folder. After that, the map only appears in the target folder.

Make sure to remove the map from the folder and not to delete the map itself. Deleting the map removes it from all folders.

### Why do I lose the editing rights of a map in a folder although I received the map with editing rights?
Source: https://www.edumaps.de/en/faq#a511000

When another user shares a map with you, they define whether editing or reading rights apply. This right is stored under [“Received”](https://www.edumaps.de/user/received). When you add the map to one of your folders, the access right in the folder depends on how you add the map:

1. Via “My maps”: When adding, you define which access right the map is stored with in the folder.
2. Via “Visited maps”: Here maps are stored with the access right that applied when the map was opened.
3. Via “Insert link to map”: Here the access right of the link decides which access right the map is stored with in the folder.

### How can I enter emojis in column titles and box titles?
Source: https://www.edumaps.de/en/faq#a512000

The title input fields do not have their own emoji picker. Use the emoji keyboard of your operating system instead:

1. Windows: Press the Windows key + . (period). The emoji picker opens, where you can also search for emojis by typing.
2. Mac: Press Ctrl + Cmd + Space.

Select the desired emoji, it is inserted directly at the cursor position. Alternatively, copy an emoji from a site such as https://emojipedia.org/ and paste it into the title.

### Is it possible to enlarge text fields?
Source: https://www.edumaps.de/en/faq#a513000

Directly enlarging text fields by dragging is currently not possible. As an alternative, you can insert line breaks before and after the text (press Enter). This makes the text field correspondingly taller and the text appears more generously placed.

### Can a student share only part of their map (e.g. individual columns) with the teacher?
Source: https://www.edumaps.de/en/faq#a514000

Sharing individual columns with a specific user account is deliberately not available in Edumaps. Sharing takes place at the level of maps and folders so that sharing stays clear for students.

You can still achieve the goal directly in the system, without the detour via email. Example: A student keeps a private portfolio and should show you only their application documents.

1. Next to the portfolio, the student creates a separate small map, e.g. “Application documents”, and uploads the cover letter and CV there. They share this map directly with your account via “Share” (blue share map button at the top right). It then appears for you under [“Received”](https://www.edumaps.de/user/received).
2. The portfolio itself remains completely private. You only see the shared map.

Tip: If you create a template for this map with the desired columns, you can hand it out to your class via “Distribute to group”. Each student then receives their own copy and only has to share it with you.

### Can checklists be filled out anonymously?
Source: https://www.edumaps.de/en/faq#a515000

With a checklist, the map owner sees which person has ticked which entries. There is no option to show only the number of ticks without names.

If you want to use checklists for self-assessment (e.g. “I can ...” lists) and the results should remain private, you have two options:

1. Write a note below the checklist such as “The results are not viewed by the teacher and remain private.” and stick to it.
2. The learners copy the map via the share link (“Create map” → “Import map”) and complete the checklist on their own private copy. Then nobody but themselves sees the ticks they set.

### Why does Edumaps send a one-time code by email for two-factor authentication instead of using an authenticator app?
Source: https://www.edumaps.de/en/faq#a516000

Because it is easier for most users. In our experience, less tech-savvy users in particular have problems with authenticator apps more often, for example during setup, when changing devices or when they lose the app or access to the device. The one-time code by email works without an additional app and is immediately available even after a device change.

### How can I quickly collect a list of participants, e.g. for a club or a field trip?
Source: https://www.edumaps.de/en/faq#a517000

For a simple sign-up without a participant limit, a poll with just one answer option (e.g. “Sign up”) is enough. Anyone who wants to take part ticks the box, and the results show you who has signed up. As soon as you need a maximum number of participants, fixed time slots or a registration deadline, use the booking module instead.

### How is the text of documents or photos recognized when I use the AI analysis?
Source: https://www.edumaps.de/en/faq#a518000

Text recognition (OCR) runs directly on the Edumaps server where your files are stored, using our own software. The photo or document never leaves the server for this purpose and is not transmitted to any external service. The recognized text is stored only at Edumaps and is only passed on to the AI assistant if you explicitly activate this in the AI analysis or when creating a map.

Supported formats are PDF, Word and image files as well as photos, for example photographed worksheets or book pages. Recognition works for German, English, Spanish, French, Italian and Russian. Handwriting and mathematical formulas are currently not recognized reliably.

### How can I create a map from a PDF?
Source: https://www.edumaps.de/en/faq#a518100

Click “Create Map” and choose “Topic Map”. In the dialog, switch to the “Document” tab and upload your PDF file. The “Instruction” field is prefilled and can be narrowed down, for example to “only the causes of World War I”. If “Add the document to the map” is ticked, the file appears in the last column of the new map. Confirm that the document contains no personal data, then click “Convert to map”. The content is arranged into a map with columns and boxes. Besides PDF, Word files, images and photos also work. The text is extracted automatically.

### How do invoicing and VAT work for licenses?
Source: https://www.edumaps.de/en/faq#a519000

You will receive an invoice by email for every license. Payment is made by bank transfer.

**School licenses:** The prices for school licenses are all-inclusive prices including VAT. The invoice shows the VAT share of your country, for example 19 % for Germany or 20 % for Austria. You do not need to provide a VAT identification number (VAT ID) when ordering. If the invoice recipient provides us with a valid VAT ID, we issue the invoice under the reverse-charge procedure for the net share, i.e. without VAT.

**Organisation and state licenses:** These prices are net prices. With a valid VAT ID, the invoice is issued under the reverse-charge procedure without VAT. Without a VAT ID, the VAT of your country is added, for example 19 % for Germany.

### Can I ask the AI analysis follow-up questions about an answer?
Source: https://www.edumaps.de/en/faq#a520000

Every task in the AI analysis is an independent request. The AI does not know its previous answer, there is no ongoing dialogue. This is how a follow-up question or a narrower focus works:

1. Copy the answer using the copy button.
2. Open the analysis again: three dots → “Analysis ᴬᴵ”.
3. In the field “Your request or question”, delete the preset text, paste the copied answer into the text field and add your follow-up question, for example: “Here is your previous answer: [...] Refer only to the section on electricity and summarise it in three points.”
4. Confirm that the map contains no personal data, select the output language if needed and click “Send”.

In edit mode, “Insert as Box” is available as well. The answer then becomes part of the map and is automatically included in the next analysis. In this case a task such as “The last box contains the previous analysis, extend it by ...” is sufficient.

You can reach the AI analysis in the map via the three dots → “Analysis ᴬᴵ”. It is available to logged-in teacher accounts.

### Why does my uploaded file look different in the preview than the original?
Source: https://www.edumaps.de/en/faq#a521000

Edumaps does not modify uploaded files. Every file is stored exactly as it was uploaded, including all formatting.

For presentations and documents, for example from Keynote, PowerPoint, or Word, Edumaps also creates a simplified PDF preview. This preview opens when you click the preview image. It is intended only for quick viewing and does not reproduce the layout, animations, or transitions exactly as in the original.

**Open the original file:** Click the download icon in the box. You will receive the unchanged original file, which you can open as usual in Keynote, PowerPoint, or Word.

**Layout-accurate display directly in the box:** Export the presentation as a PDF before uploading it and upload this file. This ensures that the layout is preserved in the preview as well.

### Can I request additional information during appointment booking (for example, the child's name and date of birth)? Can the fields in the booking form be changed?
Source: https://www.edumaps.de/en/faq#a522000

The fields in the booking form (email, first and last name, institution / class) are predefined and cannot be changed or extended. If you need additional information for a booking, for example for school enrollment appointments or parent-teacher meetings, use the comment function of the appointment box:

1. Edit the appointment box and click “Comments”.
2. Leave the visibility of the comments set to “Only me”. This ensures that only the map owner can read the comments; other visitors cannot see them.
3. Save the box and repeat this for each appointment box.
4. Use an info box on the map to describe which information you need in the comment.

The booking process then works as follows:

1. The person making the booking enters their email address and their own name in the form and books the appointment.
2. After booking, they are logged in automatically and enter the requested information as a comment in the booked appointment box.
3. For another appointment (for example, for a second child), they book using the same account and also leave a comment there.

This means the information is stored directly with the respective appointment and is deleted together with the box or the map. Questions regarding the appointment can also be submitted this way.

Important: Do not set the visibility to “All users” while personal information is included in the comments. Otherwise, anyone with the map link can read this information. With “Only me”, only the map owner can see the comments; even users with editing rights cannot see them.

Tip: Comments are enabled separately for each box. Therefore, first create one appointment box with comments enabled and duplicate it using the box menu.

### What does the read-aloud function of a box read out?
Source: https://www.edumaps.de/en/faq#a523000

A click on the speaker icon of a box reads the title of the box first and then its content. Hidden solutions (spoilers) and tables are skipped.

### How do I include an event's end time on the certificate of attendance?
Source: https://www.edumaps.de/en/faq#a524000

The certificate of attendance shows the start date and time; there is no separate end time. You can include the time range using the short description: Add a horizontal rule (---) at the end of the box content and write the text you want to appear on the certificate below it, for example “Training on 25 September 2026, 14:00 to 17:00”. This text replaces the full course description on the certificate.

### Can I use multiple logos on the letterhead?
Source: https://www.edumaps.de/en/faq#a525000

You can upload one logo for the letterhead. If an event is organised by several organisations, first combine their logos into a single image file (side by side, with sufficient width) and upload it as the logo.

### Can I create my own template for certificates of attendance?
Source: https://www.edumaps.de/en/faq#a526000

The letterhead serves as the template for certificates of attendance and loan forms and is configured per account. All certificates generated from your events use the logo, address and footer from your letterhead. You cannot create a second, separate template within the same account. If you need a separate letterhead for another institution, for example for an education authority rather than your regular school, use an additional account (such as a dedicated organisational account created for you by your education authority). Then create the events using that account, and the certificates will automatically use its letterhead.

### Can I run Edumaps under my own domain?
Source: https://www.edumaps.de/en/faq#a527000

Edumaps runs exclusively under edumaps.de. Connecting your own domain or subdomain, for example via a CNAME record, is not possible, because login, share links, security settings and legal texts are tied to this domain. You can, however, set up a redirect at your domain host from your address to your Edumaps share link, for example to the folder or map where your environment starts. In addition, you can use your own logo in the map header and your own background image in your maps, so that the environment carries your branding.

### How do I include Edumaps in our media development plan?
Source: https://www.edumaps.de/en/faq#a528000

Many school authorities and schools have to describe the software they use in a media development plan (in Germany: Medienentwicklungsplan, MEP) – especially when licences are to be financed from funding programmes such as the DigitalPakt. The following text module can be copied as it is and adapted to your situation (replace the parts in square brackets). On request we also provide the data processing agreement, the technical and organisational measures, the data protection impact assessment, the emergency plan and the documents required for EVB-IT procurement.

> **Digital pinboards and collaborative learning maps: Edumaps**
>
> The Edumaps platform (edumaps.de) is used for collaborative classroom work, the organisation of learning content and communication within the school. Edumaps is a browser-based, GDPR-compliant application for creating digital pinboards, learning maps and kanban boards with interactive elements (polls, quizzes, checklists, tables, file storage, calendar) and an AI-supported module for generating topic maps, quizzes and language courses. In this role it replaces non-compliant services from non-European providers; existing content from Padlet, TaskCards and Trello can be transferred via built-in import functions, so no teaching material is lost when switching. The platform is hosted exclusively on servers in Germany (Hetzner Online GmbH); a data processing agreement under Art. 28 GDPR including technical and organisational measures, a data protection impact assessment, a security and emergency plan and the documents required for EVB-IT procurement are available. Teachers and students sign in via [SSO system of the state/school authority, e.g. WebUntis, Univention ID Broker, Eduplaces, Edupool], so separate account management by the school is largely unnecessary; school administrators manage classes and access centrally. Licensing takes the form of a [school licence / licence via the education authority [name] / state licence] with a term of [x] years; the cost is [amount] per year and is financed from [DigitalPakt 2.0 funds / the operating budget]. Tutorials, self-paced courses and a template library with more than 200 ready-to-use maps are available for the rollout, keeping the training effort low.

Note: Whether and how platform licences are funded under DigitalPakt 2.0 is determined by the funding guideline of the respective federal state. Only fill in “DigitalPakt 2.0” in the financing sentence once your state’s guideline explicitly names software or platform licences. If there is no SSO integration, replace the SSO sentence with: “Accounts are created by the school administration via CSV import.”

### How do I set up appointment booking for parent-teacher conferences?
Source: https://www.edumaps.de/en/faq#a529000

Use the booking system. Create a separate box for each time slot and put the time slot in the box title, for example “14:00 - 14:20”. In the box settings, open “Bookings and Calendar” and select “Booking system”, then set the date and start time and limit the number of participants to 1. Then share the link to the map with the parents. Parents without an Edumaps account book with their name and email address, and an account is created automatically in the process. A booked slot is no longer available to others. A reminder email is sent automatically on the day before the appointment. The quickest way to start is the [“Parent-teacher conferences” template](https://www.edumaps.de/1054/1/7eki101kaq/g63s9vldb7), which you can copy and adapt to your dates. All settings are explained in the [booking system tutorial](https://www.edumaps.de/1137/1/7x3v9759bih1/nok6uwt85ky2).

### Can I download a page shared via column link as HTML?
Source: https://www.edumaps.de/en/faq#a530000

A separate download for pages from column links is not planned. You can achieve the same result in a few steps:

1. Create a copy of the map.
2. In the copy, delete the columns that should not be included.
3. Then download the copy as HTML.

The original map remains unchanged.

### Can an account belong to two schools or institutions at the same time?
Source: https://www.edumaps.de/en/faq#a531000

No, an account is always assigned to exactly one school or institution. If the admin of another school invites your account and you accept the invitation, the account moves there and no longer belongs to the previous school or institution. You can then no longer open maps that are shared only with members of the previous school or institution. To return, ask the admin of the original school or institution to invite your account again on the page [Invite users](https://www.edumaps.de/users/invite). Once you click the link in the invitation email, your account is assigned there again. If you work in two places, for example as a teacher at a school and as a media advisor at an authority, you need two separate accounts. The FAQ entry [“I have two accounts at a school and an institution”](https://www.edumaps.de/en/faq#a5050) explains how to access the same maps with both accounts.

### Where are the Edumaps servers located?
Source: https://www.edumaps.de/en/faq#a532000

All Edumaps servers are located in Germany. They are operated by Hetzner Online GmbH in the data center in Falkenstein/Vogtland (Saxony). All accounts, maps and uploaded files are stored there. This applies to www.edumaps.de as well as to the dedicated servers of individual states and regions, for example Hesse, Lower Saxony and North Rhine-Westphalia. For the AI features and the read-aloud function, Edumaps uses Microsoft Azure with a data center in Sweden, i.e. within the EU. Only the text required for the respective request is transmitted there, no account data. All processors and their locations are listed in the [privacy policy](https://www.edumaps.de/privacy) in the section on processors.

### Why does importing a Map from another server fail (password protection, access restricted to my school)?
Source: https://www.edumaps.de/en/faq#a533000

When importing via “Import by link”, the destination server retrieves the Map using the provided link. It accesses the Map as a visitor who is not logged in. If the Map is protected, access is denied and you will see a message explaining the reason. The following settings prevent importing:

- **“Access restricted to my school”:** The destination server cannot verify school membership, so importing such Maps is not possible. This applies to every link to the Map, including the edit link, even if you are the owner of the Map. Disable this option in the sharing menu of the original Map before importing, or ask the Map owner to do so. After importing, you can enable the option again in the original Map.
- **Password-protected Map:** A password-protected Map cannot be imported. Only the Map owner can remove the password. Remove it before importing in the “Share Map” dialog under “Set Map password”, or ask the Map owner to do so. After importing, the password can be set again there.
- **Incorrect or outdated link:** If the Map's link has been changed or was not copied completely, the destination server cannot access it. Copy the link again from the sharing menu of the original Map and paste it in full.

You can find the individual import steps in the entry [on transferring a map to another server](https://www.edumaps.de/en/faq#a181000).

### Can I connect my own AI, an API or an MCP interface to Edumaps?
Source: https://www.edumaps.de/en/faq#a534000

Edumaps does not currently offer a public API or MCP interface. You cannot connect your own AI or your own agent at this time. The AI features in Edumaps (Topic Map, quiz, map from text or document, read aloud) run through our own connection to Microsoft Azure. You can find the details in the [Data Processing Agreement](https://www.edumaps.de/legal/avv).

For exchanging data, you can export and import maps as a JSON file (import on the page [“Import Edumaps file”](https://www.edumaps.de/import/json) or in the sidebar via “Create Map” → “Import” → “Import Edumaps file”) and import via link from Padlet, TaskCards and Trello on the page [“Import by link”](https://www.edumaps.de/import). How a JSON file is structured and which rules apply to box content in the Edumaps text format (Markdown-like) is described in the [JSON format documentation](https://www.edumaps.de/docs/json), also as a template for maps you create with an AI assistant.

The following sections come from the tutorial maps.

## 1.1 Overview of essential Features
Source: https://www.edumaps.de/1004/1/mwr30eig8s/s4nqenco46

### Introduction
Source: https://www.edumaps.de/1004/1/mwr30eig8s/s4nqenco46#p86

✔️ Here you will learn about:

- Basic elements of a map and map settings
- Handling columns and boxes
- Input options and uploads
- Feedback from students
- Discovering maps (media libraries)
- User roles

### Maps
Source: https://www.edumaps.de/1004/1/mwr30eig8s/s4nqenco46#p20974

**Create Map / Edit Map**
If you create a new map, Edumaps will help you to build the map step by step:

1. Specification of basic data such as title, background
1. Create column
1. Create box in column
1. Fill the box with content

The following screenshot shows how a map (pinboard) looks like.
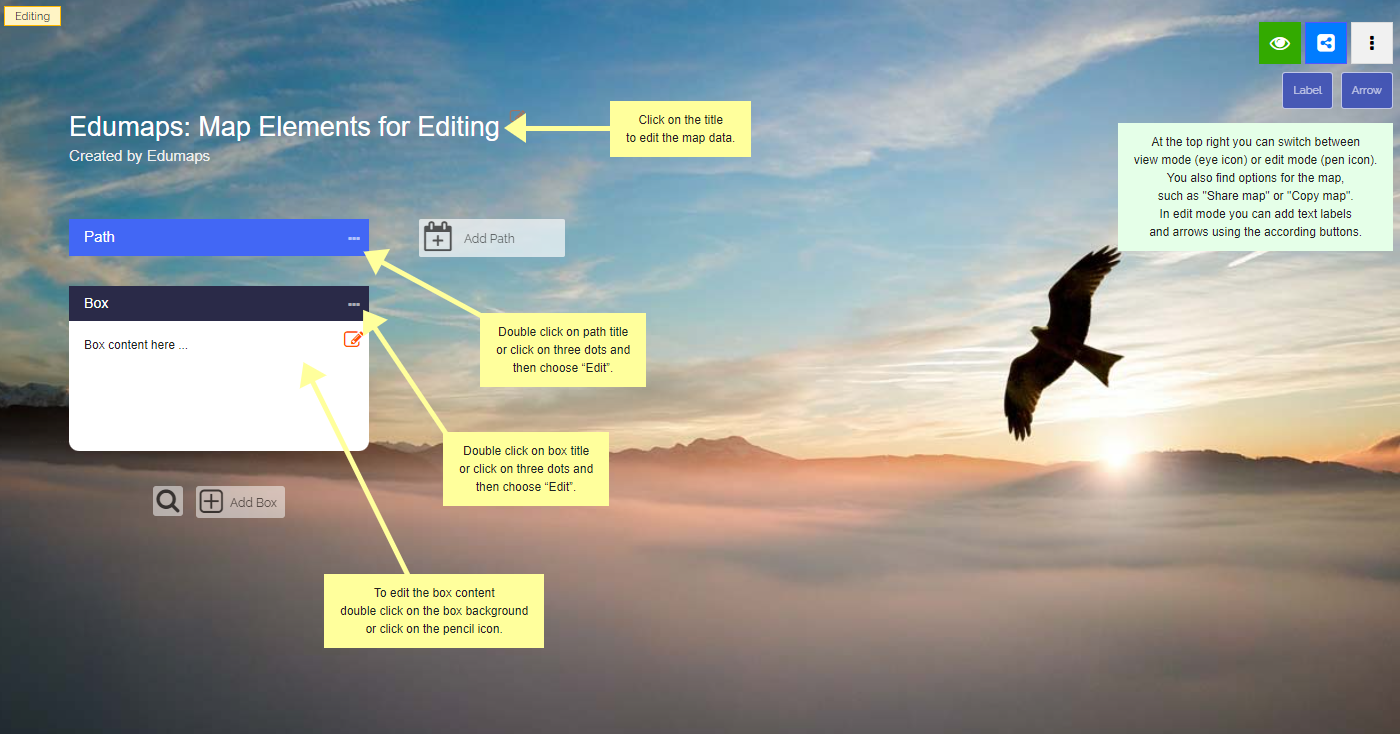
![Screenshot: Elements of a Map](https://www.edumaps.de/file/11261752783613192663.png/3qszcqu)

There are several options you can specify:

- Map title
- Map format
- Background
- Font
- Grade
- Tags
- Release
- Extras
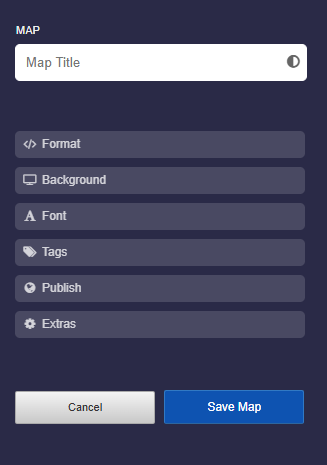
![Map Settings](https://www.edumaps.de/file/4736367201946180178.png/nn9zgav)

**Map Formats**
**Pinboard**

The pinboard consists of columns. Each column contains boxes.

Multiple columns are positioned side by side.
![Map format: Pinboard](https://www.edumaps.de/file/2387536848564589294.png/6rk7bku)

**Timeline**

The columns are horizontally arranged (“rows”). The boxes are arranged from left to right.

Multiple columns are positioned below each other.
![Map format: Timeline](https://www.edumaps.de/file/10524896192514210868.png/xp3jac8)

**Stickerwall**

The boxes are freely arranged. There are no columns.

![Map format: Stickerwall](https://www.edumaps.de/file/530150540731859997.png/0v6kh3d)

**Gallery**

In the gallery format, all boxes are positioned horizontally one after another. It also includes a photo mode that highlights photos and videos.
![Map format: Gallery](https://www.edumaps.de/file/2194727814454619526.png/2fwayyd)

**Journal**

In the journal format, all boxes are positioned vertically one below another. This creates a continuous, easy-to-read view. The format is particularly suitable for learning journals, project documentation, portfolios, reports, and chronologically structured content.

![Map format: Journal](https://www.edumaps.de/file/2465843334124746331.png/n5vyt06)

❤️ Changing from one map format to another map format is possible at any time.

**Share Map**
Options for sharing a Map:

- Link to Map
- Share with Class
- Share with User
- Share Columns
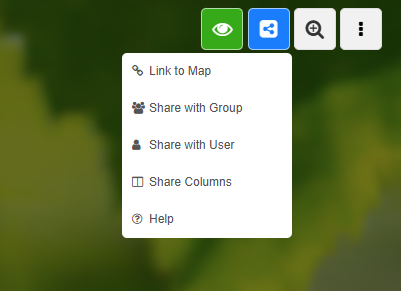
![Options for sharing a map](https://www.edumaps.de/file/3607774691853031565.png/bbs3ddf)

See [Tutorial: Sharing Maps with Links](https://www.edumaps.de/1047/1/siajhiablo/fv6nobr4hp)

**Collaboration in Realtime**
Sharing the map link allows other users to collaborate on the map.

Collaborative editing is possible **in real time**. The changes are immediately displayed to all editors.

It is also possible to work on a map with several teachers and students **anonymously**.

**Copy Map**
- Maps can be copied to customize them afterwards
- Boxes and columns can be copied

**Delete Map**
Deleting a map with all its content is possible with one click.

All columns and boxes of the map are deleted.

Uploads are retained and can be deleted individually via the upload manager.

**Export Map / Import Map**
**Export Options:**

- Export map as a JSON file
- Export to Moodle as an MBZ file (Moodle course)
- Export map as a static HTML package including all files of the map
- Export map as Markdown file
- Export map as image

**Import Options:**

- Import map from JSON file or CSV file
- Import from Padlet
- Import from Tutory collection

You can also save a map by creating a copy of the map using “Copy Map”.

**Map History**
For each map it is recorded which user made which changes. In the so-called “Map History” you can view all changes and see who has contributed to your map.

To view the map history, go in edit mode and click on the three dots in the top right corner. Then select “Map History” from the dropdown.

The individual entries are linked so that you can open each changed element directly.

By clicking on the time icon you can open the revision history for each box.

If you want to delete the entire history, click on the "Delete entire History" button at the top right.

### Columns and Boxes
Source: https://www.edumaps.de/1004/1/mwr30eig8s/s4nqenco46#p20975

**Columns**
The column settings contain the following options:

1. Title of column
1. Color of column title
1. Hide title
1. Add annotation
1. Protect column
1. Show column contents from
1. Hide column in view
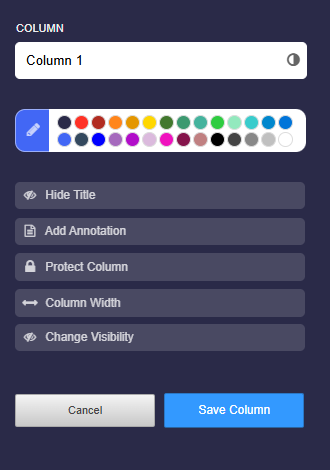
![Column Settings](https://www.edumaps.de/file/15022605696668149103.png/3r4a0dg)

**Boxes**
The box settings contain the following options:

1. Label
1. Title
1. Color of Box
1. Hide Title
1. Collapse
1. Protect
1. Visibility
1. Comments
1. Likes
1. Ratings
1. Bookings and Calendar
1. Task
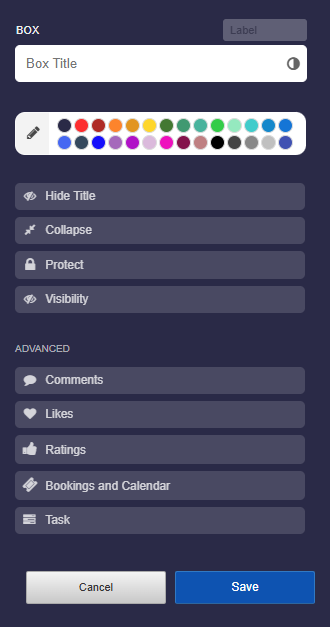
![Box Settings](https://www.edumaps.de/file/2344583288813285285.png/9aiwy18)

**Input options for Boxes**
In addition to uploads, the following inputs are possible directly in each box:

- Enter Latex:
\( \frac{1}{2} + x^{45y} + \sum \limits_{1}^{5} xy\)

- Code as a block or as inline code, such as `y = 2x`

- Superscripts and subscripts in the text: x^{2}

- Bold and italics: This is **bold** and this is *italic*.

- Thousands of Emojis, such as 😀 😇 😍

See [Tutorial: Inputs and Formatting in Box Editor](https://www.edumaps.de/1003/1/e9o5ybwc3p)

**Links to external Websites**
- Thumbnails are generated for all HTML links (as they display in the browser). Simply put a link directly in a single line.

- Thumbnails of the websites are stored on the server.

**Likes, Ratings and Voting**
If you activate the **Likes** in the box settings, a small heart with a counter appears directly below the box:
![Likes (heart) per box](https://www.edumaps.de/file/9948202437911588415.png/chk2f5z)

If you activate the **Ratings** in the box settings, you have several options:

- Assessment (Good | Average | Bad)
- Answer (Yes | Maybe | No)
- Voting (Option A | Option B | Option C)

The rating appears as a dropdown below the box.
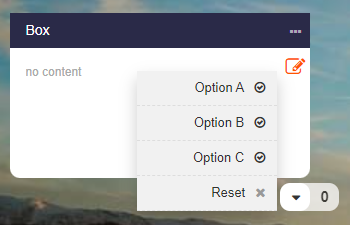
![Ratings or votes per box](https://www.edumaps.de/file/3783046625390634215.png/sktwe3p)

In edit mode you can click on the counter to see the names of the users who have voted.

**Box History (Revisions)**
Each box has a revision history. That means all changes to the box are tracked and you can restore old versions with just one click.

You can open the revision history of a box in edit mode.

Click on the three dots next to the box and select “Revision” from the dropdown.
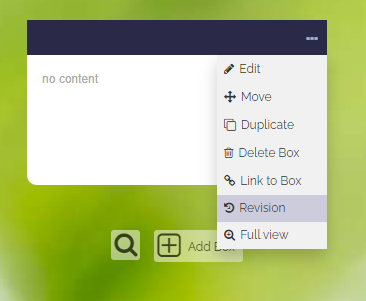
![Box menu with Revision History](https://www.edumaps.de/file/7901054990686468071.png/5gnbe1e)

Then you can see the different versions of the box over time. These are displayed in a timeline.
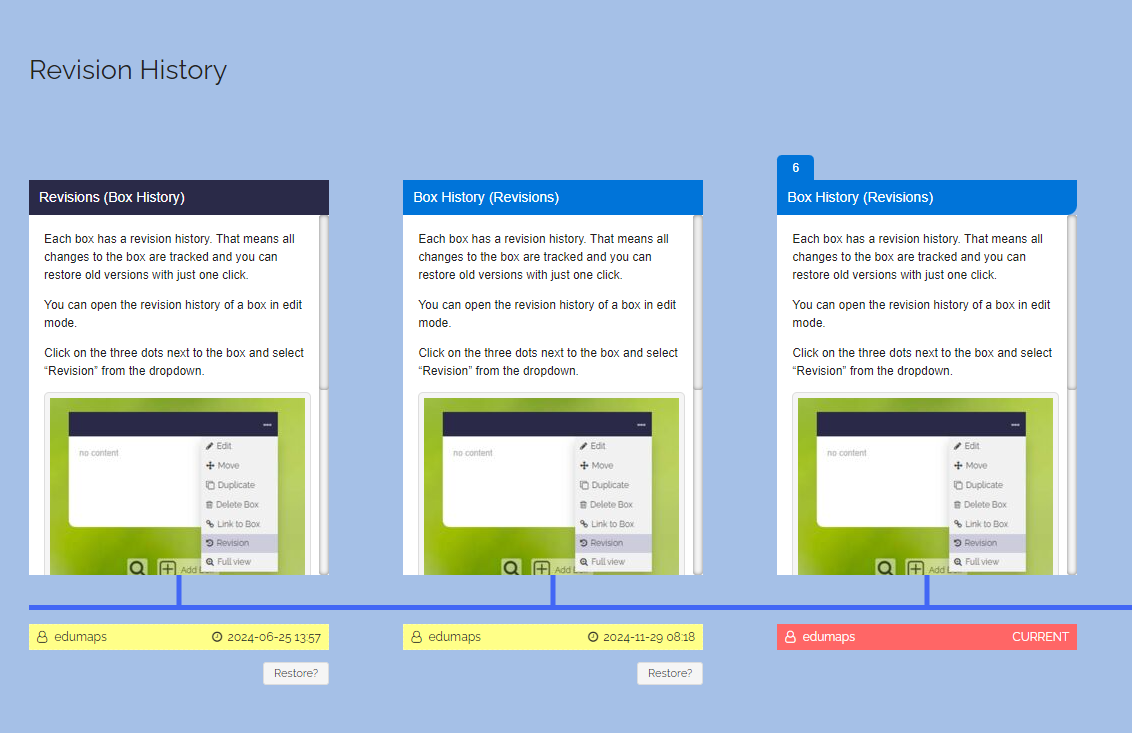
![Example of a Revision history](https://www.edumaps.de/file/6558794740017755578.png/m9pts3u)

You can restore any version by clicking on the “Restore” button located below each box version.

### Uploads
Source: https://www.edumaps.de/1004/1/mwr30eig8s/s4nqenco46#p20976

**Uploads into Boxes**
- Upload any media files (jpg, png, gif, mp3, mp4, ...)
- Easy uploading by drag & drop
- It is possible to insert an image (e.g. screenshot) from the clipboard with `CTRL + V`
- Preview of pdf, docx, xlsx, pptx, ... with just one click
- Microphone and webcam recordings are possible in every box
- All files are stored on the server in compliance with data protection and protected from third parties.

See also:

[Edumaps: File Formats for Uploads](https://www.edumaps.de/1005/1/c1g5yt7t1t/kr8pkqzn4j)

**Manage Uploads**
Overview of all your uploads including display of your free storage:

See [Tutorial: Upload Manager](https://www.edumaps.de/1075/1/iq6mcbew6y/3gx2z3ykqw)

### Feedback from Students
Source: https://www.edumaps.de/1004/1/mwr30eig8s/s4nqenco46#p20977

**Ratings of Boxes**
For each box a drop down can be activated that the students can use to gauge their understanding.
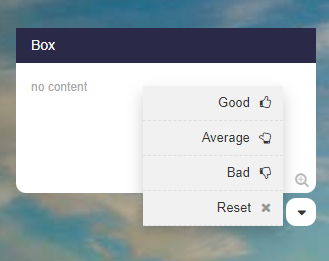
![Dropdown for Ratings](https://www.edumaps.de/file/14469155783788168434.png/8ccdmhh)

There are three types of ratings:

1. Assessment (get feedback on how the contents of a box is rated)
1. Answer (yes/maybe/no - make a poll)
1. Voting (get feedback on which option A, B or C is preferred)

**Comments**
Comments can be activated for each box.

With the help of the comment function, **discussions** can be held or students can submit their **solutions** (directly to the teacher).

In the comments the following inputs are possible:

- Text input
- Image uploads
- Audio recordings
- Uploads of media files

Comments can be set to be only visible to the teacher or to anyone viewing the map.

All comments (including uploads) can be deleted by the teacher with just one click.

💖 Notifications about new comments are displayed directly on the top right of the Edumaps website.

### Discover Maps
Source: https://www.edumaps.de/1004/1/mwr30eig8s/s4nqenco46#p20978

**Media Libraries**
Via the main menu you will find various media libraries.
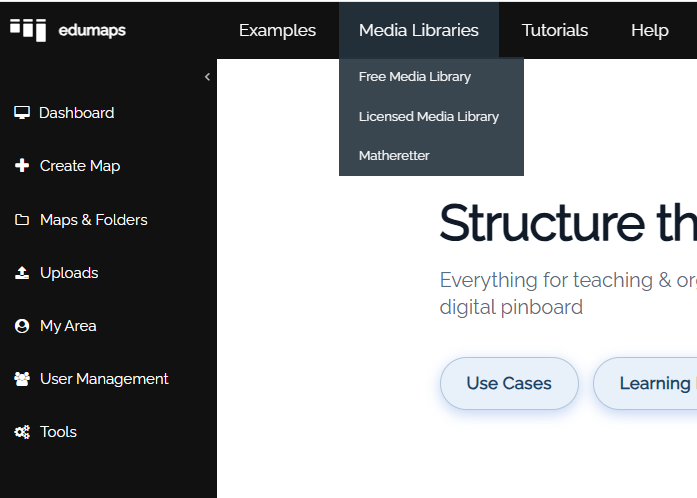
![Media libraries in the main menu](https://www.edumaps.de/file/1815046199693995580.png/pddlr1h)

Media libraries:

1. [Free Media Library](https://www.edumaps.de/search/freemedia)
1. [Licensed Media Library](https://www.edumaps.de/search/media)
1. [Matheretter](https://www.edumaps.de/search/matheretter)

The “Licensed Media Library” is only displayed if your media center has purchased licensed media from Edupool.

**Maps of my School**
You can unlock any map for your school with a teacher account and an admin account.
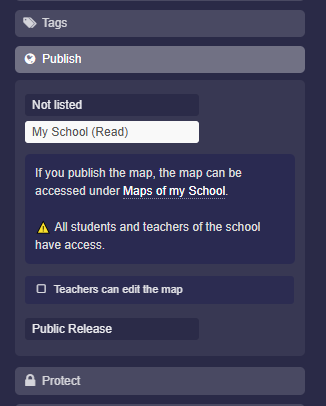
![Release: My School](https://www.edumaps.de/file/1847864555949540499.png/l98t331)

The map can then be found through the menu.
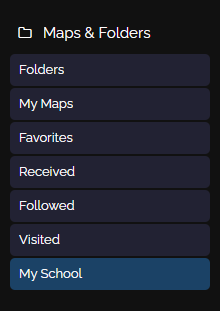
![“Maps of my School” in the menu](https://www.edumaps.de/file/743968472877631576.png/c0befpy)

On the “Maps of my School” page, all teachers, students, and the admin can find all the released maps.

### Users
Source: https://www.edumaps.de/1004/1/mwr30eig8s/s4nqenco46#p20972

**Types of Accounts**
- Admin and Superadmin
- Teacher
- Student
- Standard (and individual customers)

See also [Tutorial: User Roles and Permissions in Edumaps](https://www.edumaps.de/1045/1/acuyb12uou/u5oziu0rfk)

**Account Rights**
- each user can completely remove all their data
- every user can delete their account
- Admin accounts can delete student and teacher accounts

**Rights of Admin Accounts (Schools)**
- Create student accounts
- Create teacher accounts (admin account only)
- Create classes and assign students as you wish (also multiple times)
- Assigning to another group is possible when changing classes

See [Tutorial for Admins on Edumaps](https://www.edumaps.de/1008/1/bpk12qmwjr/zdo0glozn4)

### Data Privacy
Source: https://www.edumaps.de/1004/1/mwr30eig8s/s4nqenco46#p20973

**Server**
- Server in Germany
- Server operator is a German company (Hetzner)
- Technical and organizational measures: [Hetzner](https://www.edumaps.de/img/datenschutz/2021-04-05-Hetzner-Matheretter-Edumaps-DSGVO.pdf)

**All Scripts on one Server**
- All scripts are on our own server
- no external scripts
- especially no external tracking scripts
![Image](https://www.edumaps.de/file/11896812799124225286.png/mz33tnr)

**Protected Data**
- Data transmission on the Internet via SSL (HTTPS)
- Principle of data economy, i. e. Edumaps stores as little data as possible about the user
- each user has full transparency as to what data is stored about him/her
- the data can be removed at any time by the user himself/herself
- Data is protected from the outside, no access by third parties

## 1.2 Map Elements for Editing
Source: https://www.edumaps.de/1042/1/gm6qh9zkl5/5g26fzjemq

### Column
Source: https://www.edumaps.de/1042/1/gm6qh9zkl5/5g26fzjemq#p33

**Box**
Box content here ...

## 1.3 Inputs and Formatting in Box Editor
Source: https://www.edumaps.de/1003/1/e9o5ybwc3p/z960xa7v6r

### Introduction
Source: https://www.edumaps.de/1003/1/e9o5ybwc3p/z960xa7v6r#p83

✔️ Here you will learn all the important inputs and formatting options within the box editor.

✔️ There are many formatting options that can be quickly applied. It only takes a few characters.

✔️ The formatting for texts is easy to learn.

### Editor Bar
Source: https://www.edumaps.de/1003/1/e9o5ybwc3p/z960xa7v6r#p16651

If you are working the first time with the editor, then the **editor bar** will help you to format the text.
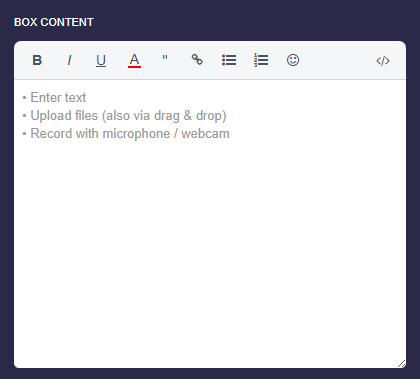
![Editor Bar](https://www.edumaps.de/file/12222426046715662126.png/u42mo0w)

Also note the other elements and modules in the lower section.
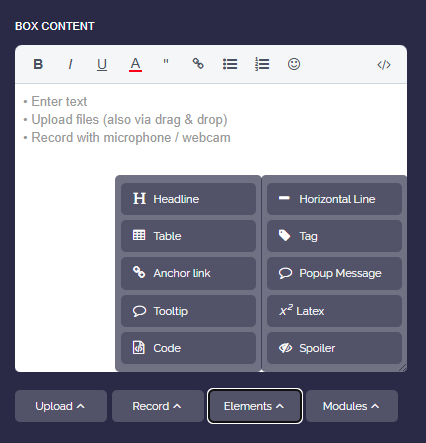
![Elements in Editor](https://www.edumaps.de/file/3993641260050176802.png/19i23u9)

![Modules in Editor](https://www.edumaps.de/file/4643204334874905613.png/xiklnfw)

### Formatting at a glance
Source: https://www.edumaps.de/1003/1/e9o5ybwc3p/z960xa7v6r#p84

The most frequently used formats shown at a glance.

📝 **Input:**

```
*italic* and **bold**

> Quote

List:
- One
- Two

Numbered list:
1. One
2. Two

  Indented Text

{Linked Text}{https://www.edumaps.de}
```

### Empty Lines between Elements
Source: https://www.edumaps.de/1003/1/e9o5ybwc3p/z960xa7v6r#p16652

> Elements (photos, videos, links) have to be divided by empty lines.

A contiguous text is recognized as **one element**, even though it continues on the next line.

Example:

```
My text with
line break
```

> My text with
line break

⚠️ If we want to attach an image/video or a file, we have to insert **a blank line** in between. Otherwise the link belongs to the previous text.

❌ **Wrong:**

```
My text with
line break
New content here
```

✔️ **Correct with new line in between:**

```
My text with
line break

New content here
```

### Line breaks vs. new lines
Source: https://www.edumaps.de/1003/1/e9o5ybwc3p/z960xa7v6r#p16654

Line breaks are rendered exactly as they are in the text editor.

If you set a new line (with an empty line in front of it), then this counts as a new paragraph.

However, if you just type Enter in the text editor and break the text, the text in the view is also broken.

For example, the following input is displayed with line break:

`It follows
a new line.`

**Half line spacing**
Sometimes a simple line break is too tight and an empty line is too wide. For spacing in between, place a tilde `~` at the end of the line.

The text wraps and additionally gets half a line of spacing.

📝 **Input:**

```
My text here ~
The text continues
```

Practical for poems and song lyrics: If the last line of a paragraph ends with `~`, the spacing to the next paragraph is also increased by half a line.

Note: In lists, tables, and code blocks, the tilde has no effect and is displayed normally.

### Bold or Italic
Source: https://www.edumaps.de/1003/1/e9o5ybwc3p/z960xa7v6r#p16653

**Make words bold or italic**
Bold with wrapping of two asterisks:

**Bold text**

Italic with wrapping of one asterisk:

*Italic text*

📝 **Input:**

```
**Bold text**

*Italic text*
```

Bold and italic:

```
***bold-italic***
```

**Strikethrough and underline words**
Strikethrough with enclosing two double tildes:

~~Strikethrough~~

Underlined with HTML syntax:

Underline

📝 **Input:**

```
~~Strikethrough~~

<u>Underline</u>
```

Crossed out and underlined:

```
~~<u>Underline</u>~~
```

Results in: ~~Underline~~

### Lists and Enumerations
Source: https://www.edumaps.de/1003/1/e9o5ybwc3p/z960xa7v6r#p16655

**Simple List**
You can generate a simple list with hyphens:

- Test 1
- Test 2
- Test 3

📝 **Input:**

```
- Test 1
- Test 2
- Test 3
```

**Numbered List**
Numbered lists can be created with double hyphens `--`:

1. test 1
1. test 2
1. test 3
1. Hello
and to the next line

The numbering is done automatically.

📝 **Input:**

```
-- test 1
-- test 2
-- test 3
-- Hello
and to the next line
```

📝 **Alternative input with numbering:**

Make sure to put **a whitespace** before the first number so that the indent is set.

```
1. test 1
2. test 2
3. test 3
4. Hello
and to the next line
```

The numbering can also start with a different number.

**Create an indented list**
A list can be indented by putting **a space** before each hyphen.

Example:

- One
- Two
- Three

📝 **Input:**

```
 - One
 - Two
 - Three
```

**Partial lists** are also possible:

- Dog breeds
   - Dachshund
   - Shepherd
   - Beagle

📝 **Input:**

```
- Dog breeds
  - Dachshund
  - Shepherd
  - Beagle
```

### Indent Text
Source: https://www.edumaps.de/1003/1/e9o5ybwc3p/z960xa7v6r#p16656

**Indent Text**
Text can be indented by putting two spaces at the beginning of the line.

For example:

This is long indented text spanning multiple lines.

📝 **Input:**

```
  This is long indented text spanning multiple lines.
```

**Text indent with two levels**
Text can be indented in two stages:

Standard

Indent Level 1

Indent Level 2

For the first level, two spaces have to be set at the beginning of the line.

For the second stage, four spaces have to be set at the beginning of the line.

📝 **Input:**

```
Standard

  Indent Level 1

    Indent Level 2
```

### Quotations
Source: https://www.edumaps.de/1003/1/e9o5ybwc3p/z960xa7v6r#p16657

**Create Quotes**
Quotations are created with a `>` at the beginning of the line:

> All dreams can come true if we have the courage to follow them.

📝 **Input:**

```
> All dreams can come true if we have the courage to follow them.
```

A second type of quotations can be created with a `>>` at the beginning of the line:

> Errare humanum est.

📝 **Input:**

```
>> Errare humanum est.
```

**Multi-line Quotes**
Place a `>` at the beginning of a paragraph, and only that paragraph will be marked as a quote. Therefore, you can place `>` before each paragraph if there are multiple paragraphs. Alternatively, you can insert a space on each empty line, and this will connect all paragraphs together.

Alternative solution: Place `>>>` at the beginning, and then all paragraphs will be represented as a quotation. You can end the large quote with `<<<`.

**📝 Input:**

```
>>> This is a quote over multiple paragraphs
... 
<<<
```

### Links with Thumbnails
Source: https://www.edumaps.de/1003/1/e9o5ybwc3p/z960xa7v6r#p16658

**Links with Thumbnails**
If a link to an external website is inserted, a **thumbnail** will be generated within 1 minute.

For example:

https://en.wikipedia.org/

📝 **Input:**

```
https://en.wikipedia.org/
```

⚠️ A preview image is only generated if the link stands alone on a line.

If the link is within text, it is displayed as a text link.

**Link with thumbnail and custom text**
If you want to set your own text under the thumbnail image, enter the text **directly on the next line** that follows the link.

For example:

[Website of Wikipedia](https://en.wikipedia.org/)

📝 **Input:**

```
https://en.wikipedia.org/
Website of Wikipedia
```

**Set text link (without thumbnail)**
If you want to create a pure text link and prevent a link thumbnail image, put an exclamation mark `!` in front of the `https`.

Alternatively, you can enclose the link in curly brackets: `{https://...}`.

Example:

This is a text link: https://en.wikipedia.org/wiki/Canidae

📝 **Input:**

```
This is a text link: !https://en.wikipedia.org/wiki/Canidae
```

or:

```
This is a text link: {https://en.wikipedia.org/wiki/Canidae}
```

**Link text with upload**
If you want to show only a link instead of the preview, place an exclamation mark before `UPLOAD1`. The text after it, or on the line below, will then be linked, for example: `!UPLOAD1` and below it `Sample PDF`.

If no text is provided, the file address will be shown as the link.

The easiest way: when uploading, use the option “Show as link (without preview)”.

Alternatively, you can place curly brackets around `UPLOAD1` and insert the text like this: `{My sample PDF}{UPLOAD1}`. This will link the text “My sample PDF”.

**Use your own thumbnail**
To set your own thumbnail of a website, proceed as follows:

1. Take a screenshot of the website.

1. Upload the screenshot into your box.

1. Enter the link to the website directly below the `UPLOAD1` text.

1. Also place an exclamation mark `!` in front of the link (`!LINK1`). This will link the preview image to the external website.

📝 **Input:**

```
UPLOAD1
!LINK1
```

You can also add a title. Overall, it would look like this:

```
UPLOAD1
!LINK1
My Title
```

### Links within Text
Source: https://www.edumaps.de/1003/1/e9o5ybwc3p/z960xa7v6r#p16659

**Links within Text**
If the link is within the text, it is automatically displayed as an inline link - without a thumbnail image.

Example of inline link:

“This is an example link to https://www.wikipedia.de in the middle of the text.”

**Link certain Text**
If you want to link part of a text, this is also possible.

Example:

This is a [linked text](https://www.edumaps.de/).

📝 **Input:**

```
This is a {linked text}{https://www.edumaps.de/}.
```

**Link as Button**
If you would like to display a link as a clickable button, you can do this as well. Example:

[Link as Button](https://www.edumaps.de/)

📝 **Input:**

```
{#Link as Button}{https://www.edumaps.de/}
```

### Labels of Images and Links
Source: https://www.edumaps.de/1003/1/e9o5ybwc3p/z960xa7v6r#p16660

**Labels for Images and Links**
A label (caption) can be assigned for each uploaded image, audio, video file, etc.

This label (caption) can also be changed later on by changing the text below `UPLOAD`.

`UPLOAD3
Photo of our School`

to:

`UPLOAD3
Photo of my old School`

**Info-Icon at Upload (image/PDF)**
If you want to add information to your uploaded image or PDF (such as mentioning the source), you can do this as follows:

📝 **Input:**

```
UPLOAD3
{Source: https://www.externalpage.org/}
```

The text inside the curly brackets is displayed on the info icon when you mouse over or click on it.

Example:
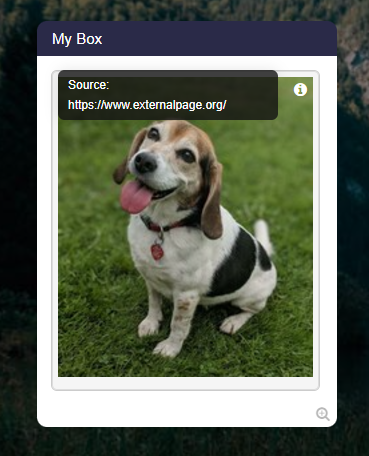
![Image](https://www.edumaps.de/file/9060978978921139325.png/3jev7ad)

The info icon also works with the caption:

📝 **Input:**

```
UPLOAD3
Image label
{Here is the text for the image}
```

### Enter code
Source: https://www.edumaps.de/1003/1/e9o5ybwc3p/z960xa7v6r#p16661

**Code Formatting**
Set inline code with backticks.

Example: `24·x + 12 = 5`

`var x = 12;`
`var y = 12;`
`var z = x + y;`

This way, you can also highlight `individual words`. However, they will have a monospaced font.

📝 **Input:**

```
Example: `24·x + 12 = 5`

`var x = 12;`
`var y = 12;`
`var z = x + y;`
```

### Use Latex
Source: https://www.edumaps.de/1003/1/e9o5ybwc3p/z960xa7v6r#p16662

**Use of Latex**
Latex as a block with surrounding dollar signs:

$$ \int \limits_{2}^{\infty} + \frac{1}{2}·x^{45+y+{\alpha} } $$

Set Latex inline with \( 5x+2^x = 12 \) and continue writing. This can be used multiple times within a sentence \( x^2 \) and \( x^3 \).

📝 **Input:**

```
$$ \int \limits_{2}^{\infty} + \frac{1}{2}·x^{45+y+{\alpha} } $$

Set Latex inline with \( 5x+2^x = 12 \) and continue writing. This can be used multiple times within a sentence \( x^2 \) and \( x^3 \).
```

Note: For latex inside text labels, always use inline latex with `\( … \)` and not block latex.

### Superscripts and Subscripts
Source: https://www.edumaps.de/1003/1/e9o5ybwc3p/z960xa7v6r#p16663

**Superscripts and Subscripts**
Superscript works with a caret and curly brackets.

Example: x^{2y}

Subscript works with underscore and curly brackets.

Example: x_{1}

📝 **Input:**

```
Example: x^{2y}

Example: x_{1}
```

### Own Notes in Boxes
Source: https://www.edumaps.de/1003/1/e9o5ybwc3p/z960xa7v6r#p16664

**Hidden Notes in Boxes**
You can add your own notes when you are in edit mode.

**These notes are hidden in the map view.**

Simply put two slashes `//` at the beginning of the line.

The line will not be displayed in the map view.
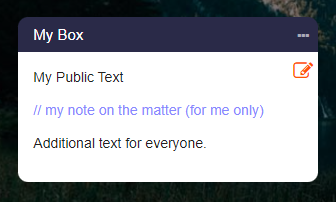
![Hidden note in edit mode](https://www.edumaps.de/file/18277788777790213356.png/eg4c12q)

### Spoiler
Source: https://www.edumaps.de/1003/1/e9o5ybwc3p/z960xa7v6r#p16665

**Spoilers**
Spoiler means: Content can be hidden and it can only be viewed when the user clicks on it.

Example:

Collapsible: This is a hidden solution text.

Collapsible: https://www.edumaps.de/file/18277788777790213356.png/eg4c12q
This is a hidden photo.

Spoilers are simply set with `??` at the beginning of a line.

📝 **Input:**

```
Example:

?? This is a hidden solution text.

?? https://www.edumaps.de/file/15951864615653000476.jpg/unhj8wy
This is a hidden photo.
```

**Timed Spoiler**
With the timed spoiler you can, for example, recreate learning with flashcards.

Example:

Collapsible: This is a learning text that only appears for 10 seconds.

If you click on the spoiler, it will be displayed for 10 seconds. Then it is hidden again.

Timed spoilers are set with `???` at the beginning of a line.

📝 **Input:**

```
Example:

??? This is a learning text that only appears for 10 seconds.
```

### Color for Text/Words
Source: https://www.edumaps.de/1003/1/e9o5ybwc3p/z960xa7v6r#p16667

**Text Color**
Words can be colored in any color.

Example: This is a blue word.

📝 **Input:**

```
This is a {blue word}{#0000FF}.
```

To do this, you need to know RGB color codes:

https://en.wikipedia.org/wiki/Web_colors#Basic_colors

Examples of RGB color codes:

- red FF0000
- green 00FF00
- blue 0000FF
- gray 888888
- light grey CCC
- maroon 800000
- yellow FFFF00
- olive 808000
- lime green 00FF00
- dark green 008000
- teal 008080
- navy blue 000080
- aqua 00FFFF
- fuchsia FF00FF
- violet 800080

### Background Color for Text/Words
Source: https://www.edumaps.de/1003/1/e9o5ybwc3p/z960xa7v6r#p26168

**Background Color for Text**
You can give any word or text a background color of your choice. To assign a background color, just add another hash `#` after the color code to an already colored word.

Example: This is a green word and the next one is a red word.

📝 **Input:**

```
This is a {green word}{#CCFFCC#} and the next one is a {red word}{#FFA1A5#}.
```

Colors are specified using [RGB color codes](https://en.wikipedia.org/wiki/Web_colors#Basic_colors). Examples of RGB color codes:
Red **#**FF0000 | Green **#**00FF00 | Blue **#**0000FF

### Headings
Source: https://www.edumaps.de/1003/1/e9o5ybwc3p/z960xa7v6r#p16668

**Headlines**
A heading can be set by putting a hash character `#` followed by a space at the beginning of the line.

**My Headline**

📝 **Input:**

```
# My Headline
```

**Subheadlines**
A subheading can be set with two hash characters `##` followed by a space at the beginning of the line:

**Second heading**

📝 **Input:**

```
## Second heading
```

Another subheading can be set with three hash characters `###` followed by a space at the beginning of the line:

**Third heading**

📝 **Input:**

```
### Third heading
```

**Special Headlines**
A special heading can be set by putting a dollar sign in front of the hash character, i.e. `$#`:

**Special heading**

📝 **Input:**

```
$# Special heading
```

With the use of such headings, texts can be better structured visually.

### Dividing Line
Source: https://www.edumaps.de/1003/1/e9o5ybwc3p/z960xa7v6r#p26174

**Horizontal Dividing Line**
A horizontal line can be set inside a box with three hyphens `---` or ``.

Example:

* * *

📝 **Input:**

```
---
```

### Font Sizes
Source: https://www.edumaps.de/1003/1/e9o5ybwc3p/z960xa7v6r#p882

You can set the font size differently for individual words.

You can increase the font size and decrease the font size of words as follows:

```
<tiny>Tiny Text</tiny>
<small>Small Text</small>
<big>Big Text</big>
```

Changing the font size can be used in map titles, column titles, box titles and box contents.

### Checkboxes
Source: https://www.edumaps.de/1003/1/e9o5ybwc3p/z960xa7v6r#p26232

**Checkboxes**
Checkboxes are easy to create using Markdown syntax.

Example:

- [x] First Element
- [x] Second Element
- [x] Third Element

📝 **Input:**

```
[x] First Element
[ ] Second Element
[x] Third Element
```

💖 In edit mode, you can click on the checkboxes within a box to check or uncheck them. The state of the checkboxes is saved in the box content.

✔️ Tip: In the box editor, use “Modules” and select the “Checklist” module, which is easier to use.

### Tooltips for Words (Popups)
Source: https://www.edumaps.de/1003/1/e9o5ybwc3p/z960xa7v6r#p20491

If you want to explain a certain word, a so-called "tooltip" is suitable for this, which displays an explanation as soon as the user moves the mouse over the word or clicks on the word on a mobile device.

Example:

An Ocelot (The ocelot is a species of carnivore native to Central and South America.) is not an Axolotl (The axolotl is an aquatic tailed amphibian).

📝 **Input:**

```
An [ocelot]{The ocelot is a species of carnivore native to Central and South America.} is not an [axolotl]{The axolotl is an aquatic tailed amphibian}.
```

⚠️ Tooltips may only consist of plain text and may not contain any links or uploads.

### Conduct Polls
Source: https://www.edumaps.de/1003/1/e9o5ybwc3p/z960xa7v6r#p286

If you want to conduct a survey, where you specify the selectable options, you can use the [poll module](https://www.edumaps.de/1086/1/xmgkv25gxf/f3u6hrdh5m).

You can find it in the dropdown under “Poll”.

The poll must be enclosed within tags, for example:

📝 **Input:**

```
<poll>
Option A
Option B
Option C
</poll>
```

### Generate QR Codes
Source: https://www.edumaps.de/1003/1/e9o5ybwc3p/z960xa7v6r#p318

If you want to generate a QR code, you can use the dropdown in the box editor and select “QR Code”.

Enter the text or link that should be hidden behind the QR code.

The QR code is generated dynamically immediately. You can change the text at any time. The QR code is updated instantly.

📝 **Input:**

```
{qrcode:My secret text}
```

### Popup Message
Source: https://www.edumaps.de/1003/1/e9o5ybwc3p/z960xa7v6r#p336

If you want to display an important message to the visitor of your map, you can use the "Popup Message" for this purpose.

Click on the dropdown in the box editor and select "Popup Message". Now, enter your text.

The text will be displayed as a popup dialog in the map view when someone visits your map.

📝 **Input:**

```
&&msg:Hello my friends!&&
```

### Insert Countdown
Source: https://www.edumaps.de/1003/1/e9o5ybwc3p/z960xa7v6r#p560

If you want to create a countdown, you can use the “Modules” dropdown in the box editor and select "Countdown".

Enter the time in seconds for how long the countdown should last.

The countdown appears in the preview. Click on it to start the countdown.
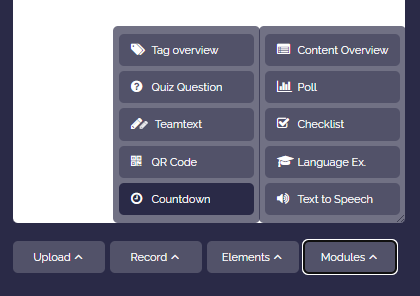
![Image](https://www.edumaps.de/file/6684407601333521179.png/1qvuv7p)

📝 **Input:**

```
&&count:123&&
```

### Create Tables
Source: https://www.edumaps.de/1003/1/e9o5ybwc3p/z960xa7v6r#p1261

You can insert a table template via the box editor. Click “Elements” and then “Table”.
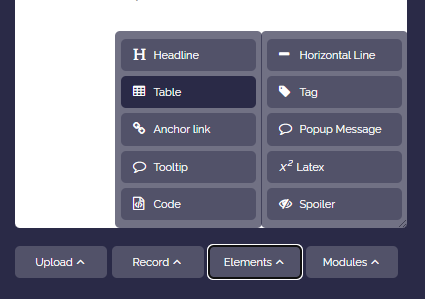
![Insert table](https://www.edumaps.de/file/9324582169788765449.png/7yi545p)

**Example:**

| Head 1 | Head 2 | Head 3 |
| --- | --- | --- |
| A1 | A2 | A3 |
| B1 | B2 | B3 |

📝 **Input:**

```
||| Head 1 | Head 2 | Head 3
|| A1 | A2 || A3
|| B1 | B2 | B3
```

The table header begins with three vertical bars `|||`. Each new table row must begin with `||`.

**Simple Alternative:**

If it is a small table, you can enter it directly by inputting the table as a code block. This requires setting 3 backticks (`), then the table content, and then 3 backticks again.

Example:

```
Head 1     | Head 2     | Head 3
Content A  | Content B  | ...
1235678    | 9012345    | ...
```

However, this requires manual formatting.

### Automatic List of Contents
Source: https://www.edumaps.de/1003/1/e9o5ybwc3p/z960xa7v6r#p620

You can automatically create a table of contents for all boxes on your map.

To do this, open the box editor, click “More”, then “Layout”, and select “List of contents”.
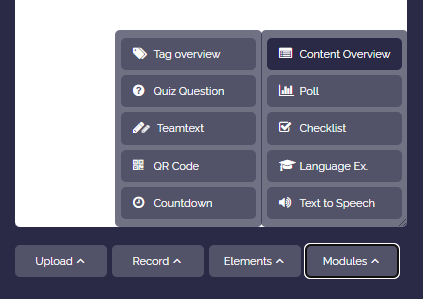
![Option: Content Overview](https://www.edumaps.de/file/11292992102415716594.png/1tiibgi)

A complete table of contents will then appear with a link to each box.

### Text to Speech
Source: https://www.edumaps.de/1003/1/e9o5ybwc3p/z960xa7v6r#p619

With the “Text-to-Speech” option, you can have any text read aloud in a natural voice.

Highlight the text, click on “More”, select “Interactive” and then “Text-to-Speech”. You will be asked to choose the audio language.

The language is then defined inside the audio tag.

**Examples:**

Je pense que le ciel est beau et paisible.

I like to play football, basketball and chess.

Пусть в твоём дне будет больше света, чем забот.

📝 **Input:**

```
<audio-fr>Je pense que le ciel est beau et paisible.</audio>
```

### Interactive Checklist
Source: https://www.edumaps.de/1003/1/e9o5ybwc3p/z960xa7v6r#p6995

If you want to give your students a task list to tick off, you can use the [“Checklist” module](https://www.edumaps.de/1162/1/b69pzgpq3uzu/4372nj9g7afu). You can find it in the box editor under “Modules”.

Unlike simple checkboxes, the interactive checklist saves progress for each user. Each student ticks off their own items without changing the box content.

**📝 Input:**

```
<check>
Read task 1
Fill out worksheet
Upload result
</check>
```

💖 An overview of all your checklists with your progress can be found on the [“My Checklists” page](https://www.edumaps.de/user/likes?check).

Hint: As the map owner, you can see in edit mode which users have ticked off which items.

### Create a Quiz
Source: https://www.edumaps.de/1003/1/e9o5ybwc3p/z960xa7v6r#p6996

If you want to integrate a comprehension question directly into a box, you can use the “Quiz” module. You can find it in the box editor under “Modules”.

You define a question and several answer options and mark the correct answer. The students choose an option and immediately receive feedback on whether the answer is correct or incorrect.

**📝 Input:**

```
<quiz>
How many legs does a spider have?
6
#8
10
</quiz>
```

### Tag Filter
Source: https://www.edumaps.de/1003/1/e9o5ybwc3p/z960xa7v6r#p85

You can set a tag within a box. To do this, place a hash sign `#` directly before a term.

Example: #done #school

> Multiple tags are also possible.

If you click on a tag, only the boxes containing this tag will be displayed. All other boxes will be hidden.

If you click the same tag again, the filter will be removed and all boxes will be shown again.

Note: A tag consists of one word (without spaces). Periods, hyphens, and underscores within the word are allowed but should be avoided.

Tip: You can also link to a map in a way that, when the map link is opened, only boxes with your selected tag are shown. To do this, append to the end of the link: `?tag=mytag` (replacing "mytag" accordingly).

📝 **Input:**

```
#mytag
```

See also:

[Tutorial: Using Tags and Tag Filters on a Map](https://www.edumaps.de/1100/1/qom3b15q28/swpwzxd9cy)

### Markdown
Source: https://www.edumaps.de/1003/1/e9o5ybwc3p/z960xa7v6r#p2378

Our editor supports most of the Markdown syntax.

Article about [Markdown (Wikipedia)](https://en.wikipedia.org/wiki/Markdown).

If you have written your documents with Markdown, you can copy and paste their contents directly into our editor.

You can display the Markdown syntax by using the dropdown in the box editor and selecting “Syntax on/off”.

## 1.4 Map Settings
Source: https://www.edumaps.de/1076/1/82f7f5907r/aq1ummf990

### Introduction
Source: https://www.edumaps.de/1076/1/82f7f5907r/aq1ummf990#p149

✔️ Here you will get to know the map settings:

✔️ Creating a map is very easy. You will quickly become familiar with the map settings.

### Map Settings Overview
Source: https://www.edumaps.de/1076/1/82f7f5907r/aq1ummf990#p150

The screenshot shows the available map settings:
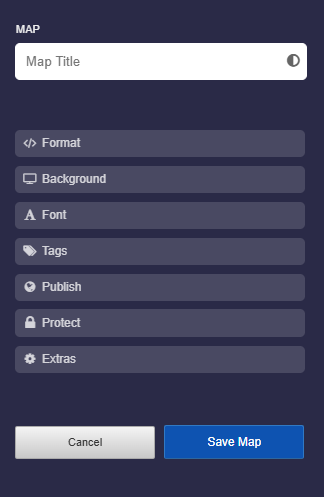
![Map Settings](https://www.edumaps.de/file/9635134629218098082.png/0uncah4)

### Title of the Map
Source: https://www.edumaps.de/1076/1/82f7f5907r/aq1ummf990#p151
![Map Title](https://www.edumaps.de/file/4718057734489073126.png/omrbcf2)

You can choose any title for your map. You can also insert emojis.

Characters from any language are possible.

Use the text color switch to use white or black font.

### Format text in Map title
Source: https://www.edumaps.de/1076/1/82f7f5907r/aq1ummf990#p606

The text of the title can also be formatted. The following formatting options are possible:

1. Set **bold** and *italic* with asterisks.

```
**Bold** heading and here is an *italic word*.
```

1. Line breaks are possible with two backslashes.

```
First line of the title \\ Second line
```

1. **Colors** can be set with hex color codes:

```
My {red title}{#F00}
```

1. **Font size**

The font size can be increased or decreased as follows:

```
<big>My large title</big> and <small>a small text</small>
```

### Map Format
Source: https://www.edumaps.de/1076/1/82f7f5907r/aq1ummf990#p152
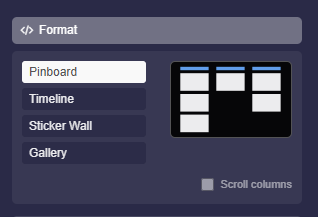
![Available Map Formats](https://www.edumaps.de/file/18429865771698487105.png/1zeoc2l)

**Pinboard**

The pinboard consists of columns. Each column contains boxes. Multiple columns are positioned side by side.

![Map format: Pinboard](https://www.edumaps.de/file/2387536848564589294.png/6rk7bku)

**Timeline**

The columns run horizontally. The boxes are arranged from left to right. Multiple columns are positioned one below the other.

![Map format: Timeline](https://www.edumaps.de/file/10524896192514210868.png/xp3jac8)

**Sticker Wall**

The boxes are freely arranged. There are no columns.

![Map format: Sticker Wall](https://www.edumaps.de/file/530150540731859997.png/0v6kh3d)

**Gallery**

In the Gallery format, all boxes are positioned horizontally one after another. It also includes a photo mode that highlights photos and videos.

![Map format: Gallery](https://www.edumaps.de/file/2194727814454619526.png/2fwayyd)

**Journal**

In the Journal format, all boxes are positioned vertically one below another. This creates a continuous, easy-to-read layout. The format is particularly suitable for learning journals, project documentation, portfolios, reports, and chronologically structured content.

![Map format: Journal](https://www.edumaps.de/file/2465843334124746331.png/n5vyt06)

❤️ You can switch from one map format to another at any time. However, please note that Sticker Wall elements such as text fields, arrows, and images may behave differently after changing the format.

### Background
Source: https://www.edumaps.de/1076/1/82f7f5907r/aq1ummf990#p153
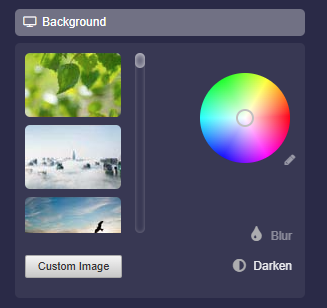
![Selecting the background of the map](https://www.edumaps.de/file/340229520230567169.png/bk1rsza)

You can customize the background of your map as you like.

- You can choose from the available background images.
- You can upload your own background image using the "Own Image" button.
- You can select any color using the color wheel.
- If you want to enter a color code, click on the small pencil icon next to the color wheel.
- By clicking on "Darken", the background will be darkened, which often leads to better readability of the map.
- By clicking on “Blur” the background will be blurred. This effect can help to perceive the boxes better.

### Font
Source: https://www.edumaps.de/1076/1/82f7f5907r/aq1ummf990#p154

You can choose one of 16 available fonts.
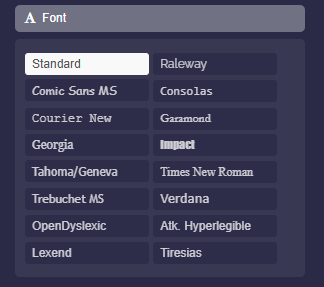
![Font Selection](https://www.edumaps.de/file/16317496205933568812.png/0ilygi0)

Notes:

- FAQ: [How can I change the font size of a map?](https://www.edumaps.de/faq#a75000)
- FAQ: [Why can additional fonts not be integrated?](https://www.edumaps.de/faq#a250000)
- FAQ: [Why is the set font displayed correctly on a PC/MAC but not on some smartphones and tablets?](https://www.edumaps.de/faq#a1400)

### Tags
Source: https://www.edumaps.de/1076/1/82f7f5907r/aq1ummf990#p156

Under “Tags“ you can assign keywords to your map. These keywords help you quickly filter your maps.

Under [“My Maps”](https://www.edumaps.de/user/maps), you can then click on a tag to quickly find all maps associated with that tag.
![Tags for your Maps](https://www.edumaps.de/file/18120109295011477516.png/6r0w5of)

The button “Choose tags” opens a dialog with pre-defined tags to choose from.

### Publish: “My School”
Source: https://www.edumaps.de/1076/1/82f7f5907r/aq1ummf990#p157

Under “Publish”, you can make the map discoverable to all students and teachers at your school.

Click on “My School (Read)” and save the map. This way, the map will be immediately available on the page [“Maps of my School”](https://www.edumaps.de/maps/school).
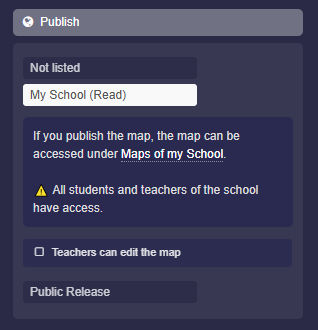
![Publish as a map for your school](https://www.edumaps.de/file/11518366456504549034.png/lz90o4x)

You will also find the option “Teachers can edit map”. Check the checkbox, and all teachers at your school will be able to edit this map.

### Publish: “Public Release”
Source: https://www.edumaps.de/1076/1/82f7f5907r/aq1ummf990#p350

Under “Publish”, you can make the map discoverable across the entire internet.

Click on “Public Release” and save the map, and it will immediately be available publicly.

In addition, you need to activate your [public profile page](https://www.edumaps.de/1087/1/qerwrf9nfe/o1gpolryps) so that your maps can be found and other users can follow you.
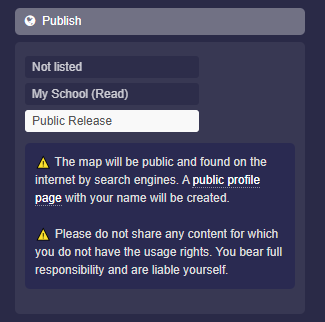
![Public Release of the Map](https://www.edumaps.de/file/18300375746801530359.png/xk5mg63)

⚠️ The map is public and can be found on the internet. The map appears on your own public profile page, which is automatically created.

⚠️ Do not share content for which you do not have usage rights. You bear full responsibility and are liable yourself.

### Protect
Source: https://www.edumaps.de/1076/1/82f7f5907r/aq1ummf990#p3967

Under **“Protect”** you will find settings that affect access protection for the map.
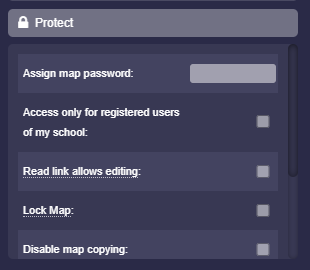
![Additional settings to protect the map](https://www.edumaps.de/file/9808754281863542361.png/0q931ox)

The following options are available:

- Assign map password
- Access only for registered users of my school
- Read link allows editing ([see here](https://www.edumaps.de/1047/1/siajhiablo/fv6nobr4hp#specialcase))
- Lock map
- Disable map copying
- Hide map owner
- Hide download buttons
- Regenerate map link

### Extras
Source: https://www.edumaps.de/1076/1/82f7f5907r/aq1ummf990#p158

Under “Extras” you will find many additional settings as a map owner.
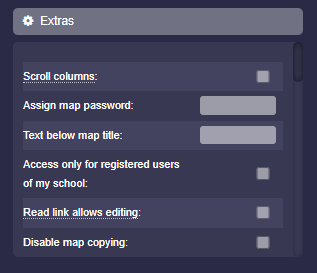
![Settings via Map Extras](https://www.edumaps.de/file/6535918446785309027.png/1edb0xz)

## 1.5 Column Settings
Source: https://www.edumaps.de/1077/1/322lwjtlaj/tvqoyykwb8

### Introduction
Source: https://www.edumaps.de/1077/1/322lwjtlaj/tvqoyykwb8#p159

✔️ Here you will learn all the important settings for the column.

✔️ You will customize the title and color of the column, and can hide the title if needed.

✔️ You can protect columns, set a password, and control visibility.

### Column Settings
Source: https://www.edumaps.de/1077/1/322lwjtlaj/tvqoyykwb8#p160
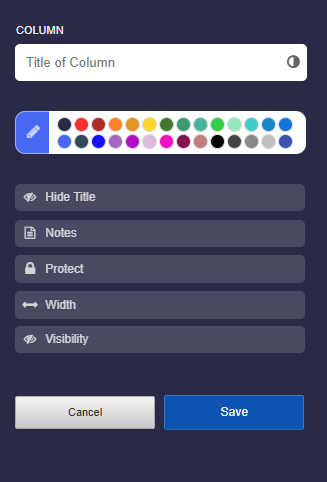
![Column Settings](https://www.edumaps.de/file/6657867067490744291.png/edznoqw)

### Title of the Column
Source: https://www.edumaps.de/1077/1/322lwjtlaj/tvqoyykwb8#p161

You can set the title of your column as you like.

You can also insert emojis.

Characters from any language are possible. There are no restrictions.

**Format Text in the Title**
For Advanced Users:

You can also style the text of the title. The following formatting options are possible:

1. **Bold** and *Italic* with asterisks.

```
**Bold Heading** and here is an *italic word*.
```

1. **Line Breaks** are possible with two backslashes.

```
First line of the title \\ Second line
```

1. **Colors** can be set with hex color codes:

```
My {blue title}{#00F}
```

1. **Font Size**

The font size can be increased or decreased as follows:

```
<big>My big title</big> and <small>a small text</small>
```

### Linking Column Title
Source: https://www.edumaps.de/1077/1/322lwjtlaj/tvqoyykwb8#p162

You can link a column title by simply adding the link after the column title.

For example, see Map:

[Mathematics Quotes and Sayings](https://www.edumaps.de/1019/1/jm16nsu7lq)

📝 Input (Example):

```
Column Title https://www.wikipedia.org/
```

### Column Title Color
Source: https://www.edumaps.de/1077/1/322lwjtlaj/tvqoyykwb8#p163

You can color each column title. Defined colors are available for this purpose.
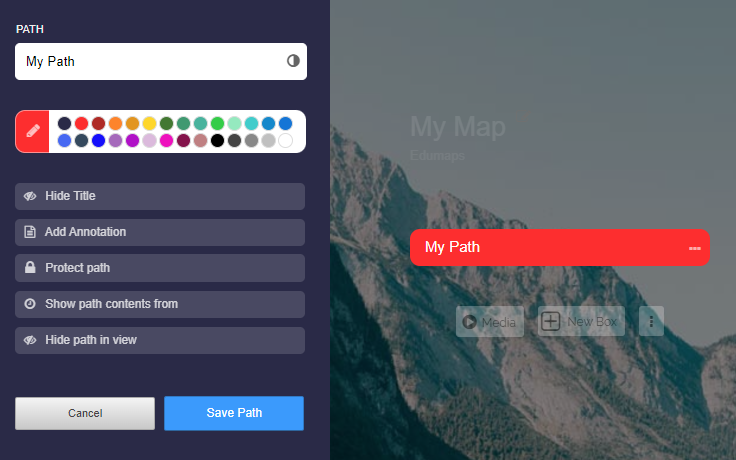
![Colors for Column Titles](https://www.edumaps.de/file/3755083524615089504.png/e24xcjh)

Click on the edit pencil icon to display additional settings.
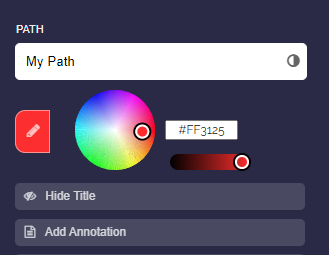
![Advanced Settings for Column Color](https://www.edumaps.de/file/18173540885354598921.png/csqyxav)

Here, you can select a color from the color wheel and adjust the brightness of the color.

You can also input a hexadecimal color code. This is useful if you want to use the exact color code from another column.

### Hide Title
Source: https://www.edumaps.de/1077/1/322lwjtlaj/tvqoyykwb8#p164

Here you can hide the title. It will then not be displayed in the map view.
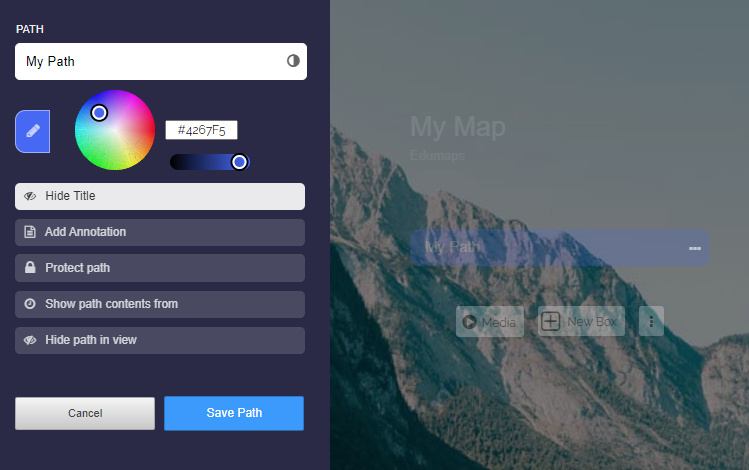
![Hide title](https://www.edumaps.de/file/14661734791780635154.png/y75n8oj)

In edit mode, you will still see the column title, as this is where access to the column settings is made.

### Add Annotation
Source: https://www.edumaps.de/1077/1/322lwjtlaj/tvqoyykwb8#p165

In the column settings, you can insert your own annotations. These annotations appear below the column title.
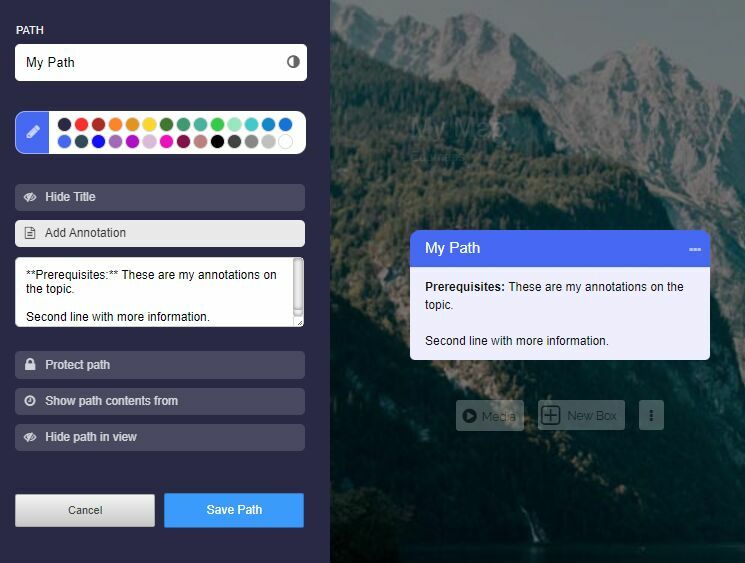
![Annotation on the column](https://www.edumaps.de/file/2562514518155186801.jpg/veq9smp)

New lines are accommodated in the annotations.

You can also apply formatting for bold and italic.

**📝 Input (Example):**

```
**Prerequisites:** These are my annotations on the topic.

Second line with more information.
```

### Protect Column
Source: https://www.edumaps.de/1077/1/322lwjtlaj/tvqoyykwb8#p166

With the “Protect column” setting, there are various ways to protect a column.

1. “Completely”
1. “Only column title”
1. “Password protection”
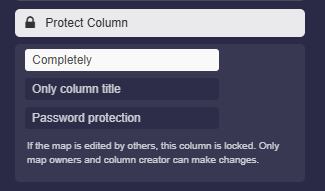
![Column protection](https://www.edumaps.de/file/11756010503960618626.png/tiil7em)

**1. Completely**

If the map is edited by others, this column is locked. Only map owners and column creator can make changes.

**2. Only column title**

Only the column title is locked, however, boxes can still be added and edited in the column.

**3. Password protection**

In the map view, the correct password must be entered to make the boxes in the column visible.

### Protect column content with password
Source: https://www.edumaps.de/1077/1/322lwjtlaj/tvqoyykwb8#p599

If you want to hide the content of a column and only make it accessible with a password, you can use the password function.
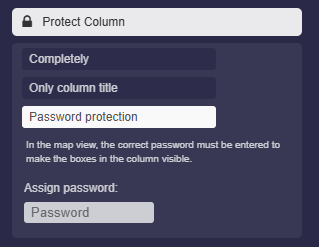
![Password Protection for Columns](https://www.edumaps.de/file/8630879348381092841.png/u4watt1)

1. To set the column password, open the column settings.
1. Activate the option “Protect column” and select “Password protection.”
1. Enter your desired password there. Save the settings.

Result: In the map view, all boxes of this column will be hidden and a password input field will appear below the column title.

Displayed only after entering the correct password.

### Change Visibility
Source: https://www.edumaps.de/1077/1/322lwjtlaj/tvqoyykwb8#p167

You can control the visibility in the map view using the "Change Visibility" option.

There are three choices available:

1. "Hide column"
1. "Show column from …"
1. "Show column until …"
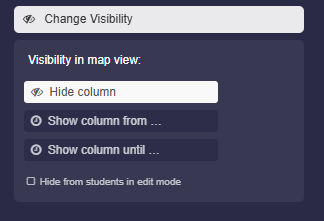
![Option "Change Visibility"](https://www.edumaps.de/file/3857172406319143793.png/o1m7vit)

### Change Visibility Settings
Source: https://www.edumaps.de/1077/1/322lwjtlaj/tvqoyykwb8#p168

**1. Hide column**

The column will be completely hidden in the map view.

**2. Show column from …**

Here you can set the time from which the column is displayed in the map view.
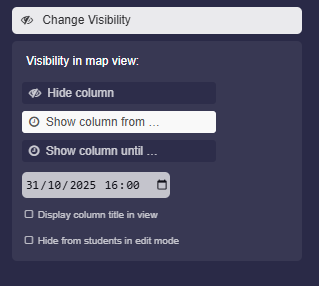
![Option "Show column from"](https://www.edumaps.de/file/12283981874020105388.png/i2ub7o5)

If you activate the option "Display column title in view", the column title will be displayed with the note "Appears on …".
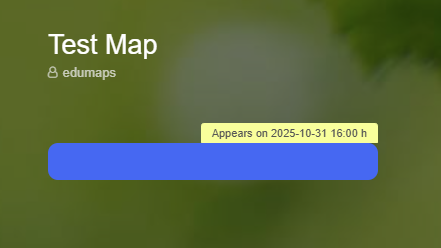
![Example of a column with appearance date](https://www.edumaps.de/file/13260990316637817624.png/bjj6pjx)

**Additional option: Hide from students**

Further down you will find the option “Hide from students in edit mode”. This allows students not to see the column themselves when editing.

**3. Show column until ...**

Here you can select a time from which the column will be completely hidden.

### Create a new column at the very front
Source: https://www.edumaps.de/1077/1/322lwjtlaj/tvqoyykwb8#p628

When you move the mouse over the empty area to the left of the first column, the “Add column” button appears.

Click the button to insert a new column at the very front.
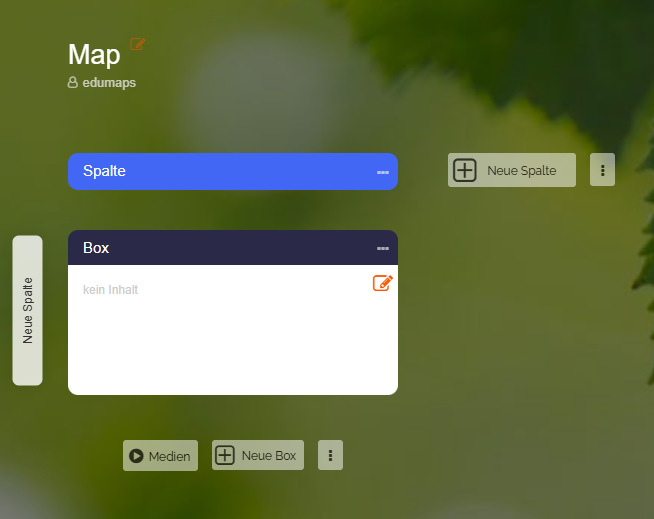
![Add column at the front](https://www.edumaps.de/file/890307740826673595.png/fnoikwr)

## 1.6 Box Settings
Source: https://www.edumaps.de/1078/1/qbg4lumykj/2eycvzchpw

### Introduction
Source: https://www.edumaps.de/1078/1/qbg4lumykj/2eycvzchpw#p169

✔️ Here you will learn all the important settings for the box.

✔️ You can customize the title, label, and color of a box as you wish.

✔️ You control visibility, collapse boxes, and protect them if needed.

✔️ You activate functions such as comments, likes, ratings, and calendar.

### Box Settings
Source: https://www.edumaps.de/1078/1/qbg4lumykj/2eycvzchpw#p170
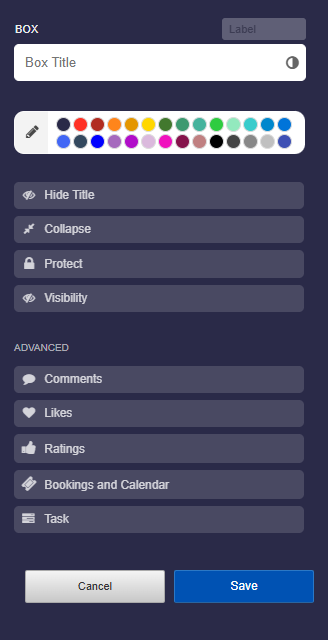
![Box Settings](https://www.edumaps.de/file/18316694766136356826.png/lfhkjze)

### Title of the Box
Source: https://www.edumaps.de/1078/1/qbg4lumykj/2eycvzchpw#p171

You can set the title as you like.

You can also insert emojis.

Characters from any language are possible. There are no restrictions.

**Font Color**

By clicking on the black-and-white icon, you can change the box title to white or black.
![Color of the box title (black/white)](https://www.edumaps.de/file/2330912534521729413.png/lhs7sh0)

### Format text in the title
Source: https://www.edumaps.de/1078/1/qbg4lumykj/2eycvzchpw#p4494

For Advanced Users:

You can also style the text of the title. The following formatting options are available:

1. Set **Bold** and *Italic* with asterisks.

```
**Bold Heading** and here is an *italic word*.
```

1. **Line breaks** can be achieved with two backslashes.

```
First line of the title \\ Second line
```

1. **Colors** can be set using hex color codes:

```
My {blue title}{#00F}
```

1. **Font size**

Font size can be increased or decreased as follows:

```
<big>My big title</big> and <small>a small text</small>
```

### Linking the Title
Source: https://www.edumaps.de/1078/1/qbg4lumykj/2eycvzchpw#p172

You can link the box title by simply adding the link right after the box title.
![Example: Linked Box Title](https://www.edumaps.de/file/4576783972436474687.png/sp77rac)

📝 Input (Example):

```
Box title https://www.wikipedia.org/
```

### Label of the Box
Source: https://www.edumaps.de/1078/1/qbg4lumykj/2eycvzchpw#p173

The box label is located to the left above the box title.

You can use the label, for example, to name the theme of the box content with a keyword or to specify a school subject.

The labels are also suitable for numbering boxes sequentially.
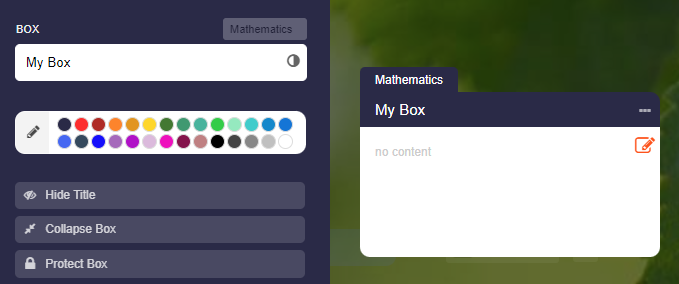
![Label of the Box](https://www.edumaps.de/file/14376257199302736934.png/2wg9erm)

### Color of the Box
Source: https://www.edumaps.de/1078/1/qbg4lumykj/2eycvzchpw#p174

You can color each box title. Defined colors are available for this purpose.
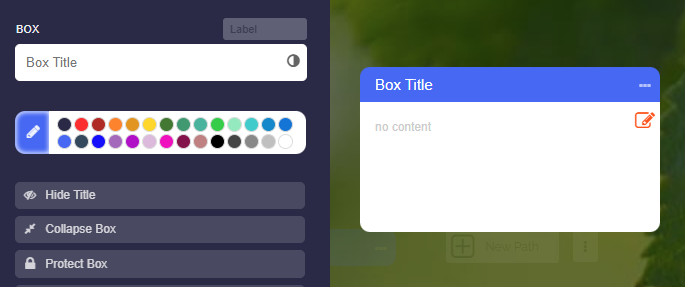
![Color for box title](https://www.edumaps.de/file/9547937096390932293.png/q1d1z9y)

Click on the edit pencil icon to display additional settings.
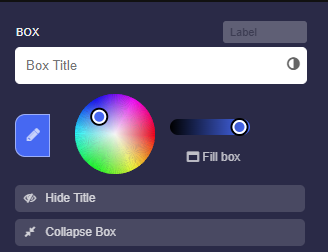
![Advanced settings for box color](https://www.edumaps.de/file/2037507929951157651.png/3mfphso)

Here you can set a color code and adjust the brightness of the color. Additionally, you can completely fill the box with color.
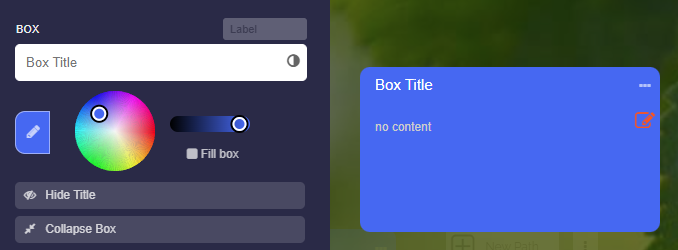
![Color-filled box](https://www.edumaps.de/file/2108209213847857574.png/oqcj4kl)

Click on the pencil icon once more, and the following options will appear:
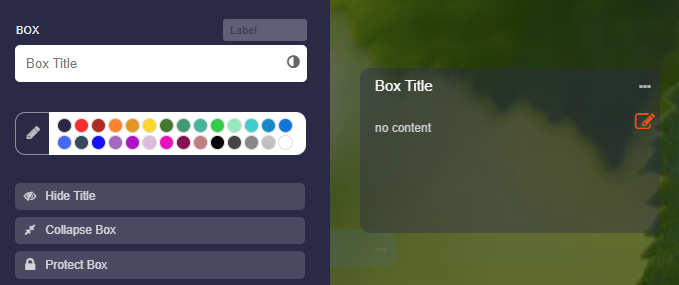
![Transparency settings for box color](https://www.edumaps.de/file/9774572519952078452.png/plncbum)

You can also enter a hexadecimal color code here. This is helpful if you want to apply the exact color code from another box.

### Hide Title
Source: https://www.edumaps.de/1078/1/qbg4lumykj/2eycvzchpw#p175

Here you can hide the title. It will then not be displayed in the map view.
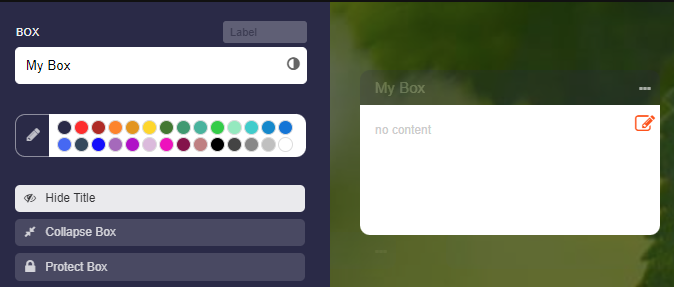
![Hide box title](https://www.edumaps.de/file/3950168171974892181.png/d6yt06e)

In edit mode, you will still see the box title, as this is where access to the box settings occurs.

### Collapse Box
Source: https://www.edumaps.de/1078/1/qbg4lumykj/2eycvzchpw#p176

If you enable the “Collapse Box” option, you can choose whether the box is fully collapsed or only partially collapsed.
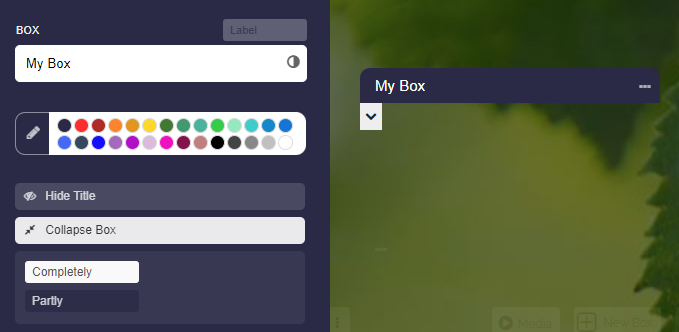
![Image](https://www.edumaps.de/file/1143961398935415042.png/4lp85yv)

### Protect Box
Source: https://www.edumaps.de/1078/1/qbg4lumykj/2eycvzchpw#p177

With the “Protect box” setting, there are various ways to protect a box.

1. “Lock editing”
1. “Full lock”
1. “Password protection”
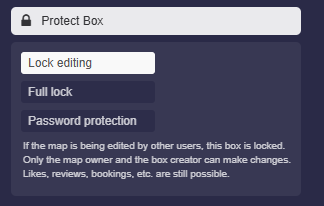
![Protect box](https://www.edumaps.de/file/5661348876520144521.png/0f2t6rg)

**1. Lock editing**

If the map is being edited by other users, this box is locked. Only the map owner and the box creator can make changes. Likes, reviews, bookings, etc. are still possible.

**2. Full lock**

In addition to the box content, likes, comments, polls, ratings, calendar, and bookings are also protected. Usage by others is no longer possible.

**3. Password protection**

In the map view, the correct password must be entered to make the box visible.

> If you only want to share a single box from your map without revealing the other boxes, this is also possible. See the tutorial here: [Share a single box](https://www.edumaps.de/1082/1/c968s4u3fmp7/dow0gnvczk1m).

### Comments
Source: https://www.edumaps.de/1078/1/qbg4lumykj/2eycvzchpw#p178

You can enable the comment function for the box. Then you will see two options:

1. “All Users” - All users can read comments. This allows for discussions.
1. “Only Me” - Only you can read comments. Helpful for private messages or homework submissions, etc.
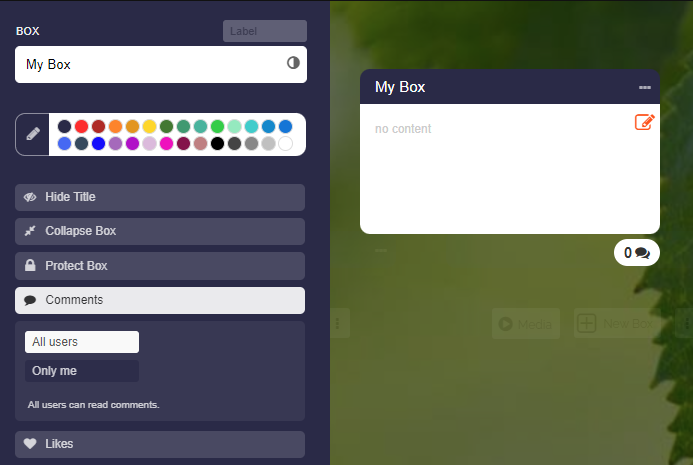
![Comments on the Box](https://www.edumaps.de/file/14878592075088685850.png/bmledbr)

### Likes
Source: https://www.edumaps.de/1078/1/qbg4lumykj/2eycvzchpw#p184

Enable likes for your box, so that other users can leave their likes by clicking on the heart icon.
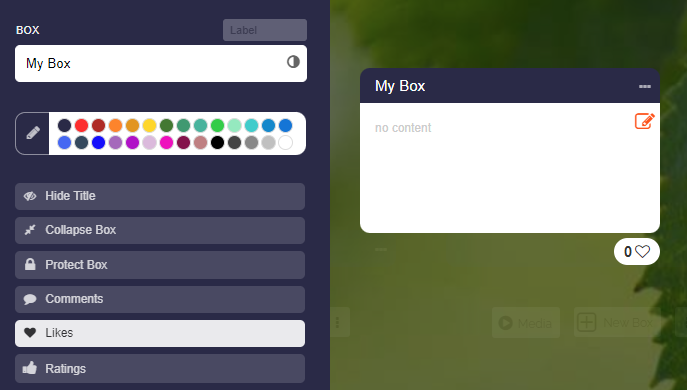
![Likes for the Box](https://www.edumaps.de/file/2768305788982838767.png/zipm6rb)

### Ratings
Source: https://www.edumaps.de/1078/1/qbg4lumykj/2eycvzchpw#p185

Enable ratings for your box, and three options will be available:

1. “Evaluate” - Dropdown with Good, Medium, Poor
1. “Answer” - Dropdown with Yes, Maybe, No
1. “Vote” - Dropdown with Option A, Option B, Option C
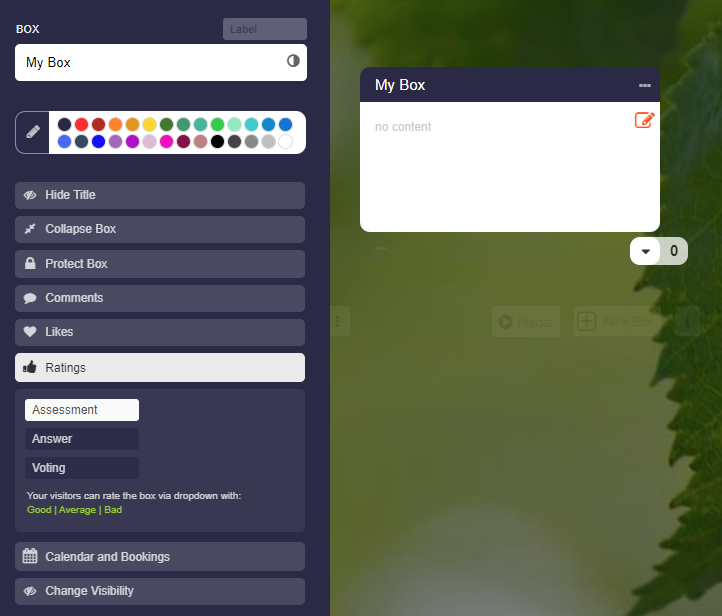
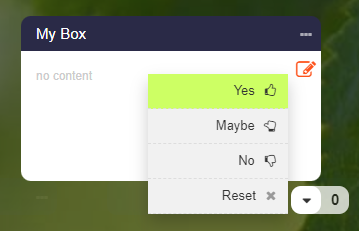
![Ratings for the box](https://www.edumaps.de/file/4052730991695140027.png/xu4wopu)

![Rating in “Answer” mode](https://www.edumaps.de/file/4547196965543215421.png/oq26ucl)

### Bookings and Calendar
Source: https://www.edumaps.de/1078/1/qbg4lumykj/2eycvzchpw#p186

Activate “Bookings and Calendar” for your box, and three options are available:

1. **“Booking System”**  - The box can be booked as a course.
1. **“Lending System”** - Usable for equipment rental and room leasing.
1. **“Calendar”** - The box receives a calendar. Usable for school and lesson planning, events, projects.
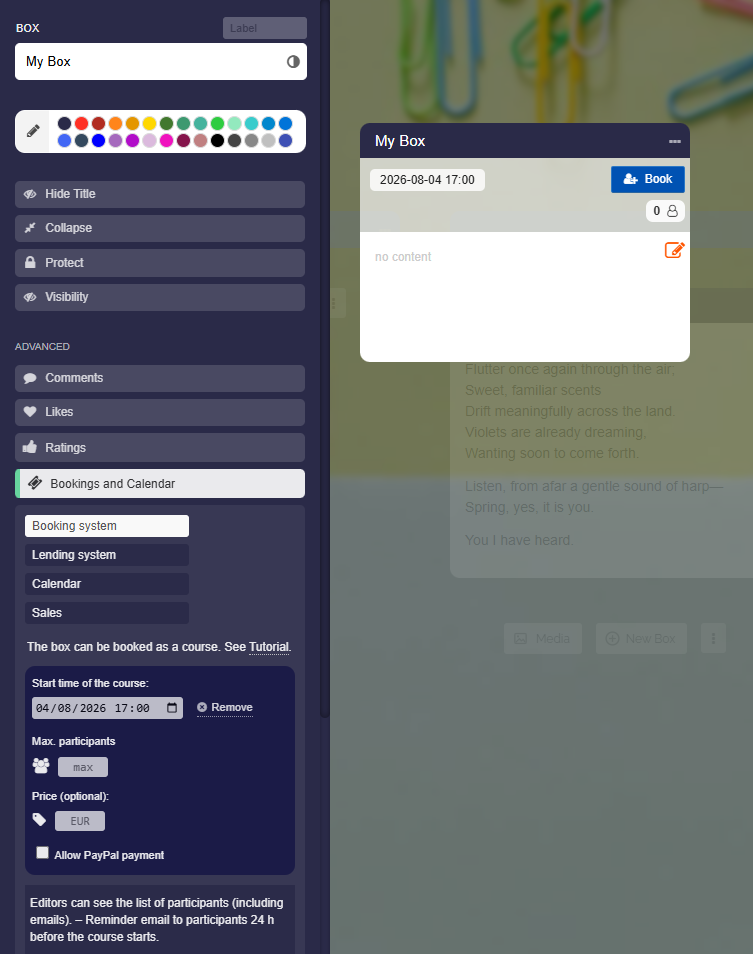
![Activated option “Bookings and Calendar”](https://www.edumaps.de/file/2830077557967202160.png/dw4037i)

These modules are comprehensive. Please take a look at the tutorials:

1. [Tutorial: Booking System](https://www.edumaps.de/1046/1/mtp976esa8/ee2qawxllh)
1. [Tutorial: Lending System](https://www.edumaps.de/1055/1/pec424hul6/wenurto5ez)
1. [Tutorial: Calendar for Boxes](https://www.edumaps.de/1059/1/1p018vc669/nt5sn3ix90)

### Change Visibility
Source: https://www.edumaps.de/1078/1/qbg4lumykj/2eycvzchpw#p187

You can control the visibility in the map view via the “Change Visibility” option. There are three options available:

1. “Hide box”
1. “Hide box content”
1. “Show box from …”
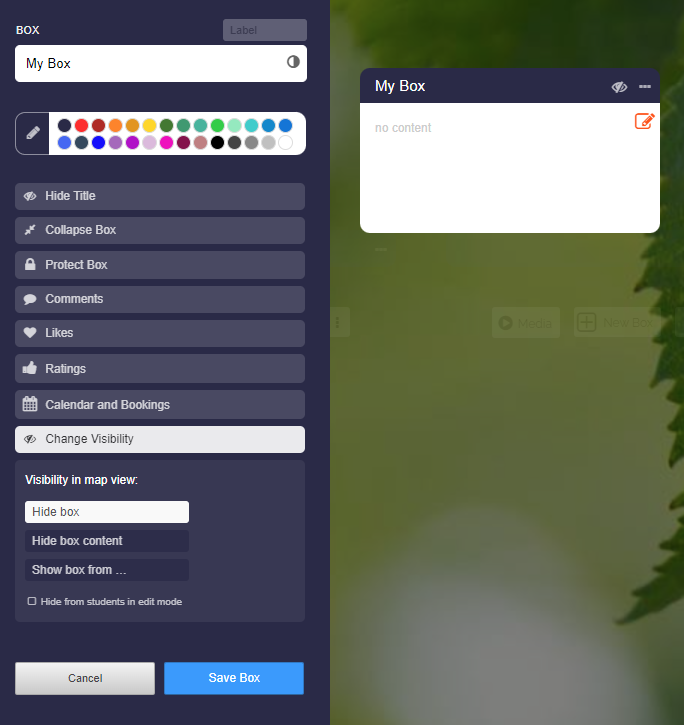
![Option “Change Visibility”](https://www.edumaps.de/file/1209252241877573591.png/5w0dqfi)

### Visibility Settings
Source: https://www.edumaps.de/1078/1/qbg4lumykj/2eycvzchpw#p188

**1. Hide Box**

The box will be completely hidden in the map view.

**2. Hide Box Content**

Only the box content will be hidden in the map view. The box title remains visible.

**3. Show Box from …**

Here you can set the time from which the box will be displayed in the map view.
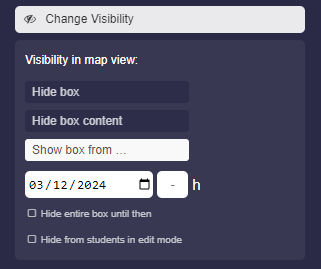
![Option “Show Box from”](https://www.edumaps.de/file/11770386603050721418.png/wjhlue8)

Enable the option “Hide entire box until then” so that the box is not visible in the map view. Otherwise, the box title will be displayed with the note “Appears on …”.
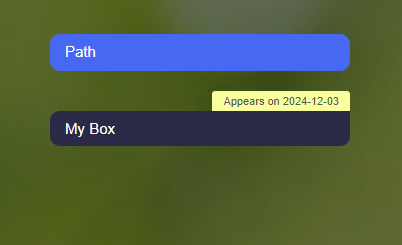
![Example of a Box with Appearance Date](https://www.edumaps.de/file/12408192946993642937.png/9sjud1h)

**Additional Option: Hide from Students**

Further down, you will find the option "Hide from students in edit mode", allowing you to make the box invisible to students even during editing.

### Assign Task
Source: https://www.edumaps.de/1078/1/qbg4lumykj/2eycvzchpw#p607

You can assign a task to a box – with status, priority, due date, and assignment to a user.
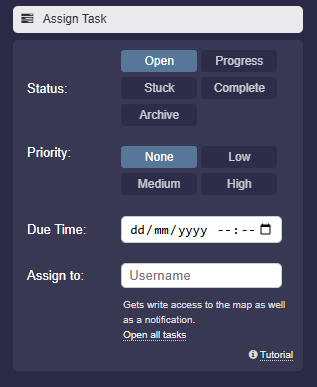
![Assign Task](https://www.edumaps.de/file/10386949314391096603.png/s9npi49)

The task details appear directly below the box.
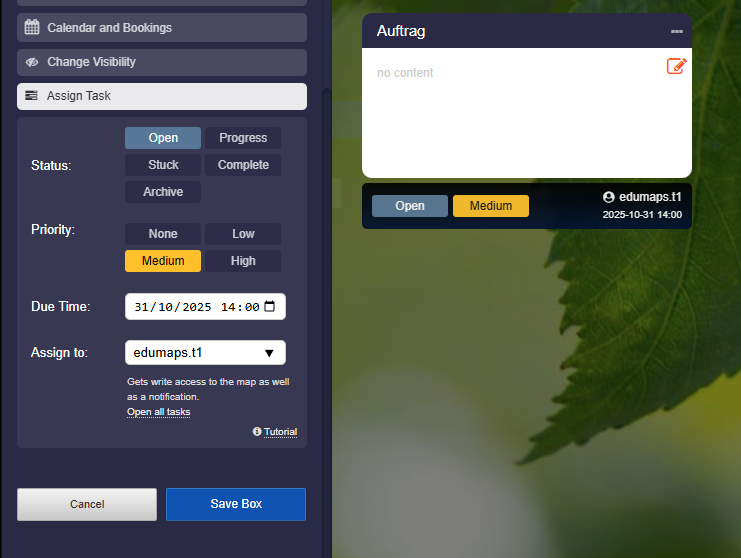
![Assigned Task with Priority, Due time and Receiver](https://www.edumaps.de/file/3463756284072970849.png/gei1d4k)

You can find a [list of all tasks here](https://www.edumaps.de/user/tasks).

### (Semi)Transparent Background Colors
Source: https://www.edumaps.de/1078/1/qbg4lumykj/2eycvzchpw#p713

You can make the background of boxes semi-transparent or fully transparent.

To create a semi-transparent background you need to:

1. Edit the box and click “Edit color” (pencil icon).
1. Click “Edit Color” a second time
1. You will now see the transparency slider that you can adjust.

If you want to apply the semi-transparent color to the whole box, you have to click on “Fill”.

### Create a new box at the very top
Source: https://www.edumaps.de/1078/1/qbg4lumykj/2eycvzchpw#p714

When you move the mouse over the empty area below the column title, the “Add box” button appears.

Click the button to insert a new box at the very top.
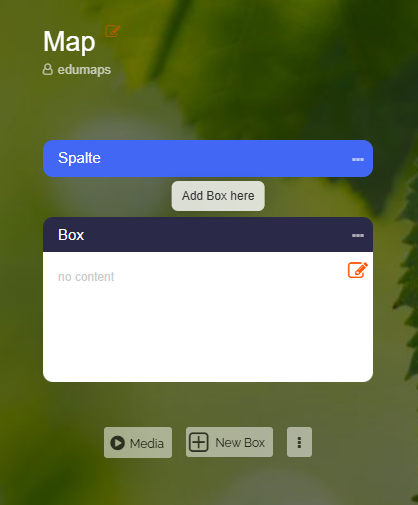
![Add new box at the top](https://www.edumaps.de/file/11955369973948100465.png/3etbp36)

## 1.7 Anchor Links (Jump Links)
Source: https://www.edumaps.de/1061/1/yb3n3dl19n/0ripgm1cdb

### Introduction
Source: https://www.edumaps.de/1061/1/yb3n3dl19n/0ripgm1cdb#p1274

✔️ With anchor links (jump links), you can create navigation within a map. To do this, you set self-named anchor links in your boxes and link them, for example, through a table of contents in a box.

### Create Anchor Links
Source: https://www.edumaps.de/1061/1/yb3n3dl19n/0ripgm1cdb#p1275

Let us assume you want to create a table of contents. Follow these steps:

1. Open the box you want to link to with the Box Editor.
1. Click on “More” and from the dropdown menu select “Layout” and then “Anchor link”.
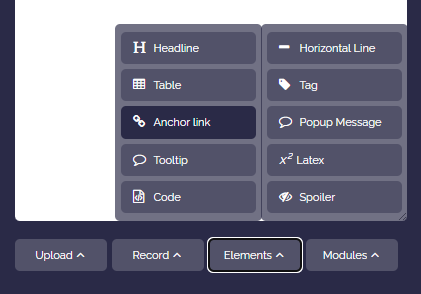
![Anchor link in the box editor dropdown](https://www.edumaps.de/file/15525133428208861264.png/f3d2dsh)

1. `!#anchor` will be inserted in the box content (as a template).
1. Rename the anchor as you wish, for example to `!#start1`. Make sure that the anchor word is a single word and that the characters `!#` are placed directly in front of the word (no spaces, all in lowercase).
1. Save the box.

The anchor link is now linked to the box and can be used for navigation (linking).

### Linking Text with Anchor Links
Source: https://www.edumaps.de/1061/1/yb3n3dl19n/0ripgm1cdb#p102

If an anchor link is associated with a box, you will see the anchor word in edit mode as follows:
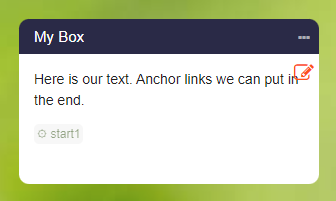
![Visible anchor link in box content](https://www.edumaps.de/file/7879041079685201312.png/8ixdpl7)

You can now use this link for navigation.

1. Open the box editor for the box where the link should be added.
1. Write your text.
1. Select a word in the text with the mouse and click on the "Insert Link" button.
1. Enter your anchor link, for example `!#start1`.
1. Save the box.
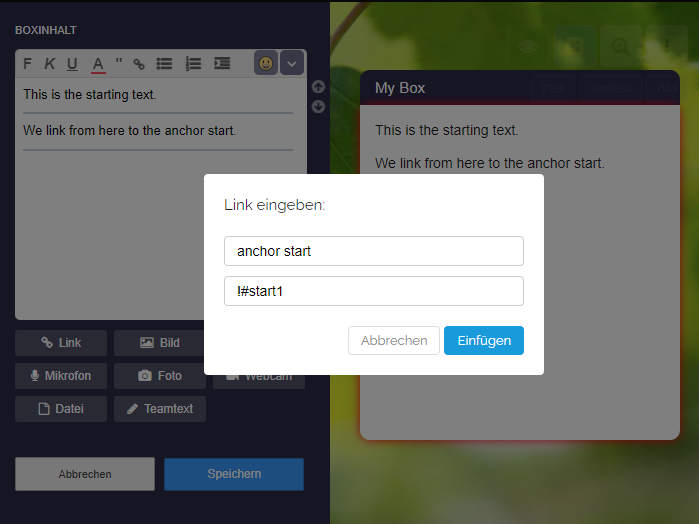
![Linking text with an anchor link](https://www.edumaps.de/file/2629309398550568980.png/5zxdvg9)

### Navigation with Anchor Links
Source: https://www.edumaps.de/1061/1/yb3n3dl19n/0ripgm1cdb#p103

When you click on the provided link, the map will scroll to the linked box (where the anchor link is located) and the box will blink three times.
![Jump to the linked box with anchor link](https://www.edumaps.de/file/11489287160656521870.png/ke65czi)

Additionally, a small back button will appear at the bottom left of the box.

However, you can also use the browser's back button (or the back button on your mouse) to return to the previous box.

### Example map with anchor links
Source: https://www.edumaps.de/1061/1/yb3n3dl19n/0ripgm1cdb#p1276

In the following example map, you can see how navigation with anchor links works.

[Example: Table of Contents with Anchor Links](https://www.edumaps.de/1053/1/v02a2muunq/e0wf3lp7ma)

If you click on a link in the table of contents, the view moves to the corresponding box.

If you use the back button on the box or the back button in the browser, it navigates back to the table of contents.

### Anchor Links in Box Titles and Column Titles
Source: https://www.edumaps.de/1061/1/yb3n3dl19n/0ripgm1cdb#p294

Anchor links can also be inserted into box titles and column titles.

To do this, simply use the syntax `!#myanchor` and add it to the end of the title.

### Map Sharing Links with Anchor Links
Source: https://www.edumaps.de/1061/1/yb3n3dl19n/0ripgm1cdb#p1277

Anchor links can be used for map self-navigation. For example, for a list of all courses in the first box on the map or for a table of contents.

However, you can also append an anchor link to your map sharing link to directly link to any box on other maps as well.

To do this, simply add the anchor link to the end of the map sharing link with `#myanchor` (without exclamation mark).

When you then call up this link, it will automatically scroll to the linked box and the box will blink.

### Formatting of Anchor Links
Source: https://www.edumaps.de/1061/1/yb3n3dl19n/0ripgm1cdb#p2623

Please observe the following rules:

- Anchor links always consist of **one word without spaces**.
- Always write anchor links in lowercase. Avoid uppercase letters.
- Avoid special characters (except the exclamation and hash character at the beginning).

**Wrong:**

```
!#my Anchor
```

**Correct:**

```
!#myanchor
```

### Anchor Links in Text Labels
Source: https://www.edumaps.de/1061/1/yb3n3dl19n/0ripgm1cdb#p104

Anchor links can also be set in text labels. This allows for additional applications:

1. Jump from text label to text label
1. Jump from text label to box
1. Jump from box to text label

When jumping to a text label, the text label blinks three times and is briefly marked in red.
![Jump to the linked text label with an anchor link](https://www.edumaps.de/file/18132762259509961118.png/0n77sff)

Input for the target text label:

`My text here !#target`

Input for the linking text label:

`My {link to the text label}{!#target}`

## 1.8 Text Fields
Source: https://www.edumaps.de/1071/1/9ios7o3n40/qyb9u6j00w

### Introduction
Source: https://www.edumaps.de/1071/1/9ios7o3n40/qyb9u6j00w#p115

Text fields are available on sticker walls. They are positioned globally on the map.

✔️ With **text fields**, you can:

- Collect ideas (brainstorming)
- Gather opinions, comments, and feedback
- Record notes and bullet points
- Form mind maps and clusters
- Sketch process flows/flowcharts (in combination with arrows)
- Create tree diagrams (in combination with arrows)

### Add Text field
Source: https://www.edumaps.de/1071/1/9ios7o3n40/qyb9u6j00w#p116

The map must be set to the “Sticker Wall” format. You will then find three blue buttons in the top right.

Then click on the blue “Text Field” button, and a text field will be added to the map.
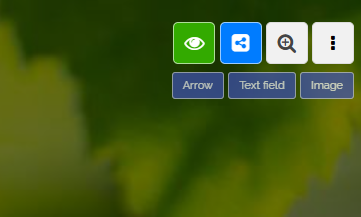
![Add text field](https://www.edumaps.de/file/1024214751681060448.png/mx277qn)

### Options for Text fields
Source: https://www.edumaps.de/1071/1/9ios7o3n40/qyb9u6j00w#p117

In a text field, the following editing options are available:

1. Change the background color
1. Change the position (Move using the Move icon)
1. Delete the text field
1. Change the rotation
![Text fields on Edumaps](https://www.edumaps.de/file/5699931738153402208.png/vkt2gp7)

### Instructions on Text fields
Source: https://www.edumaps.de/1071/1/9ios7o3n40/qyb9u6j00w#p118

- Maximum length of 300 characters
- Only plain text input, no HTML
- Texts are always centered
- Emojis are possible 🙂
- Multi-line inputs are possible

Maps can be created without boxes/columns, but only with text fields and arrows.

Text fields should not be placed on elements of a background graphic, as these graphics change according to the size of the screen. Resize the browser window, and you will see how the background image automatically scales.

### Shortcuts in Edit Mode
Source: https://www.edumaps.de/1071/1/9ios7o3n40/qyb9u6j00w#p119

- `Shift T` to add a text field
- `Delete` to delete the active text field
- `C` to change the text field color
- `Ctrl C` followed by `Ctrl V` to copy a text field
- `Ctrl X` to cut a text field

Tip: When rotating, you can align the text field more precisely by holding the Shift key while rotating.

### Precise Movement of Text fields
Source: https://www.edumaps.de/1071/1/9ios7o3n40/qyb9u6j00w#p120

Positioning a text field using the mouse can be inaccurate. To position a text field more precisely, select the text field (or add a new one) and then use your keyboard.

Hold down the Shift key and use the arrow keys (`←` `↑` `→` `↓`) to position the text field accurately.

Hold down the Ctrl key instead of Shift to move the text field in smaller increments.

### Links in Text fields
Source: https://www.edumaps.de/1071/1/9ios7o3n40/qyb9u6j00w#p121

Place a link in the text, and it will become clickable in the map view.

You can also use Markdown syntax to link words. For example:

```
[Linked Part](https://www.edumaps.de/)
```

### Hide Text for Quiz
Source: https://www.edumaps.de/1071/1/9ios7o3n40/qyb9u6j00w#p122

You can also hide text in a text field using the following syntax:

```
Which dogs are small and long?
((Dachshunds))
```

This way, the text within the double brackets is hidden, and a clickable arrow appears in the map view.

[Example: Which city is hidden behind each station? (Germany)](https://www.edumaps.de/1069/1/3520w5a0ne/d174l0etuh)

### Hide Text for Quiz (collapsible)
Source: https://www.edumaps.de/1071/1/9ios7o3n40/qyb9u6j00w#p123

You can hide text in a text field, reveal it with a click, and hide it again with a second click, similar to a flip card.

To do this, use the following syntax:

```
How fast are turtles?
!((0.2 to 0.5 km/h))
```

The text within the double brackets will be hidden, and a clickable arrow will appear in the map view.

### Examples of Stickerwalls
Source: https://www.edumaps.de/1071/1/9ios7o3n40/qyb9u6j00w#p2624

[Example: “Culinary Journey” Map](https://www.edumaps.de/1051/1/iajb8i8w2j/kpcinyrpgz)

[Example: Which city is hidden behind each station? (Germany)](https://www.edumaps.de/1069/1/3520w5a0ne/d174l0etuh)

[Example: Which city is hidden behind each station? (Switzerland)](https://www.edumaps.de/1070/1/ib48gfbdm7/v7qy6yej34)

✔️ Here you can find [example maps with arrows and text fields](https://www.edumaps.de/folder/1030/1/dz6c9xqji5h4/bf3pl22ra5vt).

## 1.9 Movable Images
Source: https://www.edumaps.de/1072/1/vki313ofzb/wy8ff8thb7

### Introduction
Source: https://www.edumaps.de/1072/1/vki313ofzb/wy8ff8thb7#p124

Movable images are available on sticker walls. They are positioned globally on the map.

✔️ With **movable images** you can:

- Upload sketches and photos for brainstorming
- Create maps
- Put together galleries and collages
- Build storyboards and step-by-step instructions
- Create diagrams/charts using image components
- Label images and combine them with text fields/arrows

### Add Image
Source: https://www.edumaps.de/1072/1/vki313ofzb/wy8ff8thb7#p125

The map must be set to the “Sticker Wall” format. Then the three buttons - arrow, text field, and image - will appear in the top right.

Then click on the blue “Image” button and then upload the desired image.
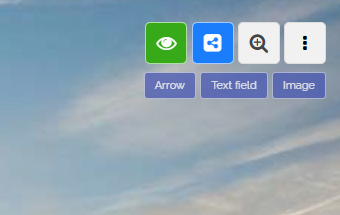
![Add Image](https://www.edumaps.de/file/190438967312751520.png/iyt6whd)

### Options for movable Images
Source: https://www.edumaps.de/1072/1/vki313ofzb/wy8ff8thb7#p126

For a movable image, the following editing options are available:

1. Change position (Move the movement icon)
1. Delete image
1. Lock image (in view)
1. Change rotation
![Movable Images](https://www.edumaps.de/file/5792725802587368846.png/dnfwrrl)

### Locking of Images
Source: https://www.edumaps.de/1072/1/vki313ofzb/wy8ff8thb7#p128

By default, all images in the map view are clickable and will be enlarged upon clicking.

However, if you click on the lock icon, the image will be locked. This means that the image will not be clickable in the map view.

This is useful if, for example, you want to place your logo next to the heading or use maps with text boxes placed on them.

[Example: Which city is hidden behind each station? (Germany)](https://www.edumaps.de/1069/1/3520w5a0ne/d174l0etuh)

### Shortcuts in Edit Mode
Source: https://www.edumaps.de/1072/1/vki313ofzb/wy8ff8thb7#p130

- `Shift I` to add an image
- `Delete` to delete the active image
- `Ctrl C` followed by `Ctrl V` to copy an image
- `Ctrl X` to cut an image

Tip: When rotating, you can align the image more precisely by holding the `Shift` key while rotating.

### Precise Movement of Images
Source: https://www.edumaps.de/1072/1/vki313ofzb/wy8ff8thb7#p131

Positioning an image with the mouse can be imprecise. To position an image more accurately, select the image and then use your keyboard.

Hold down the Shift key and use the arrow keys (`←` `↑` `→` `↓`) to position the image precisely.

You can hold down the Ctrl key instead of Shift to move the image in smaller steps.

### Notes
Source: https://www.edumaps.de/1072/1/vki313ofzb/wy8ff8thb7#p129

Maps can also be created without boxes/columns, but only with images.

## 1.10 Arrows
Source: https://www.edumaps.de/1014/1/wwi7z1fwup/5y0e2va26x

### Introduction
Source: https://www.edumaps.de/1014/1/wwi7z1fwup/5y0e2va26x#p21489

Arrows are available on sticker walls. They are positioned globally on the map.

✔️ With **arrows** you can:

- Visually connect text fields with each other (helpful for brainstorming)
- Mark sequences and process steps (workflows/flowcharts)
- Structure mind maps (branches with text fields)
- Define processes
- Create tree diagrams with text fields

✔️ Here you can find [example maps with arrows and text fields](https://www.edumaps.de/folder/1030/1/dz6c9xqji5h4/bf3pl22ra5vt).

### Add Arrow
Source: https://www.edumaps.de/1014/1/wwi7z1fwup/5y0e2va26x#p1972

The map must be set to the “Sticker Wall” format. You will then find three blue buttons in the top right.

Then click on the blue button “Arrow”, and an arrow will be added to the map.
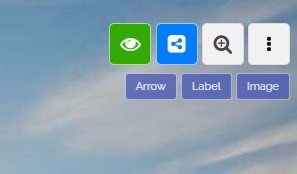
![Add arrow](https://www.edumaps.de/file/13057151869553495019.png/tlrscxi)

### Options for Arrows
Source: https://www.edumaps.de/1014/1/wwi7z1fwup/5y0e2va26x#p21490

In the case of an arrow, the following editing options are available:

1. Change the type of arrow (single, double, line)
1. Change the color of the arrow
1. Choose position (move the move icon or move the arrow itself)
1. Delete arrow
1. Change rotation (with icon at the arrowhead)
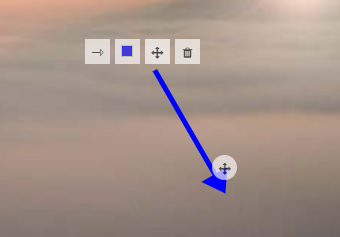
![Arrows on Edumaps](https://www.edumaps.de/file/6838281748977733355.png/8pbkcna)

### Guidelines for Positioning
Source: https://www.edumaps.de/1014/1/wwi7z1fwup/5y0e2va26x#p21491

Arrows should not be placed on elements of a background graphic because these graphics change according to the size of the screen. Resize the browser window to see how the background image scales automatically.

Arrows should always be directed only at boxes, columns, text fields, and other arrows, as these are absolutely positioned.

### Shortcuts in Edit Mode
Source: https://www.edumaps.de/1014/1/wwi7z1fwup/5y0e2va26x#p89

- `Shift A` to add an arrow
- `Del` to delete the active arrow
- `C` to change the color of the arrow
- `Ctrl C` followed by `Ctrl V` to copy an arrow
- `Ctrl X` to cut an arrow

Tip: While rotating, you can align the arrow more precisely by holding the Shift key during the rotation.

### Precise movement of arrows
Source: https://www.edumaps.de/1014/1/wwi7z1fwup/5y0e2va26x#p90

Positioning an arrow with the mouse can be imprecise. To position an arrow more precisely, select the arrow (or add a new one) and then use your keyboard.

Hold down the Shift key and use the cursor keys (`←` `↑` `→` `↓`) to precisely position the arrow.

Instead of Shift, hold Ctrl to move the arrow in smaller increments.

## 1.11 Keyboard Shortcuts
Source: https://www.edumaps.de/1084/1/4ztrw5fusl/3ggshiv0nr

### Introduction
Source: https://www.edumaps.de/1084/1/4ztrw5fusl/3ggshiv0nr#p228

✔️ With **keyboard shortcuts**, you can:

- Quickly access important functions
- Accelerate workflows by reducing mouse clicks
- Better focus, due to less switching between keyboard and mouse

### Keyboard shortcuts in the Map View
Source: https://www.edumaps.de/1084/1/4ztrw5fusl/3ggshiv0nr#p229

- `E` opens the map in edit mode
- `S` opens the map sharing dialog

### Keyboard shortcuts in Edit Mode
Source: https://www.edumaps.de/1084/1/4ztrw5fusl/3ggshiv0nr#p233

- `Shift + C` creates a new column
- `Shift + B` creates a new box
- `Shift + A` create an arrow
- `Shift + T` create a text field
- `Shift + I` create a freely movable image
- `Ctrl + Enter` saves every edit immediately
Mac Cmd + Enter
- `Alt + 1` (or 2, 3, …) toggles the checkboxes in the column settings and box settings
Mac Option + 1 (or 2, 3, …).

**Additional Shortcuts:**

- `S` opens the map sharing dialog
- `V` switches to view mode
- `M` toggles the contents of all boxes on the map

**By Double Click:**

- A double click on the column title opens the column settings.
- A double click on the box title opens the box settings.
- A double click on the box content opens the box editor.

### Keyboard shortcuts in the Box Editor
Source: https://www.edumaps.de/1084/1/4ztrw5fusl/3ggshiv0nr#p234

- `Ctrl + B` for Bold
(Mac Cmd + B)
- `Ctrl + I` for Italic
(Mac Cmd + I)
- `Ctrl + L` to insert Link
(Mac Cmd + L)
- `Ctrl + #` to insert an anchor link
(Mac Cmd + **#**)
- `Ctrl + Shift + L` to insert List or convert selected lines into a list
(Mac Cmd + Shift + L)
- `Ctrl + Shift + O` to insert Ordered List or convert selected lines into a list
(Mac Cmd + Shift + O)
- `Alt + T` for Tooltip (highlight text beforehand)

**Additional Shortcuts:**

- `Shift + Enter` for Line Break (not next paragraph)
- `Ctrl + Alt + Y` for Text-to-speech
- `Ctrl + Shift + S` for Source Code Mode (shows plain Markdown and links)
(Mac Cmd + Shift + S)
- `ESC` closes editor window (without saving)

### Keyboard Shortcuts for Arrow, Text Field and Image
Source: https://www.edumaps.de/1084/1/4ztrw5fusl/3ggshiv0nr#p236

With activated arrow or text field:

- `Del` deletes arrow/text field/image
- `Ctrl + X` to cut
Mac Cmd + X
- `Ctrl + C` to copy
Mac Cmd + C
- `Ctrl + V` to paste
Mac Cmd + V
- `C` to change the color of the arrow/text field

**Additional shortcuts:**

- Hold `Shift` and use the arrow keys (`←` `↑` `→` `↓`) to precisely position the arrow/text field/image.
- Instead of Shift, hold the `Ctrl` key to move the text field in smaller steps.

### Moving the Map View
Source: https://www.edumaps.de/1084/1/4ztrw5fusl/3ggshiv0nr#p238

- Use the arrow keys to move the view left, right, up, and down.
- `Home` moves the map view to the top left (to the beginning of the map).
Fn + ←
- `End` moves the map view to the top right (to the end of the map).
Fn + →

If you hold down the spacebar, you can pan the view by holding down the left mouse button and dragging.

On most mice, this also works by holding down the middle mouse button (pressing the scroll wheel).

### Keyboard shortcuts for full view of a box
Source: https://www.edumaps.de/1084/1/4ztrw5fusl/3ggshiv0nr#p363

- `←` navigate to the previous box
- `→` navigate to the next box
- `+` enlarge the box view
- `-` shrink the box view
- `0` reset the zoom to 100%
- `ESC` closes the full view and returns to the map

### Keyboard shortcuts in the Folder
Source: https://www.edumaps.de/1084/1/4ztrw5fusl/3ggshiv0nr#p237

- `E` opens the Edit mode
- `V` opens the View mode
- `S` opens the Share dialog

### Keyboard shortcuts in the Calendar
Source: https://www.edumaps.de/1084/1/4ztrw5fusl/3ggshiv0nr#p362

- Use the arrow keys `←` `→` to navigate the calendar forward and backward.
- `W` for week view
- `M` for month view
- `T` jumps to today's date (“Today”)
- `Ctrl + F` opens calendar search

## 2.1 Sharing Maps with Links
Source: https://www.edumaps.de/1047/1/siajhiablo/fv6nobr4hp

### Introduction
Source: https://www.edumaps.de/1047/1/siajhiablo/fv6nobr4hp#p876

✔️ At Edumaps, you can quickly and easily share a map using the blue Share button.

✔️ However, you can just as easily distribute it specifically to selected groups and users. This sharing can also be revoked.

✔️ Content can also be partially shared with individual columns.

✔️ As a teacher, you can also make your maps available to your entire school with just one click.

### 🧩 Which sharing option fits?
Source: https://www.edumaps.de/1047/1/siajhiablo/fv6nobr4hp#p984

> Link, group, single box, column, folder or a copy for every student? Answer a few short questions and you land directly at the right solution.

> [👉 Help: Find my sharing option](https://www.edumaps.de/1002/1/f7qkc7nswi6o/3rn7yx2axb6r)

Typical questions it answers:

- Teachers edit, students read
- Every student should get their own copy of the map
- Students submit homework that only I can see
- The whole school should find my map

### Map Sharing Dropdown
Source: https://www.edumaps.de/1047/1/siajhiablo/fv6nobr4hp#p94

You can access the map sharing options by clicking on the blue share icon.
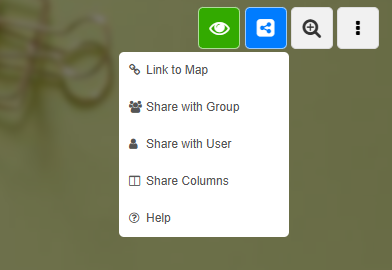
![Map Sharing Dropdown](https://www.edumaps.de/file/16573696503367562021.png/v0wmwym)

In the map share dropdown you will find the following options:

- Link to Map
- Share with Group
- Share with User
- Share Columns

### Link to Map
Source: https://www.edumaps.de/1047/1/siajhiablo/fv6nobr4hp#p1032

The access right can be selected directly in the map sharing dialog:
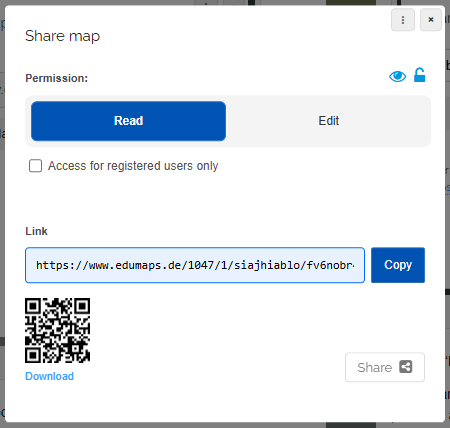
![Dialog for sharing a map](https://www.edumaps.de/file/2078222975892649872.png/5fzvd8l)

Here you can choose “Read Map” or “Edit Map”. You can also specify whether visitors to your map need to be registered with Edumaps.

### What can anonymous users do?
Source: https://www.edumaps.de/1047/1/siajhiablo/fv6nobr4hp#p1033

If you share a link without the option “Access only for registered users”, visitors who are not logged in will work on your map as “Anonymous”.

**Anonymous users can:**

- Create new boxes (including uploads)
- Edit boxes

**Anonymous users cannot:**

- Delete boxes
- Change map data or column data

Logged-in users with an edit link have full access to the map, including changing and deleting columns and boxes.

As the map owner, you can track all changes in the “Map History” and restore previous states.

### Share with Group
Source: https://www.edumaps.de/1047/1/siajhiablo/fv6nobr4hp#p1119

You can share your map directly with one of your groups/classes.
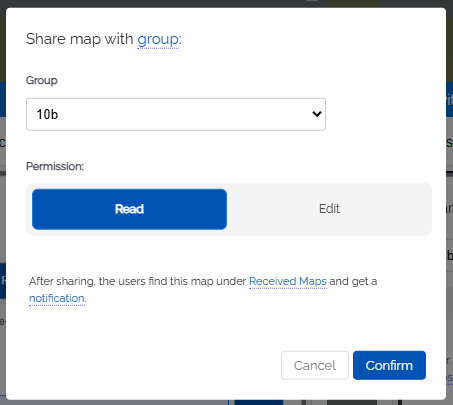
![Share map with group/class](https://www.edumaps.de/file/13192495623588709547.png/2fzf8fy)

Choose “Read Map” or “Edit Map”.

After sharing, the users of this group will find the map in their personal area under [Received](https://www.edumaps.de/user/received).

Additionally, all users (students in the class) will receive a notification on Edumaps, which will also link to the shared map.

### Share with User
Source: https://www.edumaps.de/1047/1/siajhiablo/fv6nobr4hp#p1034

You can share your map to individual users.
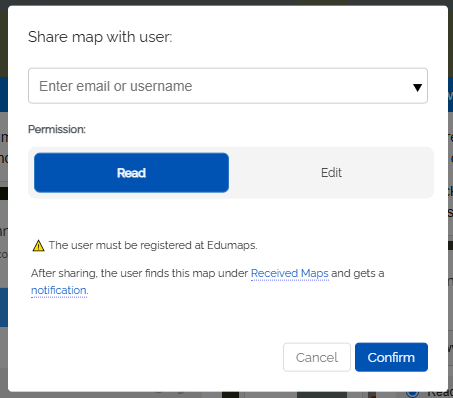
![Share map to user](https://www.edumaps.de/file/5333636076634947231.png/e0zyqp6)

The user must already be registered on Edumaps.

Choose access with “Read map” or “Edit map”.

After sharing, the user will find the map in their personal area under [Received](https://www.edumaps.de/user/received).

Additionally, they will receive a notification on Edumaps, which will also link to the shared map.

### Share Columns
Source: https://www.edumaps.de/1047/1/siajhiablo/fv6nobr4hp#p1035

You can create any number of column links to share selected columns for reading and editing.
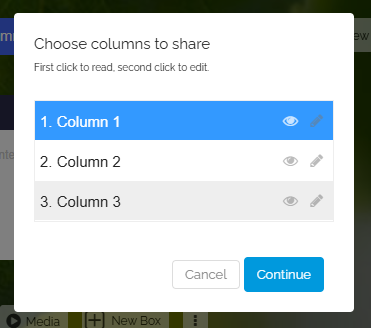
![Share columns](https://www.edumaps.de/file/11608949945934044485.png/ydm5d1i)

With the first click on a column, the column is selected for reading. With the second click for writing.

Click on “Continue”. Now you can give the link a title. Additionally, you can choose whether the visitor needs to log in to access the map.

Click on “Create Link”. Now you can copy the generated link and distribute it to your students.

Tip: All generated links can be edited afterwards and the column accesses changed. To do this, simply click on “Share Column Group” and then in the overview on edit for the column link.

### Protect Map with Password
Source: https://www.edumaps.de/1047/1/siajhiablo/fv6nobr4hp#p253

You can secure your map with a password, ensuring that only users who enter the correct password can view it.

To do this, click the three dots in the map-sharing dialog and select "Set Map Password" from the dropdown.
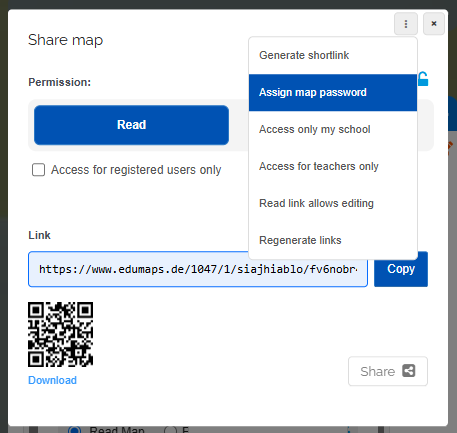
![Map-sharing dialog with password](https://www.edumaps.de/file/8353574089344898179.png/dbkmemm)

Additionally, you can find the map password in the map settings under extras.
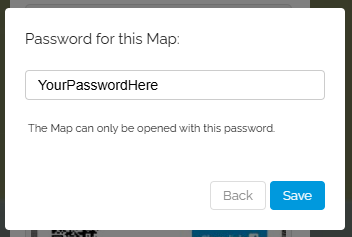
![Set Map Password](https://www.edumaps.de/file/6276747324994414766.png/5ogxpjf)

### Access only my school
Source: https://www.edumaps.de/1047/1/siajhiablo/fv6nobr4hp#p254

You can set that only users who belong to your school (viewable by the school admin in the [“List of Accounts”](https://www.edumaps.de/users/list)) are allowed to open your map. Other users will thereby not have access.

To do this, you can click the three dots in the map sharing dialog and select "Access only my school" from the dropdown.
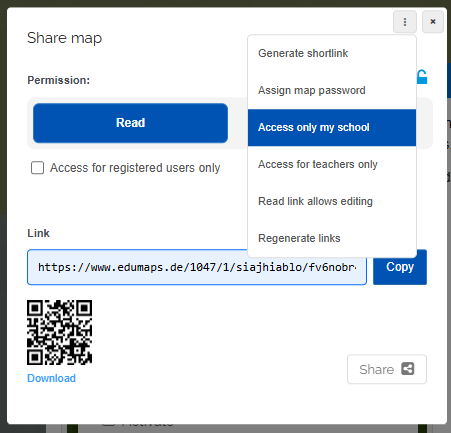
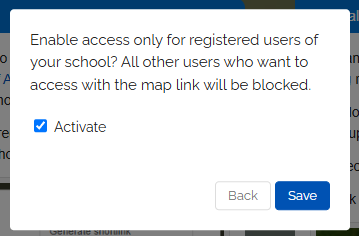
![Option: “Access only my school”](https://www.edumaps.de/file/11049865495254120152.png/k44s4ft)

![Notice about access protection](https://www.edumaps.de/file/18275291789364093349.png/pc4mzbi)

### Special case: Teachers edit, students read
Source: https://www.edumaps.de/1047/1/siajhiablo/fv6nobr4hp#p1344

If you want to share your map with your colleagues for editing and with your students for reading only at the same time, while anonymous users should not have access,

simply create two different links:

**1. Link for teachers (editing):**

1. Open the map sharing dialog.
1. Select “Edit map” and activate “Access only for registered users”.
1. Copy the link and share it with your colleagues.

**2. Link for students (reading):**

1. Open the map sharing dialog again.
1. Select “Read map”. Only activate the registration requirement if your students should be logged in.
1. Copy the link and share it with your students.

Both links work at the same time and permanently. See also: What can anonymous users do?

### Special case: Edit group 1, read group 2
Source: https://www.edumaps.de/1047/1/siajhiablo/fv6nobr4hp#p1954

You want to share your map with two groups that have different permissions. Group 1 may edit, and Group 2 may only view.

1. Click the blue Share Map button and select “Share with group”.
1. Select Group 1 from the dropdown, set the access level to Edit map, and confirm.
1. Click the Share Map button again and select “Share with group”.
1. Now select Group 2, set the access level to “Read map”, and confirm.

Both groups will then find the map on the [“Received”](https://www.edumaps.de/user/received) page and will receive a notification.

Tip: The admin can create groups centrally. All teachers can then adopt them under [Prepared Classes/Groups](https://www.edumaps.de/users/usersets-admin). Changes to the group are managed centrally by the admin.

### Special Case: Edit First, Then Read Only
Source: https://www.edumaps.de/1047/1/siajhiablo/fv6nobr4hp#p1955

You can share your map via a link, initially granting your students editing rights, and later downgrade the link to read-only access.

1. To do this, open the map-sharing dialog and click the three dots in the upper right corner.

1. Select “Read link allows editing”.

1. Click “Activate” and then the “Save” button.
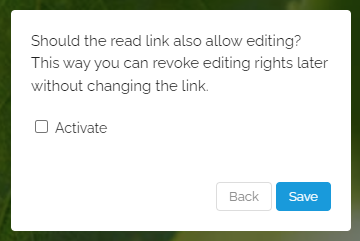
![Image](https://www.edumaps.de/file/17444935856382505982.png/1euodj4)

1. Click on the blue Share button again and copy the link with “Read Map” access rights.

1. When your students open this link, they can edit the map.

If you want to revoke the editing rights later, deactivate the option accordingly. This means the read link will only grant read rights as usual.

Additional Note:

If you use the “Share with group” function, you can share first with editing rights and later share again with read rights. This will overwrite the previous share settings.

### Regenerate links
Source: https://www.edumaps.de/1047/1/siajhiablo/fv6nobr4hp#p255

If you regenerate the map links, existing map links will become invalid and all users who are currently using these links will lose access to the map.
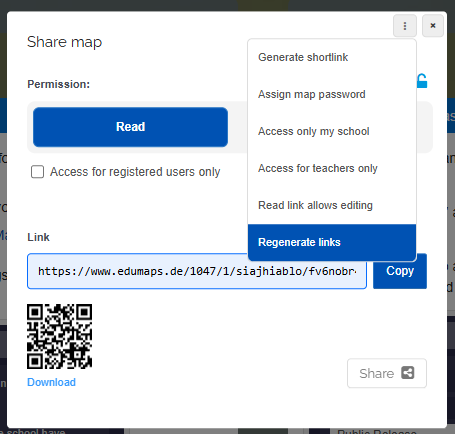
![Option: “Regenerate links”](https://www.edumaps.de/file/4718861366418747198.png/83rfp6k)

### Publish: “My School (Read)”
Source: https://www.edumaps.de/1047/1/siajhiablo/fv6nobr4hp#p875

> Find details in the tutorial:
[Make Maps available within the School](https://www.edumaps.de/1125/1/mlreg4cxu7/w4fgav3s7p)

- You want to share your map for **all** teachers and students in your school to read.
- Users who do not belong to your school should not have access.
- The map appears on page [“Maps of my School”](https://www.edumaps.de/maps/school).

To do this, open the map settings and click on “Publish” and select “My School (Read)”.
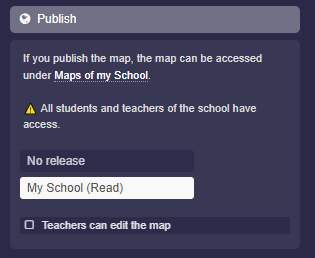
![Publish to “My School (Read)”](https://www.edumaps.de/file/4319777730896990970.png/y00hfqo)

Save your map and the map will immediately be available to all members of your school at [“Maps of my school”](https://www.edumaps.de/maps/school).

### Publish: “Public Release”
Source: https://www.edumaps.de/1047/1/siajhiablo/fv6nobr4hp#p461

Under “Publish”, you can make the map discoverable across the entire internet.

Select “Public Release” and save the map - this will make the map publicly available.

In addition, you need to activate your [public profile page](https://www.edumaps.de/1087/1/qerwrf9nfe/o1gpolryps) so that your maps can be found and other users can follow you.
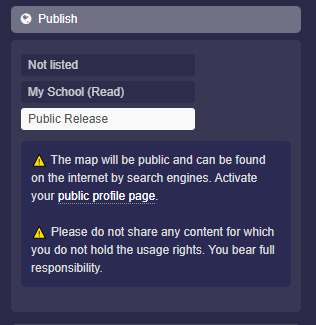
![Public Release of the Map](https://www.edumaps.de/file/7578450431972929701.png/n1pdqdn)

⚠️ The map is public and can be found on the internet by search engines.

⚠️ Do not share content for which you do not have usage rights. You bear full responsibility.

## 2.2 Make Maps available within the School
Source: https://www.edumaps.de/1125/1/mlreg4cxu7/w4fgav3s7p

### Introduction
Source: https://www.edumaps.de/1125/1/mlreg4cxu7/w4fgav3s7p#p4227

✔️ With Edumaps, you can easily make your maps available to all teachers and students at your school.

✔️ You can also share maps specifically with selected groups and users only.

**Notes**

- "Publish" determines where a map is visibly offered.
- "Protect" limits who is allowed to open a map.
- "Share" grants specific access to classes and users.

### Publish to Entire School
Source: https://www.edumaps.de/1125/1/mlreg4cxu7/w4fgav3s7p#p4229

> You can publish a map so that it is displayed to all members of your school on the ["My School"](https://www.edumaps.de/maps/school) page.

To do this, use the "Publish" category in the map settings.

You can open the map settings as follows:

1. Click the red edit icon at the top right of the map.
1. Click on the map title.
1. The map settings will open in the sidebar.
1. Click on "Publish"
1. Activate "My School (Read)" and save.

This results in the following:

1. The map appears on the ["My School"](https://www.edumaps.de/maps/school) page.
1. All teachers and students have access to the page and therefore to your map.
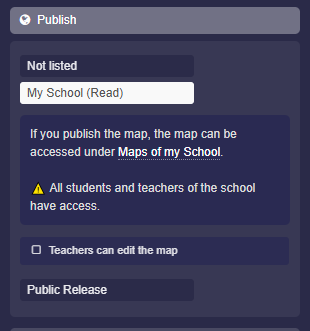
![Publish for "My School (Read)"](https://www.edumaps.de/file/7912104353563399916.png/is7kqsc)

### Publish to Entire School - Students Can Read, Teachers Can Edit
Source: https://www.edumaps.de/1125/1/mlreg4cxu7/w4fgav3s7p#p4230

If you share a map with the school, you can also specify in the map settings under "Publish" that teachers are allowed to edit the map.

This means teachers will find the map linked for editing on the "My School" page. Students, however, will still only have read access.
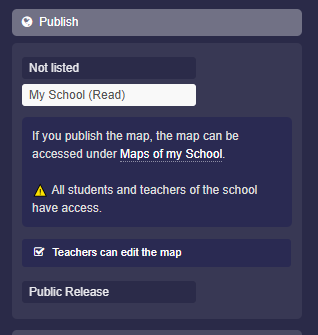
![Publish for "My School (Read)"](https://www.edumaps.de/file/7037773137591267334.png/641w70d)
with editing rights for teachers

### Access Only for Members of My School
Source: https://www.edumaps.de/1125/1/mlreg4cxu7/w4fgav3s7p#p4231

You can set that only users who belong to your school (viewable in the ["List of all accounts"](https://www.edumaps.de/users/list)) are allowed to open your map. Other users will not have access.

To do this, activate the option "Access only for registered users of my school" in the map settings under "Protect".
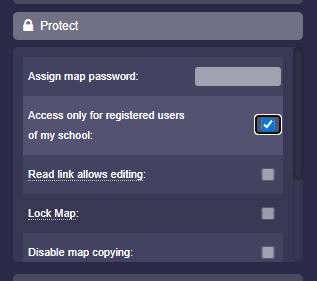
![Option: "Access only for registered users of my school"](https://www.edumaps.de/file/18108184032951437695.png/9hyh0qc)

### Protect Map with Password
Source: https://www.edumaps.de/1125/1/mlreg4cxu7/w4fgav3s7p#p4232

You can assign a password to your map. The map will then only be shown to users who enter the correct password.

To do this, you will find an input field for the map password in the map settings under "Protect".
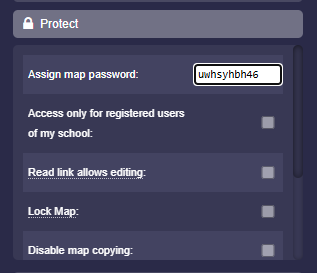
![Assign password to map](https://www.edumaps.de/file/9696185051289052496.png/u594erq)

### Individual Sharing of the Map
Source: https://www.edumaps.de/1125/1/mlreg4cxu7/w4fgav3s7p#p4233

You can share your map individually via the map sharing dropdown.

![Map sharing dropdown](https://www.edumaps.de/file/16573696503367562021.png/v0wmwym)

In the map sharing dropdown, you will find the following options:

- Link to Map
- Share with Group
- Share with User
- Share Columns

> These options are explained here: [Tutorial: Sharing maps with links](https://www.edumaps.de/1047/1/siajhiablo/fv6nobr4hp)

### Additional: Public Release of a Map
Source: https://www.edumaps.de/1125/1/mlreg4cxu7/w4fgav3s7p#p4234

This option is not intended for internal school sharing, but it is still a way to publish a map.

Under "Publish", you can make the map discoverable for the entire internet.

Select "Public Release" and save the map to make it publicly available.

In addition, you must activate your [public profile page](https://www.edumaps.de/1087/1/qerwrf9nfe/o1gpolryps) so that the maps can be found.
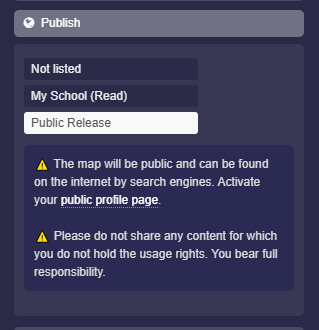
![Image](https://www.edumaps.de/file/10238197244220007954.png/sx2y54d)

⚠️ The map will be public and can be found on the internet by search engines.

⚠️ Do not share any content for which you do not have usage rights. You bear full responsibility.

## 2.3 Sharing Columns
Source: https://www.edumaps.de/1099/1/8c1r73m85c/ly9pqzltsw

### Introduction
Source: https://www.edumaps.de/1099/1/8c1r73m85c/ly9pqzltsw#p2632

✔️ With Edumaps, you can share individual columns or custom **groups of columns**.

✔️ You can allow editing of some columns while making others read-only.

✔️ Links for columns can be edited and adjusted at any time.

### Access sharing by columns
Source: https://www.edumaps.de/1099/1/8c1r73m85c/ly9pqzltsw#p2634

You will find the “Share Columns” options in the menu that opens when you click the blue share icon at the top right.

![Menu for sharing the map](https://www.edumaps.de/file/16573696503367562021.png/v0wmwym)

Click “Share Columns” from the dropdown to open the following dialog:
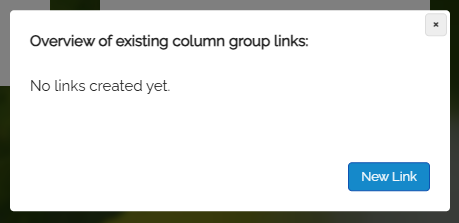
![Dialog: Overview of existing column links](https://www.edumaps.de/file/14521050302575915880.png/waey8xm)

Click the button “New Link”.

### Create a link for columns
Source: https://www.edumaps.de/1099/1/8c1r73m85c/ly9pqzltsw#p2635

You can now individually select the columns you want to share.
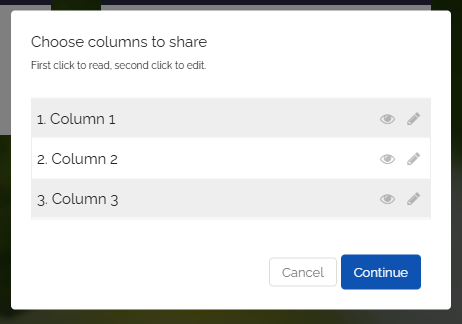
![Dialog: Select columns to share](https://www.edumaps.de/file/10073730089803094699.png/z7crf32)

The **first click** on a column selects it as read-only.

The **second click** allows editing.
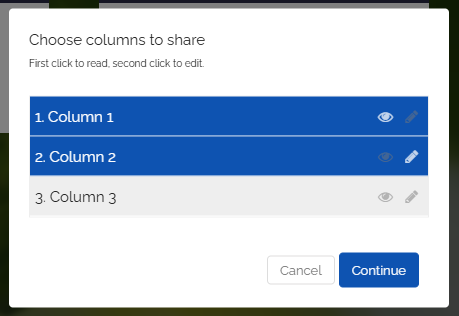
![Read or Edit Rights visible on the right](https://www.edumaps.de/file/11385559585160793847.png/ys193it)

Click the “Continue” button.

Next, you can give the link a title. You can also choose whether visitors need to log in to access the map.
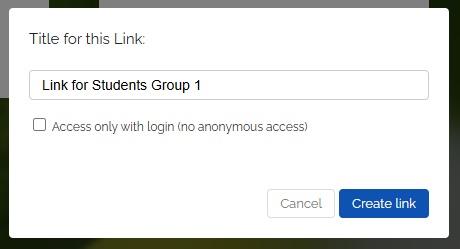
![Title for the link to column group](https://www.edumaps.de/file/12988600561974127525.png/7xna2kk)

Click “Create link”. You can now copy the generated link and distribute it to your students.
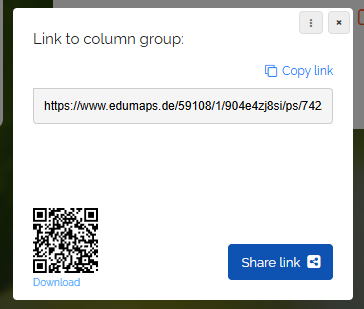
![Copy link to column group](https://www.edumaps.de/file/3218181393237824272.png/aauip06)

Tip: Use the QR code as well, which your students can conveniently scan with their phone or tablet.

### Edit or delete an existing Link
Source: https://www.edumaps.de/1099/1/8c1r73m85c/ly9pqzltsw#p2636

All created links can be edited afterwards and the column access rights changed or even removed.

Simply click the blue share button and select "Share columns".

An overview of all column group links you've already created will appear.
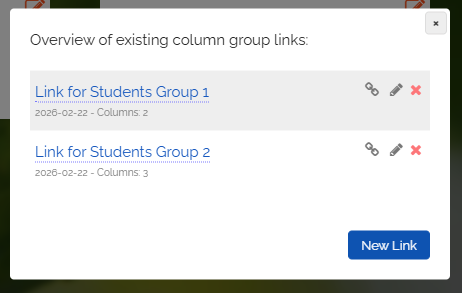
![Overview of existing column group links](https://www.edumaps.de/file/13797833216771532417.png/tmpou0i)

1. Click the link icon to copy the link.
1. Click the pencil icon to edit the link.
1. Click the red cross icon to delete the link.

Click the pencil icon, and the following dialog appears:
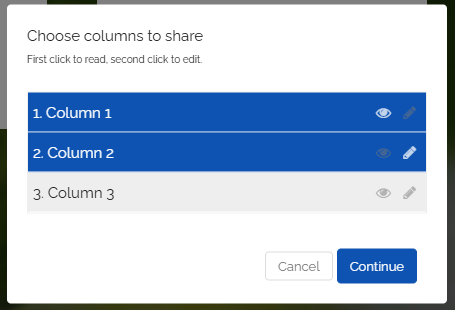
![Edit columns for existing link](https://www.edumaps.de/file/5230301523216957834.png/p5vevxm)

Click the respective columns to set permissions:

> First click is read-only,
second click is edit,
third click removes all permissions for the column.

Click “Continue”; you can optionally change the title and enable “Access only with login”. Then click “Save”. The sharing dialog will be displayed.

It is the same link as before. Your students can still use the same link.

## 2.4 Share a Single Box
Source: https://www.edumaps.de/1082/1/c968s4u3fmp7/dow0gnvczk1m

### Introduction
Source: https://www.edumaps.de/1082/1/c968s4u3fmp7/dow0gnvczk1m#p1956

✔️ With Edumaps you can share every **single box** via link or QR code, either for reading or for editing.

✔️ You choose whether the recipient sees only the single box or the entire map with the box highlighted.

✔️ Ideal for homework submissions, group work, and distributing individual materials.

### Open the share dialog
Source: https://www.edumaps.de/1082/1/c968s4u3fmp7/dow0gnvczk1m#p1958

Open your map in edit mode.

Click the three dots on the desired box and select “Share” in the dropdown.
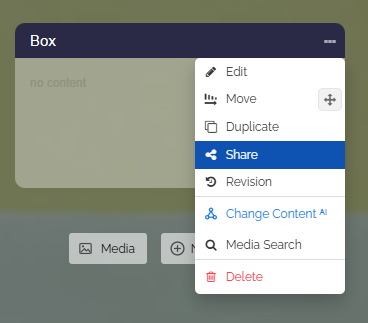
![Box menu with “Share” entry](https://www.edumaps.de/file/18204438655942754730.png/m770kjr)

The “Share box” dialog opens with the following options:

- Display: “Single box” or “Box on map”
- Permission: “Read” or “Edit”
- Link with copy button
- QR code for download
- Share button
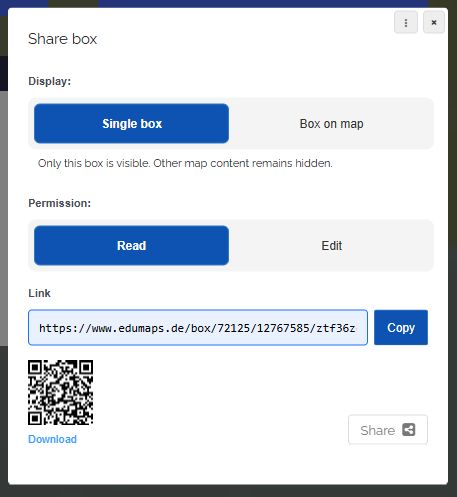
![“Share box” dialog (full view)](https://www.edumaps.de/file/16388910251903720384.png/u9ghf8g)

### Display: Single box or Box on map
Source: https://www.edumaps.de/1082/1/c968s4u3fmp7/dow0gnvczk1m#p1959

Under “Display” you define what the recipient sees when opening the link.

**1. Single box**

Only this box is visible. All other contents of the map remain hidden.

This option is suitable when the recipient should focus on this one box only, for example for submissions or individual tasks.

![Dialog with option “Single box” selected](https://www.edumaps.de/file/16388910251903720384.png/u9ghf8g)

**2. Box on map**

The entire map is visible. When opened, the view jumps to the box and the box is highlighted.

This option is suitable when you want to draw attention to a specific box while the recipient keeps the context of the whole map.
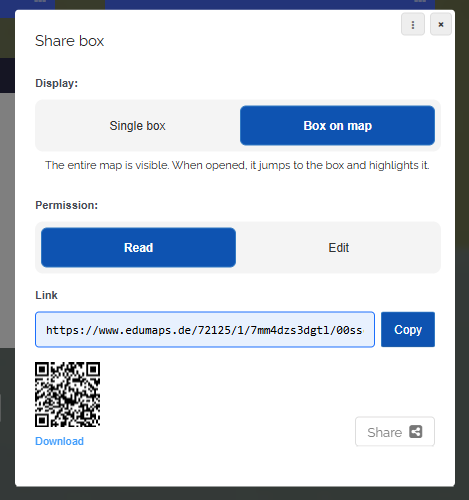
![Dialog with option “Box on map” selected](https://www.edumaps.de/file/15767983186312277148.png/mfrqzv0)

### Permission: Read or Edit
Source: https://www.edumaps.de/1082/1/c968s4u3fmp7/dow0gnvczk1m#p1960

Under “Permission” you define what the recipient is allowed to do with the box.

**1. Read**

The recipient can view the box and its contents but cannot change anything.

**2. Edit**

The recipient can change the content of the box and add their own content (texts, uploads).

Note: The permission applies to this box only. The recipient does not receive editing rights for other boxes or the map.

### Copy link, QR code, and share button
Source: https://www.edumaps.de/1082/1/c968s4u3fmp7/dow0gnvczk1m#p1961

**Copy link**

Click the “Copy” button to copy the box link to the clipboard. Then distribute it via your usual communication channel.

**QR code**

The dialog automatically generates a QR code for the link. Your students can conveniently scan it with a phone or tablet.

Click “Download” to save the QR code as an image, for example for a worksheet or a presentation.

**Share button**

Clicking “Share” opens your device's share menu (on smartphones and tablets). This way you send the link directly to an app such as email or messenger.

### What does the recipient see?
Source: https://www.edumaps.de/1082/1/c968s4u3fmp7/dow0gnvczk1m#p1962

**With “Single box”:**

The recipient sees only the shared box in a dedicated view. All other columns and boxes of the map remain hidden.
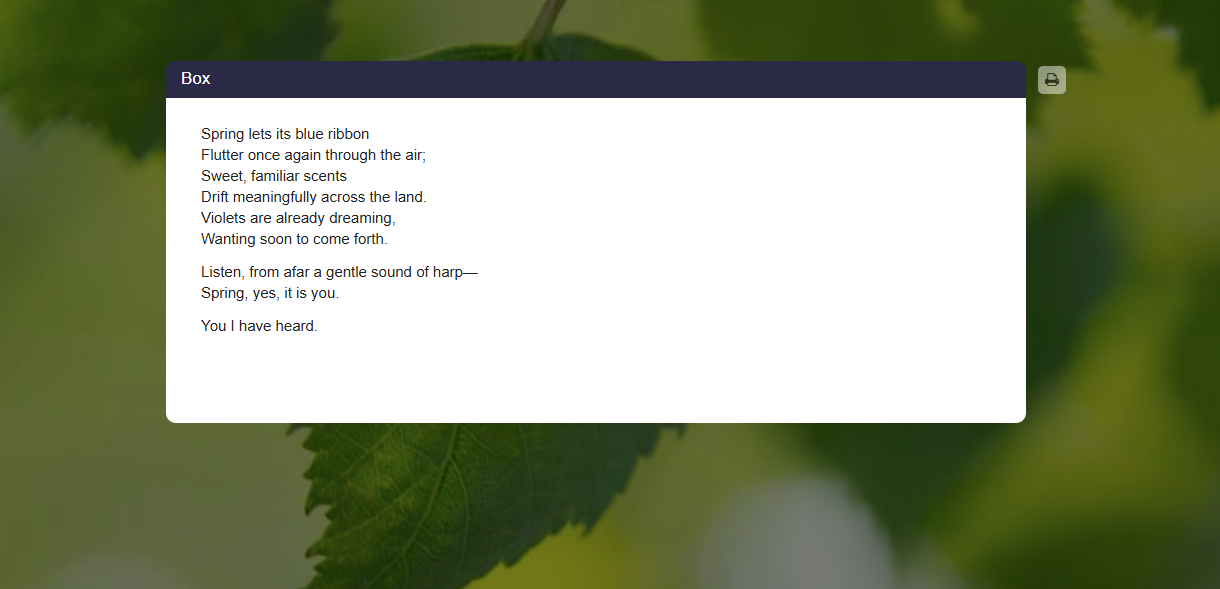
![Recipient view single box](https://www.edumaps.de/file/11196878345476484153.png/0eda6pn)

**With “Box on map”:**

The recipient sees the entire map. When opened, the view automatically scrolls to the shared box and the box is highlighted.
![Recipient view box on map (highlighted box)](https://www.edumaps.de/file/8706996266809045399.png/5fg9dei)

### Scenario: Homework submission
Source: https://www.edumaps.de/1082/1/c968s4u3fmp7/dow0gnvczk1m#p2531

With a shared single box you set up a private submission in just a few steps:

1. Create a box with the assignment.
1. In the box settings, enable “Comments” and select “Only me”.
1. Share the box with display “Single box” and permission “Read”.

Your students open the link, see only the assignment, and submit their solution as a comment, with text, photo upload, or audio recording.

Since the comments are set to “Only me”, only the teacher sees the submissions. The students do not see each other's solutions.

### Scenario: Group work
Source: https://www.edumaps.de/1082/1/c968s4u3fmp7/dow0gnvczk1m#p7003

Assign each student or each group their own box:

1. Create one box per student or group (for example with the name in the box title).
1. Share each box individually with display “Single box” and permission “Edit”.
1. Distribute each link to the respective student or group.

Each student works focused in their own box without seeing the other boxes.

As the teacher, you see all edits arrive on your map combined and **in real time**.

### Notes
Source: https://www.edumaps.de/1082/1/c968s4u3fmp7/dow0gnvczk1m#p7004

- If you want to bundle several boxes with different rights in one link, place each box in its own column and use [sharing with column groups](https://www.edumaps.de/1099/1/8c1r73m85c/ly9pqzltsw).

- If a box should remain protected from editing when sharing the whole map, use the “Protect box” option, see [box settings](https://www.edumaps.de/1078/1/qbg4lumykj/2eycvzchpw).

## 2.5 Distribute a Map to a Group: Everyone Gets Their Own Copy
Source: https://www.edumaps.de/1163/1/xifijbym0eaw/mzbs9odqd8v4

### Introduction
Source: https://www.edumaps.de/1163/1/xifijbym0eaw/mzbs9odqd8v4#p7021

✔️ With Edumaps you can **distribute** a map to a class or group. Every recipient automatically receives their **own copy** of the map.

✔️ Everyone works undisturbed in their own copy, without getting in each other's way.

✔️ Ideal for weekly plans, practice maps, self-study material and portfolio work.

### When to Use What? Sharing or Distributing
Source: https://www.edumaps.de/1163/1/xifijbym0eaw/mzbs9odqd8v4#p7023

Sharing and distributing solve different tasks:

| Function | Result | Suitable for |
| --- | --- | --- |
| Share with Group | Everyone works on **one** shared map | Collections, brainstorming, class pinboard |
| Share a Single Box | Everyone works on one map, each in **their own** box | Submissions, group work with overview |
| Distribute to Group | Everyone gets their **own copy** of the entire map | Weekly plans, practice maps, portfolios |

📖 Tutorials: [Sharing Maps with Links](https://www.edumaps.de/1047/1/siajhiablo/fv6nobr4hp) and [Sharing a Single Box](https://www.edumaps.de/1082/1/c968s4u3fmp7/dow0gnvczk1m)

### Prerequisite: Class or Group
Source: https://www.edumaps.de/1163/1/xifijbym0eaw/mzbs9odqd8v4#p7024

To distribute a map, you need a [class or group](https://www.edumaps.de/users/usersets) on Edumaps with your students as members.

Tip: The admin can create classes centrally. All teachers can then adopt them under [Prepared Classes/Groups](https://www.edumaps.de/users/usersets-admin).

### Distribute a Map to a Group
Source: https://www.edumaps.de/1163/1/xifijbym0eaw/mzbs9odqd8v4#p7025

Open your map and click on the three dots in the top right corner.
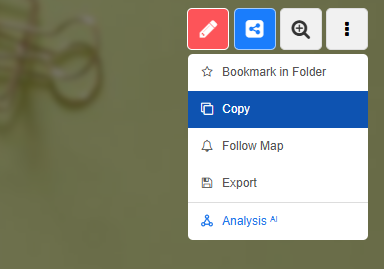
![Image](https://www.edumaps.de/file/4798439641731898551.png/odq9gw7)

Select "Copy" in the dropdown and click "Distribute to Group" in the dialog that opens.
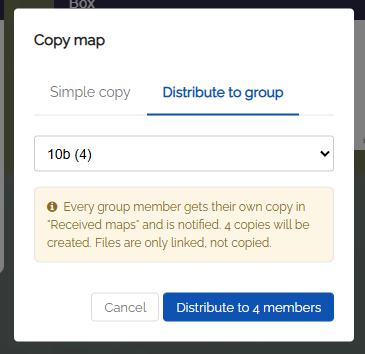
!["Copy Map" dialog with the option "Distribute to Group"](https://www.edumaps.de/file/3328425078161552365.png/12v3tzr)

Select the desired class or group in the dropdown and confirm.

A separate copy of the map is then created automatically for every member of the group.
![Success message with a link to the new folder](https://www.edumaps.de/file/16578099308505878780.png/2x8swfw)

Click "Open Folder" to go directly to the newly created folder containing all map copies.
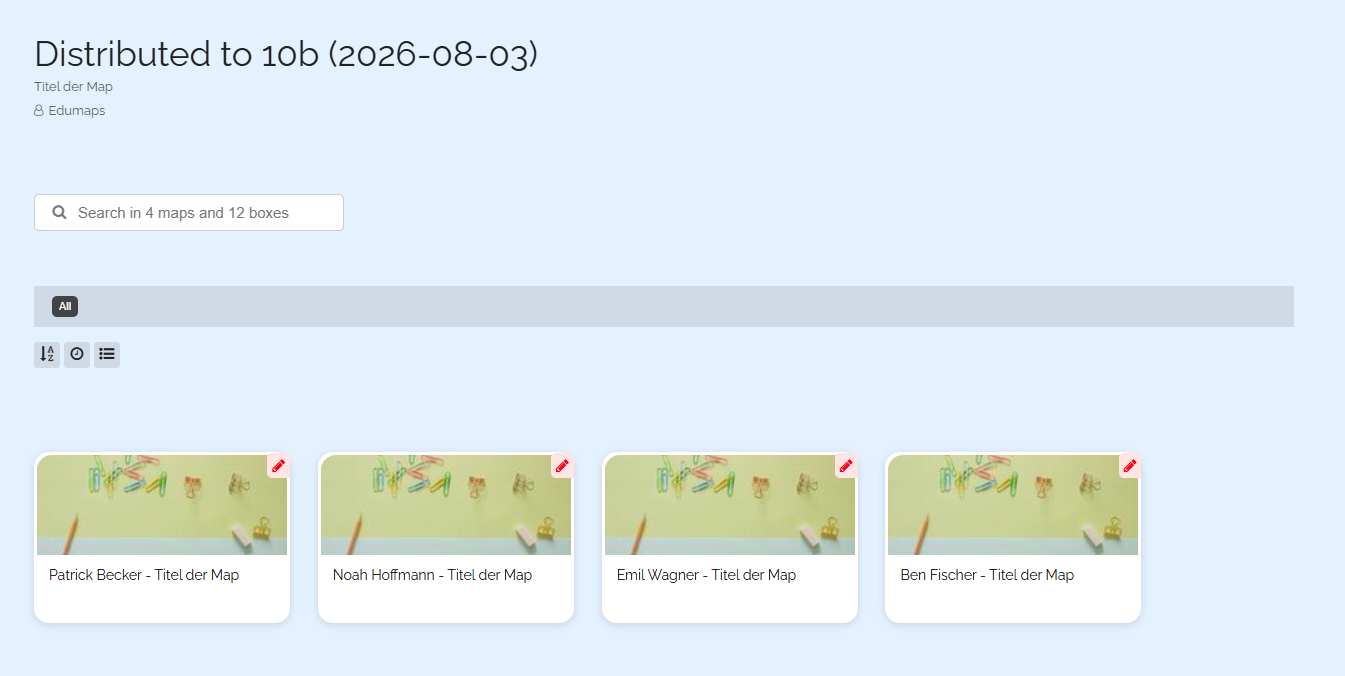
![Automatically created folder with all map copies](https://www.edumaps.de/file/2011160648851344344.png/s5nskfs)

Each copied map carries the name of the recipient (student) in the map title.

### What Do the Recipients Get?
Source: https://www.edumaps.de/1163/1/xifijbym0eaw/mzbs9odqd8v4#p7026

Every member of the group is assigned their **own copy** of the map.

- You as the teacher are the owner of every copied map.
- The recipient receives access to their map (editing rights). They find the map in their personal area under ["Received"](https://www.edumaps.de/user/received).
- The recipient receives a notification on Edumaps.
- Every recipient edits only their own copy. The maps of other students are not visible to them.

### Copies Are Independent of the Original
Source: https://www.edumaps.de/1163/1/xifijbym0eaw/mzbs9odqd8v4#p7027

The distributed copies are independent maps.

If you change the original later, the copies that were already distributed remain unchanged. The copies do not receive any updates from the original.

**Exception: Embedded Content**

If a [column](https://www.edumaps.de/1081/1/jfb6vptvgo/0g56y4cjyr) or [box](https://www.edumaps.de/1074/1/33kpbdv4am/784k8u8m6f) from another map was **embedded** in the map before distributing, this embedding remains active in the copies as well. The embedded content continues to show the current state.

Tip: This lets you combine both deliberately. Fixed content (tasks, material) belongs directly in the map. Continuously maintained content (e.g. dates) should be embedded as a column before distributing, then it stays up to date in all copies.

📖 Tutorial: [Embed External Columns](https://www.edumaps.de/1081/1/jfb6vptvgo/0g56y4cjyr)
📖 Tutorial: [Embed External Boxes](https://www.edumaps.de/1074/1/33kpbdv4am/784k8u8m6f)

### Distributing to the Same Group Again
Source: https://www.edumaps.de/1163/1/xifijbym0eaw/mzbs9odqd8v4#p7028

You can distribute the same map to the group again at a later time.

This creates **new copies**. Existing copies are not overwritten and not updated.

A new folder containing the copies is created as well.

Tip: Adjust the map title before distributing again (e.g. "Weekly Plan Week 34" instead of just "Weekly Plan") so the recipients can tell their copies apart.

### Typical Use Cases
Source: https://www.edumaps.de/1163/1/xifijbym0eaw/mzbs9odqd8v4#p7029

**Weekly Plan**

Every student checks off the tasks in their own copy and keeps track of their personal progress.

**Practice Map**

Distribute exercises with checklist or quiz boxes. Everyone practices at their own pace without seeing the results of others.

**Portfolio**

Distribute a prepared portfolio structure. Every student fills their copy with their own content over the school year.

### Notes
Source: https://www.edumaps.de/1163/1/xifijbym0eaw/mzbs9odqd8v4#p7030

- Via the automatically created folder you can open each student copy individually.

- You find all created copies under ["My Maps"](https://www.edumaps.de/user/maps). Each recipient only has access to their own map. You as the teacher are the owner of all maps.

- You can manage or delete the copies centrally via the folder, since all maps belong to you.

- If you want to see your students' work directly on your own map, use [Sharing a Single Box](https://www.edumaps.de/1082/1/c968s4u3fmp7/dow0gnvczk1m) or [Sharing Columns](https://www.edumaps.de/1099/1/8c1r73m85c/ly9pqzltsw) instead. There, all edits arrive directly on your map.

- If everyone should work together on **one** map, use the blue Share button in the top right corner and select "Share with Group", see [Sharing Maps with Links](https://www.edumaps.de/1047/1/siajhiablo/fv6nobr4hp).

## 2.6 Using Folders: Remember, Share and Search Maps
Source: https://www.edumaps.de/1057/1/ruqcqtexz1/qz34252w7n

### Introduction
Source: https://www.edumaps.de/1057/1/ruqcqtexz1/qz34252w7n#p1234

✔️ With folders you can:

- Collect important maps in one central place
- Compile and distribute maps
- Represent higher-level structures
- Compile maps into folders together with others (collaboration)

> A folder contains **references to maps**. The map itself remains in its original storage location and can be saved in multiple folders at the same time.

### Create new Folder
Source: https://www.edumaps.de/1057/1/ruqcqtexz1/qz34252w7n#p1235

On the [“My Folders”](https://www.edumaps.de/user/folders) page, you will see several folders that every user has by default.

To create a folder, click the “New folder” button.
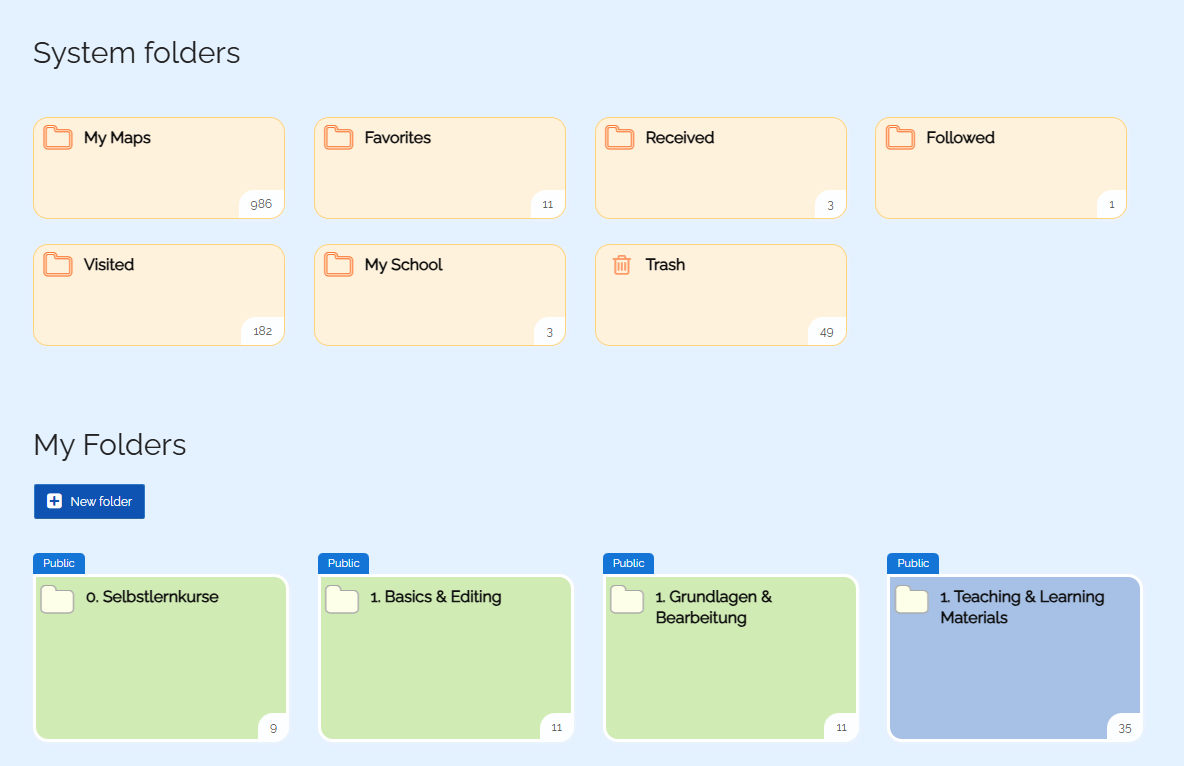
![List of all folders and the “Create new folder” button](https://www.edumaps.de/file/5531019559348690095.png/f9wlm6e)

When you create a new folder, it is added to the folder list under “My Folders”.

### Folder Settings
Source: https://www.edumaps.de/1057/1/ruqcqtexz1/qz34252w7n#p4211

Click on the folder title above to open the folder settings.
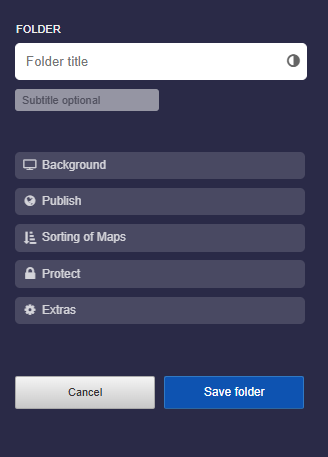
![Folder Settings](https://www.edumaps.de/file/378456618396699237.png/r3s7dfk)

Here you can configure the following settings:

1. Background
1. Publish
1. Sorting of Maps
1. Protect
1. Extras

### Details about Folder Settings
Source: https://www.edumaps.de/1057/1/ruqcqtexz1/qz34252w7n#p4212

In the folder settings, you can assign a title and subtitle to the folder.

**1. Background**

Choose a predefined color or a background image. You can darken the background and enable blur.

**2. Publish**

By default, every folder is private (not listed). However, you can share your folder with [“My School”](https://www.edumaps.de/maps/school) or on your public profile.

**3. Sorting of Maps**

Here you can define the arrangement of the maps within the folder.

**4. Protect**

Each folder can be password-protected. In addition, you can use the option “Access only for registered users of my school” to prevent other users from accessing the folder.

**5. Extras**

Here you can set the language of the folder. This is helpful if you have multiple folders/maps in different languages on your public profile. A language filter dropdown will then appear.

### Add a Map to a Folder
Source: https://www.edumaps.de/1057/1/ruqcqtexz1/qz34252w7n#p1294

If you are in a folder, you can click the “Add map” button. The following selection will then appear:
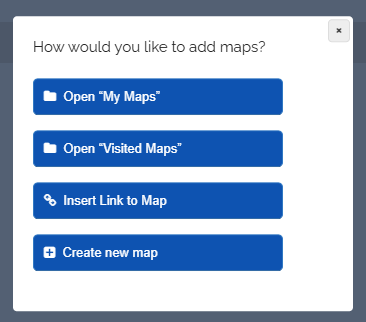
![Selection for adding maps](https://www.edumaps.de/file/6265039669520108437.png/p1ukk67)

1. [My Maps](https://www.edumaps.de/user/maps)
1. [Visited Maps](https://www.edumaps.de/user/maps-visited)
1. Select “Insert Link to Map” to paste a map link into the input field that opens.
1. Create a new map directly in the folder.

### Add Map via “My Maps” or “Visited Maps”
Source: https://www.edumaps.de/1057/1/ruqcqtexz1/qz34252w7n#p1295

To add a map, select [“My Maps”](https://www.edumaps.de/user/maps) or [“Visited Maps”](https://www.edumaps.de/user/maps-visited), and you will be redirected to the corresponding page.

There you can select the desired map by clicking on a red cross.
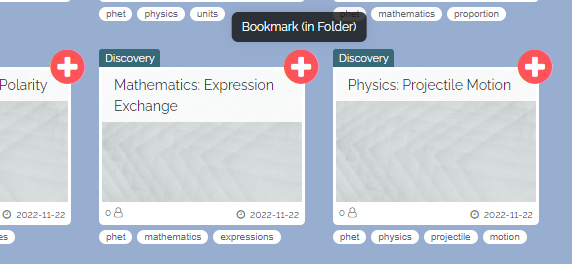
![Select Map in Map List](https://www.edumaps.de/file/1504345189925969439.png/atelkj2)

A dialog will then appear for selecting your folder and with which permissions the map should be stored there.
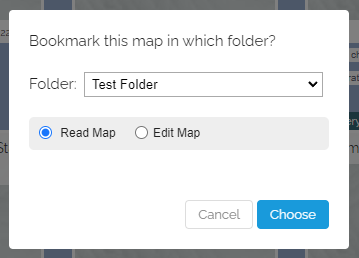
![Folder Selection for Saving the Map](https://www.edumaps.de/file/8740454462800161041.png/1yfysw2)

You can specify whether the map in the folder can only be viewed or also edited - depending on what rights you have to the map yourself.

### Add a map using a map link
Source: https://www.edumaps.de/1057/1/ruqcqtexz1/qz34252w7n#p1237

You can add any map directly to one of your folders using the map link.

- Copy the link to the map (from the map-sharing dialog).
- Go to the page [“My Folders”](https://www.edumaps.de/user/folders).
- Click on the button “Add Map”.
- Insert the link to the map.
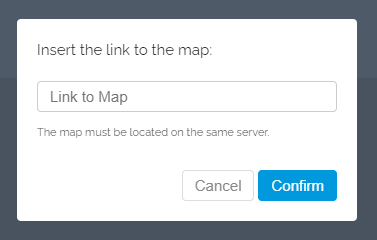
![Add map via link](https://www.edumaps.de/file/5820245933146251644.png/0dgr35o)

### Add active map to a folder via the map menu
Source: https://www.edumaps.de/1057/1/ruqcqtexz1/qz34252w7n#p1236

You can save any map directly to one of your folders. Here’s how:

1. When you have a map open, click on the map menu at the top right.
1. In the dropdown, select the entry “Bookmark (in folder)”.
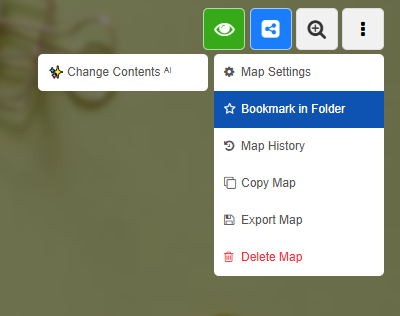
![Bookmark in folder](https://www.edumaps.de/file/7041291458674499754.png/e8vmvrt)

1. Now choose the folder where you want to save this map.
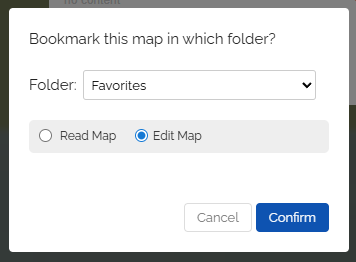
![Select folder](https://www.edumaps.de/file/1995199449411868381.png/9sh7sfq)

1. The map is now in the selected folder.

💖 A map can be saved in any number of folders.

💖 You can also save maps from other users.

### Bookmark external Folder
Source: https://www.edumaps.de/1057/1/ruqcqtexz1/qz34252w7n#p1241

You have the option to bookmark folders from other users.

Open the folder and then click on the star icon.
![External Folder Bookmark](https://www.edumaps.de/file/540751602582985290.png/ygzcq9x)

Afterwards, you will find the folder in [“External Folders”](https://www.edumaps.de/user/folders?ext).

Alternatively, you can use the “Add map via link” function.

### Removing map from Folder
Source: https://www.edumaps.de/1057/1/ruqcqtexz1/qz34252w7n#p99

You can remove any map and any folder from the folder again.

1. Click the red edit button for this purpose.
![Edit folder](https://www.edumaps.de/file/3348787443409138587.png/72twiml)

1. Then click on the red-white trash can icon.
![Remove map](https://www.edumaps.de/file/16696616311524463521.png/uvfx99p)

Afterwards, the map is removed.

The map itself is not deleted here, only the reference to the map in your folder is removed.

### Saving Folder inside Folder
Source: https://www.edumaps.de/1057/1/ruqcqtexz1/qz34252w7n#p100

You can save not only maps, but also entire folders inside another folder. This allows you to structure larger collections clearly, for example by topics, classes, projects, or school years.

Go to your folder, click the red edit icon, and then click the **“Add folder”** button. The following dialog will open:
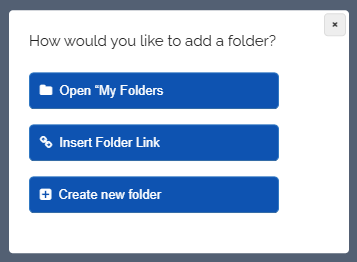
![Add a folder to a folder](https://www.edumaps.de/file/13862576503045607790.png/h1d8125)

Select the appropriate option and add another folder to the current folder.

Saved folders are not moved or deleted. They will additionally appear in your folder and can still be opened in their original location.

### Sorting of Maps in the Folder
Source: https://www.edumaps.de/1057/1/ruqcqtexz1/qz34252w7n#p4213

You have the option to change the sorting of maps within the folder.

There, you can choose between four sorting options:

- Newly added maps first
- Newly added maps at the end
- By map title A - Z
- By map creation date

This sorting is applied when the folder is opened for the first time.

Please note: Folders within folders are always sorted alphabetically.

### Content search through all maps in folder
Source: https://www.edumaps.de/1057/1/ruqcqtexz1/qz34252w7n#p1345

In each folder, you will find a search function that allows you to search through all the maps present there, including all the boxes located on these maps.
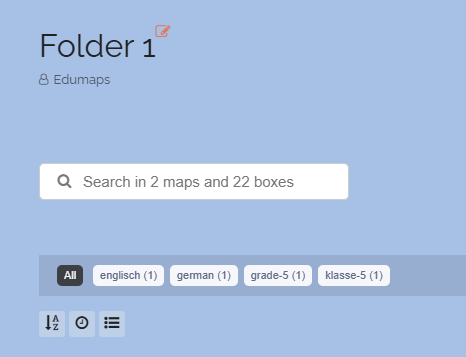
![Search for Maps and Box Contents](https://www.edumaps.de/file/15551698214479450689.png/kt06v6m)

You can save multiple maps from your colleagues in a folder and then search through the contents of all these maps using the folder search function.

Example: You can search for a name of a student or a device name for lending purposes, and only maps will be displayed where boxes containing this search term are found. When you click on the map, the corresponding map will open, and only the box with the term will be displayed.

The search for boxes works in all folders as well as globally on the “My Maps” page.

## 2.7 Sharing Folders with Links & Advanced Features
Source: https://www.edumaps.de/1083/1/e73ynks5ak/7maszk7xlr

### Introduction
Source: https://www.edumaps.de/1083/1/e73ynks5ak/7maszk7xlr#p219

✔️ With folders you can:

- Centrally collect important maps
- Compile and distribute maps
- Depict overarching structures
- Compile maps in folders with others (collaboration)

Here you can find the [Tutorial: Using Folders: Remember, Share and Search Maps](https://www.edumaps.de/1057/1/ruqcqtexz1/qz34252w7n).

### Share folder via link
Source: https://www.edumaps.de/1083/1/e73ynks5ak/7maszk7xlr#p220

You can share your folder. To do this, click on the blue share icon:
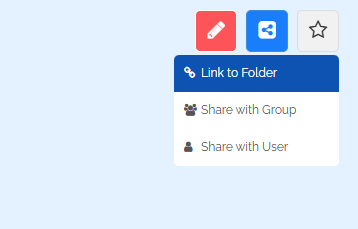
![Options for sharing folders](https://www.edumaps.de/file/10293094986584566534.png/rgm83rd)

By clicking on "Link to folder", the share dialog opens.
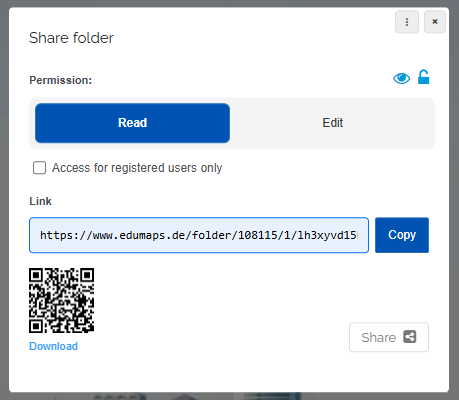
![Dialog “Share Folder”](https://www.edumaps.de/file/6602805811730660424.png/qdmp6vm)

Here you can choose whether to grant read rights or editing rights.

You can then copy and distribute the link.

### Share folder with Group (Class)
Source: https://www.edumaps.de/1083/1/e73ynks5ak/7maszk7xlr#p221

When you want to share with a class or group, this dialog opens:
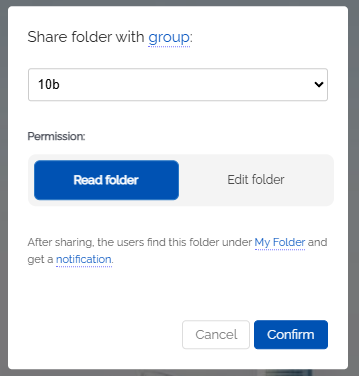
![Share folder with group](https://www.edumaps.de/file/15152998374621102522.png/8bmy5o8)

Select your class/group. Also choose the access right (Read or Edit). Then click on "Confirm".

After sharing, users will find this folder under [My Folders](https://www.edumaps.de/user/folders) (as an "External Folder") and will receive a [notification](https://www.edumaps.de/notifications).

### Share Folder with User
Source: https://www.edumaps.de/1083/1/e73ynks5ak/7maszk7xlr#p222

If you want to share the folder with a user, this dialog will open:
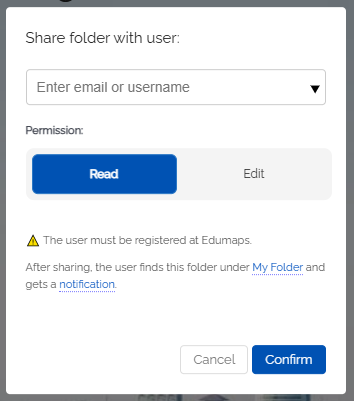
![Share Folder with User](https://www.edumaps.de/file/5096631019041453651.png/u6o52m5)

Enter the email or username. The user must already be registered with Edumaps. Then select the access right (Read or Edit). Click "Confirm" afterwards.

After sharing, the user will find this folder under [My Folders](https://www.edumaps.de/user/folders) (as an "External Folder") and will receive a [Notification](https://www.edumaps.de/notifications).

### Save folder in folder
Source: https://www.edumaps.de/1083/1/e73ynks5ak/7maszk7xlr#p223

In each folder, you will find the button "Add map" next to the button "Add folder".
![Button “Add Folder”](https://www.edumaps.de/file/13568832037006007495.png/iicnbcw)

Click the "Add folder" button to open the following dialog:
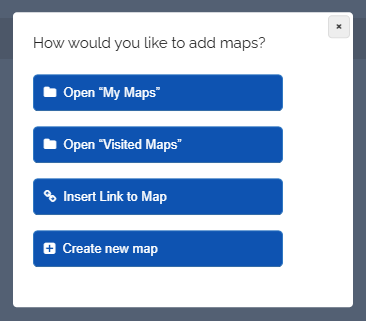
![Dialog to add folder](https://www.edumaps.de/file/6619097874447964561.png/kfvnmp6)

1. Open “My folders”
1. Insert folder link
1. Create new folder

### Add folder from “My Folders”
Source: https://www.edumaps.de/1083/1/e73ynks5ak/7maszk7xlr#p224

Click on "Open My Folders" and you will be redirected to the page.

There is a red-white cross on each folder:
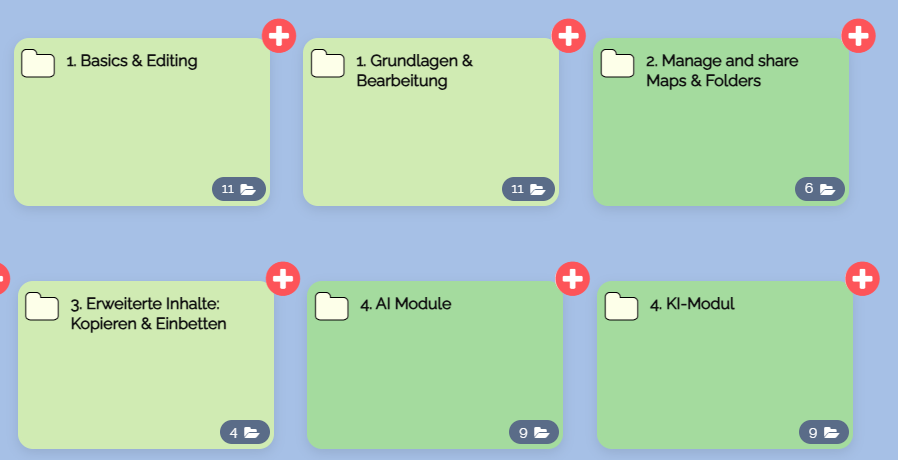
![Folder selection](https://www.edumaps.de/file/8103384028390078791.png/nnb2f16)

Click on a red-white cross, and the following dialog appears:
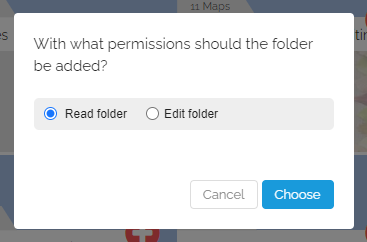
![Rights selection for the folder to be added](https://www.edumaps.de/file/9856961450637682449.png/s50tygk)

The folder now appears in the folder, also showing the access right.
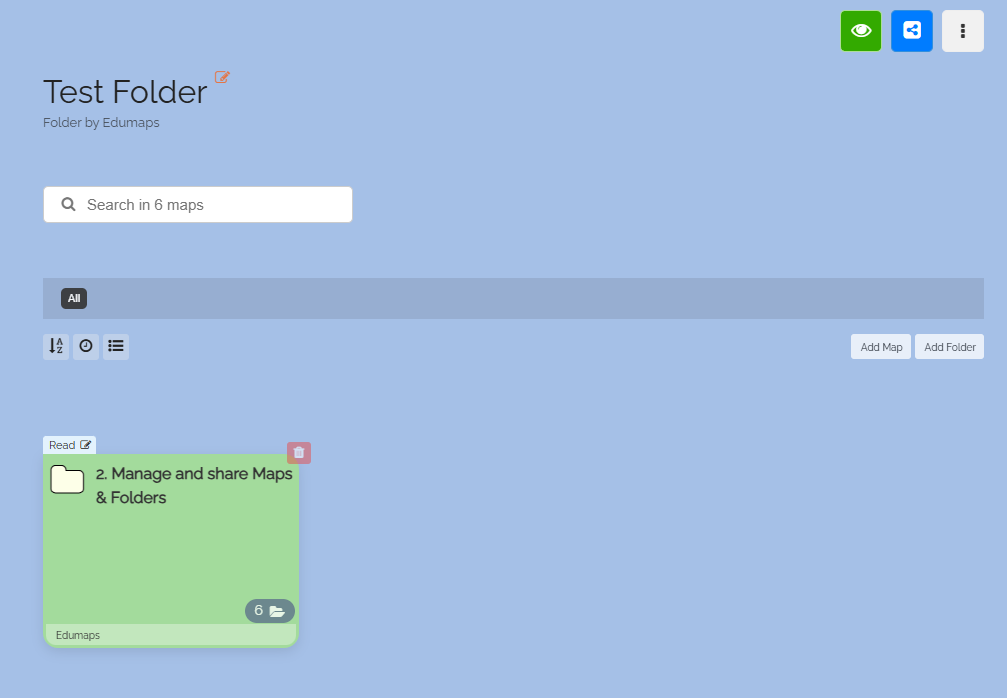
![Folder in the folder](https://www.edumaps.de/file/9926985015625003964.png/ycncm44)

### Add folder via link
Source: https://www.edumaps.de/1083/1/e73ynks5ak/7maszk7xlr#p225

Select "Insert folder link", and the following dialog will open:
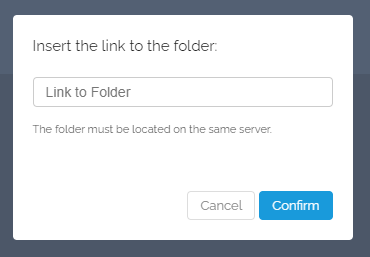
![Insert link to folder](https://www.edumaps.de/file/11764268881284613043.png/n3mixpe)

Enter the sharing link of the folder here and confirm.

The folder will then appear in your folder.

### Create New Folder in Folder
Source: https://www.edumaps.de/1083/1/e73ynks5ak/7maszk7xlr#p226

Select “Create New Folder”, and the following dialog will open:
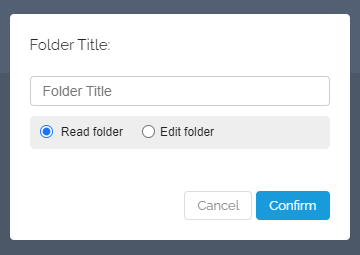
![Create New Folder in Folder](https://www.edumaps.de/file/1881798337805820431.png/mhizjuv)

Enter the name and confirm. The folder will then immediately appear in your folder. It will be assigned editing rights.

### Remove folder from folder
Source: https://www.edumaps.de/1083/1/e73ynks5ak/7maszk7xlr#p227

You can remove any folder from the folder again.

1. To do this, click on the red Edit button.
![Edit folder](https://www.edumaps.de/file/708042451560601492.png/0h6xmtv)

1. Then click on the red-white trash can icon.
![Remove folder](https://www.edumaps.de/file/14712632626883014445.png/7cl9sm2)

The folder will then be removed.

The folder itself is not deleted here, only the reference to the folder in your folder is removed.

## 2.8 Share Folders within the School
Source: https://www.edumaps.de/1126/1/zy498oukoj/4swych5o40

### Introduction
Source: https://www.edumaps.de/1126/1/zy498oukoj/4swych5o40#p4235

✔️ With Edumaps, you can easily make your folders available to all teachers and students at your school.

✔️ You can also share folders specifically with selected groups and users.

**Notes**

- “Publish” determines where a folder is visibly offered.
- “Protect” limits who is allowed to open a folder.
- “Share” grants specific access to classes and users.

### Publish to entire school
Source: https://www.edumaps.de/1126/1/zy498oukoj/4swych5o40#p4237

> You can publish a folder so that it is displayed to all members of your school on the page [“My School”](https://www.edumaps.de/maps/school).

To do this, use the “Publish” category in the folder settings.

You can open the folder settings as follows:

1. Click the red edit icon in the top right corner of the folder.
1. Click on the folder title.
1. The folder settings will open in the sidebar.
1. Click on “Publish”.
1. Activate “My School” and save.

This results in the following:

1. The folder appears on the page [“My School”](https://www.edumaps.de/maps/school).
1. All teachers and students have access to the page and therefore to your folder.
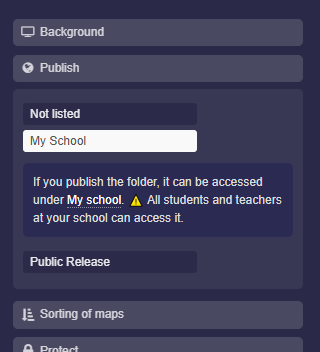
![Publish for “My School”](https://www.edumaps.de/file/17681910909785540281.png/4yzn7ij)

### Access only for members of my school
Source: https://www.edumaps.de/1126/1/zy498oukoj/4swych5o40#p4238

You can set that only users who belong to your school (visible in the [“List of all accounts”](https://www.edumaps.de/users/list)) are allowed to open your folder. Other users will not have access.

To do this, activate the option “Access only for registered users of my school” under “Protect” in the folder settings.
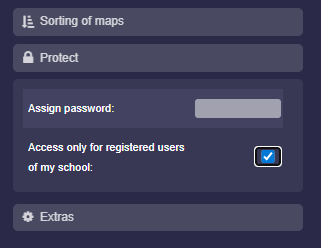
![Option: “Access only for registered users of my school”](https://www.edumaps.de/file/17651090516112851682.png/8ypyruz)

### Protect folder with password
Source: https://www.edumaps.de/1126/1/zy498oukoj/4swych5o40#p4239

You can assign a password to your folder. This way, other users can only access the folder if they enter the correct password.

To do this, you will find a password input field under “Protect” in the folder settings.
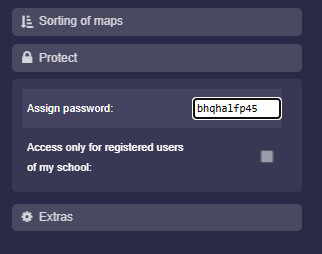
![Assign password for folder](https://www.edumaps.de/file/12916950422582377123.png/k8r5j5o)

### Individual sharing of the folder
Source: https://www.edumaps.de/1126/1/zy498oukoj/4swych5o40#p4240

Using the folder share dropdown, you can share your folder individually.

![Folder share dropdown](https://www.edumaps.de/file/10293094986584566534.png/rgm83rd)

In the share dropdown, you will find the following options:

- Link to folder
- Share with Group
- Share with User

> These options are explained here: [Share folder via link](https://www.edumaps.de/83/1/uqp63kd9rg/s8dlbq86rh)

### Additional: Public release of a folder
Source: https://www.edumaps.de/1126/1/zy498oukoj/4swych5o40#p4241

This option is not intended for internal school sharing, but it is still a way of publishing.

Under “Publish”, you can make the folder discoverable for the entire internet.

Select “Public Release” and save the folder to make it publicly available.

In addition, you must activate your [public profile page](https://www.edumaps.de/1087/1/qerwrf9nfe/o1gpolryps) so that the folder can be found.
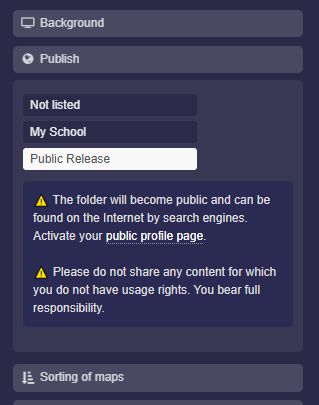
![Image](https://www.edumaps.de/file/735507154302017039.png/usj7njj)

⚠️ The folder (and all included maps) will be public and can be found on the internet by search engines.

⚠️ Do not publish any content for which you do not own the usage rights. You bear full responsibility.

## 2.9 Using Tags and Tag Filters on a Map
Source: https://www.edumaps.de/1100/1/qom3b15q28/swpwzxd9cy

### Introduction
Source: https://www.edumaps.de/1100/1/qom3b15q28/swpwzxd9cy#p7002

✔️ Use tags to organize the boxes on your map with freely chosen keywords.

✔️ Clicking a tag filters the map and shows only matching boxes.

✔️ You can share map links so that, when opened, only boxes with a specific tag are displayed.

### 📌 Introduction to Tags
Source: https://www.edumaps.de/1100/1/qom3b15q28/swpwzxd9cy#p2638

Tags are **keywords** that help structure content on a map and make it easy to filter.

They always start with a hash sign `#` and consist of a single word with no spaces, for example `#school` or `#done`.

By adding relevant tags to individual boxes, users can search for specific topics and quickly find similar content.

### ➕ Add Tags to a Box
Source: https://www.edumaps.de/1100/1/qom3b15q28/swpwzxd9cy#p2639

To add a tag to a box, follow these steps:

1. Open the desired box in your map.
1. Write a hash sign directly before the keyword, for example: `#mytag`.
1. You can also add multiple tags by using more words with hash signs, for example: `#done #school`

It is important that tags are **written without spaces** and only consist of one word.

Example:

```
#project #submission
```

This marks the box with the tags **project** and **submission**.

You may also use hyphens, dots, or underscores inside a tag, e.g. #my-school #project.1 #school_30

### 🕵️ Filter by Tags
Source: https://www.edumaps.de/1100/1/qom3b15q28/swpwzxd9cy#p2640

You can click on a tag within a box. This activates a tag filter:

- **Click on a tag:** Only the boxes containing the same tag are shown.
- **Click the same tag again:** The filter is removed and all boxes are visible again.

This makes it much easier to focus, especially when searching for specific content.

**Example:**

If you click on `#school`, only boxes marked with this tag will appear.

\#school

### 🏷️ Multiple Tags per Box Possible
Source: https://www.edumaps.de/1100/1/qom3b15q28/swpwzxd9cy#p2641

It is possible to assign multiple tags to a box. Simply add a hash sign before each word you want to use as a tag.

**Example:**

```
#exam #math #lesson
```

The box will now appear when filtering for any of these tags.

This is especially helpful for making complex content easy to find in different contexts.

Here is an example of how teachers can be filtered by subject:

[Our Faculty – Portraits of Teachers](https://www.edumaps.de/1212/1/ywmw0cujf7/nqqohuvte2)

### ⚠️ Note on Tag Formatting
Source: https://www.edumaps.de/1100/1/qom3b15q28/swpwzxd9cy#p2642

Please keep the following rules in mind when tagging:

- Tags always consist of **only one word with no spaces**.
- Special characters (except for the hash sign at the beginning as well as hyphen, dot and underscore) should ideally be avoided.
- Tags can be **chosen freely** to categorize your content.

**Incorrect:**

```
#my tag
```

**Correct:**

```
#mytag
```

### 🔗 Use Tags in Map Links
Source: https://www.edumaps.de/1100/1/qom3b15q28/swpwzxd9cy#p2643

You can link maps directly so that only boxes with a specific tag are shown when opened. Simply add your tag selection to the link:

```
?tag=mytag
```

Replace `mytag` with the desired tag.

This is particularly useful for focused presentations or sharing specific overviews.

### 📖 Example of Using Tags and Filters
Source: https://www.edumaps.de/1100/1/qom3b15q28/swpwzxd9cy#p2644

Assume your map contains the following boxes:

| Box | Content | Tags |
| --- | --- | --- |
| Tasks | List of tasks for the project | #project #todo |
| Submission | Deadline and submission notes | #submission #project |
| School | Tips for learning | #school |

If you click on `#project` or open the map with `?tag=project`, only the matching boxes are displayed. Clicking the tag again removes the filter and shows all boxes.

### 🎨 Change Tag Colors
Source: https://www.edumaps.de/1100/1/qom3b15q28/swpwzxd9cy#p2645

The colors of the tags are automatically assigned by the system based on the first letter.

\#a #b #c #d #e #f #g #h #i #j #k #l #m #n #o #p #q #r #s #t #u
\#v #w #x #y #z #0 #1 #2 #3 #4 #5 #6 #7 #8 #9

If you would like to use specific colors intentionally, there are currently only workarounds via the tag’s spelling. For example, you can use a fixed prefix. That means if the tag #biology should be red, you can write #0-biology or #a-biology.

Direct manual color selection is not possible.

### 🗂️ Summary
Source: https://www.edumaps.de/1100/1/qom3b15q28/swpwzxd9cy#p3968

Tags let you easily structure and filter content on your pinboard. Remember:

- **Start each tag with # hash.**
- **Multiple tags are possible.**
- **Format: Only one word, no spaces.**
- **Activate filter by clicking a tag.**
- **Links can include the tag filter.**

This helps you keep track and quickly find relevant information.

\#school

## 2.10 Help: Find My Sharing Option
Source: https://www.edumaps.de/1002/1/f7qkc7nswi6o/3rn7yx2axb6r

### 🧩 What do you want to share?
Source: https://www.edumaps.de/1002/1/f7qkc7nswi6o/3rn7yx2axb6r#p641

> Choose what applies to you:

A: My whole map

B: Only selected columns of my map

C: A single box of my map

D: A folder with several maps

E: Every student should get their own copy of my map

F: My map or folder should be visible to my entire school

**🧩 Manage existing access?**
> Choose what applies to you:

A: I want to revoke or change access I already granted

B: I want to protect my map with a password or limit it to my school

C: I want to publish my map for everyone on the internet

### ℹ️ Publish, Protect, Share – What is what?
Source: https://www.edumaps.de/1002/1/f7qkc7nswi6o/3rn7yx2axb6r#p642

Three terms appear in every sharing workflow on Edumaps:

- **Share** grants specific access: via link, to a class or group, or to individual users.
- **Publish** determines where a map or folder is visibly offered, for example on the page [My School](https://www.edumaps.de/maps/school) or on your public profile.
- **Protect** limits who is allowed to open a map or folder, for example with a password or only for members of your school.

**Share or distribute?**

| Function | Result | Suitable for |
| --- | --- | --- |
| Share with Group | Everyone works on **one** shared map | Collections, brainstorming, class pinboard |
| Share a Single Box | Everyone works on one map, each in **their own** box | Submissions, group work with overview |
| Distribute to Group | Everyone gets their **own copy** of the map | Weekly plans, practice maps, portfolios |

📖 All tutorials on sharing are numbered 2.1 to 2.8 in the [tutorial catalog](https://www.edumaps.de/folder/1030/1/dz6c9xqji5h4/bf3pl22ra5vt).

### 🗺️ Share the whole map
Source: https://www.edumaps.de/1002/1/f7qkc7nswi6o/3rn7yx2axb6r#p643

> Who should receive the map?

A: Anyone who has the link

B: A class or group on Edumaps

C: Individual users (e.g. a colleague)

D: Teachers may edit, students may only read

E: Students may edit now, later read only

F: Two groups with different rights

**📊 Share only selected columns**
> You want to release some columns for reading or editing while the rest of the map stays hidden.

**Solution: Column links**

1. Click the blue share button at the top right and select “Share Columns”.
1. Click “New Link”.
1. First click on a column = read, second click = edit.
1. Click “Continue”, give the link a title and decide whether a login is required.
1. Click “Create Link” and copy the link or QR code.

You can create any number of column links, e.g. one link per group with edit rights on its own column only.

All column links can be edited or deleted later. The link stays the same.

📖 Tutorial: [2.3 Sharing Columns](https://www.edumaps.de/1099/1/8c1r73m85c/ly9pqzltsw)

**📦 Share a single box**
> What do you want to achieve with the box?

A: Students submit homework privately

B: Each student or group works in their own box

C: Draw attention to one box on the map

**📁 Share a folder**
> Who should receive the folder?

A: Anyone who has the link

B: A class, group or individual users

C: All teachers and students of my school

Tip: A folder contains references to maps. The maps stay in their original location and can be in several folders at the same time.

📖 Tutorial: [2.6 Using Folders](https://www.edumaps.de/1057/1/ruqcqtexz1/qz34252w7n)

**📤 Every student gets their own copy**
> Everyone should work undisturbed in their own copy of the map, e.g. for weekly plans, practice maps or portfolios.

**Solution: Distribute to Group**

1. Open the map and click the three dots at the top right.
1. Select “Copy” and then “Distribute to Group”.
1. Select the class or group and confirm.

Every member receives their own copy with editing rights under [Received](https://www.edumaps.de/user/received). You remain the owner of all copies and find them in an automatically created folder.

⚠️ Copies are independent. Later changes to the original do not reach the copies. Exception: embedded columns or boxes stay up to date.

Prerequisite: a [class or group](https://www.edumaps.de/users/usersets) with your students as members.

📖 Tutorial: [2.5 Distribute a Map to a Group](https://www.edumaps.de/1163/1/xifijbym0eaw/mzbs9odqd8v4)

**🏫 Visible to my entire school**
> What do you want to make available?

A: A map

B: A folder with several maps

### 🔗 Link to map (anyone with the link)
Source: https://www.edumaps.de/1002/1/f7qkc7nswi6o/3rn7yx2axb6r#p644

**Solution:**

1. Click the blue share button at the top right and select “Link to Map”.
1. Choose “Read Map” or “Edit Map”.
1. Optionally activate “Access only for registered users”.
1. Copy the link or download the QR code.

**Good to know about anonymous visitors:**

Without the registration requirement, visitors who are not logged in work as “Anonymous”. They can create and edit boxes, but cannot delete boxes or change map and column data. As the owner you can track and restore all changes in the map history.

📖 Tutorial: [2.1 Sharing Maps with Links](https://www.edumaps.de/1047/1/siajhiablo/fv6nobr4hp)

**👥 Share with class or group**
**Solution:**

1. Click the blue share button and select “Share with Group”.
1. Select the class or group.
1. Choose “Read Map” or “Edit Map” and confirm.

All members find the map under [Received](https://www.edumaps.de/user/received) and get a notification on Edumaps.

Tip: The admin can create classes centrally. All teachers can adopt them under [Prepared Classes/Groups](https://www.edumaps.de/users/usersets-admin).

Sharing again with the same group overwrites the previous rights. This is how you revoke or downgrade access.

📖 Tutorial: [2.1 Sharing Maps with Links](https://www.edumaps.de/1047/1/siajhiablo/fv6nobr4hp)

**👤 Share with individual users**
**Solution:**

1. Click the blue share button and select “Share with User”.
1. Enter the email or username. The user must already be registered on Edumaps.
1. Choose “Read Map” or “Edit Map” and confirm.

The user finds the map under [Received](https://www.edumaps.de/user/received) and gets a notification on Edumaps.

📖 Tutorial: [2.1 Sharing Maps with Links](https://www.edumaps.de/1047/1/siajhiablo/fv6nobr4hp)

**👩🏫 Teachers edit, students read**
> Colleagues should edit, students should only read, anonymous visitors should have no access.

**Solution: Two links**

**1. Link for teachers (editing):**
1. Open the map sharing dialog.
1. Select “Edit Map” and activate “Access only for registered users”.
1. Copy the link and share it with your colleagues.

**2. Link for students (reading):**
1. Open the map sharing dialog again.
1. Select “Read Map”. Activate the registration requirement only if students should be logged in.
1. Copy the link and share it with your students.

Both links work at the same time and permanently.

Alternative for the whole school: Publish to My School with editing rights for teachers

📖 Tutorial: [2.1 Sharing Maps with Links](https://www.edumaps.de/1047/1/siajhiablo/fv6nobr4hp)

**⏱️ Edit first, then read only**
> Students should edit the map now and later only read it, without distributing a new link.

**Solution: “Read link allows editing”**

1. Open the map sharing dialog and click the three dots at the top right.
1. Select “Read link allows editing”, click “Activate” and save.
1. Copy the link with “Read Map” rights and share it.
1. To end the editing phase, deactivate the option. The same link then only grants read rights.

Alternative with groups: Share first with “Edit Map”, later share again with “Read Map”. The new rights overwrite the old ones.

📖 Tutorial: [2.1 Sharing Maps with Links](https://www.edumaps.de/1047/1/siajhiablo/fv6nobr4hp)

**👥👥 Two groups with different rights**
> Group 1 may edit, group 2 may only read.

**Solution:**

1. Click the blue share button and select “Share with Group”.
1. Select group 1, set “Edit Map” and confirm.
1. Click the share button again and select “Share with Group”.
1. Select group 2, set “Read Map” and confirm.

Both groups find the map under [Received](https://www.edumaps.de/user/received) and get a notification.

📖 Tutorial: [2.1 Sharing Maps with Links](https://www.edumaps.de/1047/1/siajhiablo/fv6nobr4hp)

### 📝 Private homework submission
Source: https://www.edumaps.de/1002/1/f7qkc7nswi6o/3rn7yx2axb6r#p869

> Students should see only the assignment and submit a solution that only you can see.

**Solution:**

1. Create a box with the assignment.
1. In the box settings enable “Comments” and select “Only me”.
1. Click the three dots on the box and select “Share”.
1. Choose display “Single box” and permission “Read”.
1. Copy the link or QR code.

Students submit their solution as a comment with text, photo upload or audio recording. Only you see the submissions.

📖 Tutorial: [2.4 Share a Single Box](https://www.edumaps.de/1082/1/c968s4u3fmp7/dow0gnvczk1m)

**🧑🤝🧑 Each student or group in their own box**
> Everyone works in their own box. You see all results combined on your map in real time.

**Solution:**

1. Create one box per student or group, e.g. with the name in the box title.
1. Click the three dots on each box and select “Share”.
1. Choose display “Single box” and permission “Edit”.
1. Distribute each link to the respective student or group.

Nobody sees the other boxes. Edits apply to this box only.

Tip: If several boxes with different rights should be bundled in one link, place each box in its own column and use column links.

📖 Tutorial: [2.4 Share a Single Box](https://www.edumaps.de/1082/1/c968s4u3fmp7/dow0gnvczk1m)

**🎯 Draw attention to one box on the map**
> The recipient should see the whole map, but jump directly to a specific box.

**Solution:**

1. Click the three dots on the box and select “Share”.
1. Choose display “Box on map”.
1. Choose permission “Read” or “Edit”.
1. Copy the link or QR code.

When opened, the map scrolls to the box and the box is highlighted.

📖 Tutorial: [2.4 Share a Single Box](https://www.edumaps.de/1082/1/c968s4u3fmp7/dow0gnvczk1m)

**📁🔗 Folder via link**
**Solution:**

1. Open the folder and click the blue share icon.
1. Select “Link to folder”.
1. Choose read rights or editing rights.
1. Copy and distribute the link.

Tip: Under “Protect” in the folder settings you can add a password or limit the folder to members of your school.

📖 Tutorial: [2.7 Sharing Folders with Links](https://www.edumaps.de/1083/1/e73ynks5ak/7maszk7xlr)

**📁👥 Folder with group or user**
**Solution:**

1. Open the folder and click the blue share icon.
1. Select “Share with Group” or “Share with User”.
1. Select the class or group, or enter the email or username of a registered user.
1. Choose the access right (Read or Edit) and confirm.

Recipients find the folder under [My Folders](https://www.edumaps.de/user/folders) as an external folder and get a [notification](https://www.edumaps.de/notifications).

📖 Tutorial: [2.7 Sharing Folders with Links](https://www.edumaps.de/1083/1/e73ynks5ak/7maszk7xlr)

**🏫🗺️ Map for the entire school**
> All teachers and students of your school should find the map on the page [My School](https://www.edumaps.de/maps/school). Users from other schools have no access.

**Solution:**

1. Click the red edit icon at the top right of the map.
1. Click the map title to open the map settings.
1. Click “Publish” and activate “My School (Read)”.
1. Optional: allow editing for teachers. Students keep read access.
1. Save.

📖 Tutorial: [2.2 Make Maps available within the School](https://www.edumaps.de/1125/1/mlreg4cxu7/w4fgav3s7p)

**🏫📁 Folder for the entire school**
> All teachers and students of your school should find the folder on the page [My School](https://www.edumaps.de/maps/school).

**Solution:**

1. Click the red edit icon at the top right of the folder.
1. Click the folder title to open the folder settings.
1. Click “Publish” and activate “My School”.
1. Save.

📖 Tutorial: [2.8 Share Folders within the School](https://www.edumaps.de/1126/1/zy498oukoj/4swych5o40)

**♻️ Revoke or change access**
> You want to withdraw or change access you granted earlier.

**Map links:** Open the map sharing dialog, click the three dots and select “Regenerate links”. ⚠️ All existing map links become invalid immediately, for everyone.

**Group or user sharing:** Share again with the same group or user and set the new right (e.g. “Read Map”). The new setting overwrites the old one.

**Column links:** Click “Share Columns”, then the pencil icon on the link to change rights, or the red cross to delete the link.

**Edit first, then read:** Deactivate “Read link allows editing” in the map sharing dialog. See Edit first, then read only.

**Publish:** In the map or folder settings under “Publish”, deactivate “My School” or “Public Release” and save.

📖 Tutorial: [2.1 Sharing Maps with Links](https://www.edumaps.de/1047/1/siajhiablo/fv6nobr4hp) and [2.3 Sharing Columns](https://www.edumaps.de/1099/1/8c1r73m85c/ly9pqzltsw)

**🔒 Protect: password or only my school**
> You want to limit who can open the map or folder, regardless of who has the link.

**Password for a map:** Open the map settings under “Protect” and enter a map password. Alternatively click the three dots in the map sharing dialog and select “Set Map Password”.

**Only my school (map):** In the map sharing dialog click the three dots and select “Access only my school”, or activate “Access only for registered users of my school” in the map settings under “Protect”.

**Folder:** In the folder settings under “Protect” you find the same two options: password and “Access only for registered users of my school”.

**Login required:** In every link dialog you can require that visitors are registered with Edumaps. Then nobody works as “Anonymous”.

📖 Tutorials: [2.2 Maps within the School](https://www.edumaps.de/1125/1/mlreg4cxu7/w4fgav3s7p) and [2.8 Folders within the School](https://www.edumaps.de/1126/1/zy498oukoj/4swych5o40)

**🌐 Public release on the internet**
> Your map or folder should be discoverable for everyone, also by search engines.

**Solution:**

1. Open the map or folder settings and click “Publish”.
1. Select “Public Release” and save.
1. Activate your [public profile page](https://www.edumaps.de/1087/1/qerwrf9nfe/o1gpolryps) so that your content can be found and other users can follow you.

⚠️ Public content can be found on the internet by search engines.

⚠️ Do not publish any content for which you do not have usage rights. You bear full responsibility.

📖 Tutorials: [2.2 Maps within the School](https://www.edumaps.de/1125/1/mlreg4cxu7/w4fgav3s7p) and [2.8 Folders within the School](https://www.edumaps.de/1126/1/zy498oukoj/4swych5o40)

**❓ Still unsure?**
If you could not find the right option, write to us via the [contact page](https://www.edumaps.de/contact).

Please tell us:

- Who should receive the content (class, colleagues, anyone)
- What they should be allowed to do (read, edit, submit)
- Whether it is a map, a box, a column or a folder

This way we can recommend the right sharing option quickly.

## 2.11 Copying and Transferring Maps
Source: https://www.edumaps.de/1164/1/plyzbnm17apm/j8i018wivwkh

### 🧭 Overview
Source: https://www.edumaps.de/1164/1/plyzbnm17apm/j8i018wivwkh#p7266

**🧭 Which Way Fits Your Case?**
**Where should the map go?**

- Case 1: **Your own account** → Copy map
- Case 2: **Another account, same server** → Copy map
- Case 3: **Another server** → Import map from server
- Case 4: **Save as a file** → Export/import JSON
- Case 5: **Merge two accounts** → Merge
- Case 6: **Only columns or boxes** → Copy parts
- Case 7: **One copy per student** → Distribute copy to group

> **Rule of thumb:**
Within one server: copy the map.
Between servers: import via link or JSON.

**🖥️ Important: The Edumaps Servers**
Edumaps runs on several separate servers:

- **www.edumaps.de** (main server)
- **he.edumaps.de** (Hesse)
- **nds.edumaps.de** (Lower Saxony)
- **nrw.edumaps.de** (North Rhine-Westphalia)
- **www.edumaps.ch** (Switzerland)

Each server has its own user database and its own maps. A login on one server does not work on another server.

> That is why "Copy map" only works within one server. To move between servers, use Case 3 or Case 4.

You can tell the server from the start of the map link, for example `https://nrw.edumaps.de/…`.

### 1️⃣ Copying a Map
Source: https://www.edumaps.de/1164/1/plyzbnm17apm/j8i018wivwkh#p7267

*Same account, same server*

**1️⃣ Case 1: Copying a Map Within Your Own Account**
The simplest case: you want a second, independent version of a map, for example as a backup, as a template for the next school year, or as a variant for another class.

**Here's how:**

1. Open the map.
1. Click the map menu (three dots) at the top right.
1. Choose **"Copy map"**.
1. The copy is created immediately and opens. You will find it afterwards under [My Maps](https://www.edumaps.de/user/maps).

**What happens:**

- The whole map with all columns, boxes, contents, and the map background is duplicated.
- Your own uploads are not stored twice, the copy links to the same files.
- The copy gets a new map link. Links you have already handed out still point to the original.

> Tip: Add a note such as "Backup" or "Copy 2026/2027" to the title of the copy so you can tell the two maps apart later.

See also: [FAQ: How can I copy a map?](https://www.edumaps.de/faq#a1500)

**❓ The "Copy map" Entry Is Missing?**
If you do not see a "Copy map" entry in the map menu, there are two possible reasons:

1. You are **not signed in** and are visiting the map as an anonymous user. Sign in and reload the map.
1. The map owner has enabled the option **"Disable map copying"** in the map settings under Extras. In that case only the owner can copy the map.

> The reverse also applies: if you want to prevent others from copying your map, enable exactly this option in your map settings.

See also:

- [FAQ: Why is the "Copy map" entry missing?](https://www.edumaps.de/faq#a1550)
- [FAQ: How can I block copying of a map?](https://www.edumaps.de/faq#a24500)

**✅ Checklist: Copying a Map**
[Checklist: Copied one of your own maps via the map menu / Found the copy under "My Maps" / Adjusted the title of the copy / Found the "Disable map copying" option in the map settings]

### 2️⃣ Account to Account
Source: https://www.edumaps.de/1164/1/plyzbnm17apm/j8i018wivwkh#p7268

*Same server, different account*

**2️⃣ Case 2: Transferring a Map to Another Account**
Typical situations: a colleague hands a map over to you, you take over a colleague's subject area, or you have a new account (for example after switching from a basic account to a teacher account).

**Here's how:**

1. The current owner opens the map, clicks the blue share button, and copies the **map link** (read or edit).
1. Sign in with the **target account**, the account that should own the map from now on.
1. Open the map link in your browser.
1. Click the map menu (three dots) at the top right and choose **"Copy map"**.
1. The map is now stored as your own map in the target account, including all files.

**Good to know:**

- All files from the original map are copied into the storage of the target account. They stay available even if the previous owner deletes their uploads later.
- If the map is opened with **read rights**, only the visible columns and boxes are copied. With **edit rights**, everything is copied, including hidden columns and boxes.
- The previous owner must not have enabled "Disable map copying".
- The original stays with the previous owner and can be deleted afterwards.

> There is no direct way to change the map owner. A transfer is always a copy made from the target account.

See also: [FAQ: Transferring a map from one account to another](https://www.edumaps.de/faq#a24300)

**📦 Transferring Many Maps at Once**
If many maps are to be taken over into another account, proceed as follows:

1. Sign in to the **old account** and note the links of all maps to be transferred. A folder is handy here: collect the maps in it and share the folder link with the new account.
1. Sign out and sign in again with the **new account**.
1. Open each map link one after the other and choose "Copy map" each time.

> Alternatively, export all maps as JSON files (Case 4) and import them in the new account. Same effort, but it also works across server boundaries.

See also: [FAQ: Merging duplicate accounts](https://www.edumaps.de/faq#a5000)

**✅ Checklist: Account to Account**
[Checklist: Copied the map link in the source account / Signed in with the target account and opened the link / Took over the map via "Copy map" / Checked that all files are present in the copy]

### 3️⃣ Server to Server
Source: https://www.edumaps.de/1164/1/plyzbnm17apm/j8i018wivwkh#p7269

*Import via map link*

**3️⃣ Case 3: Importing a Map from Another Edumaps Server**
Typical situations: your school moves from the main server to the state server, you move to a school in another state, or you created maps on www.edumaps.de and now work on nrw.edumaps.de.

**Here's how:**

1. On the **source server**, open the map, click the blue share button, and copy the map link.
1. Sign in on the **target server**.
1. In the sidebar, click **"Create map"** and choose **"Import"**.
1. In the dialog, choose **"Map from another server"**.
1. Paste the map link and start the import.
1. The map is created as a new map on the target server. All files are transferred and then appear in your [upload manager](https://www.edumaps.de/uploads).

**Good to know:**

- When importing between servers, the files are always copied so they are available on the target server. Do not delete the original map or its uploads until the import is complete.
- Exactly what is visible via the link is transferred. Use a link with edit rights if hidden columns and boxes should come along too.
- With many or large files, the import takes a little time.

> If the import fails, check the link, whether the map can be opened without signing in, and whether "Disable map copying" is not active.

See also:

- [Tutorial: Importing content as new maps](https://www.edumaps.de/1065/1/bck6c6wbih/hdop3a0fq8)
- [FAQ: Map from another server](https://www.edumaps.de/faq#a181000)

**🏫 A Whole School Changes Server**
If a school moves completely to another server (for example because a state license starts), the teachers transfer their maps themselves:

- Each teacher imports their own maps via map link (see above) or via JSON file (Case 4).
- The school admin first creates the accounts on the new server so that everyone can import while signed in.
- For data protection reasons, no one can transfer other users' maps for them. Every user fetches their own content.

> When changing servers, plan a transition period during which the maps on the old server remain accessible.

**✅ Checklist: Server to Server**
[Checklist: Copied the map link on the source server / Chose "Create map" → "Import" → "Map from another server" on the target server / Ran the import and opened the new map / Checked the files in the upload manager of the target server]

### 4️⃣ JSON Export and Import
Source: https://www.edumaps.de/1164/1/plyzbnm17apm/j8i018wivwkh#p7270

*Save and restore a file*

**4️⃣ Case 4: Exporting a Map as a JSON File**
The JSON file is the complete exchange format of Edumaps. It is suitable as a backup, for passing on by email or cloud, and for transferring to any account or server.

**How to export:**

1. Open the map in **edit mode** (red pencil icon at the top right).
1. Click the map menu (three dots) and choose **"Export"**.
1. Choose **"Edumaps file (json)"**.
1. The file is downloaded. The file name contains the date and the map title.

**What the file contains:**

- Map settings (title, format, background, tags)
- All columns and boxes with contents, colors, and settings
- Text fields and arrows on sticker walls
- References to uploaded files

> The files themselves are not inside the JSON file. They are fetched from the source server during import. So do not delete the uploads of the original map as long as you still want to import the JSON file.

See also: [Tutorial: Exporting maps](https://www.edumaps.de/66/1/yhs2mg21rk/l3jy98jx3e)

**📥 Importing a JSON File Again**
**How to import:**

1. Sign in with the account that should receive the map (on any server).
1. In the sidebar, click **"Create map"** and choose **"Import"**.
1. Choose **"Edumaps file (json)"** and upload the file.
1. A new map with a new map link is created.

**What happens to the files:**

- **Import on the same server, your own files:** the links stay unchanged, nothing is stored twice.
- **Import on the same server, someone else's files:** a copy is placed in your storage so the files remain available to you.
- **Import on another server:** all files are copied so they are available there.

> Every import creates a new map. If you import the same file twice, you have two maps.

See also: [FAQ: How does the map import via JSON work?](https://www.edumaps.de/faq#a23500)

**💾 Backup and License Expiry**
**Backup:** Export important maps regularly as JSON files, for example at the end of each school year. A backup within Edumaps is also possible via "Copy map", but the JSON file additionally sits outside the platform.

**License expiry:** If a school or state license expires, your maps remain fully intact. However, the storage is reset to the free quota. Save your maps as JSON files and, if needed, transfer them to another account or server.

> Uploaded files are only taken over during import if they still exist on the source server at the time of import.

See also:

- [FAQ: How can I create a backup of my map?](https://www.edumaps.de/faq#a1600)
- [FAQ: What happens to the content when a license expires?](https://www.edumaps.de/faq#a23000)

**✅ Checklist: JSON**
[Checklist: Exported a map as an Edumaps file (json) / Imported the JSON file again via "Create map" → "Import" / Understood: the files are fetched during import / Created a backup of important maps]

### 5️⃣ Merging Accounts
Source: https://www.edumaps.de/1164/1/plyzbnm17apm/j8i018wivwkh#p7271

*Duplicate accounts and changing schools*

**5️⃣ Case 5: Merging Two Accounts**
You accidentally have two accounts, for example a self-registered basic account and a teacher account created by your school. There are two ways, depending on the account type:

**A) Teacher or student accounts of the same school**

The school admin can merge both accounts:

1. The school admin signs in and opens the page [Merge accounts](https://www.edumaps.de/users/merge).
1. There they choose the account to keep and the account to dissolve.
1. All maps and uploads of the dissolved account move into the remaining account.

**B) Basic accounts (without a school)**

Merging is not possible here. Instead, transfer the maps as in Case 2:

1. Note all map links in the old account.
1. Sign in with the new account, open each link, and choose "Copy map".
1. All uploads are automatically copied into the new storage.
1. Optional: delete the old account under [My Account](https://www.edumaps.de/user/account) and then enter the email address in the new account.

Alternatively, the school admin can [invite the basic account to the school](https://www.edumaps.de/users/invite). The user then receives a confirmation link by email. After acceptance, the school admin can perform the merge.

See also: [FAQ: Merging duplicate accounts](https://www.edumaps.de/faq#a5000)

**🤝 Keeping Two Accounts and Using Them Together**
If you have one account at a school and a second one at another institution, merging is often not sensible: both accounts have different roles, rights, and single sign-ons.

**The alternative:** a shared folder.

1. Create a folder under [My Folders](https://www.edumaps.de/user/folders).
1. Click the folder's share button and share it with the second account with edit rights.
1. Both accounts now access all maps in this folder without anything having to be copied.

See also: [FAQ: Two accounts at a school and an institution](https://www.edumaps.de/faq#a5050)

**🚌 A Teacher Changes School**
If a teacher changes school **on the same server**, the maps do not need to be transferred. The account simply moves:

1. The school admin of the **new** school opens the page [Invite users](https://www.edumaps.de/users/invite).
1. They enter the teacher's email address and choose the role "Teacher".
1. The teacher confirms the invitation link in the email. The account now belongs to the new school, all maps and uploads are retained.

> If the new school is on a **different server**, moving the account is not possible. Then transfer your maps via map link (Case 3) or JSON file (Case 4) into the new account.

See also: [FAQ: How can a teacher be moved to another school?](https://www.edumaps.de/faq#a66000)

**✅ Checklist: Accounts**
[Checklist: Clarified which account type is involved (school account or basic account) / For school accounts: asked the school admin to merge / For basic accounts: took over the maps via "Copy map" / Checked whether a shared folder is the better solution]

### 6️⃣ Transferring Parts Only
Source: https://www.edumaps.de/1164/1/plyzbnm17apm/j8i018wivwkh#p7272

*Columns, boxes, files*

**6️⃣ Case 6: Copying Individual Columns**
You do not need the whole map, just one column from another map, for example a material collection from a colleague's map.

**Here's how:**

1. Open your own map in edit mode.
1. Click the three dots next to the "New column" button and choose **"Copy column from map"**.
1. Navigate to the map that contains the column you want.
1. A red plus icon now appears on every column. Click the column you want to copy.
1. You are automatically taken back to your map. There you will find the copied column with all its boxes.

> This function works within one server. From another server, import the whole map (Case 3) and then delete the columns you do not need.

See also: [FAQ: Copying a column from another map](https://www.edumaps.de/faq#a1650)

**📦 Copying Individual Boxes**
**Here's how:**

1. Open your own map in edit mode.
1. Click the three dots next to the "New box" button (below the last box in a column) and choose **"Copy box from map"**.
1. Choose where to search: My Maps, Received Maps, or Visited Maps.
1. Navigate to the map you want and click the red icon at the top right of the box.
1. The box appears in your column.

**Within the same map**, duplicate a box via the box menu (three dots on the box) with "Duplicate". This also takes over all box settings.

See also: [FAQ: Copying a box from another pinboard](https://www.edumaps.de/faq#a60000)

**🔗 Reusing Files Without Uploading Again**
You do not need to upload a video or image again if you have already uploaded it once:

1. Open the box editor, click "Upload", and choose "My Uploads".
1. There you will find an overview of all your uploaded files.
1. Click the file you want in the box content, it is inserted automatically.

Alternative way:

1. Open the [upload manager](https://www.edumaps.de/uploads) and find the file.
1. Click the file's link icon or right-click and choose "Copy link address".
1. Paste the link into the box editor of the target map. The file appears there like an upload.

> Map backgrounds can be reused too. You will find the last 5 map backgrounds you used in the image selection of the map settings.

See also: [FAQ: Reusing uploads](https://www.edumaps.de/faq#a47000)

**✅ Checklist: Transferring Parts**
[Checklist: Copied a column from another map / Copied a box from another map / Duplicated a box within the map / Inserted an existing upload into another box]

### 7️⃣ One Copy per Student
Source: https://www.edumaps.de/1164/1/plyzbnm17apm/j8i018wivwkh#p7273

*Distribute map to group*

**7️⃣ Case 7: A Copy for Every Student in a Class**
You want every student in a class to work with their **own** version of your map, for example for a weekly plan, a portfolio, or individual work. Then you do not share the map itself, you distribute copies.

**Here's how:**

1. Open your map and click the three menu dots at the top right.
1. Choose **"Copy"** and then click the tab **"Distribute to group"** in the dialog.
1. Choose the class or group.
1. Confirm. Every student in the group receives their own copy of the map in their account and a notification.

**Good to know:**

- Each copy belongs to the respective student. One student's changes are not visible to the others.
- Your original map stays unchanged. You can distribute it again later, for example to another class.
- Students find their copy under [My Maps](https://www.edumaps.de/user/maps).
- A folder containing all distributed maps is created automatically. You are the owner of this folder and can review the results at any time.

> Difference from "Share with group": there, all students work together on one map. With "Distribute to group", everyone works alone on their own copy.

See also: [Tutorial: Distributing a map to a group: everyone gets their own copy](https://www.edumaps.de/1163/1/xifijbym0eaw/mzbs9odqd8v4)

### ⚠️ Notes
Source: https://www.edumaps.de/1164/1/plyzbnm17apm/j8i018wivwkh#p7274

*What does not come along*

**⚠️ What Is Not Transferred When Copying**
A copy always starts with the **contents** of the map, but without the **user data** that has accumulated over time. Not taken over:

- Poll results and votes
- Ticks set in checklists
- Comments and student submissions
- Likes and ratings
- Bookings, reservations, and participant lists
- The map's history
- Shared links, column-group links, and group releases

> That is usually what you want: the copy for the next class starts clean. If you need the results, save them beforehand, for example participant lists as CSV.

**Also keep in mind:**

- The copy has a **new map link**. Distributed links and QR codes still point to the original.
- It is best to double-check passwords and access settings in the copy.
- Embedded columns from other maps remain references and do not become your own content.

**📁 Folders and Collections**
Folders contain only **references** to maps, not copies. They therefore cannot be copied or exported.

- If you want to "transfer" a folder, simply share it with the other account. The other account can save the folder in its own folders.
- If the maps in the folder should really pass into the ownership of the other account, that account copies the maps individually (Case 2) and places them in its own folder.

> For many maps, the folder is the easiest handover: the previous owner shares the folder, the new account gradually copies what it really needs.

See also: [Tutorial: Using folders](https://www.edumaps.de/1057/1/ruqcqtexz1/qz34252w7n)

**🎉 Summary**
**Rule of thumb for all cases:**

- **Same account:** Copy map
- **Another account, same server:** open the link, copy map
- **Another server:** Create map → Import → Map from another server
- **File for backup or handover:** export the map as JSON, import later
- **Duplicate account at school:** the school admin merges the accounts
- **Parts only:** copy an external column or box
- **One copy per student:** distribute the map to a group

> Your content belongs to you. With these ways, you can get it anywhere you need it.

The [FAQ](https://www.edumaps.de/faq) answers further questions.

## 3.1 Copy Boxes from other Maps
Source: https://www.edumaps.de/1073/1/4qjuhw8dpj/p2omobcqk8

### Introduction
Source: https://www.edumaps.de/1073/1/4qjuhw8dpj/p2omobcqk8#p132

✔️ By copying boxes from other maps, you can quickly transfer individual, selected content.

This is possible with just a few clicks.

Here we will briefly show you how to proceed.

### Copy external Boxes (Part 1/3)
Source: https://www.edumaps.de/1073/1/4qjuhw8dpj/p2omobcqk8#p133

To copy boxes from other maps, click on the three dots to the right of the “New Box” button. A dropdown menu will open. Select “Copy box from map” there.
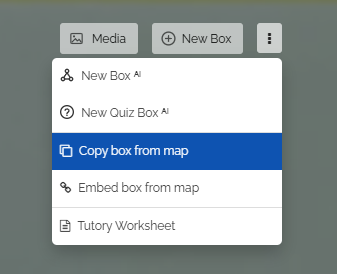
![Option “Copy box from map”](https://www.edumaps.de/file/12311856935478388386.png/tkvafz6)

Clicking on it will bring up the following selection of where to search for boxes:
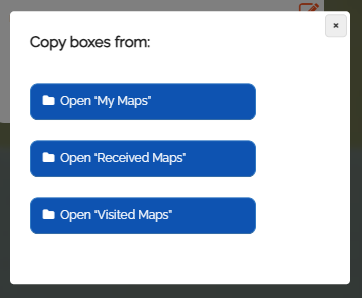
![Selection to find the box](https://www.edumaps.de/file/17314382772826481891.png/x66uyxa)

So you can choose:
- [My Maps](https://www.edumaps.de/user/maps)
- [Received Maps](https://www.edumaps.de/user/maps-shared)
- [Visited Maps](https://www.edumaps.de/user/maps-visited)

Indeed, you can also copy boxes into your map from all other pages that list maps.

### Copy external Boxes (Part 2/3)
Source: https://www.edumaps.de/1073/1/4qjuhw8dpj/p2omobcqk8#p134

By selecting the page, such as "My Maps", you will be redirected to the respective page. There you will notice that you are now in copy mode.
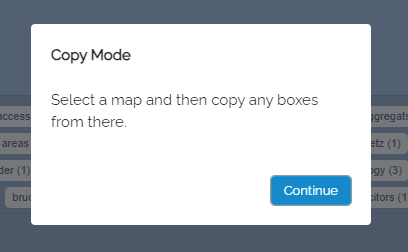
![Note on active copy mode](https://www.edumaps.de/file/8874500876457094376.png/78wvgro)

Now open a map from the map list.

In the map view, you can recognize the active copy mode by the red and white crosses on the boxes and the small red banner "Copy Mode" in the top left corner.
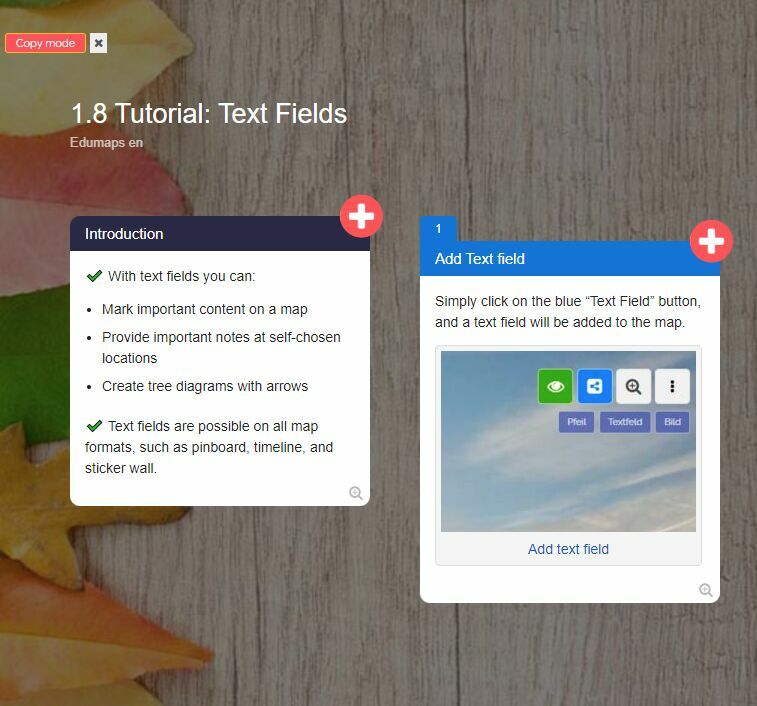
![Map with active copy mode (boxes)](https://www.edumaps.de/file/12119080842515135957.jpg/zn7qxia)

Simply click on a red and white cross, and the corresponding box will be automatically copied to your map.
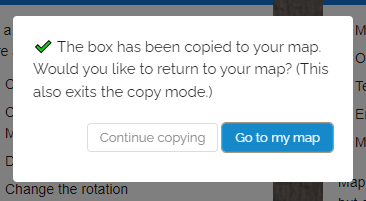
![Confirmation of box copy](https://www.edumaps.de/file/9783950883479923945.png/4vwuwbi)

You now have the option to copy additional boxes on this map or return to your map.

Upon successful copying, you will also see a green checkmark on the box.
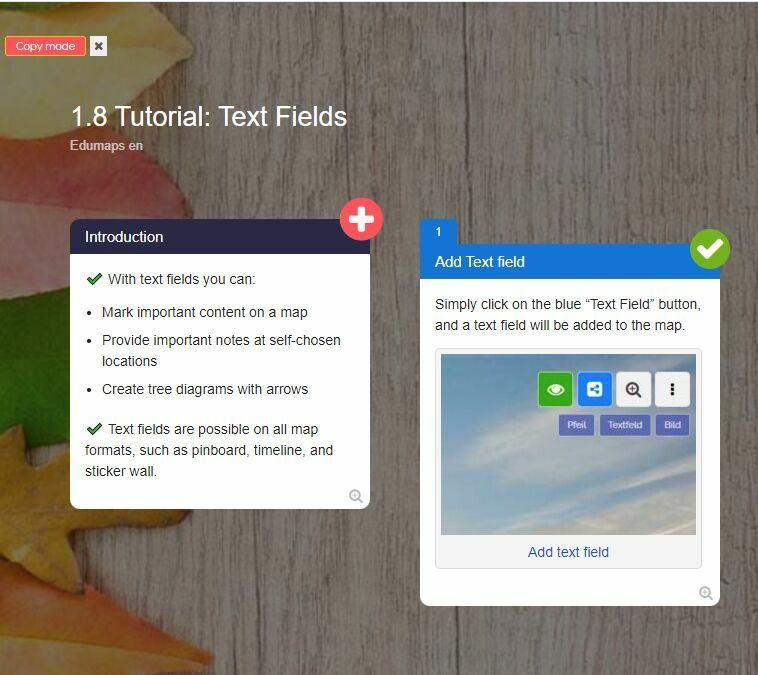
![Green checkmark on copied box](https://www.edumaps.de/file/2738286872857188599.jpg/yu27354)

### Copy external Boxes (Part 3/3)
Source: https://www.edumaps.de/1073/1/4qjuhw8dpj/p2omobcqk8#p135

If you no longer want to copy boxes, you can click on the red banner "Copy mode" at the top left. This ends the copy mode and you return to your map.
![End copy mode](https://www.edumaps.de/file/8170412773172360895.png/7zbt506)

![Image](https://www.edumaps.de/file/12796543178922691332.png/7tar55r)

Back on your map, you now see all the copied boxes, which you can further edit if needed.

## 3.2 Embed Boxes from other Maps
Source: https://www.edumaps.de/1074/1/33kpbdv4am/784k8u8m6f

### Introduction
Source: https://www.edumaps.de/1074/1/33kpbdv4am/784k8u8m6f#p136

✔️ By embedding boxes from other maps, you can make individual boxes centrally available on many other maps.

✔️ If you update a box, it will be updated in all embedded locations. This allows you to make information widely available - with just one change to one box.

Embedding is possible with just a few clicks. Here we briefly show you how to proceed.

### Embed external Boxes (Part 1/4)
Source: https://www.edumaps.de/1074/1/33kpbdv4am/784k8u8m6f#p137

To embed an external box from another map, click on the three dots to the right of the "New Box" button. A dropdown will then open. Select "Embed box from map" from there.
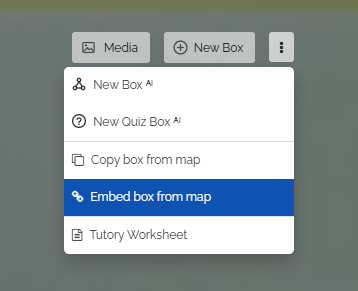
![Option "Embed box from map"](https://www.edumaps.de/file/8607024994416558536.png/ovhn1xn)

Clicking on it will display the following selection, where you can search for boxes:
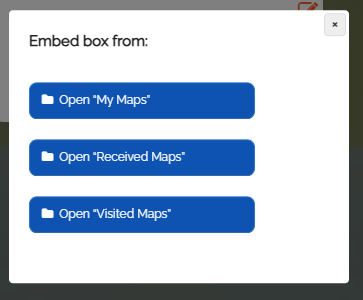
![Selection for finding the box](https://www.edumaps.de/file/4474198342313880309.png/mdn6dbt)

You can choose:
- [My Maps](https://www.edumaps.de/user/maps)
- [Received Maps](https://www.edumaps.de/user/maps-shared)
- [Visited Maps](https://www.edumaps.de/user/maps-visited)

In fact, you can also embed boxes into your map from all other pages that list maps.

### Embed external Boxes (Part 2/4)
Source: https://www.edumaps.de/1074/1/33kpbdv4am/784k8u8m6f#p138

By selecting the page such as “My Maps” you will be redirected to the corresponding page. There you will see the note that you are now in the embed mode.
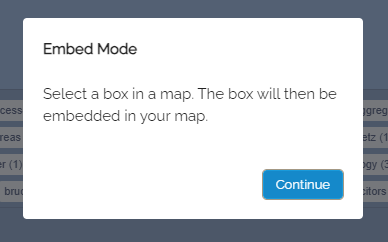
![Note on active embed mode](https://www.edumaps.de/file/1272184790995346400.png/cy7mv0o)

Now open a map from the map list.

In the map view, you can recognize the active embed mode by the red-white link symbols on the boxes as well as the small red banner “Embed Mode” at the top left.
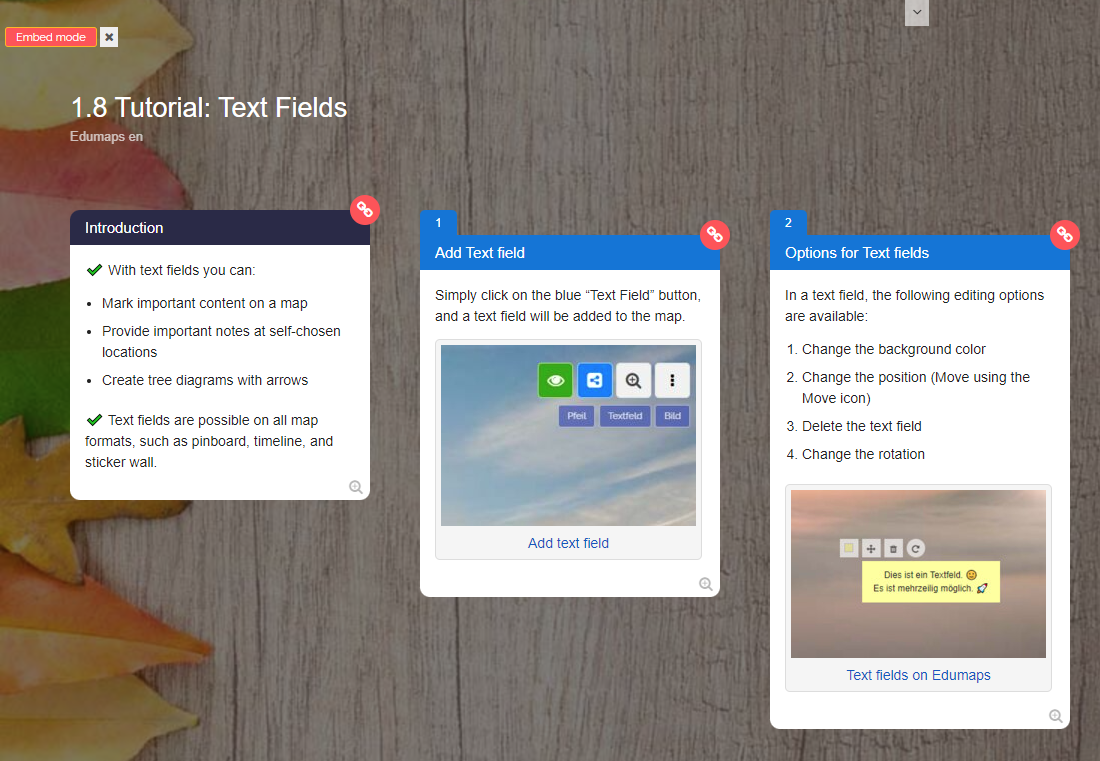
![Map with active embed mode (boxes)](https://www.edumaps.de/file/1017444336622451084.png/isyb8rm)

Simply click on a red-white link symbol, then the following query appears:
![Query to link the map](https://www.edumaps.de/file/10886109005350467916.png/pd04ymu)

> Do you want to link the box to be embedded to this map here? This allows access to both maps.

Confirm with “Do not link” or “Link box”.

Now the corresponding box will be automatically embedded in your map.
![Confirmation of box embedding](https://www.edumaps.de/file/14789701250486995912.png/si9voba)

Now you will be redirected back to your map.

### Embed external Boxes (Part 3/4)
Source: https://www.edumaps.de/1074/1/33kpbdv4am/784k8u8m6f#p139

The embedded box is now recognized by a small icon at the top right of the box.
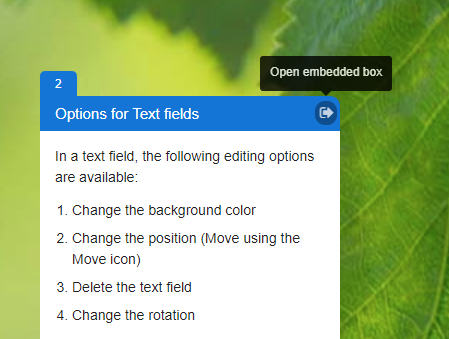
![Embedded box on the map](https://www.edumaps.de/file/16549661076814647710.png/fwqyef8)

If you have chosen "Link", you can call up the source map. If you have chosen "Do not link", the link to the source map remains hidden.

**Edit Mode**

Please note that embedded boxes are treated differently in edit mode. Their content is protected and cannot be edited.
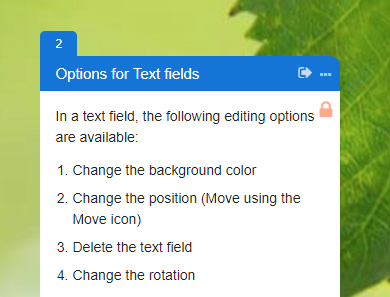
![Embedded boxes are protected](https://www.edumaps.de/file/8050520504209929952.png/3i95iwm)
in edit mode

Additionally, you can only move and delete embedded boxes.
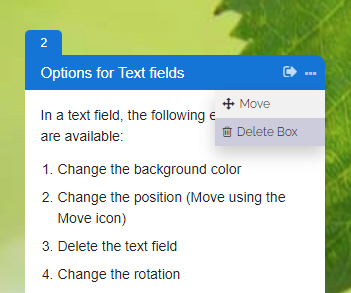
![Editing embedded boxes](https://www.edumaps.de/file/14087190066478032617.png/ypm0x87)

### Embed external Boxes (Part 4/4)
Source: https://www.edumaps.de/1074/1/33kpbdv4am/784k8u8m6f#p140

If you want to exit embed mode, you can click on the red banner "Embed Mode" at the top left. This will end the embed mode and you will return to your map.
![Exit embed mode](https://www.edumaps.de/file/10240116902329012392.png/nsszeem)

![Image](https://www.edumaps.de/file/14722981771334224565.png/0yt9p1l)

### Tip: Embedding of Tables of Contents
Source: https://www.edumaps.de/1074/1/33kpbdv4am/784k8u8m6f#p3965

You can make the tables of contents of multiple maps available centrally on **one map**, allowing quick access to the respective boxes of the other maps.

1. Create a central map.
1. Embed the box containing the table of contents of the other map there.
1. By embedding it, the anchor links within the box are modified so that they point directly to the other map.

This way, you can build a navigation structure with multiple levels.

### Tip: Embedding in lending
Source: https://www.edumaps.de/1074/1/33kpbdv4am/784k8u8m6f#p3966

For renting, you can create a **central map** with all your devices (boxes). You can then create separate maps in which you embed selected boxes from the central map.

These boxes also remain active in the other maps and can be reserved there as well.

Embedded boxes are also taken into account when using [Group Bookings](https://www.edumaps.de/1055/1/pec424hul6/wenurto5ez#cumulative).

## 3.3 Copy Columns from other Maps
Source: https://www.edumaps.de/1080/1/qhmxrppkks/qqujv2l8gt

### Introduction
Source: https://www.edumaps.de/1080/1/qhmxrppkks/qqujv2l8gt#p194

✔️ By copying entire columns from other maps, you can quickly transfer selected content.

This is possible with just a few clicks.

Here we briefly show you how to proceed.

### Copy Columns from other Map (Part 1/3)
Source: https://www.edumaps.de/1080/1/qhmxrppkks/qqujv2l8gt#p195

To copy an external column from another map, click on the three dots to the right of the "New Column" button. A dropdown will open. Select “Copy column from map” there.
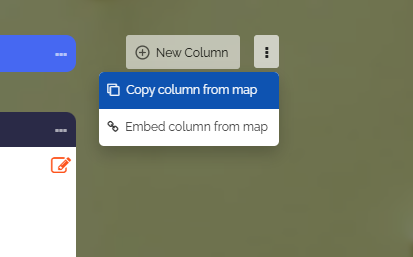
![Option “Copy column from map”](https://www.edumaps.de/file/7872821994081583319.png/rz9aaq6)

Clicking on it will bring up the following selection, from where you want to transfer the column:
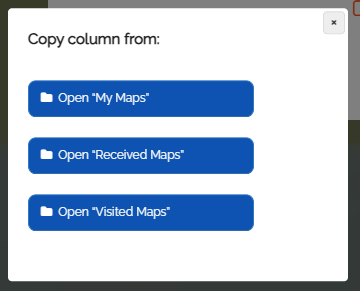
![Selection to find the column](https://www.edumaps.de/file/1439788109538989516.png/t2hbzqj)

So you can choose:
- [My Maps](https://www.edumaps.de/user/maps)
- [Received Maps](https://www.edumaps.de/user/maps-shared)
- [Visited Maps](https://www.edumaps.de/user/maps-visited)

In fact, you can also copy a column from any other pages that list maps into your map.

### Copy Columns from other Map (Part 2/3)
Source: https://www.edumaps.de/1080/1/qhmxrppkks/qqujv2l8gt#p196

When selecting the page, such as “My Maps”, you will be redirected to the respective page. There, a note appears indicating that you are now in copy mode.
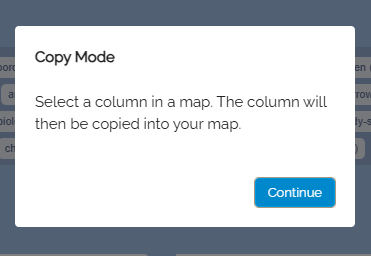
![Note on active copy mode](https://www.edumaps.de/file/9580480211685195775.png/h5ssgrf)

Now open a map from the map list.

In the map view, you will recognize the active copy mode by the red and white crosses on the columns and by the small red banner "Copy Mode" at the top left.
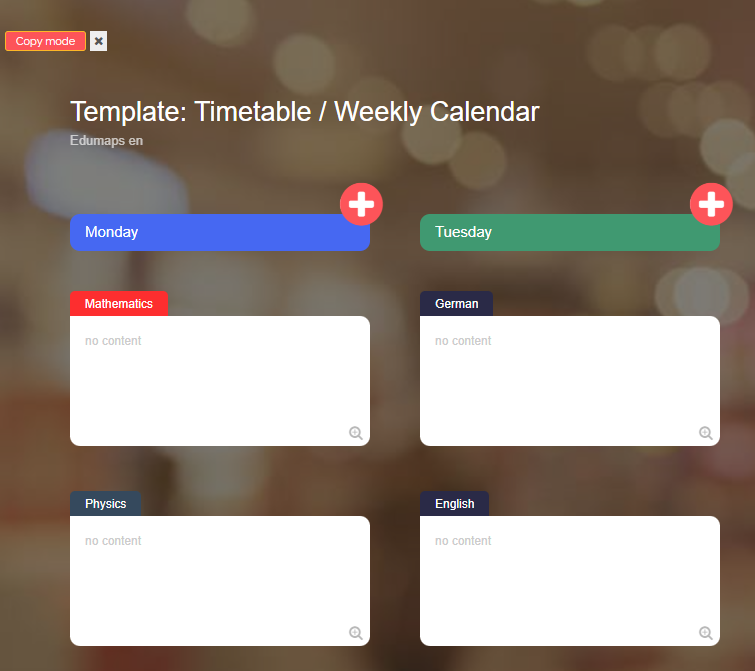
![Map with active copy mode (columns)](https://www.edumaps.de/file/613614443321569093.png/kor93wj)

Now click on a red-white cross, and the corresponding column will be automatically copied to your map. Complete with all included boxes.

You will now be automatically redirected back to your map.

### Copy Columns from other Map (Part 3/3)
Source: https://www.edumaps.de/1080/1/qhmxrppkks/qqujv2l8gt#p197

If you no longer want to copy a column, you can click on the red banner “Copy Mode” at the top left. This will end the copy mode and you will return to your map.
![End copy mode](https://www.edumaps.de/file/2950686841415960233.png/xdhi9dp)

Back on your map, you will now see the copied column with all boxes, which you can further edit if needed.

## 3.4 Embed Columns from other Maps
Source: https://www.edumaps.de/1081/1/jfb6vptvgo/0g56y4cjyr

### Introduction
Source: https://www.edumaps.de/1081/1/jfb6vptvgo/0g56y4cjyr#p198

✔️ By embedding columns from other maps, you can make individual columns centrally available on many maps.

✔️ If you update a column, it will be updated in all embedded places. In this way, you can make information widely available with only one change to one column.

Embedding is possible with just a few clicks. Here we will briefly show you how to proceed.

### Embed Columns from other Maps (Part 1/4)
Source: https://www.edumaps.de/1081/1/jfb6vptvgo/0g56y4cjyr#p199

To embed an external column from another map, click on the three dots to the right of the "New Column" button. A dropdown will then open. Select “Embed column from map” there.
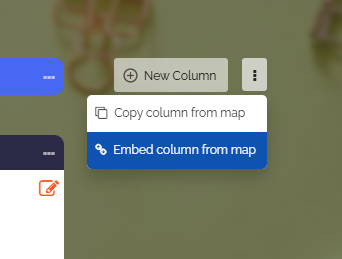
![Option “Embed column from map”](https://www.edumaps.de/file/4806026245640802520.png/ixba9s2)

Clicking on it will bring up the following selection, where the column can be searched:
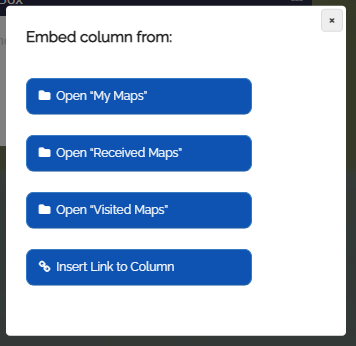
![Selection to find the column](https://www.edumaps.de/file/17927078220819715885.png/71sjn8e)

So you can choose:
- [My Maps](https://www.edumaps.de/user/maps)
- [Received Maps](https://www.edumaps.de/user/maps-shared)
- [Visited Maps](https://www.edumaps.de/user/maps-visited)

In fact, you can embed a column into your map from all other pages that list maps.

### Embed Columns from other Maps (Part 2/4)
Source: https://www.edumaps.de/1081/1/jfb6vptvgo/0g56y4cjyr#p200

When selecting the page such as “My Maps”, you will be redirected to the corresponding page. There, a notification appears indicating that you are now in embed mode.
![Notice for active embed mode](https://www.edumaps.de/file/10610447722530622559.png/mq90du0)

Now open a map from the map list.

In the map view, you can recognize the active embed mode by the red and white link symbols on the columns as well as the small red "Embed Mode" banner at the top left.
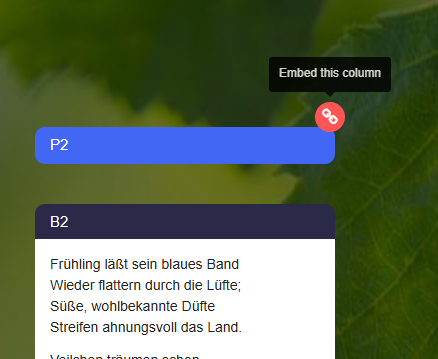
![Map with active embed mode (columns)](https://www.edumaps.de/file/18349443318959942456.png/hx5otvj)

Simply click on a red-white link symbol, and the following prompt appears:
![Prompt for linking the map](https://www.edumaps.de/file/3818849035706538436.png/p2ngyps)

> Do you want to link the column to be embedded to this map here? This allows access to both maps.

Confirm with "Do not link" or "Link".

Now the corresponding column is automatically embedded on your map.

You will now be redirected back to your map.

### Embed Columns from other Maps (Part 3/4)
Source: https://www.edumaps.de/1081/1/jfb6vptvgo/0g56y4cjyr#p201

You can now recognize the embedded column by a small icon at the top right of the column.
![Embedded column on the map](https://www.edumaps.de/file/17967947692719596419.png/qtvt4d6)

If you have chosen "Link", you can access the source map. If you have chosen "Do not link", the link to the source map remains hidden.

**Edit Mode**

Note that embedded columns and their boxes are treated differently in edit mode. Their content is protected and cannot be edited.

Additionally, you can only move and delete embedded columns.
![Edit options for embedded columns](https://www.edumaps.de/file/4508726984769186475.png/klev6gn)

### Embed Columns from other Maps (Part 4/4)
Source: https://www.edumaps.de/1081/1/jfb6vptvgo/0g56y4cjyr#p202

If you want to exit the embed mode, you can click on the red banner "Embed Mode" in the top left corner. This exits the embed mode and you return to your map.
![Exit Embed Mode](https://www.edumaps.de/file/10040661530955396212.png/gfu8xgo)

![Image](https://www.edumaps.de/file/3188784283825018573.png/2fcrxkb)

## 4.1 Create a Topic Map with AI
Source: https://www.edumaps.de/1204/1/cpqd0i83ia/vlbqzu8x5e

### Introduction
Source: https://www.edumaps.de/1204/1/cpqd0i83ia/vlbqzu8x5e#p2727

✔️ With Edumaps, you can create a map (pinboard) in just a few seconds.

✔️ Name a topic and, if desired, provide additional instructions.

✔️ The automatically created pinboard can be edited as you wish afterwards.

### Menu entry to generate map
Source: https://www.edumaps.de/1204/1/cpqd0i83ia/vlbqzu8x5e#p2729

Click on “Create map” in the sidebar on the left, then select “Topic Map”.
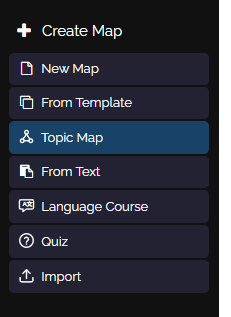
![Sidebar: Create Topic Map with AI](https://www.edumaps.de/file/9815599082446005809.png/dia8lee)

### Dialog: Generate map with AI
Source: https://www.edumaps.de/1204/1/cpqd0i83ia/vlbqzu8x5e#p2730

The dialog “Create map with AI” will open.

Here you can enter the specific topic you want your pinboard to represent.

Then click the “Create map” button.
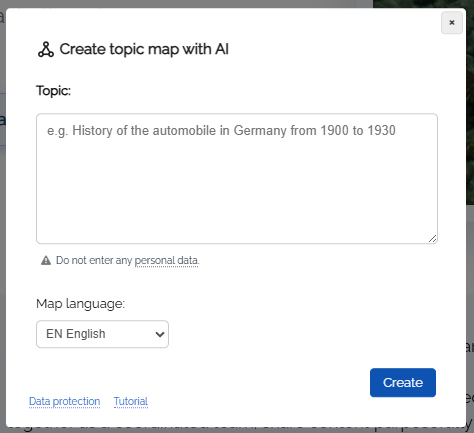
![Dialog: Create topic map with AI](https://www.edumaps.de/file/720618673554871324.png/7uys6j6)

Enter a topic of your choice, for example:

> “Economy in Germany from 1960 to 1970”

> You can also specify the number of boxes. For example: “Create 15 boxes on the topic …”

### Finished pinboard
Source: https://www.edumaps.de/1204/1/cpqd0i83ia/vlbqzu8x5e#p2731

Automatically creating the pinboard takes **around 60 seconds** depending on the topic.

After completion, you will receive a success message:
![Pinboard successfully created](https://www.edumaps.de/file/10121590989830347297.png/n10axyh)

![Finished pinboard on the topic](https://www.edumaps.de/file/4351549781033638779.png/61mu43w)

### Post-editing
Source: https://www.edumaps.de/1204/1/cpqd0i83ia/vlbqzu8x5e#p2732

You now have the option to **edit the pinboard afterwards** as desired.

- You can directly change the content in the boxes yourself.
- You can add **speech synthesis** to texts.
- In the box menu, you can click on “Media search” to add **images or videos** on the topic.
- You can **create new boxes with AI** by clicking the three dots next to the “New Box” button and selecting “New Box with AI” in the dropdown.
- You can **rewrite box content** (for example, adjust the content to another level) by opening the box menu on the box and choosing “Change Content ᴬᴵ” in the dropdown.

### Examples of AI Prompts for Creating Pinboards
Source: https://www.edumaps.de/1204/1/cpqd0i83ia/vlbqzu8x5e#p4242

Here you will find examples and ideas for creating AI-supported pinboards on different topics.

[Examples of AI Prompts for Creating Pinboards](https://www.edumaps.de/1092/1/5diqn6str1/7ixyxxlg3u)

## 4.2 Create a Language Course with AI
Source: https://www.edumaps.de/1122/1/9zrufmawrp/vvn4gmwlxh

### Introduction
Source: https://www.edumaps.de/1122/1/9zrufmawrp/vvn4gmwlxh#p3975

✔️ With Edumaps, you can create a language course **in just a few seconds**.

✔️ Simply specify the language, a topic, and the level or target group.

✔️ You can edit the automatically created language course at any time afterwards.

✔️ All generated audio files for words and texts can be edited later via text and will be regenerated automatically.

### Menu for creating a Language Course
Source: https://www.edumaps.de/1122/1/9zrufmawrp/vvn4gmwlxh#p3977

Click on “Create Map” in the left sidebar and then select “Language Course”.

![Sidebar: Create language course with AI](https://www.edumaps.de/file/12202423155980247672.png/9n0l8d0)

### Dialog: Create Language Course with AI
Source: https://www.edumaps.de/1122/1/9zrufmawrp/vvn4gmwlxh#p3978

The dialog “Create Language Course with AI” opens.

Here you can specify the following:

1. Your language (source language)
1. Language to learn
1. Grade
1. Number of questions
1. Topic

Specify a clear topic. You can also add further details or requests as free text.

Then click the “Create course” button.

![Dialog: Create Language Course with AI](https://www.edumaps.de/file/2491503375700751208.png/gp016ha)

### Language course successfully created
Source: https://www.edumaps.de/1122/1/9zrufmawrp/vvn4gmwlxh#p3979

Automatically creating the language course takes **about 30 seconds**, depending on the topic and number of questions.

A second dialog “Generating audio. Please wait …” will also appear - after that, you will be redirected to the finished language course.

![Language course created for the specified topic](https://www.edumaps.de/file/7540710871142866891.png/gnupdcl)

### Start Language Course
Source: https://www.edumaps.de/1122/1/9zrufmawrp/vvn4gmwlxh#p3982

> Click on “Start course” to open the first box in full view - and the course begins.

![Start of the course in full view](https://www.edumaps.de/file/5382007657655517453.png/s4maq0o)

### Share Course
Source: https://www.edumaps.de/1122/1/9zrufmawrp/vvn4gmwlxh#p3983

Below the headline you will find three buttons (as map owner):

![Course buttons](https://www.edumaps.de/file/346829029754928760.png/ipr76qa)

With these buttons you can:

1. start the course
1. share the course with your students
1. view your students’ results

Tips:

> Click on “Share course” and let your students scan the QR code. This allows them to start the course immediately.

> Students can participate anonymously (without an Edumaps account).

### Student Results
Source: https://www.edumaps.de/1122/1/9zrufmawrp/vvn4gmwlxh#p3984

Click on “Results” in the first box to view all your students’ results.

![Result of all Participants/Students](https://www.edumaps.de/file/5603421081097993217.png/d0vjags)

There you can also see how long each student needed for each question. You will also see the top performer marked with a crown.

> Please note that only the first submission is counted. A second attempt will not be evaluated.

### Editing Afterwards
Source: https://www.edumaps.de/1122/1/9zrufmawrp/vvn4gmwlxh#p3985

You can edit the automatically created language course at any time.

> Warning: Only edit the language course if no results have been submitted yet!

> If you would like to fundamentally change a language course that already has results, please copy the map and edit the copy. Then distribute the new map/language course again.

- You can directly change the content in the boxes yourself using the box editor.

- Pay attention to the structure of each task and do not change it. The structure is usually:

> Original sentence
Translation into native language
Additional words to choose from

- You can add new task types. In the box editor, click on “Modules” and then on “Language Exercise”. Then select the task type and use the input form.

### Helpful Tips
Source: https://www.edumaps.de/1122/1/9zrufmawrp/vvn4gmwlxh#p3986

You can open each question directly from the map by clicking the magnifying glass icon at the bottom right.

![Open language course question directly](https://www.edumaps.de/file/8601194761991668286.png/pedi5uo)

## 4.3 Create a Quiz Map with AI
Source: https://www.edumaps.de/1208/1/03snzc5m05/fon6fk3bgm

### Introduction
Source: https://www.edumaps.de/1208/1/03snzc5m05/fon6fk3bgm#p2745

✔️ With Edumaps, you can create a quiz map with the help of AI in just a few seconds.

✔️ Name a topic and the desired number of questions. The AI will generate suitable quiz questions with answer options.

✔️ You can freely edit the automatically created quiz map afterwards.

### Menu Entry: Create Quiz
Source: https://www.edumaps.de/1208/1/03snzc5m05/fon6fk3bgm#p2749

Click "Create Map" in the sidebar on the left, then select "Quiz Map ᴬᴵ".

![Sidebar: Generate Quiz with AI](https://www.edumaps.de/file/14425182279980645522.png/ehjg7nz)

### Dialog: Generate Quiz with AI
Source: https://www.edumaps.de/1208/1/03snzc5m05/fon6fk3bgm#p2750

The dialog "Create Quiz with AI" opens.

Here you can specify the exact topic to be covered in the quiz.

Then click the "Create Quiz" button.

![Dialog: Create Quiz with AI](https://www.edumaps.de/file/14498539098851301763.png/mwizu2a)

> Also enter the **number of questions** (maximum 30).

### Finished Quiz Creation
Source: https://www.edumaps.de/1208/1/03snzc5m05/fon6fk3bgm#p2751

Automatically creating the pinboard takes **about 30 seconds** depending on the topic.

You will receive a success message after completion:

![Quiz successfully created](https://www.edumaps.de/file/18256207686797251753.png/cqtvh2q)

![Finished Quiz for the topic](https://www.edumaps.de/file/2059275039622911816.png/pryzmup)

### Post-Editing
Source: https://www.edumaps.de/1208/1/03snzc5m05/fon6fk3bgm#p2752

You now have the option to **edit the created pinboard afterwards** as desired.

- You can directly edit the contents of the boxes yourself.

> Correct answers in boxes are marked with a hash symbol **#** at the beginning.

- You can add **speech synthesis** to texts.
- You can click "Media Search" in the box menu to add **images or videos** related to the topic.
- You can **generate new boxes with AI** by clicking the three dots next to the "New Box" button and choosing "New Box with AI" from the dropdown.
- You can **rewrite box content** (for example, adjust the content to another level) by opening the box menu on the box and selecting “Change Content ᴬᴵ” from the dropdown.

## 4.4 Text-to-Speech with a Natural Voice
Source: https://www.edumaps.de/1121/1/1sslcux9j8/e30ra4tj8v

### Introduction
Source: https://www.edumaps.de/1121/1/1sslcux9j8/e30ra4tj8v#p3969

✔️ With the Text-to-Speech module from Edumaps, you can easily have any text - new or existing - read aloud automatically.

✔️ The text is read out with a natural-sounding voice.

✔️ More than 60 languages are available.

✔️ You can choose between typing new texts or using existing texts in your box and individually adjust the reading language.

✔️ Texts can be edited at any time.

### Text-to-Speech with New Text
Source: https://www.edumaps.de/1121/1/1sslcux9j8/e30ra4tj8v#p3970

First, create a new box and select the Text-to-Speech module.

![Text-to-Speech module](https://www.edumaps.de/file/5156586759820591474.png/236zffs)

Select the reading language from the dropdown menu and then enter your desired text.

![Entering the text to be spoken](https://www.edumaps.de/file/2876573020226222525.png/dr5butp)

Optionally, you can enable “Hide text”. Then only the play button will appear and the text will be hidden.

After that, save the box and you can have the text read aloud. Click on the text or the play icon to start.

![Example of a reading text](https://www.edumaps.de/file/3008896342934396752.png/5fdt36w)

> Please note that the first click may require a few seconds of loading time.

### Text-to-Speech with Existing Text
Source: https://www.edumaps.de/1121/1/1sslcux9j8/e30ra4tj8v#p3971

You can also use any existing text in a box and have it read aloud.

Open the corresponding box and use your mouse to highlight the text that should be spoken.

![Highlight text to read aloud](https://www.edumaps.de/file/8154893895615068051.png/nakq1qy)

Then click on “Modules” and “Text-to-Speech”.

In the dialog, select the language of the text.

![Select reading language](https://www.edumaps.de/file/1877570257699560873.png/auxxgkm)

Optionally, you can enable “Hide text”. Then only the play button will appear and the text will be hidden.

![Only play button without displaying the text](https://www.edumaps.de/file/10517722342063680822.png/pypiddy)

Confirm and save the box.

The existing text can then be read aloud automatically with a click.

### Hide Reading Text
Source: https://www.edumaps.de/1121/1/1sslcux9j8/e30ra4tj8v#p3972

- If desired, the text can be hidden.
- Learners will then only hear the audio output without seeing the text.
- This is especially suitable for listening comprehension and language training.
- This mode is also very useful for dictations.
- Learners can fully concentrate on careful listening.
- It is particularly helpful for better perceiving pronunciation, word boundaries, and sentence melody.

Example: Text for dictation

When playing, a pause button and a stop button will appear.

The dictation can be paused and resumed at any time.

Technical note: To hide an existing text (that already has an audio tag), place an exclamation mark before the first word of the spoken text, for example: `<audio-en>!Hello ...`

### Solution to reveal (ideal for dictations)
Source: https://www.edumaps.de/1121/1/1sslcux9j8/e30ra4tj8v#p6887

For dictations and listening comprehension, there is a convenience function: the reading text is hidden and appears below at the same time as a revealable solution (like spoiler text).

To do this, activate the option “Show solution to reveal” in the text-to-speech dialog.

![Option “Show solution to reveal”](https://www.edumaps.de/file/10685568300513666954.png/4az5vm8)

In the map, learners then only see the play button and, below it, the field “Click to show”. They listen to the text, write along, and then reveal the solution with a click in order to check their own work.

![Play button with solution field](https://www.edumaps.de/file/12528760515530629222.png/jbxkc9z)

Technical note: In the box editor, a double exclamation mark controls this function, for example `<audio-en>!!We fly over the ocean ....`

A single `!` only hides the text, while a double `!!` hides it and additionally shows the solution to reveal.

You can find many ready-made examples in the [template “Read Aloud & Audio - Examples"](https://www.edumaps.de/1370/1/k6t1mcx2htej/mg6iqfexxa7v).

### Edit Reading Text Later
Source: https://www.edumaps.de/1121/1/1sslcux9j8/e30ra4tj8v#p3973

You can edit the reading text at any time afterward.

To do this, open the box in the box editor. You will then see the highlighted text. For example:

![Highlighted reading text in the box editor](https://www.edumaps.de/file/11904142396572727327.png/fvjtwp1)

This audio tag works like simple HTML. If you are not familiar with it, you can simply leave the tag unchanged. Important: Do not modify the <audio> tag itself, only your text.

You can edit, add to, or shorten the text directly.

Then save the box and click on the text to start the audio output.

> Please note that the first click may require a few seconds of loading time.

### Helpful Tips
Source: https://www.edumaps.de/1121/1/1sslcux9j8/e30ra4tj8v#p3974

- Use punctuation deliberately to make the audio output sound more natural.
- A comma or period often creates a short, natural pause.
- Use punctuation in the input text to create natural short pauses.
- For longer pauses, simply use `...`

## 4.5 Create New Boxes with AI
Source: https://www.edumaps.de/1206/1/4jwusrd9bf/qn6acc58dc

### Introduction
Source: https://www.edumaps.de/1206/1/4jwusrd9bf/qn6acc58dc#p2733

✔️ With Edumaps, you can create boxes with any content on your map (pinboard) in just a few seconds.

✔️ Name a topic and provide additional instructions if desired.

✔️ You can edit the automatically created box at any time afterwards.

### Menu Entry to Generate Box
Source: https://www.edumaps.de/1206/1/4jwusrd9bf/qn6acc58dc#p2735

Click on the three dots to the right of the "New Box" button. In the dropdown, select "New Box with AI".

![Menu Dropdown: New Box with AI](https://www.edumaps.de/file/8633495926319865755.png/2xj6et6)

You can also see that you can alternatively create a quiz box.

### Dialog: Create Box with AI
Source: https://www.edumaps.de/1206/1/4jwusrd9bf/qn6acc58dc#p2736

The “New Box with AI” dialog opens.

Here you can specify the exact topic to be covered in the box.

Then click on the “Create Box” button.

![Dialog: New Box with AI](https://www.edumaps.de/file/18104531944623070317.png/2atbwc5)

Enter a topic of your choice, for example:

> "Write a short biography about the scientist ..."

### Finished Box
Source: https://www.edumaps.de/1206/1/4jwusrd9bf/qn6acc58dc#p2737

Automatic box creation takes **about 10 to 30 seconds** depending on the topic.

After completion you will receive a success message:

![Box successfully created](https://www.edumaps.de/file/3434884246631340880.png/hp0b8am)

![Finished box for the topic](https://www.edumaps.de/file/13964895630338335110.png/7hgu87o)

### Post-Editing
Source: https://www.edumaps.de/1206/1/4jwusrd9bf/qn6acc58dc#p2738

You now have the option to **edit the created box as you wish afterwards**.

- You can change the contents in the box directly yourself.
- You can add texts with **speech synthesis**.
- You can click on “Media Search” in the box menu and add **images or videos** on the topic.
- You can **rewrite the box content** (for example, to change the content to a different level) by opening the box menu on the box and selecting "Change Content ᴬᴵ" from the dropdown.

## 4.6 Edit an Existing Pinboard with AI
Source: https://www.edumaps.de/1093/1/rsvefn1i88/3f43axy5ik

### Introduction
Source: https://www.edumaps.de/1093/1/rsvefn1i88/3f43axy5ik#p2626

✔️ With the AI on Edumaps, you can create any maps you like. You can also use the contents of an **existing map** and use them for your AI task.

✔️ A **new map** will be created containing all the changes.

### Menu entry to change the map
Source: https://www.edumaps.de/1093/1/rsvefn1i88/3f43axy5ik#p2628

1. Open a map for which you have editing rights.
1. Open the map dropdown at the top right.
1. Select **"Change Content ᴬᴵ"**.

![Change request to AI](https://www.edumaps.de/file/3931846893306340412.png/ka36jj6)

### Dialog: Change content with AI
Source: https://www.edumaps.de/1093/1/rsvefn1i88/3f43axy5ik#p2629

In the dialog that opens, enter your request.

![Modify content with AI](https://www.edumaps.de/file/2425110003925932965.png/9i2g4oh)

> A **copy of the current map** will be created and processed by the AI module according to your request.

> You can also add new boxes or even remove boxes - depending on your request.

### New altered pinboard
Source: https://www.edumaps.de/1093/1/rsvefn1i88/3f43axy5ik#p2630

Changing the map takes **up to 120 seconds** depending on the scope and task.

After completion, you will receive a success message:
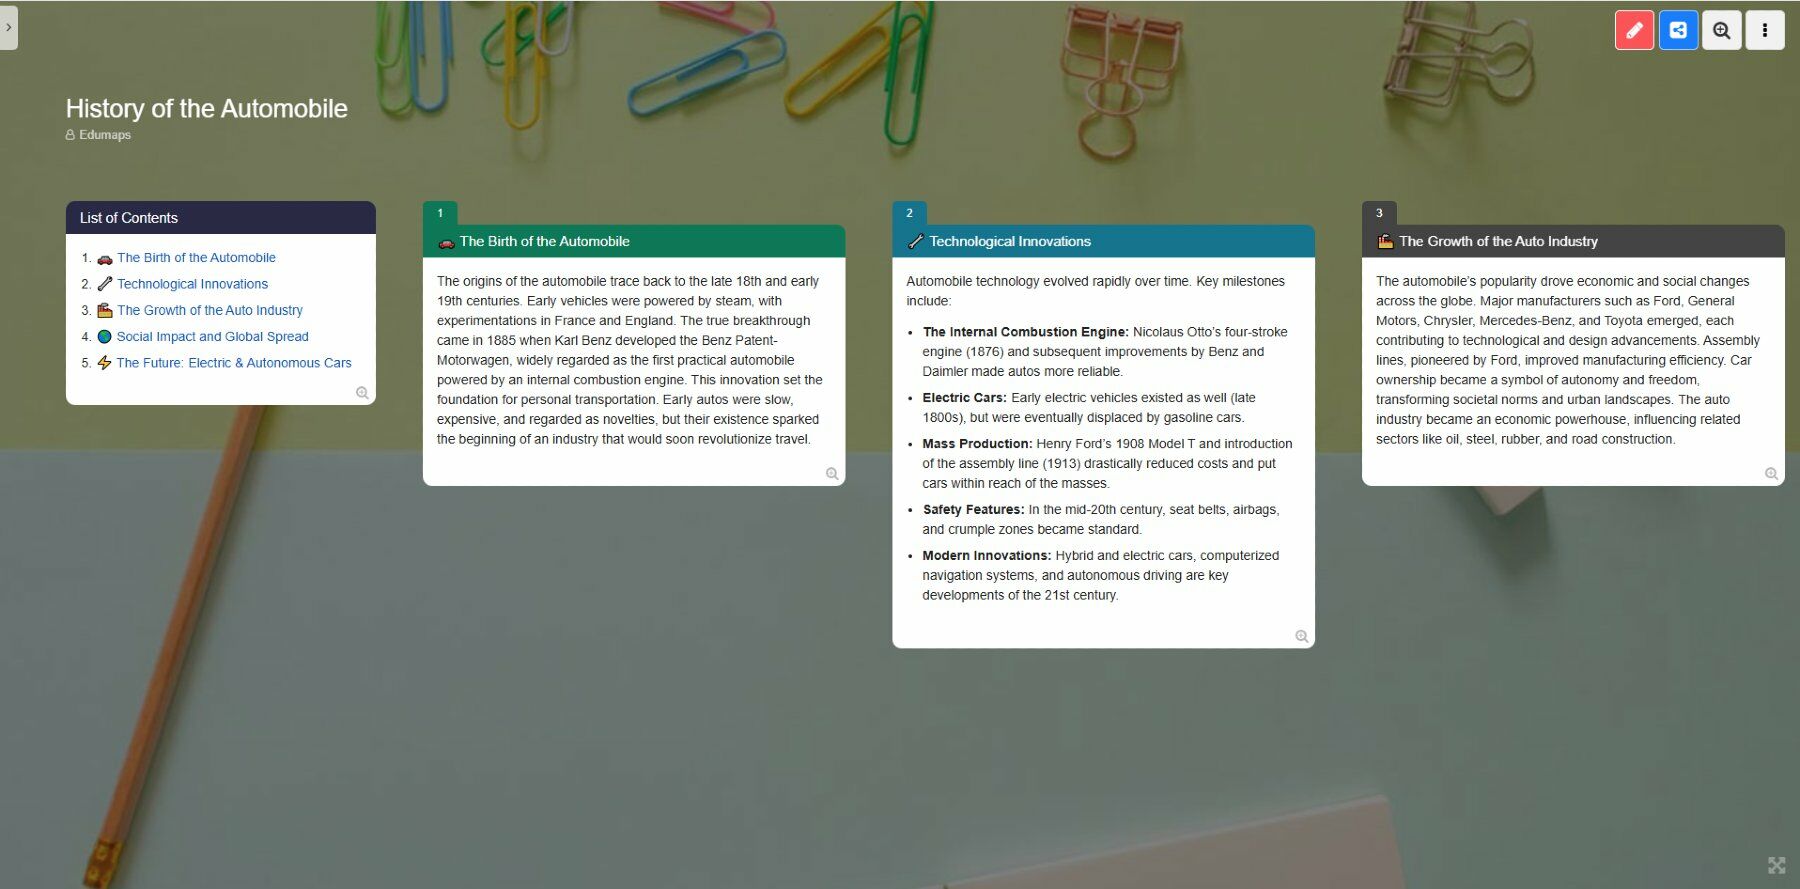
![Pinboard successfully changed](https://www.edumaps.de/file/1109655664579344425.png/7dtbcbg)

### Post-editing
Source: https://www.edumaps.de/1093/1/rsvefn1i88/3f43axy5ik#p2631

You now have the possibility to **edit the created pinboard afterwards** as you wish.

- You can directly edit the content in the boxes yourself.
- You can add **speech synthesis** to texts.
- You can click on "Media search" in the box menu and add **images or videos** to the topic.
- You can **create new boxes with AI** by clicking on the three dots next to the "New box" button and selecting "New box with AI" in the dropdown.
- You can **rewrite box content** (for example, change the content to another level) by opening the box menu on the box and selecting "Change Content ᴬᴵ" in the dropdown.

## 4.7 Analyzing Maps with AI
Source: https://www.edumaps.de/1369/1/io8ujh1fvvch/vv9e082u169q

### Introduction
Source: https://www.edumaps.de/1369/1/io8ujh1fvvch/vv9e082u169q#p6860

✔️ With AI analysis, you receive a **didactic assessment** of your map in just a few seconds.

✔️ The AI evaluates the structure, completeness, and clarity of the content and provides **specific suggestions for improvement**.

✔️ You can freely adjust the analysis prompt and ask your own questions about your map.

✔️ This feature is available to teachers with editing rights for the map.

### Menu Entry for AI Analysis
Source: https://www.edumaps.de/1369/1/io8ujh1fvvch/vv9e082u169q#p6862

1. Open a map for which you have editing rights.

1. Click the three dots in the top bar and select “AI Analysis”.

![Menu entry for AI analysis](https://www.edumaps.de/file/16066949973271408598.png/4hgvmfv)

### Dialog: AI Analysis of the Map
Source: https://www.edumaps.de/1369/1/io8ujh1fvvch/vv9e082u169q#p6863

The “AI Analysis of the Map” dialog opens. A proven analysis prompt is already preset there:

> “Create a didactic analysis of the map regarding: structure and organization, completeness of content, clarity for learners, and provide specific suggestions for improvement. Rating on a scale from 1 to 10.”

You can use this prompt directly or adapt it to your needs. (Further examples can be found on this map.)

Then click the **“Analyze”** button.

> Note: For the analysis, the content of the map is transmitted to the AI module. Please make sure that the map does not contain any personal data.

![Dialog AI analysis of the map](https://www.edumaps.de/file/13185479685670550773.png/ltknneg)

### Analysis Result
Source: https://www.edumaps.de/1369/1/io8ujh1fvvch/vv9e082u169q#p6864

Depending on the size of the map, the analysis takes **about 10 to 30 seconds**.

The result is displayed directly in the dialog, for example with ratings for structure, completeness, and clarity, as well as an overall assessment on a scale from 1 to 10.

![Result of the AI analysis (example)](https://www.edumaps.de/file/2311981386889242272.png/1uds5f6)

### Using the Analysis Further
Source: https://www.edumaps.de/1369/1/io8ujh1fvvch/vv9e082u169q#p6865

You have several options for continuing to work with the result:

- Click **“Insert as Box”** to save the analysis as a new box in your map. This keeps the feedback available so you can work through the suggestions step by step.
- Implement the suggestions for improvement directly, for example by rearranging boxes or adding missing content.
- Then use **“Change Content ᴬᴵ”** in the box menu to have individual box content rewritten according to the suggestions.
- Run the analysis again after revising the map and compare the rating.

### Didactic Quality Check
Source: https://www.edumaps.de/1369/1/io8ujh1fvvch/vv9e082u169q#p6866

Check your map before sharing it with the class using the preset prompt:

> “Create a didactic analysis of the map regarding: structure and organization, completeness of content, clarity for learners, and provide specific suggestions for improvement. Rating on a scale from 1 to 10.”

Ideal as a quick quality check before you share the map with learners.

### Clarity for a Grade Level
Source: https://www.edumaps.de/1369/1/io8ujh1fvvch/vv9e082u169q#p6867

Have the AI check whether the content matches the level of your learner group:

> “Check whether the content of the map is understandable for learners in grade 7. Name technical terms and formulations that should be simplified, and provide specific suggestions for easier wording.”

Especially helpful for differentiation and for German as a second language learner groups.

### Completeness and Subject Accuracy
Source: https://www.edumaps.de/1369/1/io8ujh1fvvch/vv9e082u169q#p6868

Have the map checked for gaps and errors:

> “Check the content of the map for subject accuracy and completeness on the topic. Name factual errors, missing subtopics, and outdated information. Suggest which boxes should be added.”

This helps you identify missing subtopics before the map is used in class.

### Feedback on Student Work
Source: https://www.edumaps.de/1369/1/io8ujh1fvvch/vv9e082u169q#p6869

Use the analysis to support the assessment of your learners’ project pinboards:

> “Assess this student work according to the following criteria: depth of content, structure, language quality, and clarity. Formulate appreciative feedback for each criterion with one specific tip for improvement. Rating on a scale from 1 to 10.”

You can insert the result as a box and share it with learners as feedback.

### Deriving Tasks from the Map
Source: https://www.edumaps.de/1369/1/io8ujh1fvvch/vv9e082u169q#p6870

Use the content of the map to create practice material directly:

> “Based on the content of this map, create 5 quiz questions with answers and 3 open discussion questions for class. Sort the questions by difficulty.”

You can insert the questions as a box and use them, for example, as a lesson starter or for review.

### Check the Map for Language and Spelling
Source: https://www.edumaps.de/1369/1/io8ujh1fvvch/vv9e082u169q#p6871

Analyze language and spelling:

> “Check the content of the map for spelling and language. List spelling mistakes, unclear formulations, and suggestions for improvement.”

You can insert the list of spelling mistakes as a new box and discuss it with the student.

### Improve the Structure of the Map
Source: https://www.edumaps.de/1369/1/io8ujh1fvvch/vv9e082u169q#p6872

Find out how well your map is organized and what can be improved.

> “Analyze the order and structure of the boxes. Identify areas that seem unclear and suggest a better arrangement.”

### Check Language for the Target Group
Source: https://www.edumaps.de/1369/1/io8ujh1fvvch/vv9e082u169q#p6873

Check whether the language level is appropriate.

> “Check whether the language of the map is understandable for the intended learner group. Name terms that are too difficult and formulate simpler alternatives.”

Use the evaluation to improve the map yourself or with the AI module.

### Suggestions for Improving Individual Boxes
Source: https://www.edumaps.de/1369/1/io8ujh1fvvch/vv9e082u169q#p6874

Find out in detail which boxes could be improved.

> “Name boxes that are too brief, too long, or unclearly worded, and suggest how they should be revised.”

## 4.8 Edit Existing Boxes with AI
Source: https://www.edumaps.de/1207/1/7l949u3us0/yg1x50nyzo

### Introduction
Source: https://www.edumaps.de/1207/1/7l949u3us0/yg1x50nyzo#p2739

✔️ With the AI module, you can freely modify the content of existing boxes.

✔️ Each change creates an entry in the box's history, allowing you to undo changes if needed.

### Menu Entry for Changing the Box
Source: https://www.edumaps.de/1207/1/7l949u3us0/yg1x50nyzo#p2741

1. Open a map in edit mode.

1. Navigate to a box and open the dropdown in the top right corner.

1. Select **“Change Content ᴬᴵ”**.

![Change box content with AI](https://www.edumaps.de/file/7459306549167297000.png/dq0pptp)
(or create new box content)

### Dialog: Change Box Content with AI
Source: https://www.edumaps.de/1207/1/7l949u3us0/yg1x50nyzo#p2742

In the dialog that opens, enter your request.

![Modify content with AI](https://www.edumaps.de/file/10018487307681482835.png/sntyxrh)

> The box content will be changed directly.

> In the box history, you can restore the previous version if needed.

### New Edited Box
Source: https://www.edumaps.de/1207/1/7l949u3us0/yg1x50nyzo#p2743

Changing the box takes **10 to 30 seconds** depending on the request.

You will receive a success message when finished:

![Box successfully changed](https://www.edumaps.de/file/10021636245826336095.png/rvhf9z1)

The new box is displayed immediately.

### Post-Processing
Source: https://www.edumaps.de/1207/1/7l949u3us0/yg1x50nyzo#p2744

You now have the option to **edit the created box** as you wish.

- You can directly change content in the box yourself.
- You can add texts with **speech synthesis**.
- You can click "Media search" in the box menu to add **images or videos** related to the topic.
- You can **rewrite the box content** (for example, adjust the level) by opening the box menu and selecting "Change Content ᴬᴵ" from the dropdown.

## 4.9 Examples of AI Prompts for Creating Pinboards
Source: https://www.edumaps.de/1092/1/5diqn6str1/7ixyxxlg3u

### Introduction
Source: https://www.edumaps.de/1092/1/5diqn6str1/7ixyxxlg3u#p552

✔️ With the AI module you can create any pinboards you like. Content is generated according to your instructions.

**Instructions:**

1. Click on "Create map" in the sidebar.
1. Select **"Topic Map"**.
1. In the dialog that opens, enter your instruction.

![Send instruction to AI](https://www.edumaps.de/file/720618673554871324.png/7uys6j6)

> Creating the map takes about 60 seconds.

### 📚 Lesson Plan Generator
Source: https://www.edumaps.de/1092/1/5diqn6str1/7ixyxxlg3u#p561

Create a detailed and structured lesson plan suitable for [subject], targeting [grade level]. Include learning objectives, key concepts, suggested activities, assessment methods, and required materials. Format the plan into sections with clear headings and lists for each component. Ensure the content is engaging and accessible for both teachers and students.

### 🌍 Interactive Geography Factboard
Source: https://www.edumaps.de/1092/1/5diqn6str1/7ixyxxlg3u#p553

Generate a pinboard that showcases fascinating facts, and quick quizzes about [continent/country/topic]. Each box should feature a subtopic such as culture, geography, language, or famous landmarks. Use bullet points and brief explanations to make facts easy to digest. Include a fun activity suggestion in each box to help learners engage further with the content.

### 🧪 Science Experiment Collection
Source: https://www.edumaps.de/1092/1/5diqn6str1/7ixyxxlg3u#p554

Compile a set of safe, at-home science experiments suitable for students in [grade level]. For each experiment, provide a title, a list of materials, step-by-step instructions, expected results, and a brief explanation of the underlying scientific principle. Use clear, concise language and emphasize safety precautions where necessary.

### 🖋️ Writing Prompt Ideas
Source: https://www.edumaps.de/1092/1/5diqn6str1/7ixyxxlg3u#p555

Suggest creative writing prompts for [genre or topic] to inspire student work. For each prompt, give a scenario or question, possible themes, and a brief outline of what students might include in their response. Arrange the prompts in a pinboard format, making it easy to select one for a classroom activity or homework assignment.

### 💡 Study Tips & Techniques
Source: https://www.edumaps.de/1092/1/5diqn6str1/7ixyxxlg3u#p556

List effective study strategies for students preparing for [subject or standardized exam]. Include techniques like active recall, spaced repetition, mind mapping, and group study. Explain the benefits and proper use of each strategy. Provide practical advice for creating a study schedule and minimizing distractions. Use checklists and tips for best results.

### 🧩 Math Challenge Board
Source: https://www.edumaps.de/1092/1/5diqn6str1/7ixyxxlg3u#p557

Create a pinboard featuring a variety of math challenges tailored to [grade level or topic, e.g., fractions, algebra]. Each box should contain a problem statement, hints for solving it, and a detailed explanation of the solution. Incorporate both word and number problems for diverse practice. Highlight key mathematical concepts involved in each challenge.

### 🎨 Visual Arts Inspiration
Source: https://www.edumaps.de/1092/1/5diqn6str1/7ixyxxlg3u#p558

Design pinboard content that introduces students to different art styles, artists, and creative activities. Each box should provide an overview of an art movement, a brief biography of a famous artist, or a step-by-step art project. Incorporate images, color palettes, and quick exercises to stimulate creativity in students. Use engaging language and clear formatting.

### 📖 Reading Recommendations
Source: https://www.edumaps.de/1092/1/5diqn6str1/7ixyxxlg3u#p559

Curate a list of engaging books tailored to [age group or reading level]. For each recommendation, provide the book title, author, a brief summary, and reasons why it’s a great choice for students. Mention themes and any related discussion questions that could be used in class. Arrange the selections to promote variety in genre and perspective.

### 📖 Create a complete map with empty boxes
Source: https://www.edumaps.de/1092/1/5diqn6str1/7ixyxxlg3u#p6844

Create a pinboard with 5 empty boxes, numbered from 1 to 5. Do not use emojis. Do not add any box content. Do not comment.

## 4.10 Examples of AI Prompts for Editing Pinboards
Source: https://www.edumaps.de/1205/1/2isjxln0cv/97pnai9rdy

### Introduction - Capabilities of the AI Module
Source: https://www.edumaps.de/1205/1/2isjxln0cv/97pnai9rdy#p570

The AI can write, invent, edit, delete, or rework texts for you—depending on the task you give it.

✔️ **Create content**
Specify the topic and purpose in your task.

✔️ **Modify content**
Include a text in your task and tell the AI what to do with it.

✔️ **Expand content**
Let the AI write new text. Tell the AI what content you want to add.

✔️ **Remove content**
Let the AI modify an existing text and remove contents as you wish.

✔️  The boxes on the right show examples of tasks for the AI.

### Create Content
Source: https://www.edumaps.de/1205/1/2isjxln0cv/97pnai9rdy#p571

**Sample Prompt:**

> Add five quiz questions (each with four answer options) to each box according to its topic.

**Sample Prompt:**

> Add 5 new boxes to the pinboard that describe the characters from Harry Potter.

**Sample Prompt:**

> Fill all empty boxes with content on the topic of the history of the Weimar Republic. Describe the contents for students of 9th grade in grammar schools.

### Expand Content
Source: https://www.edumaps.de/1205/1/2isjxln0cv/97pnai9rdy#p572

**Sample Prompt:**

> Add exercises and solutions for 5th grade to each box on the topic of adding fractions. Use LaTeX for output.

**Sample Prompt:**

> Expand the info boxes on the topic of "reducing fractions" with explanatory texts and two new common mistakes with short explanations for 5th grade.

**Sample Prompt:**

> Add further meaningful information to each box that may be interesting for students. In doing so, additional competencies should be conveyed.

### Modify / Rework Content
Source: https://www.edumaps.de/1205/1/2isjxln0cv/97pnai9rdy#p573

**Sample Prompt:**

> Change the contents of the pinboard so that instead of addition, it deals with multiplication of fractions. 6th grade level. Adjust the examples and solutions accordingly and provide them in LaTeX.

**Sample Prompt:**

> Transform the contents of the pinboard so that instead of "converting decimals to fractions" the topic is "comparing fractions." The level should be appropriate for 5th grade. Provide at least three new tasks with sample solutions.

### Remove Content
Source: https://www.edumaps.de/1205/1/2isjxln0cv/97pnai9rdy#p574

**Sample Prompt:**

> Remove from all boxes on the topic "converting fractions to decimals" every sentence that addresses or explains the topic of "percentage calculation." The remaining content should remain unchanged.

**Sample Prompt:**

> Revise each box on the topic "multiplying fractions" by removing all sentences and examples that mention the terms "simplifying" or "expanding" so that only multiplication is covered.

**Sample Prompt:**

> Remove from all boxes the words "faulty" and "error." Also remove sentences that are longer than 20 words.

### Helpful Ideas
Source: https://www.edumaps.de/1205/1/2isjxln0cv/97pnai9rdy#p65

Here are some **helpful ideas** for inspiration:

**Evaluation of a Student Map**

You can assign a student the task of writing a map on a particular topic. Afterwards, you can instruct the AI with:

> "Evaluate the student's content. Rate each box from 1 (poor) to 10 (very good). Create a box at the end that summarizes the entire evaluation."

**List Spelling Mistakes**

> "Find all spelling mistakes and write them in a new box."

**Change Map Structure**

> Move all boxes into the first column. Only place the last box into the second column.

## 4.11 Transform Existing Texts into a Pinboard
Source: https://www.edumaps.de/1383/1/xoy9wow1937c/fj56bvpuvd9z

### Introduction
Source: https://www.edumaps.de/1383/1/xoy9wow1937c/fj56bvpuvd9z#p6981

✔️ In Edumaps, you can turn **your own texts** into a ready-structured pinboard - for example a daily schedule, notes, or an email.

✔️ Simply paste in your text, and the AI will handle the division into columns and boxes.

✔️ The content remains unchanged: the AI structures your text, it does not invent anything.

✔️ You can freely edit the automatically created pinboard afterwards.

### Step by Step
Source: https://www.edumaps.de/1383/1/xoy9wow1937c/fj56bvpuvd9z#p6983

**Menu entry for creating from text**
Click on “Create Map” in the left sidebar and then select “From Text”.

![Sidebar with entry "From Text"](https://www.edumaps.de/file/18095860361260829273.png/u6ild3l)

> Alternatively, you can also open “Topic Map” and switch to “Your text” in the dialog - both ways lead to the same dialog.

### Step by Step
Source: https://www.edumaps.de/1383/1/xoy9wow1937c/fj56bvpuvd9z#p6984

**Dialog: Insert your own text**
The dialog opens in the "Insert your text" mode. Paste your existing text here, for example by copying and pasting from a note, an email, or a document.

The text may be unformatted and unsorted (up to 15,000 characters).

![Dialog in “Your Text” mode](https://www.edumaps.de/file/6718979015192835617.png/9mug3bs)

> Note: To create the pinboard, your text is transferred to the AI module. Please make sure that the text does not contain any personal data, and confirm this using the checkbox in the dialog.

Then click the “Convert to map” button.

### Step by Step
Source: https://www.edumaps.de/1383/1/xoy9wow1937c/fj56bvpuvd9z#p6985

**Finished pinboard**
Automatically creating the pinboard takes **about 10 to 30 seconds**, depending on the length of the text. You will receive a success message when it is finished.

Related content is placed in shared columns, individual points become boxes, and times and bullet points are neatly formatted.

### Example and Tips
Source: https://www.edumaps.de/1383/1/xoy9wow1937c/fj56bvpuvd9z#p6986

**Example: Before and After**
Your source text might look like this - copied directly from a note:

> Summer festival on Friday. Setup starts at 2 p.m., helpers meet at the gym. 3 p.m. welcome by the school administration. 3:15 p.m. performance by class 3a. 3:45 p.m. cake buffet, please register donations by Thursday. 4:30 p.m. game stations in the schoolyard. 6 p.m. closing together. Please bring sun protection. If it rains, everything will take place in the assembly hall.

This could become, for example, a pinboard with:

- Column **Schedule** with one box per program item and time
- Column **Helping out** with setup and cake donations
- Column **Important notes** with sun protection and rainy-day alternative

![Example: Resulting pinboard for the summer festival](https://www.edumaps.de/file/16508463588241362557.png/8dpuouo)

### Example and Tips
Source: https://www.edumaps.de/1383/1/xoy9wow1937c/fj56bvpuvd9z#p6987

**What is this suitable for?**
Whenever content **already exists** but is not yet clearly organized:

- Daily routines and weekly plans
- Notes from meetings or parent evenings
- Procedures for projects, trips, or celebrations
- Material lists and checklists
- Longer emails or text documents
- Bullet points for a teaching unit

> Tip: You can also add wishes in front of the text, for example: "Create a parent information board from this with the columns Schedule, Helping out, and Notes."

### Example and Tips
Source: https://www.edumaps.de/1383/1/xoy9wow1937c/fj56bvpuvd9z#p6988

**Post-editing**
You now have the option to edit the created pinboard **afterwards** as you wish.

- You can change content directly in the boxes yourself.
- You can add **speech synthesis** to texts.
- You can click **Media Search** in the box menu and add **images or videos** related to the topic.
- You can create **new boxes with AI** by clicking the three dots next to the "New Box" button and selecting "New Box with AI" from the dropdown.
- You can **rewrite box content** (for example, adjust the content to a different level) by opening the box menu and selecting "Change Content ᴬᴵ" from the dropdown.

## 5.1 Booking System
Source: https://www.edumaps.de/1046/1/mtp976esa8/ee2qawxllh

### Introduction
Source: https://www.edumaps.de/1046/1/mtp976esa8/ee2qawxllh#p434

✔️ With the booking system, you can assign a bookable time slot to each box. This lets you quickly and easily create and organize courses.

You can also collect payments via PayPal.

The booking system can be used for:

- Courses and workshops
- Parent-teacher conferences
- Participation in sports events
- Meeting rooms
- Attendance at concerts
- Meal orders

✔️ The booking system is powerful and can save you a great deal of time.

### Activate Bookings
Source: https://www.edumaps.de/1046/1/mtp976esa8/ee2qawxllh#p92

You can easily convert a box into a course.

- The box title becomes the course title.
- The box content becomes the course content.

To do this, click “Bookings and Calendar” in the box settings. There, activate the “Booking system” option:

![Option: “Booking system”](https://www.edumaps.de/file/985720107449274647.png/d7b9ib4)

Then set the course start time in the input field.

- Optionally, you can enter the maximum number of participants.
- Optionally, you can set a price.

Click “Save Box” – Congratulations, your course is now activated.

Note: This option cannot be activated by students or anonymous users.

### Booking Process
Source: https://www.edumaps.de/1046/1/mtp976esa8/ee2qawxllh#p435

Once you have finished setting up your map and have enabled bookings for one or more boxes, you can distribute your map via a link.

The users visiting your map will now see a booking button directly on the box:

![Booking button on the box](https://www.edumaps.de/file/8330500408534074949.png/4hp1j9v)

If the user clicks on the blue booking button, they will receive the following message:

![Notification during booking](https://www.edumaps.de/file/7184249093639700942.png/4g9xtca)

If the user confirms by clicking "Book", they will be successfully enrolled in the course.

![Confirmation of participation after booking](https://www.edumaps.de/file/11377951158537511020.png/gl5a5m0)

The appointment can now be found in the [user calendar](https://www.edumaps.de/user/calendar).

A "Booked" label appears on the box.

### Who can book?
Source: https://www.edumaps.de/1046/1/mtp976esa8/ee2qawxllh#p264

Registered Edumaps users can book, and so can anonymous visitors.

If a user is logged in, they can click the Book button directly and are enrolled in the course.

If an anonymous visitor clicks the Book button, two options appear:

- Log in with account
- Book with email

Anyone who already has an account (for example via the single sign-on of their school) should log in first. This way no second account is created.

If the visitor clicks “Book with email”, they can enroll in the course by entering their email, name and institution.

In this case a **basic account** is created for the user. The user confirms this with a checkbox in the booking form. The account is necessary for the following functions to work:

1. Cancelling the booking
1. Automated certificate of participation
1. Reminder email 24 hours before the course starts

After booking, the user receives an email with the booking confirmation. Via a link in this email the user confirms their email address and can set their own password there if needed.

> ⚠️ The certificate of participation is only sent to confirmed email addresses. Please ask your participants to click the link in the booking confirmation.

If the email address already belongs to an account, the booking is assigned to that account.

The user can delete the account at any time under [My account](https://www.edumaps.de/user/account).

### Until when can you book?
Source: https://www.edumaps.de/1046/1/mtp976esa8/ee2qawxllh#p349

An enrollment is possible until the course begins. The “book” button will be displayed up to 1 hour after the set course start. After that, it will be hidden.

This 1-hour grace period has been set in case someone decides to participate at short notice.

To enforce a registration deadline yourself, you can activate the “Full Protection” under “Protect Box” in the box settings, then no further registrations will be possible.

For the map owner, a Finish button will appear instead of an enrollment button after the course time ends, allowing them to end the course.

### View Participant List
Source: https://www.edumaps.de/1046/1/mtp976esa8/ee2qawxllh#p436

As a course instructor (map owner), you can view all participants for a course by switching to **Edit Mode** and then clicking on the button with the counter:

![Number of Participants](https://www.edumaps.de/file/10384704129855600778.png/s80yi15)

All other editors (as long as they are not anonymous) can also access the participant list in edit mode.

The list of participants then looks like this, for example:

![Example: Participant List](https://www.edumaps.de/file/1080275727131295601.png/g2ds7et)

### Remove Participants from Course
Source: https://www.edumaps.de/1046/1/mtp976esa8/ee2qawxllh#p445

You can remove participants from the course at any time by opening the list of all participants and then clicking on the remove icon for the respective user:

![Remove participants](https://www.edumaps.de/file/1080275727131295601.png/g2ds7et)

### Participant cancels Course
Source: https://www.edumaps.de/1046/1/mtp976esa8/ee2qawxllh#p265

Each participant can deregister from the course by simply clicking on the “Booked” button:

![Option to cancel the booking](https://www.edumaps.de/file/16837316051014883348.png/l438d52)

### Finish Course
Source: https://www.edumaps.de/1046/1/mtp976esa8/ee2qawxllh#p639

If the time of your course is in the past (at least 1 hour old), in edit mode a “Finish” button will appear instead of a “Book” button.

This is only displayed to the course instructor (map owner).

![Finish course](https://www.edumaps.de/file/3506362396535308584.png/0om29jt)

If you click on the “Finish” button, the following dialog appears:

![Dialog for finishing the course](https://www.edumaps.de/file/7717056585908654020.png/b5e7gwa)

There you can also view a preview of the certificate of participation.

If you confirm by clicking on “Finish Course”, the following appears:

![Confirmation of course completion](https://www.edumaps.de/file/5699448508676636274.png/fripazh)

An email with a link to the certificate of participation will be automatically sent to all participants.

### Certificate of Participation
Source: https://www.edumaps.de/1046/1/mtp976esa8/ee2qawxllh#p640

When a course is finished, each participant automatically receives an email with the certificate of participation.

Each participant can also find the certificate of participation under ["My Bookings"](https://www.edumaps.de/user/bookings).

![Page “My Bookings”](https://www.edumaps.de/file/11534977938866394905.png/97g7t3l)

In the last column, the user can view and print the certificate of participation.

![Certificate of participation for the course](https://www.edumaps.de/file/11844494653254328851.png/fmigha8)

### Short Description for Certificate of Participation
Source: https://www.edumaps.de/1046/1/mtp976esa8/ee2qawxllh#p266

If you want to insert only a brief description instead of the full description into the certificate of participation, you can do it as follows:

1. Edit your box content (course content).
1. Go to the end, insert a blank line and then three hyphens `---` on another line.
1. This creates a horizontal line. It serves as a separator from the detailed description above to your new short description.
1. Save the box.
1. Now, only the text below the horizontal line will appear on the certificate of participation.

```
Description for box on map
---
Brief description for certificate
```

### Custom Letterhead with Logo for Certificate of Participation
Source: https://www.edumaps.de/1046/1/mtp976esa8/ee2qawxllh#p267

Each certificate of participation can be customized by you. You can insert a logo as on a letterhead, enter your address and contact details, and add further data in the footer.

To do this, simply open the page for [editing the letterhead](https://www.edumaps.de/docs?template).

![Edit your own letterhead](https://www.edumaps.de/file/5059260128631188184.png/sob59j0)

Make sure that the image for the logo is in JPG or PNG format.

### Automatic Emails
Source: https://www.edumaps.de/1046/1/mtp976esa8/ee2qawxllh#p479

A participant receives the following emails automatically:

1. Booking confirmation after the booking
1. Reminder email 24 hours before the appointment
1. Completion email when the course leader ends the course

When booking with email, the booking confirmation is always sent for a newly created account. Logged-in users receive it if they select this option when booking and their email address is confirmed. The email contains a link to cancel the booking. When booking with email, it also contains the link to confirm the email address.

The completion email contains a link that lets the participant print a certificate of participation. It contains their name and all descriptions from the box. The completion email is only sent to confirmed email addresses.

### Export Participant List
Source: https://www.edumaps.de/1046/1/mtp976esa8/ee2qawxllh#p636

You can export the entire participant list by clicking on the “CSV Export” button.

![CSV export of the participant list](https://www.edumaps.de/file/1080275727131295601.png/g2ds7et)

You can open the downloaded file in your spreadsheet program.

### Export Participant List of all courses on a map
Source: https://www.edumaps.de/1046/1/mtp976esa8/ee2qawxllh#p93

You can export the participants of all courses in a map as a single CSV file.

1. Enter edit mode.
1. Click on the three dots in the map menu and select "Export map".
1. In the dialog that opens, choose "Participants of all bookings (csv)".

![Export all Participants of all Bookings (csv)](https://www.edumaps.de/file/13256388117114253572.png/toet7mr)

You can now save and reuse the generated CSV file on your computer.

The export includes the course name, email, full name, and username of each participant.

### Overview: “My Bookings”
Source: https://www.edumaps.de/1046/1/mtp976esa8/ee2qawxllh#p546

On the [“My Bookings”](https://www.edumaps.de/user/bookings) page, every user can see which courses he has already booked.

There you can also open the booked courses again.

### Pay via Paypal
Source: https://www.edumaps.de/1046/1/mtp976esa8/ee2qawxllh#p604

> ⚠️ The Paypal integration is not available on all servers.

You have the option to set a price for your course and receive payment directly from your participants via Paypal.

To do this, go to the box settings and enter the “Payment amount via Paypal” in euros in the booking system.

![Price for Course](https://www.edumaps.de/file/18426610950127038786.png/wru8p4e)

After that, you will see a price label on the box.

![Price label on box](https://www.edumaps.de/file/8385427286534285563.png/wzajabn)

Participants can now first book the course and then make the payment in a second step.

The dialog during booking appears as follows:

![Booking confirmation](https://www.edumaps.de/file/17331907636372612028.png/hknnfu9)
with redirect to payment

![Payment page - Redirect to Paypal](https://www.edumaps.de/file/16194213445576277048.png/3y3c3as)

The user is then redirected to Paypal.

After successful payment, the payment entry with all details appears for you as the course instructor on the page [“Received Payments”](https://www.edumaps.de/user/payments).

![Page “Received Payments”](https://www.edumaps.de/file/9431859852688102012.png/29omcu6)

> You can set your PayPal address on the [My Account](https://www.edumaps.de/user/account) page. If no email is set, the email of your user account will be used.

### Pay via PayPal to other users
Source: https://www.edumaps.de/1046/1/mtp976esa8/ee2qawxllh#p75

If there are different course providers and the PayPal payments should go to different users, proceed as follows:

1. The other users create maps with boxes, activate the booking module, and set a price for the respective box.
1. The other users send you the link to the box or to the map.
1. You embed the corresponding boxes of the other users on your own map.
1. Now the different boxes from the different users can be **booked and paid** directly on your map.
1. The respective payment goes to the corresponding course provider.

### Cancel course (by provider)
Source: https://www.edumaps.de/1046/1/mtp976esa8/ee2qawxllh#p320

You can cancel the course as an owner by simply deactivating the “Booking system” option and saving the box. Alternatively, you can simply delete the box.

**Question: Are all participants of a course automatically informed by email if I cancel the course?**

An automatic email is not sent by Edumaps, as this would lead to mass emails and our mail server would be blacklisted. The function could also be misused to generate mass emails. Instead, proceed as follows: Open the list of all participants. To do this, click on the participant counter on the box. This list will show you all email addresses. You can now copy the emails and send a message to all participants using your email program.

Tip: If all courses in your map are canceled, you can export a CSV list of participants from all courses. You can find this CSV export under "Export map". You can then open the CSV file and copy the column with the emails.

### FAQ
Source: https://www.edumaps.de/1046/1/mtp976esa8/ee2qawxllh#p348

In our FAQ, you will find answers to various questions:

- [Can we setup the booking module so that only users who are already registered can book the course?](https://www.edumaps.de/faq#a135000)
- [Will people who have not registered an account also receive a certificate of participation by email?](https://www.edumaps.de/faq#a172000)
- [When a user books a course via email, he is automatically logged in, other times he is not. What is the reason?](https://www.edumaps.de/faq#a173500)
- [As a course instructor, how can I add multiple students to a course later?](https://www.edumaps.de/faq#a210000)
- [Why is the “Book” button still visible when the course time is in the past?](https://www.edumaps.de/faq#a306000)
- [Can I set up recurring bookings?](https://www.edumaps.de/faq#a106000)
- [Can you hide the date and time in the booking module?](https://www.edumaps.de/faq#a154000)
- [Can all participants in all boxes of a map be reset at once?](https://www.edumaps.de/faq#a155000)
- [How can a completed course be activated again (box is marked with “Finished”)?](https://www.edumaps.de/faq#a173000)
- [Why is the booking option not displayed?](https://www.edumaps.de/faq#a174000)
- [How can I see an example or preview of a certificate of participation?](https://www.edumaps.de/faq#a205000)
- [We have activated bookings for a box. Who can view the participant list of the course?](https://www.edumaps.de/faq#a333000)
- [Is it possible to set limitations for rental systems and calendar bookings (booking only during specific periods or with 2-hour slots)?](https://www.edumaps.de/faq#a360000)
- [Why do I not see the finish button for the bookings of the box?](https://www.edumaps.de/faq#a306100)

## 5.2 Lending System
Source: https://www.edumaps.de/1055/1/pec424hul6/wenurto5ez

### Introduction
Source: https://www.edumaps.de/1055/1/pec424hul6/wenurto5ez#p939

✔️ With the lending system you can assign a calendar to each box, allowing your visitors to make reservations.

This is useful for:

- Lending of items and equipment
- Lending of rooms and spaces
- Booking of persons

✔️ The lending system is powerful and can save you a lot of time.

### Activate Lending
Source: https://www.edumaps.de/1055/1/pec424hul6/wenurto5ez#p940

To activate the lending system for a box, open the box settings, click on “Bookings and Calendar”, and then select “Lending system”.

![Option in Box Settings](https://www.edumaps.de/file/6330607627873884816.png/jx84m4e)

Afterwards, a “Reserve” button will appear on the box.

![Reservation Button at the box](https://www.edumaps.de/file/3831476643648673087.png/hzq9f6y)

### Settings for Calendar View
Source: https://www.edumaps.de/1055/1/pec424hul6/wenurto5ez#p621

For the calendar you have the following settings.

![Mode: Time slots](https://www.edumaps.de/file/8032960142200506331.png/agki8vz)

The “Display when first opening the calendar” determines the calendar view for the visitor.

The following modes are available:

- Month (for booking by day)
- Week (for booking by hour)
- Day (for booking by hour)

**Letterhead**

At the very bottom you will also find the settings for your [own letterhead](https://www.edumaps.de/docs?template), which will appear on the lending slip.

### Calendar View with Time slots
Source: https://www.edumaps.de/1055/1/pec424hul6/wenurto5ez#p623

By default, the “Time slots” mode is active, which matches a familiar calendar with times:

![Mode: Time slots](https://www.edumaps.de/file/8032960142200506331.png/agki8vz)

Here you will find the following settings:

- “Length of bookable timeslots”: Specified in minutes – for example, `60` means that you cannot book less than 1 hour.

- “Time period of a day”: Set start time and end time – for example, `8` to `16` means the days are shown only from 8:00 to 16:00.

### Calendar View with School lessons
Source: https://www.edumaps.de/1055/1/pec424hul6/wenurto5ez#p624

Choose the “School lessons” mode instead of "Time slots" so that each day is divided into a number of numbered school periods instead of times.

![Mode: School lessons](https://www.edumaps.de/file/15094197429299473829.png/wqpt15u)

Enter the “Number of school lessons in a day” to specify how many lessons the day should have.

### Blocked Days
Source: https://www.edumaps.de/1055/1/pec424hul6/wenurto5ez#p2622

You can also define additional blocked days. This means: After each booking, the days are blocked. Useful if devices need to be checked.

![Blocked days after Lending](https://www.edumaps.de/file/1438468068670425693.png/vsuocp5)

The blocked days appear in the lending calendar as blocked days and cannot be booked.

### Visibility of the names of the borrowers
Source: https://www.edumaps.de/1055/1/pec424hul6/wenurto5ez#p941

By clicking on the reserve button, the calendar for the loan item is displayed.

Only the map owner (lender) can see the names of the borrowers in the calendar.

![View for map owner with names](https://www.edumaps.de/file/6571153043903973123.png/7gnx4wi)

The person making the reservation sees other reservations as `- booked -` and their own reservations are highlighted in green.

![View for the person making the reservation](https://www.edumaps.de/file/14347500934797815033.png/kra6p8v)

### Overview of all lending items of the current map
Source: https://www.edumaps.de/1055/1/pec424hul6/wenurto5ez#p949

By clicking on the reserve button, a calendar opens. There you will find a red button at the top right "Show all lending items".

![Button for the list of all borrowed items](https://www.edumaps.de/file/5709099042701929384.png/t3cc8jh)

When you click on it, an overview of all lending items on the map opens.

![List of all lending items of a map](https://www.edumaps.de/file/13157497888789634342.png/kry0yqq)

This way, every user can see at a glance which devices are available on which days.

### Overview of all Reservations for the Lender
Source: https://www.edumaps.de/1055/1/pec424hul6/wenurto5ez#p943

The lender finds an overview of all their devices on the page [“All Lending Items”](https://www.edumaps.de/user/rentals).

In the user menu, this page can be accessed via the entry “Lending System”.

![User menu with link to the lending system](https://www.edumaps.de/file/17619212653521915601.png/y4xqa1h)

![Page “All Lending Items”](https://www.edumaps.de/file/13157497888789634342.png/kry0yqq)

There, the lending items can be sorted alphabetically or organized by maps. All maps that contain reservations are considered.

### Overview of all Reservations for the borrower
Source: https://www.edumaps.de/1055/1/pec424hul6/wenurto5ez#p942

The borrowers can view their reservations on the [“My Bookings”](https://www.edumaps.de/user/bookings) page.

Alternatively, each user can open their [user calendar](https://www.edumaps.de/user/calendar) and find all bookings and reservations accumulated there.

![Overview of all reservations (Borrower)](https://www.edumaps.de/file/6379130546224472074.png/ghh32of)

### Create Reservations yourself
Source: https://www.edumaps.de/1055/1/pec424hul6/wenurto5ez#p944

As a lender, you can view "All lending items" and click on the timeline to enter any reservation you wish.

![Enter dates as a lender](https://www.edumaps.de/file/11803471227132134158.png/icxg47g)

Here, you can use the “Notes” field to add your own remarks.

If you see the “Book for” option, you can create a booking for another user.

### Delete Reservations
Source: https://www.edumaps.de/1055/1/pec424hul6/wenurto5ez#p239

On the “All Lending” page, you can click on an appointment within the timeline. In the dialog, alongside the data, you will find a delete icon.

![Deleting a Reservation](https://www.edumaps.de/file/747009872501219846.png/11eofpe)

Alternatively, below the reservation calendar of the respective box, you will find a tabular listing of the reservations. You can also perform the deletion there.

![Delete Option below Box Calendar](https://www.edumaps.de/file/11160828780990319305.png/cwrdzis)

### Delete Reservations by Borrower
Source: https://www.edumaps.de/1055/1/pec424hul6/wenurto5ez#p945

The borrower can delete his reservations on the page [“My Bookings”](https://www.edumaps.de/user/bookings?rent) if they have not yet started.

![Delete option for borrower](https://www.edumaps.de/file/6379130546224472074.png/ghh32of)

### Contact the Borrower
Source: https://www.edumaps.de/1055/1/pec424hul6/wenurto5ez#p946

Open the "Timeline" of the reservations, then you can simply click on an appointment and you will see all the essential contact details of the borrower.

![Contact details of the borrower](https://www.edumaps.de/file/747009872501219846.png/11eofpe)

Alternatively, you can also find contact details below the calendar box, in the list of all reservations.

### Notification about Reservation
Source: https://www.edumaps.de/1055/1/pec424hul6/wenurto5ez#p240

The lender always receives a notification for reservations. This appears at the top right of the website.

![Notification for Lender](https://www.edumaps.de/file/2895767424147755929.png/kczracc)

Clicking on the notification icon opens the page of all [Notifications](https://www.edumaps.de/notifications). The new reservations are listed there.

![Image](https://www.edumaps.de/file/15784385345354863082.png/hch7sp0)

### Display and Print Borrow Slip
Source: https://www.edumaps.de/1055/1/pec424hul6/wenurto5ez#p241

Click on a reservation in the calendar or in the timeline (“All Lending Items”), and the following dialog will open with the reservation details:

![Details of the Reservation with Button for borrow slip](https://www.edumaps.de/file/5522054418139200676.png/rnj3337)

Click the "Show borrow slip" button, and the borrow slip for this reservation will open.

![Borrow slip for Printing](https://www.edumaps.de/file/1903523817094642706.png/ytha9fj)

You can print this borrow slip directly. It can be signed by the borrower when picking up the device.

Incidentally, all devices booked by the borrower are listed here. Click on one of the devices in the borrow slip, and it will be removed from the list (visually only).

### All Borrowings of a User
Source: https://www.edumaps.de/1055/1/pec424hul6/wenurto5ez#p334

As a lender, you will find the option "User's Borrowings" in the reservation details:

![Reservation details with loan slip button](https://www.edumaps.de/file/5522054418139200676.png/rnj3337)

Click the button “User's Borrowings” to open a page with all borrowings that the borrower has made with you:

![Borrowings per user](https://www.edumaps.de/file/16288864290547899959.png/rxz14hf)

### Group Booking
Source: https://www.edumaps.de/1055/1/pec424hul6/wenurto5ez#p622

You can make multiple devices bookable at once.

To do this, create a Map and enable the "Group Booking" option under "Extras".

> Tip: You can create a central map with all devices (boxes) and create separate maps where you embed selected boxes. These boxes are also active in other maps and can be reserved.

When the user now opens a reservation calendar and clicks on the red button "Show all lending items," a note appears indicating that the user can book all lending items cumulatively.

![Cumulative Booking](https://www.edumaps.de/file/1322800073245754089.png/7hbbf7g)

Now a separate line appears in the timeline, showing all the available days that can be cumulatively booked.

![Timeline with Cumulative Display](https://www.edumaps.de/file/16225284855587277528.png/02u7zci)

### Hint: Reservations through non-registered users
Source: https://www.edumaps.de/1055/1/pec424hul6/wenurto5ez#p947

We recommend creating a separate admin account for lending purposes.

For example, if a kindergarten wants to borrow a device from you and does not have an account with Edumaps, create a "student account" within this admin account. Enter the name and optionally the email address.

Now you can borrow a device in the calendar using this account. You can also pass the login details to the kindergarten.

This way, you can keep track of who borrowed what and when.

This also allows you to correctly print loan slips based on the user.

### FAQ
Source: https://www.edumaps.de/1055/1/pec424hul6/wenurto5ez#p948

FAQ:

- How can a user reserve multiple devices at once? – The user who wants multiple devices must book them individually. Alternatively, the device lender can create a group of devices and lend them using a box.

- How can the device number be noted? – Simply enter the device number in the box title.

- How to completely deactivate lending (e.g., during downtimes) without losing reservations? – Simply hide the box from the map.

- How to delete all reservations at once? – Disable the reservations option for the box and save the box.

- How to enter lending fees? – Enter fees directly into the box content as text.

- Can the borrower send reservation requests? – Reservations are made on a “User First” basis, meaning the user can directly reserve. Afterwards, the borrower can contact the user and make changes as needed.

## 5.3 Sales Module
Source: https://www.edumaps.de/1009/1/o4xh876aqd/7gt9m53bn7

### Introduction
Source: https://www.edumaps.de/1009/1/o4xh876aqd/7gt9m53bn7#p3936

✔️ With the sales module, you can turn any box into a product and offer it for purchase.

✔️ You can also receive payments via PayPal.

✔️ The sales module can be used for:

- physical products
- digital products
- learning materials
- templates and downloads
- tickets
- offers

### Activate Sales Module
Source: https://www.edumaps.de/1009/1/o4xh876aqd/7gt9m53bn7#p3940

In the box settings, click on “Bookings and Calendar”. There you can activate the “Sales” option:

![Option "Sales"](https://www.edumaps.de/file/561760521880391736.png/2xpjbgb)

You can then **optionally** set the available quantity and a price. However, purchasing is also possible without this information.

Click on “Save Box”. – Congratulations, your product is now available for purchase.

Notes:
- This option cannot be activated by students or anonymous users.

### Booking Process
Source: https://www.edumaps.de/1009/1/o4xh876aqd/7gt9m53bn7#p3941

Once you have finished your map and activated the sales module for one or more boxes, you can share your map via link with potential buyers.

Users who visit your map will now see a purchase button directly in the box:

![Purchase button in the box](https://www.edumaps.de/file/11952437509906199363.png/g4l7io0)

If the user clicks the blue booking button, they will see the following message:

![Notice when ordering](https://www.edumaps.de/file/3589860188004173403.png/s1ltq96)

The user can request a confirmation by email.

If the user confirms by clicking “Buy”, they are successfully registered as a buyer.

![Purchase confirmation](https://www.edumaps.de/file/17294004069051958977.png/0x3mgnz)

If a price has been set, the user can now click "Proceed to payment" and pay via PayPal.

A “Purchased” label appears on the box.

![Image](https://www.edumaps.de/file/8527852026601860998.png/o3xs9au)

### Who can purchase?
Source: https://www.edumaps.de/1009/1/o4xh876aqd/7gt9m53bn7#p3942

Both registered Edumaps users and anonymous visitors can make purchases.

If a user is logged in, they can directly click the purchase button.

If an anonymous visitor clicks the purchase button, two options appear:

- log in with an account
- book directly with email

If the user selects "book directly with email", they can complete the purchase by providing their name and email address.

A basic account will be created for the user. This is necessary so that functions such as canceling the order can work.

### View Buyer List
Source: https://www.edumaps.de/1009/1/o4xh876aqd/7gt9m53bn7#p3943

As a seller (map owner), you can view all buyers of a box by switching to **edit mode** and clicking the counter button:

![Quantity sold resp. number of buyers](https://www.edumaps.de/file/8991355312500606516.png/h6x66pc)

All other editors (as long as they are not anonymous) can also access this list in edit mode.

### Remove Buyer
Source: https://www.edumaps.de/1009/1/o4xh876aqd/7gt9m53bn7#p3944

You can remove buyers at any time by first opening the list of all buyers and then clicking the remove icon next to the respective user:

![Remove buyer](https://www.edumaps.de/file/16094355261921826120.png/uc7n32x)

### Buyer Cancels Purchase
Source: https://www.edumaps.de/1009/1/o4xh876aqd/7gt9m53bn7#p3945

Any buyer can cancel their order by clicking the "Purchased" button:

![Cancel your own order](https://www.edumaps.de/file/12382015673957802108.png/xjrljp1)

### Export Buyer List
Source: https://www.edumaps.de/1009/1/o4xh876aqd/7gt9m53bn7#p3946

You can export the entire buyers list by clicking the "CSV Export" button.

![CSV export of the buyers list](https://www.edumaps.de/file/16094355261921826120.png/uc7n32x)

You can then open the downloaded file in your spreadsheet program.

### Buyer List – Export All Buyers of a Map
Source: https://www.edumaps.de/1009/1/o4xh876aqd/7gt9m53bn7#p3947

You can export the buyers of all products on a map as a single CSV file.

1. Switch to edit mode.
1. Click on the three dots in the map menu and select "Export map".
1. In the dialog that opens, choose "Participants of all bookings (csv)".

![Export all bookings / buyers (csv)](https://www.edumaps.de/file/13256388117114253572.png/toet7mr)

You can now save the generated CSV file on your computer and continue working with it.

The export includes the product name, email address, full name, and username of each buyer.

### Overview "My Purchases"
Source: https://www.edumaps.de/1009/1/o4xh876aqd/7gt9m53bn7#p3948

On the page [“My Purchases”](https://www.edumaps.de/user/bookings?purchase), each user can see which purchases they have already made.

![“My Purchases” page](https://www.edumaps.de/file/15520509104989619391.png/2ixwksi)

There you can find your ordered products and cancel them.

### Pay with PayPal
Source: https://www.edumaps.de/1009/1/o4xh876aqd/7gt9m53bn7#p3949

> ⚠️ The PayPal payment feature is only available on the main server (www.edumaps.de) and requires a Premium account.

You can set a price for your product and receive the money directly from your buyers via PayPal.

To do this, go to the box settings and enter the “Price” in euros.

![Set price for product](https://www.edumaps.de/file/561760521880391736.png/2xpjbgb)

The price label will then appear on the box.

The buyer can first book the product and then proceed to payment.

The booking dialog appears as follows:

![Booking confirmation with redirect to payment](https://www.edumaps.de/file/5348146990037938364.png/gmhgx4m)

![Payment page – redirect to PayPal](https://www.edumaps.de/file/13421478078600447325.png/8fgc76d)

The user will then be redirected to PayPal.

After successful payment, you will find the transaction with all details on the page [“Received Payments”](https://www.edumaps.de/user/payments).

> You can set your PayPal address on the page [My Account](https://www.edumaps.de/user/account). If no email is specified, the email address of your user account will be used.

### Central Sale of Products from Other Users
Source: https://www.edumaps.de/1009/1/o4xh876aqd/7gt9m53bn7#p3950

If there are multiple sellers/providers (and PayPal payments should go to different users), proceed as follows:

1. The other users create maps with boxes, activate the sales module, and set a price for each box.
1. The other users send you the link to the box.
1. You embed the corresponding boxes of the other users into your own map.
1. The different boxes from different users can now be **booked and paid for** directly on your map.
1. Each payment is sent to the respective user who provides the box.

## 5.4 Calendar for Boxes
Source: https://www.edumaps.de/1059/1/1p018vc669/nt5sn3ix90

### Introduction
Source: https://www.edumaps.de/1059/1/1p018vc669/nt5sn3ix90#p1297

✔️ The calendar system provides you with a powerful tool for various scenarios.

- A separate calendar can be activated for each box.
- Calendars can be subscribed to and will then appear in the personal calendar.
- Calendars can be embedded into other calendars.
- Every user has their own calendar. See the page [“My Calendar”](https://www.edumaps.de/user/calendar) and [Tutorial “Personal Calendar”](https://www.edumaps.de/1062/1/jj3nem387d/utmny9e9vk).

### Applications of the box calendar
Source: https://www.edumaps.de/1059/1/1p018vc669/nt5sn3ix90#p101

You can assign each box its own calendar in which you can enter events/appointments.

**Areas of application include:**

- School and lesson planning (timetables, exam dates)
- Birthday calendar
- Training plans and game dates (for clubs)
- Event planning for workshops, celebrations, etc.
- Project management (milestones)
- Community projects (for neighbors, communities)
- Opening hours and bookings (museums, theaters, restaurants, etc.)

Tip: For lending items and renting rooms, you can use the [lending system](https://www.edumaps.de/1055/1/pec424hul6/wenurto5ez).

### Activate the calendar
Source: https://www.edumaps.de/1059/1/1p018vc669/nt5sn3ix90#p1267

To enable the calendar for a box, open the box settings and click on “Bookings and Calendar” and then “Calendar”.

![Image](https://www.edumaps.de/file/6325384245315006204.png/kg0qp9u)
Calendar option activated in the box settings

A “Calendar” button will then appear on the box.

![Calendar button on the box](https://www.edumaps.de/file/3510268152887954112.png/8fl2v3p)

### Settings for calendar view
Source: https://www.edumaps.de/1059/1/1p018vc669/nt5sn3ix90#p625

For the calendar you have the following settings.

![Calendar options in the box settings](https://www.edumaps.de/file/10540807488108587826.png/5c3qmrn)

The “Display when first opening the calendar” determines the calendar view for the visitor.

The following modes are available:

- Month (for daily entries)
- Week (for hourly entries)
- Day (for hourly entries)

### Calendar view with time slots
Source: https://www.edumaps.de/1059/1/1p018vc669/nt5sn3ix90#p626

By default, the "Time slots" mode is active, which corresponds to a familiar calendar with clock times.

![Week view with selection of time slots or school lessons](https://www.edumaps.de/file/8032960142200506331.png/agki8vz)

Here you will find the following settings:

- “Length of bookable timeslots”: Specified in minutes – for example, `60` means that you cannot book less than 1 hour.

- “Time period of a day”: Set start time and end time – for example, `8` to `16` means the days are shown only from 8:00 to 16:00.

### Calendar view with school lessons
Source: https://www.edumaps.de/1059/1/1p018vc669/nt5sn3ix90#p627

Instead of "Time slots", you can also choose the "School lessons" mode. Each day will then be divided into a number of numbered school lessons rather than clock times.

![Mode: School lessons](https://www.edumaps.de/file/15094197429299473829.png/wqpt15u)

Enter the “Number of school lessons in a day” to specify how many lessons the day should have.

### Reading or editing the calendar
Source: https://www.edumaps.de/1059/1/1p018vc669/nt5sn3ix90#p1268

If registered users open your map with editing rights, they can also enter events in the calendar.

This makes collaborative use of different calendars possible.

If users only have read access rights, they also only have read access to the calendar. Only the map owner can make changes to the calendar at any time.

Anonymous users cannot edit the calendar. Every user must be logged in.

### Sharing the calendar
Source: https://www.edumaps.de/1059/1/1p018vc669/nt5sn3ix90#p6511

You can share each calendar separately, either with read access or edit access.

To do this, click the blue Share button in the top right.

![Share button in the box calendar](https://www.edumaps.de/file/7516275395913446768.png/3eju3yw)

You can now set Reading or Editing and receive the corresponding link.

![Share calendar with access rights](https://www.edumaps.de/file/493599433296208805.png/djlf7ew)

### Edit the map but give calendar read-only rights
Source: https://www.edumaps.de/1059/1/1p018vc669/nt5sn3ix90#p293

If you have shared a map for editing, as the map owner, you can protect a calendar by activating the “Protect Box” setting.

In this case, all users can edit your map, but they cannot make changes to the calendar of the box.

### Overview of all events below the calendar
Source: https://www.edumaps.de/1059/1/1p018vc669/nt5sn3ix90#p1269

As the map owner, you will find the list of all events in each calendar below the calendar.

![List of all Events in a calendar](https://www.edumaps.de/file/18444382745208826837.png/ww0ojg0)

### Create events
Source: https://www.edumaps.de/1059/1/1p018vc669/nt5sn3ix90#p1270

You can add events simply by clicking in the calendar or by selecting a time period with the mouse.

![Create event](https://www.edumaps.de/file/8191595075008639230.png/170bbo3)

Change the times as desired. Add the title and a description. Optionally choose a different color.

You can also set repetitions for the event.

You can also upload any number of files. You will then find the files on the [“My Uploads”](https://www.edumaps.de/uploads?own) page.

### Create events with repetitions
Source: https://www.edumaps.de/1059/1/1p018vc669/nt5sn3ix90#p6512

You can also create an event with repetitions so that it appears regularly at the specified times.

![Create event with repetitions](https://www.edumaps.de/file/7293027054249765741.png/7j5nvdj)

![Example: Event every Friday](https://www.edumaps.de/file/10321358281104980815.png/8mtg2yq)

**Types of repetitions:**

- Daily
- Weekly
- Monthly
- Yearly

### Edit events
Source: https://www.edumaps.de/1059/1/1p018vc669/nt5sn3ix90#p1271

Click on the event, then a dialog for editing will open:

![Edit event](https://www.edumaps.de/file/18071225580481743105.png/qgn2vu6)

**Event times** can also be changed directly in the calendar with the mouse:

1. Move the event - hold the mouse button down on the event and drag it to the new time slot.

1. Event length - move the mouse to the bottom edge of the event. Grab the bottom edge (hold the mouse button down) and change the length.

![Shorten or extend event time](https://www.edumaps.de/file/16184233455621949393.png/bl1xpc4)

### Delete event
Source: https://www.edumaps.de/1059/1/1p018vc669/nt5sn3ix90#p1272

You can delete events by clicking directly on the event and selecting the delete icon next to the Save button.

![Delete button for event](https://www.edumaps.de/file/4953368748802673221.png/4pjo6am)

Alternatively, you can delete the event in the events list below the calendar by clicking on the trash can icon.

### Notification for new event entries by others
Source: https://www.edumaps.de/1059/1/1p018vc669/nt5sn3ix90#p1273

If a third party adds an event to your calendar, you will receive a notification. This notification appears in the top right corner of the website.

![Notification](https://www.edumaps.de/file/2895767424147755929.png/kczracc)

Clicking the notification icon opens the page with all [notifications](https://www.edumaps.de/notifications) . The newly entered events are listed there.

### Subscribe to calendar
Source: https://www.edumaps.de/1059/1/1p018vc669/nt5sn3ix90#p1298

Each box calendar can be subscribed to by logged-in users. All events will then appear on the personal page [“My Calendar”](https://www.edumaps.de/user/calendar).

The tutorial shows how subscribing works and how to cancel a subscription:

[Tutorial: Subscribe to and embed calendars](https://www.edumaps.de/1380/1/p07lbvo1xlob/zlerztz65yo0#b13660)

### Embed calendar into another box calendar
Source: https://www.edumaps.de/1059/1/1p018vc669/nt5sn3ix90#p6513

You can embed any number of box calendars into another box calendar - for example, to create a central school calendar that brings together all class calendars. Changes in the source calendars are automatically applied.

The tutorial shows all steps, how embedded events are displayed, and further examples of use:

[Tutorial: Subscribe to and embed calendars](https://www.edumaps.de/1380/1/p07lbvo1xlob/zlerztz65yo0#b13663)

### Embed in external calendars such as Apple and Google
Source: https://www.edumaps.de/1059/1/1p018vc669/nt5sn3ix90#p1299

You can embed any box calendar into external calendars such as Google and Apple calendars.

As the owner of the map, you will find an “iCalendar Link” below the calendar.

![iCalendar Link](https://www.edumaps.de/file/9703222414340247154.png/ivr1692)

Click on it, and the iCalendar link will be displayed.

![iCal link for adding calendar](https://www.edumaps.de/file/4770840199233771662.png/eitubbu)
to external calendars

Copy the link and integrate it into your Apple or Google calendar.

If you would like to have your calendar as a widget on your smartphone's home screen, you can use this tutorial:

[Tutorial: Calendar as a Widget on the Phone (with Synchronization)](https://www.edumaps.de/1088/1/qrrfzf76qh/2vv8ecx0u4)

## 5.5 Subscribe to and embed calendars
Source: https://www.edumaps.de/1380/1/p07lbvo1xlob/zlerztz65yo0

### 1️⃣ Basics
Source: https://www.edumaps.de/1380/1/p07lbvo1xlob/zlerztz65yo0#p1296

**Three ways to share a calendar**
Every box calendar can be made visible outside its box in three ways:

**1. Subscribe** - The events appear in your personal calendar on the ["My Calendar"](https://www.edumaps.de/user/calendar) page.

**2. Embed** - The events appear in another box calendar, for example in a central school calendar.

**3. iCalendar link** - The events appear in external calendar apps such as Apple, Google, or Outlook.

> All three methods are live connections: New or changed events in the source calendar are automatically adopted. You do not need to copy anything again.

**Which method for which purpose?**
**Subscribe** is suitable for individual users who want to see events from other calendars in their personal overview - for example, a teacher who subscribes to the class calendar.

**Embed** is suitable for map owners who want to combine several calendars in one place - for example, a central school calendar made up of all class calendars.

**iCalendar link** is suitable for anyone who wants to see their events outside Edumaps - for example, as a [widget on their phone](https://www.edumaps.de/1088/1/qrrfzf76qh/2vv8ecx0u4).

We describe the iCalendar method in the ["Calendar per box" tutorial](https://www.edumaps.de/1059/1/1p018vc669/nt5sn3ix90#external).

### 2️⃣ Subscribe to calendars
Source: https://www.edumaps.de/1380/1/p07lbvo1xlob/zlerztz65yo0#p6989

**Subscribe to a calendar**
Open the box calendar you want to subscribe to.

Above the calendar, you will find the **"Subscribe"** button.

![Subscribe button in the box calendar](https://www.edumaps.de/file/5840617145105891672.png/k2mwfkv)

When you click it, the calendar is subscribed immediately. You must be logged in to do this.

**Events in "My Calendar"**
All events from the subscribed calendar will now appear on your personal [“My Calendar”](https://www.edumaps.de/user/calendar) page.

You can subscribe to as many box calendars as you like and bundle all important events into one view.

You can find more about the personal calendar in the [“Personal Calendar”](https://www.edumaps.de/1062/1/jj3nem387d/utmny9e9vk) tutorial.

**End a subscription**
If you no longer want to subscribe to a calendar, open the box calendar again and click the **“Calendar subscribed”** button.

![End the subscription by clicking “Calendar subscribed”](https://www.edumaps.de/file/4278446062769197878.png/d5f1tyo)

The events will then disappear from [My Calendar](https://www.edumaps.de/user/calendar). The source calendar itself remains unchanged.

### 3️⃣ Embed calendars
Source: https://www.edumaps.de/1380/1/p07lbvo1xlob/zlerztz65yo0#p6990

**Embed a calendar step by step**
Open the box calendar in which the events from other calendars should appear (the target calendar).

Below the calendar, you will find the **“Add calendar”** button.

![“Add calendar” button below the calendar](https://www.edumaps.de/file/10405019501969579248.png/z91pv9u)

A dialog opens in which you enter the link to the source calendar. You can get this link directly in the source calendar by clicking the share button.

![Dialog for entering the link to the source calendar](https://www.edumaps.de/file/4603371726444629013.png/d92pkwh)

Confirm the selection, and all events from the source calendar will immediately appear in the target calendar.

You can embed as many calendars as you like into one box calendar.

**Display of embedded events**
Embedded events appear in the target calendar together with your own events.

![Target calendar with own and embedded events](https://www.edumaps.de/file/9805292191722062487.png/x9lt43d)

Embedded events are maintained in the source calendar. If you change or delete an event there, the change is automatically transferred to all target calendars.

**Remove an embedding**
Below the target calendar, you will see the list of all embedded calendars.

![List of embedded calendars](https://www.edumaps.de/file/8166259044129597967.png/c95mq9e)

Click the remove icon there to remove an embedding.

The events from the source calendar will then disappear from the target calendar. The source calendar itself remains unchanged.

**Permissions**
To embed a calendar, you need the link to the source calendar. A read link is sufficient, because embedded events are only displayed and not edited.

Visitors to your map see the embedded events in the target calendar just like your own events.

Anyone who wants to edit an event needs edit permission for the source calendar.

### 4️⃣ Practice & examples
Source: https://www.edumaps.de/1380/1/p07lbvo1xlob/zlerztz65yo0#p6991

**Use cases**
**Central school calendar** - One box per class with its own calendar, plus a central calendar that embeds all class calendars. The school administration can see everything at a glance.

**Exam calendar** - Each department maintains its exam dates in its own calendar, and the exam calendar combines them and shows overlaps immediately.

**Personal teaching calendar** - Teachers embed the official school calendar into their own teaching calendar and have holidays, conferences, and personal events in one view.

**Club calendar** - Training times for each team in separate calendars, while the club calendar bundles all events for the board level.

> Changes in the source calendars are automatically adopted.

**Step by step: Room bookings**
A complete practical example with several calendars and one central calendar can be found in the tutorial **"Set up room bookings with calendars"**:

[Set up room bookings with calendars](https://www.edumaps.de/1363/1/hhvya5urr6jn/swrqm2e6v2pz)

**Further tutorials**
**Calendar per box** - Basics: activate calendars, create events, share, iCalendar link:

[Tutorial: Calendar per box](https://www.edumaps.de/1059/1/1p018vc669/nt5sn3ix90)

**Personal Calendar** - The **"My Calendar"** page in detail:

[Tutorial: Personal Calendar](https://www.edumaps.de/1062/1/jj3nem387d/utmny9e9vk)

**Calendar as a widget on your phone** - Events with synchronization on the home screen:

[Tutorial: Calendar as a widget on your phone](https://www.edumaps.de/1088/1/qrrfzf76qh/2vv8ecx0u4)

## 5.6 Set Up Room Bookings with Calendars (Step by Step)
Source: https://www.edumaps.de/1363/1/hhvya5urr6jn/swrqm2e6v2pz

### 🎯 The Result
Source: https://www.edumaps.de/1363/1/hhvya5urr6jn/swrqm2e6v2pz#p6853

**What You Will Have at the End**
> A map where each room has its own box with its own calendar: interested users can see available times and book on their own.

> In addition, a central calendar that combines all rooms: your complete overview, also on mobile.

> Setup time: about 20 minutes for 3 rooms.

### 1️⃣ Create the Map
Source: https://www.edumaps.de/1363/1/hhvya5urr6jn/swrqm2e6v2pz#p6854

**Start from the Template**
Copy the template ["Rent & Book Rooms"](https://www.edumaps.de/1362/1/o4av34fh4518/p7yjmpb7guwr) from the template catalog.

Adjust room names, photos, features, and prices: one column per room.

**More or Fewer Rooms?**
Add rooms: copy a column.

Remove rooms: delete a column.

The structure stays the same whether you have 2 or 10 rooms.

### 2️⃣ Enable a Calendar for Each Room
Source: https://www.edumaps.de/1363/1/hhvya5urr6jn/swrqm2e6v2pz#p6855

**The Core of the System**
Open the "Availability & Booking" box of the first room and enable the calendar for that box (if it is not already enabled).

See also [Tutorial: Calendar per Box](https://www.edumaps.de/1059/1/1p018vc669/nt5sn3ix90).

**Set Bookable Times**
Define when the room can be booked (in the weekly view, enter the time range for each day under the time settings, as well as the length of the bookable time slots).

Repeat for the other rooms.

> One separate calendar per room (one separate box).

**Make a Test Booking**
Open the map in reading mode (or in a private browser window) and book a slot yourself: this lets you see exactly what your customers see.

### 3️⃣ Set Up a Central Calendar
Source: https://www.edumaps.de/1363/1/hhvya5urr6jn/swrqm2e6v2pz#p6856

**All Rooms in One View**
Create a central calendar and include all room calendars in it: every booking from every room will appear here automatically.

See tutorial: [Embed Calendars](https://www.edumaps.de/1380/1/p07lbvo1xlob/zlerztz65yo0)

> You can include as many other box calendars as you want in one box calendar.

You decide which of your boxes serves as the central box and contains the central calendar.

**Tip: Keep Events Separate**
An additional calendar for events (workshops, concerts) keeps rentals and events neatly separated while still bringing them together in the overall view.

### 4️⃣ Share & Publish
Source: https://www.edumaps.de/1363/1/hhvya5urr6jn/swrqm2e6v2pz#p6857

**The Right Link**
Customers receive the map's read-only link: they can see everything, book through the calendars, and cannot change anything.

Tutorial: [Share Maps with Links](https://www.edumaps.de/1047/1/siajhiablo/fv6nobr4hp)

Create one box for each room so you can also share just a single box. Click the three dots on the box and choose "Share".

**Make It Visible**
Embed the link on your website, add a QR code to the studio door, and include the link in your email signature.

Keep the central calendar link private: it is your internal view.

### 5️⃣ In Everyday Use
Source: https://www.edumaps.de/1363/1/hhvya5urr6jn/swrqm2e6v2pz#p6858

**Overview on Your Phone**
Add the central calendar as a widget on your phone, including synchronization: you can see every new booking without opening the map.

Tutorial: [Calendar as a Widget on Your Phone](https://www.edumaps.de/1088/1/qrrfzf76qh/2vv8ecx0u4)

**Manage Bookings**
Enter your own appointments (maintenance, private use) directly into the room calendar yourself: the slot will then be blocked for customers.

### 🚀 Extensions
Source: https://www.edumaps.de/1363/1/hhvya5urr6jn/swrqm2e6v2pz#p6859

**Allow Online Payments**
For payment directly during booking, take a look at the sales module.

Tutorial: [Sales Module](https://www.edumaps.de/1009/1/o4xh876aqd/7gt9m53bn7)

**Equipment Instead of Rooms**
The same principle also works for equipment rental (microphones, projectors, instruments).

Tutorial: [Lending System](https://www.edumaps.de/1055/1/pec424hul6/wenurto5ez)

**Suitable Templates**
- [Rent & Book Rooms](https://www.edumaps.de/1362/1/o4av34fh4518/p7yjmpb7guwr)
- [Club Season Plan](https://www.edumaps.de/1313/1/qp0gm9n28ynh/ap0ma998uyu6)
- [Internal Training Courses](https://www.edumaps.de/1242/1/xvb4d3972u9m/zupveigrx1rs)

More can be found in the template catalog.

## 5.7 Personal Calendar
Source: https://www.edumaps.de/1062/1/jj3nem387d/utmny9e9vk

### Introduction
Source: https://www.edumaps.de/1062/1/jj3nem387d/utmny9e9vk#p1300

✔️ With the calendar system, you have a powerful tool for various scenarios at your disposal.

- Each user has their own calendar. See the page [“My Calendar”](https://www.edumaps.de/user/calendar).
- A separate calendar can be activated for each box. See the tutorial: [Using the Calendar for Boxes](https://www.edumaps.de/1059/1/1p018vc669).
- Calendars can be subscribed to and will appear in your own calendar.

### Scenarios and Examples
Source: https://www.edumaps.de/1062/1/jj3nem387d/utmny9e9vk#p1301

**Scenario: Timetable**

- A class teacher creates a timetable for their class (the "Calendar" option must be enabled in the box settings for this).
- All students log in, visit the calendar, and click the "Subscribe to Calendar" button.
- Now, each student has the class teacher's calendar events in their personal calendar.

**Scenario at a School**

- Mr. Miller creates a calendar with math exams.
- Ms. Schneider creates a calendar with school music events.
- The school office creates a calendar with all vacation times and all local celebrations.

The students receive all three calendar links and subscribe to the calendars.

After that, the students always have all the dates in their calendar.

> If a teacher changes a date in their calendar, all students will see this change in their own calendars.

### Personal calendar
Source: https://www.edumaps.de/1062/1/jj3nem387d/utmny9e9vk#p1302

Every user has their own personal calendar. This can be found via the user menu top right which opens the page [“My Calendar”](https://www.edumaps.de/user/calendar).

![Example of a personal calendar](https://www.edumaps.de/file/5262374301830113506.png/pn98q6i)

In this calendar, each user can enter their own appointments/events.

Additionally, all events from subscribed calendars are shown there.

A list of all subscribed calendars can be found below the calendar.

![List of subscribed calendars](https://www.edumaps.de/file/7950274073748061194.png/wxx2517)

### Subscribe to box calendar
Source: https://www.edumaps.de/1062/1/jj3nem387d/utmny9e9vk#p1303

If you open a box calendar, you will find the blue button "Subscribe" in the top right corner.

![Subscribe to Calendar Button](https://www.edumaps.de/file/14248975814375783332.png/l9gibhw)

Click on it to confirm the subscription.

![Confirm Calendar Subscription](https://www.edumaps.de/file/2424240428161181708.png/f082w4v)

Afterwards, you will find all the events from this calendar entered into your [personal calendar](https://www.edumaps.de/user/calendar).

The tutorial explains how subscribing works and how to cancel a subscription:

[Tutorial: Subscribe to and integrate a calendar](https://www.edumaps.de/1380/1/p07lbvo1xlob/zlerztz65yo0)

### Unsubscribe from calendar
Source: https://www.edumaps.de/1062/1/jj3nem387d/utmny9e9vk#p1304

To unsubscribe from a calendar, visit the calendar and click the “Calendar subscribed” button in the top right corner.

![Button showing a subscribed calendar](https://www.edumaps.de/file/13610418896740329169.png/l93qb8h)

Click on it to confirm the unsubscription.

Afterwards, all events from this calendar will be removed from your [personal calendar](https://www.edumaps.de/user/calendar).

### Bookings and Reservations
Source: https://www.edumaps.de/1062/1/jj3nem387d/utmny9e9vk#p1305

In addition to the appointments you have entered yourself and the appointments from subscribed calendars, your personal calendar also displays all your appointments from [Bookings and Reservations](https://www.edumaps.de/user/bookings).

### Import External Calendars
Source: https://www.edumaps.de/1062/1/jj3nem387d/utmny9e9vk#p368

As the map owner, you will find the “Import calendar (ICS)” option in the calendar menu.

![Import calendar (ICS)](https://www.edumaps.de/file/6162738280873979848.png/9ls72jg)

Here you can upload an ICS file. All events will then be imported automatically.

![Import iCalendar file](https://www.edumaps.de/file/12551661540809220552.png/5s9wdm2)

With the import you can choose a color for all imported events.

“ICS” stands for “Internet Calendaring and Scheduling Core Object Specification (iCalendar)”. It is a file format for sharing calendar information. Almost every external application allows you to export a calendar as an ICS file.

### Export calendar or download calendar as ICS file
Source: https://www.edumaps.de/1062/1/jj3nem387d/utmny9e9vk#p369

In the calendar menu you can find the “iCalendar Link” and the “Download (ics)”.

The iCalendar link you can copy and integrate into an external calendar application.

The download is helpful to create a backup of your entire calendar.

## 5.8 Calendar as a Widget on the Phone (with Synchronization)
Source: https://www.edumaps.de/1088/1/qrrfzf76qh/2vv8ecx0u4

### Introduction
Source: https://www.edumaps.de/1088/1/qrrfzf76qh/2vv8ecx0u4#p451

✔️  At Edumaps, three types of calendars are available:

1. [Personal Calendar](https://www.edumaps.de/1062/1/jj3nem387d/utmny9e9vk) - each user has their own calendar
1. [Box Calendar](https://www.edumaps.de/1059/1/1p018vc669/nt5sn3ix90) - each box has its own calendar
1. [Lending System with Calendar](https://www.edumaps.de/1055/1/pec424hul6/wenurto5ez) - a box receives a calendar for reservations

Each calendar can be integrated into external applications via an iCalendar link. See the tutorial [“Embedding in external calendars like Apple and Google”](https://www.edumaps.de/1059/1/1p018vc669/nt5sn3ix90#external) for more information.

> With a calendar widget, you can bring all of the school's important dates to every mobile phone of your teachers and students.

⚠️ If you have already integrated your Edumaps calendar into your Apple or Google calendar, you can directly use the calendar widget there.

### Goal: Set widget on the phone that shows all current events
Source: https://www.edumaps.de/1088/1/qrrfzf76qh/2vv8ecx0u4#p453

Our goal is to create a widget on the mobile background that shows us all the events of a calendar.

With it, you always have all important events literally in your pocket at a glance.

![Widget on the home screen of the mobile phone](https://www.edumaps.de/file/10474813697194449221.jpg/ra0kvjc)

Below we will show you the necessary steps for this.

### iCalendar link of the calendar
Source: https://www.edumaps.de/1088/1/qrrfzf76qh/2vv8ecx0u4#p454

First, open the desired calendar on your phone.

![Calendar on phone](https://www.edumaps.de/file/16857708561567776941.png/wbiblzc)

Below the calendar on the right, you will find a link "iCalendar Link". Click on it, and a dialog with this link will open:

![iCalendar link to copy](https://www.edumaps.de/file/16541297211000481093.png/hxqtucx)

Copy the link.

### Install the OneCalendar app
Source: https://www.edumaps.de/1088/1/qrrfzf76qh/2vv8ecx0u4#p455

**Android:** Open the [OneCalendar app in the Play Store](https://play.google.com/store/search?q=OneCalendar&c=apps) and install the app.

**iPhone:** Open the [OneCalendar app in the App Store](https://apps.apple.com/us/app/one-calendar/id1238379385) and install the app.

Then open the app.

### Integrate the Edumaps calendar into the app
Source: https://www.edumaps.de/1088/1/qrrfzf76qh/2vv8ecx0u4#p456

Open the app and click the icon for the menu.

There, select "Accounts":

![Selection: Accounts](https://www.edumaps.de/file/10843571737069893415.png/w8meyb9)

Now click on "Add account":

![Add Account](https://www.edumaps.de/file/13530388139142689271.png/0eqmre1)

Select "WebCal" from the list:

![WebCal](https://www.edumaps.de/file/10913365965891657682.png/7wrfnob)

Insert the link into the input field and save.

The app should now display the confirmation:

![iCalendar from Edumaps embedded in app](https://www.edumaps.de/file/8549711462552111424.png/i4deem0)

### Display the Edumaps calendar in the app
Source: https://www.edumaps.de/1088/1/qrrfzf76qh/2vv8ecx0u4#p457

When you now open the app, all imported events from the Edumaps calendar will be displayed to you:

![Display all events](https://www.edumaps.de/file/5597650300120917373.png/xa0on78)

You can choose different views like day, week, month, and list in the app.

### Place widget on home screen
Source: https://www.edumaps.de/1088/1/qrrfzf76qh/2vv8ecx0u4#p458

Set a calendar widget on your home screen now to always see the current events of the calendar.

1. Press and hold the home screen with one finger until the selection “Wallpaper | Widget | Transitions | Home screen settings” appears.

![Option: Add widget](https://www.edumaps.de/file/14121506947410051853.png/udwhyzv)

1. Click on “Widgets”.

1. Find “OneCalendar” and click on it.

![OneCalendar](https://www.edumaps.de/file/2614816982346577215.png/7gau7z5)

1. OneCalendar has three widgets to choose from:

![Three widgets from OneCalendar](https://www.edumaps.de/file/7622081139465481517.png/cx14vc3)

Choose “Agenda” to get a widget with a list view of all events.

Choose “Month” to get a calendar widget that can be scrolled month by month.

Result:

![Active Widget on Homescreen](https://www.edumaps.de/file/10474813697194449221.jpg/ra0kvjc)

### Activate automatic synchronization in the app
Source: https://www.edumaps.de/1088/1/qrrfzf76qh/2vv8ecx0u4#p459

To ensure the app regularly displays the current events from the Edumaps calendar, you need to enable synchronization.

To do this, go to the menu and select "Options":

![Selection "Options"](https://www.edumaps.de/file/1559303465543249487.png/ugule4r)

Then select "Synchronization":

![Selection "Synchronization"](https://www.edumaps.de/file/9305387169978871480.png/0xm4zfp)

Click on "Webcal automatic synchronization":

!["Webcal automatic synchronization"](https://www.edumaps.de/file/4343830901528321148.png/4sd8g62)

Choose, for example, "2 hours" or "4 hours" as the synchronization interval:

![Selection of synchronization interval](https://www.edumaps.de/file/8415145249532700073.png/8ajcjm5)

Now the app synchronizes with the Edumaps calendar every 2 hours.

## 6.1 Checklists
Source: https://www.edumaps.de/1162/1/b69pzgpq3uzu/4372nj9g7afu

### Introduction
Source: https://www.edumaps.de/1162/1/b69pzgpq3uzu/4372nj9g7afu#p6514

✔️ With the checklist module, you can insert a checklist into any box. This makes it quick and easy to tick off tasks and work steps.

✔️ The checklist module is simple, yet powerful.

### Examples of Checklists
Source: https://www.edumaps.de/1162/1/b69pzgpq3uzu/4372nj9g7afu#p6516

Here are some examples of applications of checklists:

- Tick off homework and weekly plan tasks
- Packing list for the school trip
- Materials list for lessons
- Work through the steps of an experiment step by step
- Preparation for a report or presentation
- Submission checklist for project work
- Self-check of learning goals (can-do lists)
- Station learning: mark completed stations
- Organize classroom duties
- Confirm safety rules in the lab
- Checklist for planning school events
- School enrollment checklist for parents
- To-do list before exams
- Checklist for returning school books
- Onboarding new colleagues

### Set Up a Checklist
Source: https://www.edumaps.de/1162/1/b69pzgpq3uzu/4372nj9g7afu#p6517

You can insert a checklist into a box very easily.

To do this, open the box editor and click "Modules". In the dropdown, select "Checklist".

![Insert checklist into box](https://www.edumaps.de/file/8281301260415349822.png/ubof362)

Enter the checklist items. Use "Add item" to add more entries. You can change the order by grabbing an item using the handle on the left and moving it.

![Enter checklist items](https://www.edumaps.de/file/16972499485038680986.png/axi4lp7)

Click "Done" to apply the checklist. In the box content, the placeholder `CHECK1` appears, representing the checklist.

### Set Up a Checklist - Notes
Source: https://www.edumaps.de/1162/1/b69pzgpq3uzu/4372nj9g7afu#p6518

**Please note:**

- ⚠️ Do not change the order or the number of items once a checklist is active. Otherwise, existing checkmarks may shift.
- Create new boxes on your map for additional checklists.

### Everyone ticks off their own checkmarks
Source: https://www.edumaps.de/1162/1/b69pzgpq3uzu/4372nj9g7afu#p6969

![Each person checks off items for themselves](https://www.edumaps.de/file/8862760035704971150.png/k40sf8t)
(individual checkmarks per user)

> Checkmarks are individual for each person. If student A checks off an item, student B does not see that checkmark. Each user only sees their own checkmarks on the map.

This allows the whole class to work with the same checklist without checking off items for one another. As the map owner, you can use the checkmark counter to see who has checked off which item (see section “Display the List of All Checkmarks”).

**Checking off – Who and how?**

- Registered users as well as anonymous visitors can check off items.
- Items are checked off by clicking the checkbox of the respective entry.
- If you click an active checkbox again, the checkmark is removed.
- ⚠️ Anonymous checkmarks are tied to the respective device. A user account is required for checking off items across devices.

### Display the List of All Checkmarks
Source: https://www.edumaps.de/1162/1/b69pzgpq3uzu/4372nj9g7afu#p6520

As the map owner, you can view all checkmarks that have been set by clicking one of the checkmark counters:

![Number of checkmarks for an entry](https://www.edumaps.de/file/4416043595309916836.png/q15qqho)

Teacher and admin accounts also have access to the checkmark list. Student accounts do not.

The list of all checkmarks looks like this, for example:

![Example: list of checkmarks](https://www.edumaps.de/file/14429876349448967123.png/76nge9h)

### Remove Checkmarks
Source: https://www.edumaps.de/1162/1/b69pzgpq3uzu/4372nj9g7afu#p6521

You can remove checkmarks at any time by clicking one of the checkmark counters. A list of all checkmarks for the entry will then appear.

For the respective user, there is a remove icon on the right:

![Remove checkmarks](https://www.edumaps.de/file/14429876349448967123.png/76nge9h)

### Overview "My Checklists"
Source: https://www.edumaps.de/1162/1/b69pzgpq3uzu/4372nj9g7afu#p6522

On the page ["My Checklists"](https://www.edumaps.de/user/likes?check), each user can see which checklists they have participated in and which entries they have checked off.

There, you can open the checklists again.

![Access to “My Checklists”](https://www.edumaps.de/file/2431158902990916159.png/yhoyhnh)

### Try it
Source: https://www.edumaps.de/1162/1/b69pzgpq3uzu/4372nj9g7afu#p7006

Tick off the entries easily - only you can see your checkmarks:

[Checklist: Checklist discovered / First entry checked off / Checkmark removed again (click again) / Ready for your own checklist]

> Tip: Then open the page [“My Checklists”](https://www.edumaps.de/user/likes?check) - there you will find your checkmarks again.

### Yes-No Mode
Source: https://www.edumaps.de/1162/1/b69pzgpq3uzu/4372nj9g7afu#p7300

In addition to simply ticking items off, there is a **Yes/No** mode. Each item can then be answered with ✓ (yes), ✗ (no), or left unanswered.

How to enable this mode:

1. Create a checklist in the box editor using the checklist dialog, or edit an existing one
1. Select **Yes/No** in the dialog
1. Save; the items now show the counts for ✓ and ✗ next to the checkbox

The results show how many participants answered yes, answered no, or have not yet answered each item. Ideal for can-do checklists and self-assessments, because an unchecked box no longer automatically means "no".

**Yes or No?**

> One click selects yes, a second selects no, and a third clears the answer.

[Checklist: I can create a checklist in the box editor / I can enable Yes/No mode / I can change my answer / I can find the results showing Yes and No / I know where to find My Checklists]

## 6.2 Polls / Voting
Source: https://www.edumaps.de/1086/1/xmgkv25gxf/f3u6hrdh5m

### Introduction
Source: https://www.edumaps.de/1086/1/xmgkv25gxf/f3u6hrdh5m#p324

✔️ With the poll module, you can insert a poll into any box. This allows for quick and easy organization of votes.

✔️ The poll module is simple yet powerful.

### Examples of Polls
Source: https://www.edumaps.de/1086/1/xmgkv25gxf/f3u6hrdh5m#p325

Here are some examples of applications for the poll module:

- Evaluation of your own maps
- Finding common dates
- Gathering opinions (e.g., homework load)
- Student feedback on teaching quality
- Food preferences in the school cafeteria
- Parent survey on school development
- Evaluation of school offerings
- Interest in which extracurricular activities
- Evaluation of school events
- Sustainability initiatives (opinions on environmental projects)
- Selection of elective subjects
- Survey on transport needs for school buses or bicycle parking
- Feedback on school health and wellness initiatives
- Survey on preferred communication between school and parents/students
- Evaluations of classroom equipment

### Set up a Poll
Source: https://www.edumaps.de/1086/1/xmgkv25gxf/f3u6hrdh5m#p326

You can effortlessly insert a poll into a box.

To do this, open the box editor, click on “Module” and choose “Poll”.

![Insert a poll into a box](https://www.edumaps.de/file/14751216103011225140.png/izhqbcc)

Confirm whether you want to allow a “single selection” or “multiple selection”.

![Enter poll data](https://www.edumaps.de/file/3566738897789575067.png/aoxk1l3)

Enter the poll data, which you can modify as you wish.

### Set up a Poll - Instructions
Source: https://www.edumaps.de/1086/1/xmgkv25gxf/f3u6hrdh5m#p332

Please note:

- A box may contain only **one** poll.
- Create new boxes on your map for additional polls.
- ⚠️ Do not modify the poll once votes have been cast! Otherwise, the assignments of the previous votes will change and become incorrect.
- If you are in syntax mode, you must not change the tags `<poll>` and `</poll>`.

### Voting - Who and how?
Source: https://www.edumaps.de/1086/1/xmgkv25gxf/f3u6hrdh5m#p327

Registered users can vote, but so can anonymous visitors.

Depending on the survey settings, single or multiple selections are possible.

Voting is done by clicking on the checkbox of the respective entry.

If you click on the active checkbox again, the vote will be removed.

### Show list of all Votes
Source: https://www.edumaps.de/1086/1/xmgkv25gxf/f3u6hrdh5m#p328

As the map owner, you can view all votes by clicking on one of the voting counters:

![Number of Votes of a Poll](https://www.edumaps.de/file/13070549714791423663.png/5t79qmj)

Teacher and admin accounts also have access to the voters list. Student accounts, however, do not.

The list of all votes looks, for example, like this:

![Example: List of Votes](https://www.edumaps.de/file/3908780731681876175.png/5tp2jxk)

### Remove Votes
Source: https://www.edumaps.de/1086/1/xmgkv25gxf/f3u6hrdh5m#p329

You can remove votes at any time by clicking on one of the voting counters. This will bring up a list of all the votes in the poll.

For each user, there is a remove icon on the right:

![Remove Votes](https://www.edumaps.de/file/3051602161217862834.png/r331qau)

### Overview “My Votes”
Source: https://www.edumaps.de/1086/1/xmgkv25gxf/f3u6hrdh5m#p330

On the page [“My Votes”](https://www.edumaps.de/user/likes?poll), every user can see which polls they participated in and how they voted.

There, one can reopen the polls.

![Access to “Likes and Reviews” as well as Polls](https://www.edumaps.de/file/215503006333668655.png/o4tiynf)

![Page „My Votes“](https://www.edumaps.de/file/1257741862805689008.png/kqx9z97)

### How helpful is this tutorial?
Source: https://www.edumaps.de/1086/1/xmgkv25gxf/f3u6hrdh5m#p331

[Poll: Excellent 🚀 / Very good / Good / Worthy of improvement / Bad, I haven't understood anything]

## 6.3 Tasks
Source: https://www.edumaps.de/1095/1/2kk68kgef7/nook74wcsd

### Introduction
Source: https://www.edumaps.de/1095/1/2kk68kgef7/nook74wcsd#p588

✔️ With the Task Module, you can assign any box to a user.

✔️ You will find an overview of all assigned tasks in a separate table, easy and quick to sort. This way, you can track every status and improve collaboration.

✔️ Whether you are leaving a small note or managing a large project – with this feature you manage tasks more efficiently.

### Manage Status
Source: https://www.edumaps.de/1095/1/2kk68kgef7/nook74wcsd#p590

When assigning a task, you can set the *status* to clearly document progress.

The following statuses are available:

- **Open**: The task has been created, but not yet started.
- **In Progress**: Someone is actively working on the task.
- **Stuck**: There are obstacles or delays. The task is not progressing on time.
- **Follow-up**: The assigned user has a follow-up question.
- **Complete**: The task is complete and ready for review.
- **Archive**: The task is archived and is no longer shown as an active task on the [“Tasks”](https://www.edumaps.de/user/tasks) page.

The status can be changed at any time, so all participants are always up to date.

![Assign Task in Box Settings](https://www.edumaps.de/file/1166745062460119251.png/gvkyawm)

### Set Priority
Source: https://www.edumaps.de/1095/1/2kk68kgef7/nook74wcsd#p591

Prioritize tasks to highlight the most important ones.

You can choose from the following options:

- **None**: No special priority assigned.
- **Low**: The task is less urgent.
- **Medium**: Normal priority, moderate importance.
- **High**: This task takes precedence and requires prompt attention.

This helps prevent misunderstandings and ensures everyone is focused on the right priorities together.

As soon as priorities have been assigned, a task filter appears at the top left of your map, allowing you to filter the corresponding boxes.

![Filter for Priorities](https://www.edumaps.de/file/3310511963511259197.png/dp5s5aj)

### Set Due Date
Source: https://www.edumaps.de/1095/1/2kk68kgef7/nook74wcsd#p592

Every task can be given a *due date*. This increases accountability and enables assigned users to plan their time better.

Simply enter the desired date by which the task should be completed.

> **Tip:** Setting a date helps you keep an overview of ongoing and upcoming tasks.

### Assign to User
Source: https://www.edumaps.de/1095/1/2kk68kgef7/nook74wcsd#p593

A task can be assigned to a specific user. Enter the *username* of the recipient.

If no user is entered, the task is assigned to yourself.

> The assigned user automatically receives write access to the respective pinboard. They can document collaborations, edit tasks, or update the status.

Additionally, the user receives a [notification](https://www.edumaps.de/notifications) about the shared task.

### Overview of All Tasks
Source: https://www.edumaps.de/1095/1/2kk68kgef7/nook74wcsd#p594

On the [“Tasks” page](https://www.edumaps.de/user/tasks), you will find a central overview of all your tasks.

This page offers the following features:

- Display all received, assigned, and own tasks in a table
- Ability to sort tasks by different criteria (e.g., title, due date, status, priority)
- Quick access to the respective box/map

| Category |  | Description |
| --- | --- | --- |
| Received Tasks |  | Tasks assigned to you |
| Assigned Tasks |  | Tasks you assigned to others |
| Own Tasks |  | Tasks you created and are working on yourself |

![Tasks Page](https://www.edumaps.de/file/5696139431907973339.png/upsk3cv)

This way, you always have a full overview and can easily search or filter for specific tasks.

### Step-by-Step: Assign a Task
Source: https://www.edumaps.de/1095/1/2kk68kgef7/nook74wcsd#p595

1. Open the pinboard where you want to create a task. Switch to edit mode.

1. Select the box you wish to assign a task to. Click the three dots and choose “Edit”.

1. In the box settings, select the menu item “Assign Task”.

![Image](https://www.edumaps.de/file/1166745062460119251.png/gvkyawm)

1. Fill out the fields as needed:
   - Status (e.g., Open, In Progress)
   - Priority (None, Low, Medium, High)
   - Due date (if desired)
   - Recipient username (optional)

1. Save the box. – The recipient gets a notification and can start working on the task.

1. Afterwards, conveniently track all changes via the central [Tasks page](https://www.edumaps.de/user/tasks).

> With just a few clicks, tasks are clearly assigned, prioritized, and traceable.

### Tasks in User Calendar
Source: https://www.edumaps.de/1095/1/2kk68kgef7/nook74wcsd#p596

Every task that you assign to a user with a **due date** will appear in their user calendar and can be opened from there.

Your own tasks with due dates will also be shown in the calendar.

![Example of a user calendar with tasks from boxes](https://www.edumaps.de/file/17356708591223174291.png/8uan210)

> Tip: At the bottom right, you will find the “iCalendar Link”. You can add this directly to the calendar you currently use (such as Google or Apple Calendar). This way, all your due dates will appear directly in your personal calendar.

### Archive Tasks
Source: https://www.edumaps.de/1095/1/2kk68kgef7/nook74wcsd#p600

If a task has been assigned to another user, this user should set the status to “Done” after completion. This will create a notification for the map owner.

Then, the assigner should check the result (box content).

If there are still problems, the assigner can set the status back to “In Progress” and leave notes in the box content.

> If the task is completed, the assigner can set the status to **“Archive”**. As a result, the task will no longer appear in the task list of the user.

In addition, the task (if a due date has been set) will no longer appear in the user's calendar.

### Try it out - on your own map
Source: https://www.edumaps.de/1095/1/2kk68kgef7/nook74wcsd#p7005

Create your first task in 2 minutes. Check off each step – only you can see your checkmarks:

[Checklist: Open your own map in edit mode / Select a box and open “Assign task” / Set the status and priority / Enter a due date / Find the task again on the “Tasks” page / Set the status to “Complete” – Done!]

You can find the overview at any time under [“Tasks”](https://www.edumaps.de/user/tasks).

## 7.1 File Formats for Uploads
Source: https://www.edumaps.de/1005/1/c1g5yt7t1t/kr8pkqzn4j

### Introduction
Source: https://www.edumaps.de/1005/1/c1g5yt7t1t/kr8pkqzn4j#p20600

✔️ Here you will find a list of all file formats that you can upload to Edumaps.

✔️ All popular video, image, audio and document formats are accepted.

✔️ Foreign formats are zipped and provided as ZIP files.

The maximum file size for uploads can be found in the Upload Manager tutorial under [Upload Limits](https://www.edumaps.de/1075/1/iq6mcbew6y/3gx2z3ykqw#uploadlimits).

### Images
Source: https://www.edumaps.de/1005/1/c1g5yt7t1t/kr8pkqzn4j#p20603

**Image Formats**
**Image Formats:**

- [bmp](https://en.wikipedia.org/wiki/BMP_file_format) (Bitmap Format)
- [gif](https://en.wikipedia.org/wiki/GIF) (Graphics Interchange Format)
- [heic](https://en.wikipedia.org/wiki/High_Efficiency_Image_File_Format) (High Efficiency Image File Format)
- [jpeg / jpg / jfif](https://en.wikipedia.org/wiki/JPEG) (Joint Photographic Experts Group)
- [odg](https://en.wikipedia.org/wiki/OpenDocument) (OpenOffice Graphics)
- [png](https://en.wikipedia.org/wiki/Portable_Network_Graphics) (Portable Network Graphics)
- [tif / tiff](https://en.wikipedia.org/wiki/TIFF) (Tag Image File Format)
- [webp](https://en.wikipedia.org/wiki/WebP) (Free image format)
- [xcf](https://en.wikipedia.org/wiki/XCF_(file_format)) (Gimp image format)

> Image files remain unchanged. Only if an image is too wide or too high is it scaled down and saved as a JPG.

> Screenshots can be inserted directly into the editor using copy and paste.

**Image Examples**
![Selective Focus Photography of Orange Sunroot Flowers](https://www.edumaps.de/file/222776611163734536.jpg/hx3tg3m)
https://www.pexels.com/photo/selective-focus-photography-of-orange-sunroot-flowers-982662/

![Photo of Brown House Near Mountain](https://www.edumaps.de/file/8390897320832832314.jpg/dwh2u9y)
https://www.pexels.com/photo/photo-of-brown-house-near-mountain-1424246/

![An Ice Cream Cone with Macaroons](https://www.edumaps.de/file/13490166688986383736.jpg/hstgb7d)
https://www.pexels.com/photo/an-ice-cream-cone-with-macaroons-7296698/

**Image Animation (GIF) Examples**
![Descriptive Zoopraxography Lion Walking Animated](https://www.edumaps.de/file/1678179702177663775.gif/gu3o44o)
https://en.wikibooks.org/wiki/File:Descriptive_Zoopraxography_Lion_Walking_Animated_12.gif

![Animated Quadratic Bezier Curve](https://www.edumaps.de/file/16166765239144346318.gif/rk3syp0)
https://classes.engineering.wustl.edu/cse425s/index.php?title=File:B%C3%A9zier_2_big.gif

### Documents
Source: https://www.edumaps.de/1005/1/c1g5yt7t1t/kr8pkqzn4j#p20604

**Document Formats**
**Document Formats:**

- [csv](https://en.wikipedia.org/wiki/Comma-separated_values) (Comma-Separated Values)
- [doc](https://en.wikipedia.org/wiki/Microsoft_Word) / [docx](https://en.wikipedia.org/wiki/Office_Open_XML) (Microsoft Word)
- [key](https://en.wikipedia.org/wiki/Keynote_(presentation_software)) (Apple Presentation)
- [numbers](https://en.wikipedia.org/wiki/Numbers_(spreadsheet)) (Apple Spreadsheet)
- [odp](https://en.wikipedia.org/wiki/OpenDocument) (OpenOffice Presentation)
- [ods](https://en.wikipedia.org/wiki/OpenDocument) (OpenOffice Spreadsheet)
- [odt](https://en.wikipedia.org/wiki/OpenDocument) (OpenOffice Text)
- [pages](https://en.wikipedia.org/wiki/Pages_(word_processor)) (Apple Text Document)
- [pdf](https://en.wikipedia.org/wiki/PDF) (Portable Document Format)
- [ppt](https://en.wikipedia.org/wiki/Microsoft_PowerPoint) / [pptx](https://en.wikipedia.org/wiki/Office_Open_XML) (Microsoft PowerPoint)
- [rtf](https://en.wikipedia.org/wiki/Rich_Text_Format) (Rich Text Format)
- [tex](https://en.wikipedia.org/wiki/TeX) (Typesetting system)
- [txt](https://en.wikipedia.org/wiki/Text_file) (Text File)
- [xls](https://en.wikipedia.org/wiki/Microsoft_Excel) / [xlsx](https://en.wikipedia.org/wiki/Office_Open_XML) (Microsoft Excel)

> Documents stay unchanged.

> Thumbnails are generated for PDF files.

**PDF Examples**
[A Little Princess](https://www.edumaps.de/file/429274443562492328.pdf/du5f06o)
Frances Hodgson Burnett

**Examples of Microsoft Documents**
[PPTX](https://www.edumaps.de/file/498864454756738653.pptx/fodfm4z)

[DOCX](https://www.edumaps.de/file/18193045095843689728.docx/dzoywke)

[XLSX](https://www.edumaps.de/filepreview/9888147760811053047.xlsx/0htbpoa)

### Videos
Source: https://www.edumaps.de/1005/1/c1g5yt7t1t/kr8pkqzn4j#p20601

**Video Formats**
**Video Formats:**
- [avi](https://en.wikipedia.org/wiki/Audio_Video_Interleave) (Audio Video Interleave)
- [mov](https://en.wikipedia.org/wiki/QuickTime_File_Format) (Quicktime Movie)
- [mp4](https://en.wikipedia.org/wiki/MP4_file_format) (Moving Picture Experts Group)
- [m4v](https://en.wikipedia.org/wiki/M4V) (Apple video format)
- [webm](https://en.wikipedia.org/wiki/WebM) (Free video format)
- [wmv](https://en.wikipedia.org/wiki/Windows_Media_Video) (Windows Media Video)

> All video files are converted into the format [H.264](https://en.wikipedia.org/wiki/Advanced_Video_Coding) with the file extension **mp4**.

**Video Examples**
[Video (MP4)](https://www.edumaps.de/file/2314585497019982172.mp4/04q1iba)

[Video (MP4)](https://www.edumaps.de/file/11610277992770907807.mp4/vp6obh9)

[Video (MP4)](https://www.edumaps.de/file/7572370477486834028.mp4/9vrl25i)

### Audio
Source: https://www.edumaps.de/1005/1/c1g5yt7t1t/kr8pkqzn4j#p20602

**Audio Formats**
**Audio Formats:**

- [3gp](https://en.wikipedia.org/wiki/3GP_and_3G2) (3rd Generation Partnership Project)
- [aac](https://en.wikipedia.org/wiki/Advanced_Audio_Coding) (Advanced Audio Coding)
- [flac](https://en.wikipedia.org/wiki/FLAC) (Free Lossless Audio Codec)
- [m4a](https://en.wikipedia.org/wiki/Apple_Lossless_Audio_Codec) (Apple Lossless Audio Codec)
- [mp3](https://en.wikipedia.org/wiki/MP3) (MPEG-1 Audio Layer III)
- [mp4 Audio](https://en.wikipedia.org/wiki/MP4_file_format) (MPEG-4 Part 3, AAC)
- [oga / ogg](https://en.wikipedia.org/wiki/Ogg) (Xiph.Org Foundation)
- [opus](https://en.wikipedia.org/wiki/Opus_(audio_format)) (Opus Audio format)
- [wav](https://en.wikipedia.org/wiki/WAV) (Waveform Audio File Format)
- [webm Audio](https://en.wikipedia.org/wiki/WebM) (Free Audio format)
- [wma](https://en.wikipedia.org/wiki/Windows_Media_Audio) (Windows Media Audio)

> All audio files are converted into the format [MP3](https://en.wikipedia.org/wiki/MP3) with the extension **mp3**.

**Audio Examples**
[At First Sight - FiftySounds](https://www.edumaps.de/file/2980396792779032444.mp3/7755qjj)

Source\: [fiftysounds.com](https://www.fiftysounds.com/royalty-free-music/at-first-sight.html)

[A Day to Remember - FiftySounds](https://www.edumaps.de/file/14326589519461376229.mp3/cjfvmp7)

Source\: [fiftysounds.com](https://www.fiftysounds.com/royalty-free-music/a-day-to-remember.html)

[Big rain drops](https://www.edumaps.de/file/12207668707209509385.mp3/krsg1gu)

Source\: [chosic.com](https://www.chosic.com/download-audio/28294/)

### Other Formats
Source: https://www.edumaps.de/1005/1/c1g5yt7t1t/kr8pkqzn4j#p922

**Other Formats**
**Other Formats:**

- [blend](https://en.wikipedia.org/wiki/Blender_(software)) (Blender 3D)
- [html](https://en.wikipedia.org/wiki/HTML) (Hypertext Markup Language)
- [obj](https://en.wikipedia.org//wiki/Wavefront_.obj_file) (Wavefront 3D geometry)
- [stl](https://en.wikipedia.org/wiki/STL_(file_format)) (Stereolithography CAD)
- [zip](https://en.wikipedia.org/wiki/ZIP_(file_format)) (ZIP archive)

> All other third-party formats are automatically packaged and provided as ZIP.

## 7.2 Upload Manager
Source: https://www.edumaps.de/1075/1/iq6mcbew6y/3gx2z3ykqw

### Introduction
Source: https://www.edumaps.de/1075/1/iq6mcbew6y/3gx2z3ykqw#p141

✔️ With the upload manager, you can:

- Find all your uploads in one central place
- Access boxes and comments where the uploads took place
- Rotate images
- Change file names
- Enter metadata such as licenses
- Delete files

### Overview of the Upload Manager
Source: https://www.edumaps.de/1075/1/iq6mcbew6y/3gx2z3ykqw#p142

![Example Upload Manager](https://www.edumaps.de/file/2732462997443186813.png/z5qkzah)

At the top, you will find three tabs:

- All Uploads
- My Uploads
- Uploads from Others

Depending on your selection, you can filter your uploads. Uploads from other users to your maps are stored in your account, and you can manage them.

Use the search field to quickly locate uploads.

### Details about the Upload
Source: https://www.edumaps.de/1075/1/iq6mcbew6y/3gx2z3ykqw#p143

Each uploaded file is represented with:

- File type
- Link button and Delete button
- Time of upload
- Size of the file
- File name
- Metadata ("no info" if not provided)
- Location (Upload took place in box, comment, as movable image (textfield), map background, ...)

![Example of an upload](https://www.edumaps.de/file/9252372504809875296.png/gh0j8rt)

### Location of the Upload
Source: https://www.edumaps.de/1075/1/iq6mcbew6y/3gx2z3ykqw#p144

By clicking on the blue button “Show Box”, the map is opened where the upload took place. The box is also automatically brought into focus.

![Button "Show Box"](https://www.edumaps.de/file/9252372504809875296.png/gh0j8rt)

Locations can be:
- Box
- Comment
- Movable image (textfield)
- Map background

### Rotate Image
Source: https://www.edumaps.de/1075/1/iq6mcbew6y/3gx2z3ykqw#p145

For images, you will find a Rotate button directly next to the red delete button, which allows you to rotate the image by 90° as many times as you like.

![Rotate button at the top right](https://www.edumaps.de/file/12229056422180470099.png/bgthzre)

### Deleted Boxes / Comments
Source: https://www.edumaps.de/1075/1/iq6mcbew6y/3gx2z3ykqw#p146

If the box in which the file was uploaded has already been deleted, you will find a red note below the file "Box deleted".

![Image](https://www.edumaps.de/file/14128420299401964433.png/uz10zs5)

The same applies to deleted comments and deleted movable images.

> The file was in a box that has since been deleted. However, the file could still be in other boxes or linked externally. Please check before deleting. The file remains available and can continue to be used.

### Storage Space
Source: https://www.edumaps.de/1075/1/iq6mcbew6y/3gx2z3ykqw#p147

The storage space display shows you how much storage space you have left.

You can also see how much space your uploads and third-party uploads occupy.

![Free Storage Space (Example)](https://www.edumaps.de/file/4164964797423366443.png/lk55f36)

Below that, you will find a button that allows you to automatically delete all files from deleted boxes, deleted comments, and deleted movable images.

> The probably unused files could still be in other boxes or linked externally. Please check before deleting. Deleted files remain recoverable in the Trash for 30 days.

### Rename file and add metadata
Source: https://www.edumaps.de/1075/1/iq6mcbew6y/3gx2z3ykqw#p148

By clicking on the file name, you can change it.

By clicking on “no info”, you can add any metadata to your upload. This is particularly useful for license notices or source links.

![File name and metadata](https://www.edumaps.de/file/9252372504809875296.png/gh0j8rt)

### Direct File Upload
Source: https://www.edumaps.de/1075/1/iq6mcbew6y/3gx2z3ykqw#p321

You can also upload a file without creating a map.

To do this, simply click the “Upload file” button near the storage display.

![Button “Upload file” for direct upload](https://www.edumaps.de/file/147883380951661989.png/4bg8fmf)

The uploaded file will then have the note “Direct Upload”.

![Note “Direct Upload” at file](https://www.edumaps.de/file/1160189063286308412.png/91pd0tc)

### Upload Limits
Source: https://www.edumaps.de/1075/1/iq6mcbew6y/3gx2z3ykqw#p322

The upload limit depends on the map owner. Depending on the account, the upload limit for the respective map is:

- 10 MB/file with plan “Free” (each registered user)
- 100 MB/file with plan “Standard” (customers)
- 500 MB/file with plan “Premium” (customers)

The following applies to school and state licenses:

- 100 MB/file for students
- 250 MB/file for teachers

If you use a different Edumaps server, there might be different limits.

Example 1: If the map owner is a teacher, all students and teachers who are logged in and visit his map can upload files up to 250 MB in size.

Example 2: If the map owner has booked the “Premium” plan, an upload limit of 500 MB per file applies to his map.

Note: An upload limit of 10 MB/file always applies to anonymous users, regardless of the map owner.

## 7.3 Import Content as new Maps
Source: https://www.edumaps.de/1065/1/bck6c6wbih/hdop3a0fq8

### Introduction
Source: https://www.edumaps.de/1065/1/bck6c6wbih/hdop3a0fq8#p1058

✔️ You can export and import your maps easily.

✔️ You can import external content as a new map on Edumaps.

✔️ Only a few clicks are required for this.

### Import Steps
Source: https://www.edumaps.de/1065/1/bck6c6wbih/hdop3a0fq8#p106

To perform an import that creates a new map, click on “New Map” in the sidebar, and then select “Import Map”.

![Menu with option “Import”](https://www.edumaps.de/file/16406630464898962127.png/p9vaoia)

The following dialog will then open:

![Import options](https://www.edumaps.de/file/7649988735900638794.png/2ocvi6e)

### Edumaps file (json)
Source: https://www.edumaps.de/1065/1/bck6c6wbih/hdop3a0fq8#p1066

When you export a map from Edumaps, it is done in JSON format.

The JSON file can be imported here to create a new map.

Click on “Edumaps (json)”, select the file, and the map will be imported.

If there are uploads in the box contents (that do not originate from you), they will also be imported and appear in your upload manager.

### Map from other Edumaps server
Source: https://www.edumaps.de/1065/1/bck6c6wbih/hdop3a0fq8#p3964

If you have maps on other Edumaps servers, you can import them directly using a map link.

Click on “Map from another server” and paste the map link.

The map will be imported automatically. All files will be transferred and will later appear in your upload manager.

### Padlet Pinboard
Source: https://www.edumaps.de/1065/1/bck6c6wbih/hdop3a0fq8#p1068

The pinboards created on Padlet can be easily and directly imported into Edumaps.

You can learn how to perform the import directly on the import page:

https://www.edumaps.de/import/padlet

### Taskcards
Source: https://www.edumaps.de/1065/1/bck6c6wbih/hdop3a0fq8#p1118

Boards created on Taskcards can be easily and directly imported into Edumaps.

You can find out how to carry out the import directly on the import page:

https://www.edumaps.de/import/taskcards

### Trello Board
Source: https://www.edumaps.de/1065/1/bck6c6wbih/hdop3a0fq8#p7080

Boards created in Trello can be imported directly into Edumaps.

Click **"Create map"** in the sidebar and select **"Import"**. In the dialog, then click **"Trello board"**.

You can import any board via link, but you must make it public for the duration of the import, or import it via JSON file.

![Import dialog for Trello](https://www.edumaps.de/file/15206624854295937757.png/tzx3fd9)

### Tutory Collection
Source: https://www.edumaps.de/1065/1/bck6c6wbih/hdop3a0fq8#p1067

The collections of worksheets created on Tutory can be directly imported into Edumaps.

See the tutorial:

[Import of Tutory worksheets and collections](https://www.edumaps.de/1063/1/iwhqihuls4/q7pfiqhxbl)

## 7.4 Import of external Media (Media Libraries)
Source: https://www.edumaps.de/1067/1/9blpyaqff9/s3yptn4fgj

### Introduction
Source: https://www.edumaps.de/1067/1/9blpyaqff9/s3yptn4fgj#p1145

✔️ You can import external media directly into your map.

- Large selection of free media (50,000+ media)
- Large selection of licensed media (depending on the media center)
- Legal license control for licensed media
- With just a few clicks, the medium is available as a box in your map

### Instructions for adding media
Source: https://www.edumaps.de/1067/1/9blpyaqff9/s3yptn4fgj#p109

To import a medium as a new box, open your map in edit mode and click on the “Media” button.

![Button “Media”](https://www.edumaps.de/file/12535013572102085092.png/j6fepro)

Then the following dialog opens:

![Dialog “Insert media”](https://www.edumaps.de/file/6318160716196877730.png/y25cuj6)

Select the option you need.

### Licensed Media Library (your media center)
Source: https://www.edumaps.de/1067/1/9blpyaqff9/s3yptn4fgj#p1146

Here you will find licensed media on Edupool that have been acquired by your media center.

You will be redirected to the search page, where you can directly search for media using text search.

![Example search results](https://www.edumaps.de/file/5229234509735454701.png/5a4yh8a)
for Edupool media

Click on the red-white cross and the medium will be added to your map.

### Free Media Library
Source: https://www.edumaps.de/1067/1/9blpyaqff9/s3yptn4fgj#p1147

By clicking on the "Free Media Library" button, you will be directed to the free media library with over 50,000 free media (OER and CC) on state servers and approximately 12,000 media on our main server.

There, you can search for a medium using text input and filters.

![Search for medium in the free media library](https://www.edumaps.de/file/5095628627874194310.png/h0evzlj)

You can click on the medium, and all details about the medium will be displayed to you.

![Details about the selected medium](https://www.edumaps.de/file/887070526492945149.png/a0j1oll)

Click on the red-white cross and the medium will be added to your map.

## 7.5 Export of Maps
Source: https://www.edumaps.de/1066/1/1pub713maq/ticgrlk5gg

### Introduction
Source: https://www.edumaps.de/1066/1/1pub713maq/ticgrlk5gg#p1120

✔️ You can export your map on Edumaps in various formats.

✔️ We offer you as many formats as possible to choose from. Even an export as plain HTML with all static files is possible.

### Steps to Export
Source: https://www.edumaps.de/1066/1/1pub713maq/ticgrlk5gg#p107

For the export, proceed as follows:

Click on the three dots at the top right in edit mode and select "Export map".

![Map menu with “Export Map”](https://www.edumaps.de/file/18108530000067100084.png/dewjbub)

The following dialog will then open:

![Options for Export](https://www.edumaps.de/file/18304558156886799071.png/xjn6p7o)

Select the desired option here.

### Offline Map with all files (html)
Source: https://www.edumaps.de/1066/1/1pub713maq/ticgrlk5gg#p1121

With the export option “Offline Map with all files (html)” you can download your entire map and make it available offline.

Here, in addition to the HTML, all files are provided.

The download is available as a ZIP file.

In addition to the HTML and your files, the ZIP file also contains an Edumaps JSON export file.

### Edumaps File (json)
Source: https://www.edumaps.de/1066/1/1pub713maq/ticgrlk5gg#p108

By default, any map can be exported as a JSON file.

This file can be imported on any Edumaps server and will create a new map.

Click on “Edumaps (json)” and the JSON file will be generated.

If you import the file on another Edumaps server, an attempt will be made to transfer all files from this map to the new server.

### Moodle Course (mbz)
Source: https://www.edumaps.de/1066/1/1pub713maq/ticgrlk5gg#p1122

It is possible to export a map with all its contents directly as a Moodle course.

To do this, click on “Moodle course (mbz)” and a Moodle course file will be generated.

This Moodle course is structured according to the setup of your map and can be imported into Moodle.

In Moodle, you can then directly import the MBZ file as a course using the “Restore course” function.

![Import into Moodle](https://www.edumaps.de/file/3748666196200927361.gif/tdfkg3i)

### Markdown (md)
Source: https://www.edumaps.de/1066/1/1pub713maq/ticgrlk5gg#p1123

Each map can be exported as a Markdown document and used in other systems.

### Image file (png)
Source: https://www.edumaps.de/1066/1/1pub713maq/ticgrlk5gg#p1124

Each map can be saved as an image file.

The generated image corresponds to a screenshot of the entire map.

If you want QR codes to appear for all your content, use the “Print Map” option in the map view.

### PDF document (pdf)
Source: https://www.edumaps.de/1066/1/1pub713maq/ticgrlk5gg#p578

Each map can be exported as a PDF.

Click on the PDF export to reach the print view. There, click on the "Print" button.

Afterwards, select “Destination: Save as PDF” in your browser.

Now your PDF document will be created and downloaded.

Tip: Almost all browsers can print to a PDF document.

### Participants of all Bookings (csv)
Source: https://www.edumaps.de/1066/1/1pub713maq/ticgrlk5gg#p1125

If bookings are used on the map, there is an additional export option (besides map exports) called “Participants of all Bookings (csv)”.

This allows you to export all participants of all bookings on your map with just one click.

## 7.6 Importing Tutory Worksheets and Collections
Source: https://www.edumaps.de/1063/1/iwhqihuls4/q7pfiqhxbl

### Introduction
Source: https://www.edumaps.de/1063/1/iwhqihuls4/q7pfiqhxbl#p1334

✔️ [Tutory.de](https://www.tutory.de/) is a platform where you can create worksheets. You can also create collections of worksheets.

✔️ At Edumaps, you can import individual worksheets or entire collections with just one click.

### At Tutory: Exporting a Single Worksheet
Source: https://www.edumaps.de/1063/1/iwhqihuls4/q7pfiqhxbl#p1335

To export a worksheet, follow these steps:

- Open the Tutory website. Log in.
- Open a worksheet using the “Preview” button.
- Then you will find the “Edumaps Export” option under “Actions” in the top right corner.

![Edumaps Export at Tutory](https://www.edumaps.de/file/7599673349842398729.png/3ijeeym)

Click on “Edumaps Export” and an export dialog with configuration options will appear:

![Settings for exporting a Tutory worksheet](https://www.edumaps.de/file/15103730713626863038.png/jxorgy9)

Select what you need. Then copy the link or save the link.

### At Edumaps: Importing a Single Worksheet
Source: https://www.edumaps.de/1063/1/iwhqihuls4/q7pfiqhxbl#p1336

To import a single worksheet, open a map and enter edit mode.

Now click on the three dots next to the “New Box” button and a dropdown opens.

![Option to import a Tutory worksheet](https://www.edumaps.de/file/14094762027316671849.png/z522bds)

Click on "Tutory Worksheet", then a field for entering the Tutory link appears.

![Enter the link to the Tutory worksheet](https://www.edumaps.de/file/11845024813026034941.png/ykoo9hx)

Enter the link copied from Tutory into the input field.

Our server now imports the Tutory worksheet according to your settings.

### At Tutory: Exporting a Collection of Worksheets
Source: https://www.edumaps.de/1063/1/iwhqihuls4/q7pfiqhxbl#p1337

Go to the Tutory website. Log in.

- Open a collection/package.

- Now, you will find the “Edumaps Export” button at the top right corner.

![Edumaps Export at Tutory](https://www.edumaps.de/file/14146320196781295121.png/hk09iqv)

Click on “Edumaps Export” to open an export dialog with setting options:

![Settings for exporting a Tutory worksheet collection](https://www.edumaps.de/file/9817435316555815921.png/lqxbl2q)

Select what you need. Then, copy the link or save the link.

### At Edumaps: Importing a Worksheet Collection
Source: https://www.edumaps.de/1063/1/iwhqihuls4/q7pfiqhxbl#p1338

To import an entire worksheet collection from Tutory into Edumaps, click on “Create Map” and select “Import”.

The following dialog will then open:

![Dialog for Map Import](https://www.edumaps.de/file/2579173280896788800.png/l2nlkv2)

Select “Tutory Collection”. A dialog with an input field will then open. Enter the Edumaps export link from Tutory there.

Confirm, and the Edumaps server will automatically import the entire collection of worksheets according to your settings.

## 8.1 User Roles and Permissions in Edumaps
Source: https://www.edumaps.de/1045/1/acuyb12uou/u5oziu0rfk

### Introduction
Source: https://www.edumaps.de/1045/1/acuyb12uou/u5oziu0rfk#p292

✔️ Edumaps offers four different user roles. Here we briefly show you the essential rights of these users.

### Overview of User Roles and Rights
Source: https://www.edumaps.de/1045/1/acuyb12uou/u5oziu0rfk#p587

**Release and User Management**

| Function / Permission | Superadmin | Admin | Teacher | Student |
| --- | --- | --- | --- | --- |
| Access to all schools | ✅ | ❌ | ❌ | ❌ |
| Release maps to all schools | ✅ | ❌ | ❌ | ❌ |
| Access all users of a school | ✅ | ✅ | ❌ | ❌ |
| Create classes/groups | ✅ | ✅ | ✅ | ❌ |
| Release maps to own school | ❌ | ✅ | ✅ | ❌ |
| Share maps to classes/groups | ❌ | ✅ | ✅ | ❌ |
| Create user accounts | ❌ | ✅ | ❌ | ❌ |
| Delete user accounts | ❌ | ✅ | ❌ | ❌ |
| Edit user accounts | ✅ | ✅ | ❌ | ❌ |
| Merge user accounts | ✅ | ✅ | ❌ | ❌ |
| Invite users to school | ✅ | ✅ | ❌ | ❌ |
| Change user passwords | ✅ | ✅ | ❌ | ❌ |
| View page [“My school”](https://www.edumaps.de/maps/school) | ❌ | ✅ | ✅ | ✅ |
| View page [“Media center”](https://www.edumaps.de/maps/mediacenter) | ✅ | ✅ | ✅ | ❌ |

**Use of Maps**

The following is a comparison of the rights of visitors versus the map owner.

| Function / Permission | **Map owner** | Admin / Teacher | Student | Anonymous |
| --- | --- | --- | --- | --- |
| Delete map | ✅ | ❌ | ❌ | ❌ |
| Change map settings | ✅ | ❌ | ❌ | ❌ |
| Copy map | ✅ | ✅ | ✅ | ❌ |
| Add columns | ✅ | ✅ | ✅ | ✅ |
| Edit/delete columns | ✅ | ✅ | ✅ | ❌ |
| Add boxes | ✅ | ✅ | ✅ | ✅ |
| Edit boxes | ✅ | ✅ | ✅ | ✅ |
| Delete boxes | ✅ | ✅ | ✅ | ❌ |
| Booking module | ✅ | ✅ | ❌ | ❌ |
| Box calendar | ✅ | ✅ | ❌ | ❌ |
| Likes and ratings | ✅ | ✅ | ✅ | ✅ |
| Borrowing items | ✅ | ✅ | ✅ | ❌ |
| Upload files | ✅ | ✅ | ✅ | ✅ |
| Upload limit per file | 250 MB | 250 MB | 100 MB | 10 MB |

**Notes:**

- Edit map – Must be distributed with an appropriate editing link (without restrictions such as password or teacher-only access)
- Edit/delete columns – as long as the column is not protected
- Edit/delete boxes – as long as the box is not protected

### Superadmin
Source: https://www.edumaps.de/1045/1/acuyb12uou/u5oziu0rfk#p290

- Can edit school, teacher and student accounts on the [User Management](https://www.edumaps.de/users/superadmin) page:
   - Change names
   - Change emails
   - Change passwords
- Access to [List of Schools](https://www.edumaps.de/users/list)
- Distributing maps to schools

See also [Superadmin / Media center - Distributing maps to schools](https://www.edumaps.de/1068/1/gxuqtu9bwo/mv0l9vlyoe)

- [Guide for Superadmins: Managing Users](https://www.edumaps.de/1124/1/r4nnisdsmx/9fpdsz9w1u)
- [Superadmin / Media center - Distributing maps to schools](https://www.edumaps.de/1068/1/gxuqtu9bwo/mv0l9vlyoe)

### Admin account (School account)
Source: https://www.edumaps.de/1045/1/acuyb12uou/u5oziu0rfk#p423

- Can create accounts for teachers and students
   - [create](https://www.edumaps.de/users/create)
   - [edit](https://www.edumaps.de/users/list)
   - [delete](https://www.edumaps.de/users/list)
   - [merge](https://www.edumaps.de/users/merge)
- Access to [list of all accounts](https://www.edumaps.de/users/list)
- [Create classes](https://www.edumaps.de/users/sets)
- Change emails, passwords and real names
- Invite registered users to school

For details see: [Tutorial for Admins on Edumaps](https://www.edumaps.de/1008/1/bpk12qmwjr/zdo0glozn4)

### Teacher account
Source: https://www.edumaps.de/1045/1/acuyb12uou/u5oziu0rfk#p287

- can create classes/groups with students
- can share maps to classes (students get a notification)
- can share maps internally for their own school
- sees **which students** were active on the map (map history)
- sees **which students** have rated boxes
- sees **which students** have submitted material or commented on a box
- can access the media licensed for the school at Edupool

For details see: [Tutorial for Teachers on Edumaps](https://www.edumaps.de/1006/1/42ns564tsr/6rupugfcnr)

### Student account
Source: https://www.edumaps.de/1045/1/acuyb12uou/u5oziu0rfk#p288

- can access internal school maps (go to “Discover” → “Public Maps” and choose the tab [“Maps of my School”](https://www.edumaps.de/maps/school))
- can upload material in box (comment)
- can have discussions in comments
- can access the media licensed for the school at Edupool

For details see: [Tutorial for Students on Edumaps](https://www.edumaps.de/1007/1/xvzlo8huq4/h4om9t7ny6)

### Technical Notes
Source: https://www.edumaps.de/1045/1/acuyb12uou/u5oziu0rfk#p289

Username is based on school ID, examples:

- admin with "he4566"
- teacher with "he4566.t1"
- Student with "he4566.123"

- Search and license access to Edupool media depending on the school/media center

## 8.2 Guide for Admins: Managing Users, Classes, and the School
Source: https://www.edumaps.de/1008/1/bpk12qmwjr/zdo0glozn4

### Introduction
Source: https://www.edumaps.de/1008/1/bpk12qmwjr/zdo0glozn4#p21017

✔️ With an admin account, you have a powerful, responsible tool at your disposal.

✔️ With an admin account, you can centrally manage the users, classes, and access for your school or organization.

✔️ This guide shows you step by step how to create, edit, invite, remove, or merge accounts, prepare classes as templates, and use administrative tasks such as CSV imports or login passes.

> Please note: Admin accounts are a tool of responsibility.

### Create Single-Sign-Ons
Source: https://www.edumaps.de/1008/1/bpk12qmwjr/zdo0glozn4#p87

With various single sign-on solutions, your teachers and students can also log in to Edumaps.

For example:

- IServ ([Instructions here](https://www.edumaps.de/1050/1/9p332rdqbb/pi0cqyd7uz))
- Edupool
- various state solutions

Important: Admin accounts should never be used personally and are never accessible via single sign-ons.

For your own maps, you should definitely use a teacher account.

However, you can always use the admin account to manually create accounts without single sign-on.

### List of all Accounts
Source: https://www.edumaps.de/1008/1/bpk12qmwjr/zdo0glozn4#p1056

You can find a list of all existing accounts on the page [List of Accounts](https://www.edumaps.de/users/list).

![List of Accounts](https://www.edumaps.de/file/4342849577590385530.png/iqtlfms)

### Create Accounts for Students and Teachers
Source: https://www.edumaps.de/1008/1/bpk12qmwjr/zdo0glozn4#p21016

On the page [Create Accounts](https://www.edumaps.de/users/create) you can see how many student and teacher accounts can be created and how many have already been created.

![Page: Create Accounts](https://www.edumaps.de/file/11700609860462318251.png/gij6178)

At the bottom you find **3 options** for creating new accounts:

- Create without names/emails
- Create via list of names/emails
- Create via CSV file

Choose the option that suits you and create new student and teacher accounts.

![Image](https://www.edumaps.de/file/11189886007249998534.png/adn0bvm)
1. Create Accounts via List (names/emails)

![Image](https://www.edumaps.de/file/321843404757200124.png/5x59f87)
1. Create Accounts via CSV file

![Image](https://www.edumaps.de/file/14609055647830582958.png/7g39vqw)
1. Create Accounts without emails

Tip: When you create accounts via a CSV file, you can also specify the class name, which is imported into the system, in addition to name and e-mail.

### Edit Accounts
Source: https://www.edumaps.de/1008/1/bpk12qmwjr/zdo0glozn4#p21112

On the page [List of Accounts](https://www.edumaps.de/users/list) you can edit each user that is part of your school/organisation.

You can change the usernames, the email and the password by clicking on the pen icon.

![Option to edit a user](https://www.edumaps.de/file/4550830264402289475.png/8pccl17)

![Editing an account](https://www.edumaps.de/file/18338848783778808658.png/8d7427q)

### Delete Accounts
Source: https://www.edumaps.de/1008/1/bpk12qmwjr/zdo0glozn4#p21111

Accounts can easily be deleted from the [List of Accounts page](https://www.edumaps.de/users/list).

Just click on the trash icon on the right, check if it is the correct account, and then confirm the deletion.

![Option: Delete Account](https://www.edumaps.de/file/9365317600636044892.png/qkbapo5)

![Delete Account Page](https://www.edumaps.de/file/7216829327217388886.png/17l6i0d)

> Users who still have maps in their account cannot be deleted for data protection reasons. To ensure that no content is lost, these maps must be reviewed first. Alternatively, you can remove the user from the school.

### Create prepared classes/groups as presets for teachers
Source: https://www.edumaps.de/1008/1/bpk12qmwjr/zdo0glozn4#p21018

In principle, each teacher creates their own classes and groups, but a lot of time can be saved if you create classes with the admin account. Because the classes created by the school admin are available to all your teachers as “Prepared Classes”.

With an admin account you can create classes as follows:

1. Go to the [Manage Classes](https://www.edumaps.de/users/sets) page.
1. Create classes.
1. Add students to each class.

![Add students to the class](https://www.edumaps.de/file/8080204183258317251.png/wyzpbzc)

As soon as you have created classes, all your teachers will see a “Prepared classes” button on the [Manage classes](https://www.edumaps.de/users/sets) page. When teachers click on it, they come to a page where they can use the prepared classes.

### Invite Users to your School
Source: https://www.edumaps.de/1008/1/bpk12qmwjr/zdo0glozn4#p21115

On the [List of Accounts](https://www.edumaps.de/users/list) page you can also invite existing users to join your school/organization.

To do so, click the blue button "Invite user" which brings you to the page [Invite user](https://www.edumaps.de/users/invite).

![Page: Invite user](https://www.edumaps.de/file/15523430048764746933.png/afn3njz)

Enter the user's email and they will receive an invitation link.

Important: The user must already have an account with Edumaps, only then they can be invited.

### Remove User from School
Source: https://www.edumaps.de/1008/1/bpk12qmwjr/zdo0glozn4#p4487

On the page [List of Accounts](https://www.edumaps.de/users/list), you can remove teacher and student accounts from the school/organization.

Click on “Remove” and confirm.

![Option “Remove user”](https://www.edumaps.de/file/13928116068303396543.png/2w7rqwc)

If you remove a student or teacher from the school, the account will be downgraded to a basic account. This means the user will no longer have access to the “My School” or “Media Center” pages. In addition, they will no longer be able to access licensed media.

### Merge User Accounts
Source: https://www.edumaps.de/1008/1/bpk12qmwjr/zdo0glozn4#p88

On the page [List of all Accounts](https://www.edumaps.de/users/list) you will find the button “Merge accounts”.

Here you can merge two accounts with each other, meaning, combine the data.

![Page: Merge accounts](https://www.edumaps.de/file/16489726023722218625.png/rlwhqvn)

> Both accounts must be associated with your school.

> Please note that a merging of accounts cannot be undone.

### Update accounts (e.g. school year transition)
Source: https://www.edumaps.de/1008/1/bpk12qmwjr/zdo0glozn4#p251

At the turn of the school year, there are two ways to update the accounts. In most cases, the first one is all you need.

**Case 1: Only the class names change**

If all classes simply move up one grade level at the turn of the school year, use the [Rename Classes](https://www.edumaps.de/users/usersets-rename) page. Click "School Year Change" there. All class names are automatically raised by one grade level, "7A" becomes "8A". No CSV import is needed for this.

**Case 2: Updating account data via CSV**

If you also want to update account data (new email addresses, individual students changing classes, new students), you can use the CSV import method.

1. Go to the [Create Accounts](https://www.edumaps.de/users/create) page with your admin account.
1. Click on "Create via CSV File" and upload your CSV file.
1. **Important: The system requires unique names. The name can only appear once. If "Max Muster" appears twice, you must set "Max Muster 2" for the second user with the same name.**
1. The CSV must contain the entry `Name,Email,Class` per line for class updates. The email can be empty, for example: `Max Muster, ,10B`
1. Then submit the file. A verification report will be automatically generated by the server indicating which data will be updated.
1. Correct the data as needed (you can change the data directly in the verification table). Click "Check All" again and then, if no errors are shown, click the "Create User" button.

When importing CSV files, the server checks whether the respective name and email address are already contained in the Edumaps user database. The name takes precedence in the check (names must be unique). After uploading the CSV file, you will see a verification report that lists all changes in detail. No accounts are overwritten, existing accounts are updated in a targeted way.

Existing classes are kept during the CSV import. Classes from the CSV file that do not exist yet are created as new classes. You can then delete classes that are no longer needed (for example, empty classes from the previous year) under [Manage Classes](https://www.edumaps.de/users/sets).

Follow-up question 1: "Do maps shared by teachers remain accessible in the student accounts if a class is deleted?"

Answer: Yes, each student will still find the maps shared via class in their "Received Maps", even if the class is deleted.

Follow-up question 2: "Do maps created by students themselves remain accessible?"

Answer: Yes, deleting classes has no effect on self-created maps.

### Create Login Pass for Students
Source: https://www.edumaps.de/1008/1/bpk12qmwjr/zdo0glozn4#p252

It has been found helpful for young students to create a login pass. The login pass contains all necessary login information as well as a QR code that logs the student in directly upon scanning.

> As an admin, you can always print login passes immediately after [creating accounts](https://www.edumaps.de/users/create).

![Example of a login pass](https://www.edumaps.de/file/11135525094453912591.png/z2ju3yc)

Should you wish to create a login pass later, it is only possible by assigning a new password.

- Go to the [list of all accounts](https://www.edumaps.de/users/list).
- Find the student and click on "Edit".
- Set the new password. Then the following appears:

![Image](https://www.edumaps.de/file/15406207708816798663.png/pf2jnn6)

By clicking "print here," the login pass for the student will be displayed to you.

![Image](https://www.edumaps.de/file/6884693863079475564.png/kzrfyjb)

### Manual: “Edumaps for Admins – Step by Step”
Source: https://www.edumaps.de/1008/1/bpk12qmwjr/zdo0glozn4#p5103

Further knowledge and guidance on handling admin accounts can be found in the following manual:

[Manual: “Edumaps for Admins – Step by Step”](https://www.edumaps.de/folder/1022/1/dqjte8pcqe6r/sj6cchzgiq87)

## 8.3 Guide for Teachers: Creating and Sharing Maps and Working with Classes
Source: https://www.edumaps.de/1006/1/42ns564tsr/6rupugfcnr

### What is Edumaps
Source: https://www.edumaps.de/1006/1/42ns564tsr/6rupugfcnr#p21000

**General Information**
✔️ With Edumaps you can:

- Create pinboards, timelines and stickerwalls
- Create weekly plans
- Work in collaboration in real time
- Upload files in 100+ formats
- Embed media from Edupool and Mundo
- Manage students and teachers
- Record microphone and webcam directly
- Import existing Padlets
- Export maps as Moodle courses
- Create bookings/courses
- Automate Certificates of participation
- Organize Reservations for Rentals
- Write texts with your team in Teamtext
- Create content with our AI Assistant

Our startpage contains all the important information and details. Please take a look there.

Our FAQ is very comprehensive and answers almost all questions: https://www.edumaps.de/faq

We wish you and your students a lot of joy and easy organization with Edumaps.

**GDPR compliant**
![Edumaps is GDPR compliant](https://www.edumaps.de/file/16119568313172475874.png/2uazwbf)

### Teacher Account
Source: https://www.edumaps.de/1006/1/42ns564tsr/6rupugfcnr#p21001

**Set up your Account**
The following simple steps will set up your account:

1. [Login](https://www.edumaps.de/login) with Username and Password.
1. Go to the [my account page](https://www.edumaps.de/user/account).
1. On your profile you see, which school you belong to.
1. There is also a hint that you should set up your account which links to the [setup-account-page](https://www.edumaps.de/user/init).
1. There you specify your email and password.  Optionally you can add your name and your class.
1. Confirm and your account is set up.
1. Next an email is sent to you with a link to confirm your new email address. Please click this link.

Your email address will help to recover your password if you forgot or lose it. Otherwise your teacher can change your password using the admin account of your school.

**Remove your Data / Delete your Account**
**Remove your Data**

If you like to delete all your data, you can open the [my account page](https://www.edumaps.de/user/account), scroll down and click „Remove Data“.

On the [Remove Data](https://www.edumaps.de/user/cleardata) page you can see all the data that will be deleted.

Note: The deletion is final and cannot be reverted.

Confirm by clicking the button “Remove my data”.

**Delete your Account**

To delete your account, open the [my acocunt page](https://www.edumaps.de/user/account), scroll down and click „Delete Account“.

On the [Delete Account](https://www.edumaps.de/user/delete) page you can see all the data that will be deleted.

Note: The deletion is final and cannot be reverted. – Your account gets immediately deleted and cannot be used afterwards.

Confirm by clicking the button “Delete my account”.

**List of all Students**
The list of all student accounts can be found at:

https://www.edumaps.de/users/list

**Create Classes/Groups**
Each teacher can create their own classes or groups on the [“Manage classes & groups”](https://www.edumaps.de/users/usersets) page.

Classes are not “school-wide”, but are created by each teacher for their own account. You can also create any groups instead of classes (e.g. a math remedial course).

The maps can then be distributed to the students in the specified groups (“Share map to class”). Each student in the selected group will then receive a notification on Edumaps.

Classes or groups are created once and are available to the user in Edumaps and also in Matheretter.

### Create Map
Source: https://www.edumaps.de/1006/1/42ns564tsr/6rupugfcnr#p21002

**Map Formats**
> Pinboards, timelines und stickerwalls are called „Maps“.

**Pinboard**

The pinboard consists of columns. Each column contains boxes.

Multiple columns are positioned side by side.

![Map format: Pinboard](https://www.edumaps.de/file/2387536848564589294.png/6rk7bku)

**Timeline**

The columns are horizontally arranged (“rows”). The boxes are arranged from left to right.

Multiple columns are positioned below each other.

![Map format: Timeline](https://www.edumaps.de/file/10524896192514210868.png/xp3jac8)

**Stickerwall**

The boxes are freely arranged. There are no columns.

![Map format: Stickerwall](https://www.edumaps.de/file/530150540731859997.png/0v6kh3d)

❤️ Changing from one map format to another map format is possible at any time.

**Create Map**
To create a map click on “Create Map” in the main menu.

![Create Map (Map Editor)](https://www.edumaps.de/file/4736367201946180178.png/nn9zgav)

> Use the [Tutorial: Map Settings](https://www.edumaps.de/1076/1/82f7f5907r/aq1ummf990) to familiarize yourself with the settings.

Notes:

- If you define “My School” under “Access to Map” then your map will show up for all students under [“My School”](https://www.edumaps.de/maps/school)
- Tags are used to sort your maps on the [“My Maps”](https://www.edumaps.de/user/maps) page by clicking on them.

**Create Columns and Boxes**
A map / pinboard consists of columns and boxes.

**Creating Columns**

1. First, create a new map.
1. Then click on “New column”.
1. In the column settings, give the column a title. Feel free to set various options.

![Column Settings](https://www.edumaps.de/file/5835160311257655001.png/10wjctx)

> Use the [Tutorial: Column Settings](https://www.edumaps.de/1077/1/322lwjtlaj) to familiarize yourself with the settings.

**Creating Boxes**

1. For a pinboard or timeline, you have to first create a column before the “Add Box” button appears.
1. On a stickerwall, you can add a new box immediately without creating a column.
1. In the box editor, give the box a title. You can also set various options.

![Box Settings](https://www.edumaps.de/file/3734170833935279009.png/i9wit0z)

> Use the [Tutorial: Box Settings](https://www.edumaps.de/1078/1/qbg4lumykj/2eycvzchpw) to familiarize yourself with the settings.

**Insert Material into Box (Media/Files)**
You can easily insert material into a box.

First click on the edit icon and then upload any file (photo, video, audio, etc.) by drag and drop or upload button.

Further, you can start microphone recordings, photo recordings and webcam recordings directly with the according buttons.

![Box Content Editor with File upload and Recording options](https://www.edumaps.de/file/10766022768341772281.png/pevby4v)

**Edit Box Content**
To edit the contents of a box afterwards, click the orange edit icon or double-click on the box background.

You can then use the editor to make your texts and materials look appealing.

See [Tutorial: Inputs and Formatting in the Box Editor](https://www.edumaps.de/1003/1/e9o5ybwc3p/z960xa7v6r)

### Edit and structure Maps
Source: https://www.edumaps.de/1006/1/42ns564tsr/6rupugfcnr#p21003

**Change the Map Data**
If you want to change the data of your map, you can click on the map title or on “Map Settings” in the map menu. This will open the map editor.

There are several options you can change:

1. Map title
1. Format
1. Background
1. Font
1. Tags
1. Publish
1. Extras

**Move Columns and Boxes**
To move a column to the left or right, click on the three dots and choose “Move”.

To move a box to another position on the map, click on the three dots and choose “Move”. Then drag the box to the new position.

![Recording: Move Box on Map](https://www.edumaps.de/file/240676770630694920.gif/mp4nbrn)

**Delete Box or Column**
**Delete Box**

To delete a box, you click the three dots and choose “Delete Box”.

![Delete Box](https://www.edumaps.de/file/11804598049785034080.png/zxykotp)

**Delete Column**

To delete a column, you click the three dots and choose “Delete Column”. Note that all boxes inside this column will also be deleted!

![Screenshot: Delete Column](https://www.edumaps.de/file/8630515777013607643.png/50l233v)

**Delete entire Map**
To delete the entire map, you click on the three dots on the top right and choose “Delete Map”.

Deleting an entire map deletes all columns and boxes.

Uploads that were in this map are not deleted automatically because they could be used in other maps. To delete them, visit the [upload manager](https://www.edumaps.de/uploads) and delete them manually.

### Copy existing materials
Source: https://www.edumaps.de/1006/1/42ns564tsr/6rupugfcnr#p21004

**Discover Maps and Copy Maps**
In the [Edumaps Media Library](https://www.edumaps.de/search), you can find maps and media that you can use freely.

Use the search and keyword selection directly on the discover page to find interesting maps.

Any public map can be copied by you. Simply click on “Copy map” in the top right menu:

![Copy Map](https://www.edumaps.de/file/3772975891582656815.png/yzccbkx)

You can change the copied map as you like, redesign it and distribute it to third parties.

**Maps of your own school**

If you click on the tab [“My school”](https://www.edumaps.de/maps/school), you will see all the maps and folders that the teachers of your school have shared.

**Add external Media and copy boxes from other Maps**
You can easily add external media or simply copy boxes from other maps.

See details in the tutorials:

- [Tutorial: Import of external Media](https://www.edumaps.de/1067/1/9blpyaqff9/s3yptn4fgj)
- [Tutorial: Import Content as new Maps](https://www.edumaps.de/1065/1/bck6c6wbih/hdop3a0fq8)
- [Tutorial: Copy Boxes from other Maps](https://www.edumaps.de/1073/1/4qjuhw8dpj/p2omobcqk8)

### Share Maps
Source: https://www.edumaps.de/1006/1/42ns564tsr/6rupugfcnr#p21005

**Share Maps + Access Rights**
You share your map by clicking the share button at the top right:

![Map Share Button](https://www.edumaps.de/file/12227523156487044354.png/tdbes7i)

A dialog with the share link will then open:

![Map Share Dialog](https://www.edumaps.de/file/5039598949331828049.png/7iqo65g)

You can send this link to your students or colleagues if they need to work on the map as well.

> See tutorials under [Manage and share Maps & Folders](https://www.edumaps.de/folder/1004/1/mtpjedbr82/jq573vl9a9)

### Feedback of Students
Source: https://www.edumaps.de/1006/1/42ns564tsr/6rupugfcnr#p21007

**Rating of Boxes**
For each box a drop down can be activated that the students can use to gauge their understanding.

![Dropdown for Ratings](https://www.edumaps.de/file/14469155783788168434.png/8ccdmhh)

There are three types of ratings:

1. Assessment (get feedback on how the contents of a box is rated)
1. Answer (yes/maybe/no - make a poll)
1. Voting (get feedback on which option A, B or C is preferred)

**Comments for Discussions and Submissions**
Comments can be activated for each box.

With the help of the comment function, **discussions** can be held or students can submit their **solutions** (directly to the teacher).

In the comments the following inputs are possible:

- Text input
- Image uploads
- Microphone recordings
- Uploads of media files

Comments can be set to be only visible to the teacher or to anyone viewing the map.

All comments (including uploads) can be deleted by the teacher with just one click.

💖 Notifications about new comments are displayed directly on to the top right of the Edumaps website.

**Notification of new comments**
The notification for new comments is displayed in yellow in the top right-hand corner.

![Example of notification](https://www.edumaps.de/file/2895767424147755929.png/kczracc)

### Uploads
Source: https://www.edumaps.de/1006/1/42ns564tsr/6rupugfcnr#p21008

**Upload of Files into Boxes**
You can upload any file to the editor.

For example photos, videos, PDFs, MP3s, GIFs, Word documents, ...

The allowed file formats can be found in the following map:

[Map: File Formats for Uploads](https://www.edumaps.de/1005/1/c1g5yt7t1t)

The upload works via drag and drop or with the upload button.

Thumbnails are generated for almost all uploaded materials.

**Overview of Uploads**
You can find an overview of all your uploads in the [Upload Manager](https://www.edumaps.de/uploads).

![Screenshot: Example Upload Manager](https://www.edumaps.de/file/9184306549642361366.png/cz3q0au)

There you will see the name of each file, the upload date, file type and file size.

You can delete any of your files at any time.

Furthermore, you can see in which box you uploaded the file. Simply click on the “Show box” button.

You can also leave information (e.g. a source) as a reference for each file. Simply click on "no info" to open the input field. This information is only displayed to you.

The uploads can be filtered according to “All uploads”, “My uploads” and “Uploads of Others”.

**Audio Recordings and Webcam Recordings**
If you want to leave a message for your students, you can activate your microphone directly in the Box Editor using the "Microphone" button.

![Recording Buttons](https://www.edumaps.de/file/6850193466414355686.png/lo33kv1)

**Storage Space**
Each account has a certain storage space available. Teacher accounts usually have 5 GB.

In the [Upload Manager](https://www.edumaps.de/uploads) you can see how much storage space is still available for you:

![Example: Display of free Storage Space](https://www.edumaps.de/file/9085751328418154324.png/x7rxfjj)

**Accounting for storage space: **

Your storage space will count towards:

1. Your uploads to your own maps.
1. All uploads to your maps from students/colleagues.
1. Uploads at the comments of the boxes of your maps.

## 8.4 Guide for Students: Opening and Editing Maps and Submitting Materials
Source: https://www.edumaps.de/1007/1/xvzlo8huq4/h4om9t7ny6

### What is Edumaps
Source: https://www.edumaps.de/1007/1/xvzlo8huq4/h4om9t7ny6#p21012

**General Information**
✔️ With Edumaps you can:

- Create pinboards, timelines and stickerwalls
- Create weekly plans
- Work in collaboration in real time
- Upload files in 100+ formats
- Record microphone and webcam directly
- Write texts with your team in Teamtext

Our startpage contains all the important information and details. Please take a look there.

Our FAQ is very comprehensive and answers almost all questions: https://www.edumaps.de/faq

We wish you a lot of fun with Edumaps.

### Student Account
Source: https://www.edumaps.de/1007/1/xvzlo8huq4/h4om9t7ny6#p21013

**Set up your Account**
The following simple steps will set up your account:

1. [Login](https://www.edumaps.de/login) with Username and Password.
1. Go to the [my account page](https://www.edumaps.de/user/account).
1. On your profile you see, which school you belong to.
1. There is also a hint that you should set up your account which links to the [setup-account-page](https://www.edumaps.de/user/init).
1. There you specify your email and password.  Optionally you can add your name and your class.
1. Confirm and your account is set up.
1. Next an email is sent to you with a link to confirm your new email address. Please click this link.

Your email address will help to recover your password if you forgot or lose it. Otherwise your teacher can change your password using the admin account of your school.

**Remove your Data / Delete your Account**
**Remove your Data**

If you like to delete all your data, you can open the [my account page](https://www.edumaps.de/user/account), scroll down and click „Remove Data“.

On the [Remove Data](https://www.edumaps.de/user/cleardata) page you can see all the data that will be deleted.

Note: The deletion is final and cannot be reverted.

Confirm by clicking the button “Remove my data”.

**Delete your Account**

To delete your account, open your [my account page](https://www.edumaps.de/user/account), scroll down and click „Delete Account“.

On the [Delete Account](https://www.edumaps.de/user/delete) page you can see all the data that will be deleted.

Note: The deletion is final and cannot be reverted. – Your account gets immediately deleted and cannot be used afterwards.

Confirm by clicking the button “Delete my account”.

### Working with Edumaps
Source: https://www.edumaps.de/1007/1/xvzlo8huq4/h4om9t7ny6#p21014

**Map Formats**
> Pinboards, timelines, and stickerwalls are collectively called “maps”.

**Pinboard**

The pinboard consists of columns. Each column contains boxes.

Multiple columns are positioned side by side.

![Map format: Pinboard](https://www.edumaps.de/file/2387536848564589294.png/6rk7bku)

**Timeline**

The columns are horizontally arranged (“rows”). The boxes are arranged from left to right.

Multiple columns are positioned below each other.

![Map format: Timeline](https://www.edumaps.de/file/10524896192514210868.png/xp3jac8)

**Stickerwall**

The boxes are freely arranged. There are no columns.

![Map format: Stickerwall](https://www.edumaps.de/file/530150540731859997.png/0v6kh3d)

**Ratings of Boxes**
For each box a drop down can be activated.

![Dropdown for Ratings](https://www.edumaps.de/file/14469155783788168434.png/8ccdmhh)

There are three types of ratings:

1. Assessment (get feedback on how the contents of a box is rated)
1. Answer (yes/maybe/no - make a poll)
1. Voting (get feedback on which option A, B or C is preferred)

**Comments for Discussions and Submissions**
Comments can be activated for each box.

With the help of the comment function, **discussions** can be held or students can submit their **solutions** (directly to the teacher).

In the comments the following inputs are possible:

- Text input
- Image uploads
- Audio recordings
- Uploads of media files

Comments can be set to be only visible to the teacher or to anyone viewing the map.

All comments (including uploads) can be deleted by the teacher with just one click.

💖 Notifications about new comments are displayed directly on to the top right of the Edumaps website.

**My Uploads**
You find all your uploads listed in the [Upload Manager](https://www.edumaps.de/uploads).

**Notification of new comments**
The notification for new comments is shown in yellow in the upper right corner.

![Example Notification](https://www.edumaps.de/file/2895767424147755929.png/kczracc)

## 8.5 Guide for Superadmins: Managing Users
Source: https://www.edumaps.de/1124/1/r4nnisdsmx/9fpdsz9w1u

### Introduction for Superadmins
Source: https://www.edumaps.de/1124/1/r4nnisdsmx/9fpdsz9w1u#p4215

> ⚠️ This role comes with special responsibility.

✔️ As a **Superadmin** at Edumaps, you have comprehensive administrative rights for all connected schools.

✔️ Among other things, you can:

- Edit all your schools
- Search and edit all users within your area of responsibility
- Reset passwords
- Access media management
- Share maps with **all schools**

### Edit Schools
Source: https://www.edumaps.de/1124/1/r4nnisdsmx/9fpdsz9w1u#p4217

As a Superadmin, you can manage **all registered schools** in the system on the page [List of all schools](https://www.edumaps.de/users/list).

Typical tasks:

- Adjust school data (name, email, school number)
- Change password
- Define school type
- Set maximum number of teachers
- Block school

Changes take effect immediately for the respective organization.

![List of Schools](https://www.edumaps.de/file/14832038160761794477.png/bjkcpeo)

### Search and Edit All Users
Source: https://www.edumaps.de/1124/1/r4nnisdsmx/9fpdsz9w1u#p4218

With the [User Management](https://he.edumaps.de/users/superadmin), you have access to **all user accounts** across all schools.

Options:

- Find users using the search function
- Edit profile data
- Change email addresses
- Reset passwords
- Review accounts across schools
- Configure storage space
- Assign accounts to other schools
- Adjust roles (T/S)

This function is especially helpful for support requests or school transfers.

![User management for searching user accounts](https://www.edumaps.de/file/3555800793087647037.png/6rsdvyv)

Once you have found a user, you can click the edit icon and modify the user data.

![Edit user data](https://www.edumaps.de/file/12708647546328456788.png/8jap6ca)

### Change Passwords for Schools and Users
Source: https://www.edumaps.de/1124/1/r4nnisdsmx/9fpdsz9w1u#p4219

If there are login issues, you can manually reset passwords.

Procedure:

1. [Search user](https://he.edumaps.de/users/superadmin)
1. Open edit
1. Set new password

Then inform the user about the new login credentials.

### Change teacher and student affiliation
Source: https://www.edumaps.de/1124/1/r4nnisdsmx/9fpdsz9w1u#p4503

You can edit teacher and student accounts and move them to another school. This may be necessary if a teacher changes schools.

Open the [User Management](https://www.edumaps.de/users/superadmin), find the user, and click “Edit”.

In the dialog that opens, you will see a dropdown menu to change the affiliation.

![Change affiliation](https://www.edumaps.de/file/11135278044664336728.png/r4nota3)

### Increase Storage Space for Individual Users
Source: https://www.edumaps.de/1124/1/r4nnisdsmx/9fpdsz9w1u#p4220

You can **increase the storage quota** for individual teachers.

This is useful if:

- many media files are uploaded
- larger projects are implemented
- additional capacity has been requested

Storage space for school admin accounts cannot be changed.

### Access to Media Management
Source: https://www.edumaps.de/1124/1/r4nnisdsmx/9fpdsz9w1u#p4221

As a Superadmin, you have access to the [central media management](https://www.edumaps.de/search/media-admin).

There you can:

- View your licensed media
- Review content
- Remove media if necessary

![Media Management](https://www.edumaps.de/file/8659044161906721739.png/t6osha7)

You can also automatically retrieve valid licenses from Edupool/educational media libraries so that the meta search on Edumaps only displays media licensed for you.

### Share Maps with All Schools
Source: https://www.edumaps.de/1124/1/r4nnisdsmx/9fpdsz9w1u#p4222

You can publish selected maps so that they are available to **all schools in the system**.

This is particularly suitable for:

- Announcements
- State-wide materials
- Central templates
- Reviewed teaching content

After sharing, schools can access these maps and integrate them into their work.

**Activate sharing:**

To share a map, go to the map settings and select “Publish”, then activate “All Schools (Distribution List)”.

![Image](https://www.edumaps.de/file/5823087865345551563.png/ljsttah)

**Sharing by school type:**

You can also specify whether the map should be distributed to all or only certain school types. To do this, click “Tags / School Types” in the map settings. Select “All” (or “Primary School”, etc.) and save the map.

![Sharing with all schools](https://www.edumaps.de/file/12952439977463199046.png/7q8jac4)

Schools will then find the map on the page [“Media Center”](https://www.edumaps.de/maps/mediacenter) (under Maps & Folders).

### Enter or Edit Edupool Credentials for Schools
Source: https://www.edumaps.de/1124/1/r4nnisdsmx/9fpdsz9w1u#p4223

When editing a school as a Superadmin, you can enter or modify the Edupool ID for single sign-on. Important: Each Edupool ID must be unique and may only be assigned once per school.

Additionally, there is an input field for the Edupool license ID for the [licensed media library](https://www.edumaps.de/search/media). An Edupool ID may be assigned to multiple schools.

If you do not enter an Edupool license ID, the license stored in your Superadmin account will apply.

![Image](https://www.edumaps.de/file/16957215075618272055.png/q349cuo)

### Blocking Schools
Source: https://www.edumaps.de/1124/1/r4nnisdsmx/9fpdsz9w1u#p4225

Individual schools can be blocked directly by you.

This may be necessary, for example, in the following cases:

- no license for the media
- violation due to distributing licensed media
- no payment has been made for usage

Click Edit and then select “Block”.

### Remove User from School
Source: https://www.edumaps.de/1124/1/r4nnisdsmx/9fpdsz9w1u#p4501

As Superadmin you can remove teacher and student accounts from the school/organization.

Click on “Remove” and confirm.

![Option “Remove user”](https://www.edumaps.de/file/11064227958194210413.png/3ne7q4k)

If you remove a student or teacher from the school, the account will be downgraded to a basic account. This means the user will no longer have access to the “My School” or “Media Center” pages. In addition, they will no longer be able to access licensed media.

### Merge User Accounts
Source: https://www.edumaps.de/1124/1/r4nnisdsmx/9fpdsz9w1u#p4502

On the page [User Management](https://www.edumaps.de/users/superadmin) you will find the button “Merge accounts” below.

Here you can merge two accounts with each other, meaning, combine the data.

![Page: Merge accounts](https://www.edumaps.de/file/16366252940393691922.png/zjbi1hq)

Both accounts must be associated with your school.

> Please note that a merging of accounts cannot be undone.

### Statistics for Superadmin
Source: https://www.edumaps.de/1124/1/r4nnisdsmx/9fpdsz9w1u#p4224

As a Superadmin, you have access to the page [“Statistics for Superadmin”](https://www.edumaps.de/users/superstats).

![Example: “Statistics for Superadmin”](https://www.edumaps.de/file/4766119936980532626.png/5we987g)

![Example: “Detailed statistics”](https://www.edumaps.de/file/9176818985476030919.png/ycckiiy)

Further down, part of this data is displayed over time in a chart.

Click the link “… activated accounts” to go to the page [“Activated Accounts”](https://www.edumaps.de/users/activated), which shows how many users have already activated their account.

## 8.6 Superadmin / Media center - Distributing maps to schools
Source: https://www.edumaps.de/1068/1/gxuqtu9bwo/mv0l9vlyoe

### Introduction
Source: https://www.edumaps.de/1068/1/gxuqtu9bwo/mv0l9vlyoe#p110

If we have set up your account as a media center (so-called "Superadmin"), you can distribute any maps to your schools.

Each school assigned to your media center will find the menu “Maps” the entry “Media center”:

!["Media center" in the menu](https://www.edumaps.de/file/16127343092751794862.png/nbcm46o)

Here, you as a media center can distribute your maps and folders.

The page "[Media Center](https://www.edumaps.de/maps/mediacenter)" is visible to all school admins and all teachers, but not to the students.

Teachers can copy the maps you have unlocked for their own use. Or only selected boxes with content.

### Release Map for Schools
Source: https://www.edumaps.de/1068/1/gxuqtu9bwo/mv0l9vlyoe#p111

If you have created a map and you want to share it with your school, proceed as follows:

1. In the map settings, choose under Share: "All Schools (Distribution List)"

![Image](https://www.edumaps.de/file/10143473210938924522.png/wnl4rs7)

1. Scroll all the way down, there you will find the keywords. With the help of the keywords, you can determine whether all your schools should see the map or only specific school types.

1. Use the pre-made school types for selection. Simply click:

![Image](https://www.edumaps.de/file/5011463331565216988.png/5f6pevc)

1. The keyword `all` displays the map to all your schools on the page [Maps Media Center](https://www.edumaps.de/maps/mediacenter):

1. Once you click “Save”, all schools will find this map on the page [Maps Media Center](https://www.edumaps.de/maps/mediacenter).

![Page: Media Center Maps](https://www.edumaps.de/file/17800021918178397338.png/gt5xtan)

### Distribute by school types
Source: https://www.edumaps.de/1068/1/gxuqtu9bwo/mv0l9vlyoe#p112

You can define school types by using one or more of the following keywords:

- `all` All schools
- `gs` Primary school
- `hs` Secondary general school
- `rs` Intermediate school
- `ge` Comprehensive school
- `gy` Grammar school
- `fö` Special needs school
- `bk` Vocational college/vocational school

Example: The map is tagged with `gs`, `ge`, and `rs`. This means the map will only be shown to the following schools: Primary school, Comprehensive school, and Intermediate school.

### Distribute by school numbers
Source: https://www.edumaps.de/1068/1/gxuqtu9bwo/mv0l9vlyoe#p113

If the schools assigned to you are provided with school numbers, you can enter the school number in the keyword field in the Map Editor and thus specifically provide the map only for this school.

### Who sees your maps?
Source: https://www.edumaps.de/1068/1/gxuqtu9bwo/mv0l9vlyoe#p114

If shared by school type, the shared map will appear to all school administrators of this school type as well as the teachers there.

If shared by school number, the shared map will appear to the school administrator with this school number as well as the teachers there.

Students do not have access to the page "[Media Center](https://www.edumaps.de/maps/mediacenter)".

### Share Folders to Schools
Source: https://www.edumaps.de/1068/1/gxuqtu9bwo/mv0l9vlyoe#p4214

You also have the option to share entire folders with schools.

To do this, open the desired folder and click the edit icon in the top right corner.

In the settings, click “Publish” and select “All schools (distribution list)”.

Save the folder.

All schools and teachers will now find the folder on the page “[Media Center](https://www.edumaps.de/maps/mediacenter)”.

Note: Sharing by school type using tags is not possible.

## 8.7 Setup Single Sign-On with IServ
Source: https://www.edumaps.de/1050/1/9p332rdqbb/pi0cqyd7uz

### Introduction
Source: https://www.edumaps.de/1050/1/9p332rdqbb/pi0cqyd7uz#p95

✔️ iServ is a school management software that also offers a single sign-on solution, which means that users can log in to multiple external services with a single login.

✔️ Specifically: iServ users can be directed to Edumaps with just one click from iServ and be automatically logged in.

✔️ Here you will learn how to set up this single sign-on as an admin.

### Creating IServ-SSO for Edumaps
Source: https://www.edumaps.de/1050/1/9p332rdqbb/pi0cqyd7uz#p96

For Edumaps:

As a school admin in IServ:

**Step 1**
Open the IServ administration panel. Then: Administration - System - Single Sign On.

**Step 2**
+ Add - Add OAuth-Client

![Image](https://www.edumaps.de/file/7125329982367396046.png/ndsy6rb)

**Step 3**
Copy the Client ID and Client Secret.

**Step 4**
Click the "Restrictions" tab and activate the scopes there.

![Image](https://www.edumaps.de/file/2507553215521786671.png/e31fevy)

**Step 5**
Click the "Application" tab and add "Redirect URIs" with `https://www.edumaps.de/sso/iserv` (must correspond to your server, so replace `www` with, e.g., `he` or `nds` or `nrw`). Then save.

**Step 6**
Create a WebModule - Administration - System - Navigation - click **+ Add** - and fill it out as seen in the screenshot - important! Replace **he1234** with the **username** of your Edumaps admin account. Then save!

![Image](https://www.edumaps.de/file/5518686052761013752.png/z0hjvns)

Example: `https://www.edumaps.de/sso/iserv?id=he1234`

Make sure to enter the correct Edumaps server here. Instead of "www", use "he", "nds", "nrw", etc.

**Step 7**
Switch to Edumaps. Log in with your admin account.

Go to "My Profile". There you will find a button "Create Single Sign-On". Click on it.

Now enter the IServ-SSO data:

- URL of your IServ server: e.g., `https://yourschool-iserv.de` (without "/iserv/auth" etc.)
- Client ID
- Client Secret

Done.

### Creating IServ-SSO for Matheretter
Source: https://www.edumaps.de/1050/1/9p332rdqbb/pi0cqyd7uz#p97

For Matheretter:

As a school admin on IServ:

**Step 1**
Open the IServ administration. Then: Management - System - Single Sign-On.

**Step 2**
+ Add - Add OAuth Client

![Image](https://www.edumaps.de/file/7125329982367396046.png/ndsy6rb)

**Step 3**
Copy Client ID and Client Secret.

**Step 4**
Click on the "Restrictions" tab and activate Scopes there.

![Image](https://www.edumaps.de/file/2507553215521786671.png/e31fevy)

**Step 5**
Click on the "Application" tab and add "Redirect URLs" `https://www.matheretter.de/sso/iserv` (must match your server, so instead of `www` set, for example, `he` or `nds` or `nrw`). Then save.

**Step 6**
Create WebModule - Management - System - Navigation - Click **+ Add** - and then fill out as shown in the screenshot - important! Replace **he1234** with the **username** of your Edumaps admin account. Then save!

![Image](https://www.edumaps.de/file/4833414310369776825.png/gk9mrou)

Example: `https://www.edumaps.de/sso/iserv?id=he1234`

Make sure to enter the correct Edumaps server here. So instead of "www" then "he", "nds", "nrw", etc.

**Step 7**
Switch to Matheretter. Log in with your admin account.

Go to "My Profile". There you will find a button "Create Single Sign-On". Click on it.

Now enter the IServ SSO data:

- URL of your IServ server: e.g., `https://yourschool-iserv.de` (without "/iserv/auth" etc.)
- Client ID
- Client Secret

Done.

## 8.8 Help: Problems with Login and Password
Source: https://www.edumaps.de/1098/1/4lh2aylcjr2o/zqsw8yrahzzb

### 🧩 Which situation applies to you?
Source: https://www.edumaps.de/1098/1/4lh2aylcjr2o/zqsw8yrahzzb#p6997

> How was your account created?

A: Registered directly with email

B: Login via single sign-on (such as IServ, Edupool etc.)

C: Account was created by the admin and handed over to me

D: I forgot my password

E: Login works, but I am immediately logged out again

F: I can no longer find my content / I didn't have an account at all

G: I have enabled two-factor authentication (2FA) and can no longer log in

**🧩 Problems with registration?**
> Please choose:

A: Registration shows error: "A user with your email already exists"

B: The confirmation email does not arrive

### 🛠️ For admins:Managing student and teacher accounts
Source: https://www.edumaps.de/1098/1/4lh2aylcjr2o/zqsw8yrahzzb#p6998

Admins can set the email and password for every student and teacher account in the [list of all accounts](https://www.edumaps.de/users/list).

**Typical admin support:**

- Correct an email address, e.g. after typos or a change of address.
- Reset a password when users have forgotten it or can no longer log in.

**Procedure for admins:**
- Open the [account list](https://www.edumaps.de/users/list).
- Select the affected user.
- Set the correct email and a new password (communicate via your school/organization).
- Inform the user about the changes.

**Where do I get the admin account?**

- For school licenses, the admin credentials were sent by email.
- For district licenses, your Medienzentrum holds the login data for your school.
- For state licenses, your school received the credentials by email (e.g. from the ministry of education).

### 📧 Registered directly with email
Source: https://www.edumaps.de/1098/1/4lh2aylcjr2o/zqsw8yrahzzb#p6999

> Which error message appears when logging in?

A: Error: "User not found"

B: Error: "Password not correct"

**🔐 Login via single sign-on**
> The single sign-on no longer works. Please choose the matching problem:

A: Error: "A user with your email already exists"

B: Error: "The Edumaps server tried to authenticate your request with the SSO server. However, the server rejected it."

C: Error: "Your Edupool account has no school number. Please contact your Medienzentrum so that a school number is entered on the Edupool side."

**👤 Account was created by the admin**
> Which error message appears when logging in?

A: Error: "User not found"

B: Error: "Password not correct"

**👤 Worked as a guest (anonymously)**
> You contributed to a map but can no longer find your content or log in.

- Check whether you participated as a guest at the time. When using Edumaps as a guest, “Anonymous" is displayed in the top right and no user account exists.
- Guest contributions are linked to the device and browser. They are no longer accessible on another device or after deleting the browser data. The contributions themselves remain on the map, but their association with you is lost.
- It is not possible to transfer them to an account afterward.
- Recommendation: [Register](https://www.edumaps.de/user/register) and work while logged in from now on. This ensures that your contributions remain permanently associated with your account.

### 🚫 Error: "User not found"
Source: https://www.edumaps.de/1098/1/4lh2aylcjr2o/zqsw8yrahzzb#p7000

> The user account does not exist on this server.

**Possible causes:**

A: Username or email was entered incorrectly

B: The account exists on a different server (he.edumaps.de, nrw.edumaps.de etc.)

C: The account was deleted

D: The email was changed by the admin

E: The account has not been created yet

**🔑 Error: "Password not correct"**
> The password is not accepted.

**Possible causes:**

A: The password was entered incorrectly.

B: The password was changed by the admin.

C: A single sign-on was used and no password has been set yet.

**♻️ Error: "A user with your email already exists"**
> This error message only appears when using single sign-ons such as Edupool, VIDIS, IServ or Moin.

A: First possibility: You already created an Edumaps account in the past, either by registering directly or by booking a course with your email address. An account with your email address therefore already exists and the single sign-on does not work.

B: Second possibility: The single sign-on was used in the past and a user account was created with the transmitted email. Our server checks whether the transmitted identifier is already in use and which email is assigned to it. If the identifier was changed but the same email is still transmitted, the single sign-on does not work.

**Solution:**

In both cases, generate a new password on the [password reset page](https://www.edumaps.de/user/forgot). Then log in with this password. Afterwards, go to the [single sign-on management page](https://www.edumaps.de/user/sso-connect) and activate the matching SSO.

**🔓 Forgot your password**
> You forgot your password and can no longer log in.

**Solution:**

- Use the [password reset page](https://www.edumaps.de/user/forgot). You will receive a recovery link by email. ⚠️ This is only possible if a correct email address is stored for your account.
- After logging in, you can set a new password at any time on the [change password page](https://www.edumaps.de/user/password).
- If you have a student or teacher account and no email is stored, your admin can reset the password.
- No email received?

**📬 Email from Edumaps not arriving**
> An email from Edumaps (confirmation, invitation, or password reset) does not reach you.

**Possible solutions:**

- Check your spam folder.
- Try an alternative email address from a different provider. If the email arrives there, your mail server is blocking our emails. Ask your mail administrator to put our domain on the whitelist.
- You can change your email address at any time under [My account](https://www.edumaps.de/user/account).
- For student and teacher accounts, the admin can change the email in the [list of all accounts](https://www.edumaps.de/users/list).

**🆘 Login without SSO (fallback)**
> If your single sign-on does not work, you can log in to Edumaps directly, independent of the SSO.

**Solution:**

1. Generate a password for your email (the one stored with your SSO) on the [password reset page](https://www.edumaps.de/user/forgot).
1. Log in with your email and password via the login page. An SSO is then no longer required.
1. If no email is stored, your school admin can set a new email and password for you.

**Note on the error "The SSO server rejected it":**

The SSO configuration is faulty. As an admin, check all entered links for typos (e.g. in IServ) or contact your Medienzentrum or the SSO provider's support.

**Note on the error "Edupool without school number":**

Ask your Medienzentrum to enter the school number on the Edupool side. Until then, use the login with email and password.

**🔄 Immediately logged out after logging in**
> The login is successful, but you are immediately logged out again or the session does not remain active.

- Allow cookies for edumaps.de in your browser. Without cookies, your login session cannot be saved.
- Exit private or incognito mode and log in using a normal browser window.
- If you are using Edumaps embedded within another platform, open Edumaps directly in a separate browser tab instead.
- Check that the date and time on your device are set correctly.
- Test the login on another device.

**🔐 Problems with two-factor authentication (2FA)**
> You have enabled 2FA. When logging in, a code is requested by email, but it does not work.

**A: The code does not arrive**

- Check your spam folder.
- Use the "Resend email" button. A new code can be requested every 60 seconds.
- Didn't receive an email?

**B: The code has expired or was entered incorrectly too many times**

- Each code is valid for 10 minutes. Simply request a new code.

**C: No longer have access to the email inbox**

- If your school uses Single Sign-On (e.g. IServ, VIDIS, Moin), log in through it. SSO login works without a code. Then disable 2FA under [My Account](https://www.edumaps.de/user/account) and enable it again with a current email address.
- Without SSO access, contact us via the [contact page](https://www.edumaps.de/contact). Provide your username and server.

**Tip:** For 2FA, use a private email address that you can access permanently, not your school email address.

### ⌨️ Username or email was entered incorrectly
Source: https://www.edumaps.de/1098/1/4lh2aylcjr2o/zqsw8yrahzzb#p7001

**Possible solutions:**

- Are the username or email spelled correctly? Check capitalization, spaces and typos.
- Log in with the **email address** stored for your account instead of the username. If no error or a different error appears, the account exists.
- Did you enter a wrong email when registering? Log in with your **username** and change the email under [My account](https://www.edumaps.de/user/account).
- Contact your **admin**. They can find your account in the [user management](https://www.edumaps.de/users/list) and change your email and password there.

**🌐 Check that you are on the right server**
- Edumaps runs on several servers with separate databases:
- Main server: www.edumaps.de
- Lower Saxony: nds.edumaps.de
- Hesse: he.edumaps.de
- NRW: nrw.edumaps.de
- Switzerland: www.edumaps.ch

- Check whether you are on the right server, as your account may only exist on one specific server. Try logging in on the server of your federal state.

**🗑️ The account was deleted**
**Possible causes:**

- You deleted the account yourself.
- The admin deleted the account.
- Your account was merged with another account.

**Note:**

A deleted account is permanently deleted for data protection reasons and cannot be restored.

**Solution:**

- Your admin can create a new account for you.
- If your account was merged with another account, use the credentials of the other account.

**✏️ The email was changed by the admin**
**Possible causes:**

- If you log in with your email and "User not found" appears, the admin may have changed your email.

**Solution:**

- Contact your **admin**. They can find your account in the [user management](https://www.edumaps.de/users/list) and change your email and password there.

**❌ The password was entered incorrectly**
**Possible solutions:**

- Show the password you entered by clicking the eye icon and check it for typing errors (uppercase/lowercase letters, Caps Lock, trailing spaces).
- Use the [password reset page](https://www.edumaps.de/user/forgot) to generate a new password. ⚠️ This is only possible if a correct email address is stored for your account. – No email received?
- Contact your admin. They can find your account in the [user management](https://www.edumaps.de/users/list) and change your password there.

**🔧 The password was changed by the admin**
**Possible causes:**

- The admin may have changed your password.

**Solution:**

- Use the [password reset page](https://www.edumaps.de/user/forgot) to generate a new password. ⚠️ This is only possible if a correct email address is stored for your account.
- Contact your **admin**. They can find your account in the [user management](https://www.edumaps.de/users/list) and change your password there.
- No email received?

**🆕 Account has not been created yet**
> You do not yet have a user account on this server.

- Register directly on the [Registration page](https://www.edumaps.de/user/register).
- For student and teacher accounts: Ask your admin or teacher to create the account in the user management.
- For single sign-on: Sign in once using your school’s SSO. The account will be created automatically.

**❓ Nothing helped?**
If you could not solve your problem, write to us via the [contact page](https://www.edumaps.de/contact).

Please include:

- The exact error message
- Your username or email address
- Browser and device
- The server you are using (www, nds, he, nrw or ch)

This way we can help you as quickly as possible.

## 9.1 Following Maps
Source: https://www.edumaps.de/1079/1/vahlwdap0i/6fpa5kwfkr

### Introduction
Source: https://www.edumaps.de/1079/1/vahlwdap0i/6fpa5kwfkr#p190

✔️ With the “Follow Map” function, you will be notified about new content on a map.

✔️ Via notification on our website or via email once daily.

### Follow Map
Source: https://www.edumaps.de/1079/1/vahlwdap0i/6fpa5kwfkr#p191

If you open the map (view) of another user, you will find the option “Follow Map” in the map menu.

![“Follow Map” in the map menu](https://www.edumaps.de/file/5389029919243793577.png/agt8utn)

If you click on it, the following notice appears:

![Dialog about following a map](https://www.edumaps.de/file/13763988644105958439.png/glls0u7)

You can then access your [followed maps](https://www.edumaps.de/user/maps-followed).

### Events for Notifications
Source: https://www.edumaps.de/1079/1/vahlwdap0i/6fpa5kwfkr#p512

> If you follow a map, you will receive a notification on Edumaps as soon as **new boxes** are created. Additionally, the server sends an email once a day if new boxes have appeared in the last 24 hours.

Changes to existing boxes do not count as relevant events. – This means that only the creation of new boxes triggers an email notification.

Tip: If you want all followers of your map to receive an email about new content, simply create a new box on your map.

### Followed Maps
Source: https://www.edumaps.de/1079/1/vahlwdap0i/6fpa5kwfkr#p192

In the main menu, you will find the entry [“Followed Maps”](https://www.edumaps.de/user/maps-followed).

![“Followed Maps” in the menu](https://www.edumaps.de/file/9593641765104058750.png/ed3khsa)

When you access the page, you will see all the maps you are currently following.

![List of all followed maps](https://www.edumaps.de/file/1705979904986949554.png/v1s8wti)

### Unfollow Map
Source: https://www.edumaps.de/1079/1/vahlwdap0i/6fpa5kwfkr#p193

If you wish to unfollow a map, go to the [“Followed Maps”](https://www.edumaps.de/user/maps-followed) page and simply remove the map from the list.

![Unfollow Map](https://www.edumaps.de/file/11176222903226381560.png/dc142oo)

### FAQ
Source: https://www.edumaps.de/1079/1/vahlwdap0i/6fpa5kwfkr#p323

**Q: Why do I not see the “Follow Map” option in the map menu?**

A: If it is your own map, this option wil not appear, as you are automatically informed of changes to the map and receive a daily email.

If it is the map of another user, make sure you are in the map view and open the map menu there (not in edit mode).

**Q: How do my colleagues receive a notification when something new is posted on the map?**

To receive notifications about new boxes on a map, your colleagues can follow a map. To do this, they click on the three dots at the top right in the map view and select “Follow Map” from the dropdown menu. They will receive notifications directly on Edumaps. Additionally, our server checks once a day which users should be informed about new content and sends out an email notification.

## 9.2 Public User Profiles / Follow Users
Source: https://www.edumaps.de/1087/1/qerwrf9nfe/o1gpolryps

### Introduction
Source: https://www.edumaps.de/1087/1/qerwrf9nfe/o1gpolryps#p351

✔️ A public user profile is used to allow other users to follow you.

✔️ As soon as users follow you and you share a map publicly, your followers will receive a notification about it.

### Activate Public User Profile
Source: https://www.edumaps.de/1087/1/qerwrf9nfe/o1gpolryps#p353

Open the sidebar, select "My Area" and then "My public Profile". Your profile page will then open.

The profile page is protected by default and cannot be accessed from outside.

> If you want your profile page to be publicly discoverable, click the toggle button at the top right until it shows “ON”.

![Own profile page](https://www.edumaps.de/file/428253273275222350.png/gy5oqlb)

### Link to Public Profile Page
Source: https://www.edumaps.de/1087/1/qerwrf9nfe/o1gpolryps#p354

If your profile page is public, you can share the link to your profile.

Click the blue Share button at the top right of your profile page. A dialog with the link and a QR code will appear.

![Share the profile link](https://www.edumaps.de/file/466491787128380499.png/7hk1q7n)

Copy the link to your profile page and share it with your teachers/students/friends. They can now follow your profile.

The link to the profile page is `www.edumaps.de/p/username` (where "username" is your Edumaps username).

You can also find the link to your public user profile on the page [My Account](https://www.edumaps.de/user/account).

### Public Sharing of Maps
Source: https://www.edumaps.de/1087/1/qerwrf9nfe/o1gpolryps#p352

In the map settings under “Publish”, you can make the map discoverable for the entire internet.

Click on “Public Release” and save the map, so the map is publicly and freely accessible.

> In order for your shared maps to appear on your profile page, your public profile page must also be activated.

![Public Release of the Map](https://www.edumaps.de/file/13979480987366288653.png/zkwk4g7)

> ⚠️ The map will be public and can be found on the internet by search engines. Activate your public profile page.

⚠️ Do not share any content for which you do not hold the usage rights. You bear full responsibility.

As soon as you publish maps with "Public Release", these maps will appear on your profile page.

![Public user profile with shared maps](https://www.edumaps.de/file/10445899059509032938.png/l6gw5bh)

### Follow other Users
Source: https://www.edumaps.de/1087/1/qerwrf9nfe/o1gpolryps#p355

You can follow other users by clicking the “Follow” button.

![Button “Follow”](https://www.edumaps.de/file/16680367234192921779.png/tu0ebtt)

When you follow the user, you will receive a notification if new maps are published.

A list of all the users you are following can be found on the [Users I follow](https://www.edumaps.de/user/following) page.

![Page "Users I follow"](https://www.edumaps.de/file/5614391165425662131.png/q9c6qz7)

### Unfollow Users
Source: https://www.edumaps.de/1087/1/qerwrf9nfe/o1gpolryps#p356

If you already follow a user, you will see the button “Followed” on their profile page.

![Already followed user](https://www.edumaps.de/file/15954784386709026933.png/z5gpzm0)

Click the "Followed" button to unfollow the user.

### Accessing the Public User Profile
Source: https://www.edumaps.de/1087/1/qerwrf9nfe/o1gpolryps#p359

The user profile can be accessed from the public map by clicking on the map creator's name.

![Link to the public user profile](https://www.edumaps.de/file/5533718192145617866.png/rrmdthx)

You can see from the icon that the map creator's name is linked.

## 9.3 How to use Teamtext
Source: https://www.edumaps.de/1060/1/oz8ph32tih/gw9fr07zos

### Introduction
Source: https://www.edumaps.de/1060/1/oz8ph32tih/gw9fr07zos#p957

✔️ A team text is an online document that allows any number of users to write together in real-time. Here, ideas can be collected, tasks can be worked on, or brainstorming sessions can be held.

✔️ You can also create breakout rooms by creating a separate team text document for each group and distributing them accordingly.

✔️ Collaborative cooperation (including chat) is thus made incredibly easy.

✔️ Team text is based on [Etherpad](https://github.com/ether/etherpad-lite).

You can find team text on the server: https://team.edumaps.de/

### Note on Data Security
Source: https://www.edumaps.de/1060/1/oz8ph32tih/gw9fr07zos#p951

In Team text you can write any text with others in real time. Just share the link with other users.

> ⚠️ ANYONE with the link can access the content! There is **no access control**.

### Create a Teamtext document
Source: https://www.edumaps.de/1060/1/oz8ph32tih/gw9fr07zos#p950

To create a teamtext document, simply click on “Add Box” or edit an existing box (by clicking on the orange pencil icon).

Then click on “Modules” and select “Teamtext”.

![Teamtext Button](https://www.edumaps.de/file/9534532538094858214.png/x0z7t9u)

A teamtext document will automatically be created for you. You can write this document together with other users.

The link to the teamtext will be added to your box.

### Editor bar
Source: https://www.edumaps.de/1060/1/oz8ph32tih/gw9fr07zos#p952

You can use an editor bar to design texts:

![Editor bar in Teamtext](https://www.edumaps.de/file/4047599636738578488.png/axqgjn7)

Features:

- Bold, Italic, Underlined, Strikethrough
- List (numbered and unordered)
- Indenting and Outdent
- Undo and Redo
- Reset author colors
- Font size

### Menu bar
Source: https://www.edumaps.de/1060/1/oz8ph32tih/gw9fr07zos#p953

At the top right you will see another menu bar:

![Menu bar in Teamtext](https://www.edumaps.de/file/12505035814803935333.png/35xwj27)

The following options are available here:

- Export (as Etherpad, HTML, plain text)
- Revisions (with timeslider)
- Save revision
- Pad Settings
- Share pad (including read-only option)
- Participants online

### Chat
Source: https://www.edumaps.de/1060/1/oz8ph32tih/gw9fr07zos#p954

At the bottom right you will find a chat:

![Chat in Teamtext](https://www.edumaps.de/file/10306154950881623650.png/en445ds)

You can use the chat to exchange arbitrary information.

### Applications (Examples)
Source: https://www.edumaps.de/1060/1/oz8ph32tih/gw9fr07zos#p955

- Generate arbitrary texts
- Create texts in real-time with other users
- Collect ideas
- Plan projects
- Create content for presentations
- Play realtime text games
- Use breakout rooms by creating multiple Teamtexts and distributing them to students
- and there are many more possibilities.

### Additional Use Cases
Source: https://www.edumaps.de/1060/1/oz8ph32tih/gw9fr07zos#p956

**1. Collaborative Writing:**

Team Projects: Teams can collaborate on writing reports, proposals, or any document where multiple contributors need to provide input simultaneously.

Brainstorming Sessions: Use Teamtext to facilitate real-time brainstorming sessions where participants can contribute ideas and suggestions in a collaborative environment.

**2. Meeting Notes:**

Real-time Meeting Notes: During virtual or in-person meetings, participants can collectively take notes, make updates, and share key points in real-time.

**3. Education:**

Group Projects: Students working on group projects can use Teamtext to collaboratively draft and edit their assignments.

Class Notes: Instructors and students can use Teamtext for taking collaborative class notes during lectures or group discussions.

**4. Code Collaboration:**

Pair Programming: Developers engaged in pair programming can use Teamtext to share code snippets, discuss solutions, and make real-time edits collaboratively.

Code Reviews: Teams can use Teamtext to collaboratively review and discuss code changes before integrating them into a project.

**5. Event Planning:**

Agenda Creation: Organizers can use Teamtext to collaboratively create and update event agendas, ensuring all team members have input.

Task Lists: Use Teamtext to manage and update task lists for event planning, assigning responsibilities and tracking progress.

**6. Idea Generation:**

Creativity Workshops: Use Teamtext for creative workshops, allowing participants to contribute and build on each other's ideas in real-time.

**7. Emergency Response:**

Crisis Management: In situations where rapid collaboration is crucial, teams can use Teamtext for real-time updates, sharing information, and coordinating responses during emergencies.

**8. Language Translation:**

Collaborative Translation: Teamtext can be used for collaborative translation projects where multiple translators work on different sections of a document simultaneously.

**9. Anonymous Collaboration:**

Anonymous Feedback: In situations where anonymity is important, Teamtext can be used for collecting and collaborating on anonymous feedback or suggestions.

**10. Remote Work:**

Virtual Team Collaboration: Teamtext is useful for remote teams working on documents together, as it provides a real-time shared workspace.

Teamtext's simplicity and real-time collaboration features make it versatile for various scenarios where multiple individuals need to work together on a document or project.

### FAQ
Source: https://www.edumaps.de/1060/1/oz8ph32tih/gw9fr07zos#p958

**Q: How to share a Teamtext document with read-only permissions?**

A Teamtext can be shared with read-only access by clicking on the share button and activating “Read only”. You will then be shown a new link. Copy this link and distribute it or post the link to your map.

**Q: How can you export a Teamtext as a PDF?**

Open the Teamtext document in your browser. Then select “Print” in your browser menu and then select the browser-built-in PDF printer. The keyboard shortcut for this is: Ctrl + P

**Q: When reloading Teamtext (Etherpad) in the background, the JAWS screen reader jumps to the beginning and reads with a slight delay?**

Unfortunately, we have no direct control over Etherpad, as this open-source software is developed by others. You can report such issues directly to the developers [here](https://github.com/ether/etherpad/issues).

## Saving Time with Edumaps - Before and After
Source: https://www.edumaps.de/1016/1/yhm1jwuj0hmi/j7onme4n9ks0

### Table of Contents
Source: https://www.edumaps.de/1016/1/yhm1jwuj0hmi/j7onme4n9ks0#p7031

This map collects scenarios/examples that show the benefits of Edumaps. With a particular focus on the time saved.

Each scenario follows the same pattern: **Before** shows the old way, **With Edumaps** the new one.

### ⏱️ In the Classroom
Source: https://www.edumaps.de/1016/1/yhm1jwuj0hmi/j7onme4n9ks0#p7032

**Substitute lesson ready in two minutes**
**Before:** Stepping in at short notice, searching for worksheets, copying, improvising.

**With Edumaps:** A prepared map is ready to go. QR code on the board, the class joins via write code without any login and is working after two minutes.

> **What's eliminated:** copying, dictating links and access problems.

**Parallel classes: build once, use many times**
**Before:** Building the same lesson structure three times for 7a, 7b and 7c. Starting from scratch again next school year.

**With Edumaps:** Duplicate the finished map, adjust names and dates, done.

> **What's eliminated:** the complete rebuild for every learning group.

**A weekly plan that delivers itself**
**Before:** Uploading material or unlocking tasks every morning. Anyone who is ill or stuck in a meeting doesn't get to it.

**With Edumaps:** Prepare the whole week in one sitting and give each box a display date. The tasks appear day by day on their own.

> **What's eliminated:** the daily upkeep. The map keeps delivering even when you are unavailable.

📖 Tutorial: [Box Settings](https://www.edumaps.de/1078/1/qbg4lumykj/2eycvzchpw)

**Evaluating a brainstorming with AI**
**Before:** After the collection phase, reading 25 boxes one by one, sorting them and summarizing them for the plenary discussion.

**With Edumaps:** The AI summarizes the full map in seconds and delivers topics, clusters and open questions as a starting point.

> **What's eliminated:** the manual review. The pedagogical judgment stays with you.

### 🗳️ Voting & Feedback
Source: https://www.edumaps.de/1016/1/yhm1jwuj0hmi/j7onme4n9ks0#p7033

**Votes instead of counting paper slips**
**Before:** Handing out slips, collecting them, counting them, announcing the result. Scheduling questions often take several rounds.

**With Edumaps:** Post a poll box, everyone votes, the result is visible live.

> **What's eliminated:** the entire return process including the counting.

📖 Tutorial: [Polls/Votings](https://www.edumaps.de/1086/1/xmgkv25gxf/f3u6hrdh5m)

**Feedback, fast and central**
**Before:** Feedback arrives on slips, by e-mail or in passing. The responses are scattered and have to be compiled.

**With Edumaps:** Collect feedback centrally on one map, for example via a poll box or comments. Everything is in one place and can be evaluated directly.

> **What's eliminated:** compiling input from different channels.

### 🔗 Sharing & Distributing
Source: https://www.edumaps.de/1016/1/yhm1jwuj0hmi/j7onme4n9ks0#p7034

**Sharing files and material without registration**
**Before:** Sending files as e-mail attachments or sharing them on platforms where recipients first have to register.

**With Edumaps:** Drag files into a map and pass on the read-only link or QR code. With anonymous access, nobody has to register or log in.

> **What's eliminated:** registrations, passwords and attachment chaos on the recipients' side.

📖 Tutorial: [Sharing maps with links](https://www.edumaps.de/1047/1/siajhiablo/fv6nobr4hp)

**Distributing photos and videos**
**Before:** Photos and videos travel through various chat systems (WhatsApp, Viber, Messenger, ...). Not everyone uses every channel, and latecomers ask individually.

**With Edumaps:** One map as the central place for all photos and videos, regardless of which chat system the recipients use.

> **What's eliminated:** sending the same content through multiple channels.

**Distributing a map to the class: everyone gets their own copy**
**Before:** Copying a worksheet 25 times and handing it out. Or digitally: sending a file and hoping that everyone works on their own version. Those who let the whole class work on one shared map instead watch the students get in each other's way.

**With Edumaps:** Hand the prepared exercise map to the class via "Copy" → "Distribute to group". Each student automatically receives their own copy and works in it undisturbed. Ideal for weekly plans, exercise maps and portfolio work. The teacher owns all copies and keeps track of them in an automatically created folder.

> **What's eliminated:** manual copying and assigning per student. Prepare once, distribute to the whole class with one click.

📖 Tutorial: [Distribute map to group: everyone gets their own copy](https://www.edumaps.de/1163/1/xifijbym0eaw/mzbs9odqd8v4)

**Individual material or feedback per student**
**Before:** Managing 25 separate e-mails or documents so that each student only sees their own material and feedback.

**With Edumaps:** One map with one box per student. Each box is shared individually, everyone sees only their own area, and you keep everything on one map.

> **What's eliminated:** managing 25 individual documents and mail threads.

### 🏫 School Organization
Source: https://www.edumaps.de/1016/1/yhm1jwuj0hmi/j7onme4n9ks0#p7035

**Single sign-on instead of password slips**
**Before:** The admin manages access slips and password resets as a permanent issue, especially after the holidays.

**With Edumaps:** Set up single sign-on once (e.g. via IServ). Everyone logs in with their familiar school account.

> **What's eliminated:** password resets and paperwork, week after week.

📖 Tutorial: [Setting up single sign-on with IServ](https://www.edumaps.de/1050/1/9p332rdqbb/pi0cqyd7uz)

**Onboarding new teachers**
**Before:** Every new teacher is briefed individually and asks the same questions about accounts, procedures and contact persons.

**With Edumaps:** An onboarding map answers everything once and for all and is reused every year.

> **What's eliminated:** the repeated one-on-one briefings.

📖 Template: [Welcome to the Team (Onboarding)](https://www.edumaps.de/1333/1/yk5av12u7kee/dhcpuy4ptbmi)

**Changing a date once instead of three times**
**Before:** A date changes and has to be corrected separately in the class map, the parent map and the parent letter. One place gets forgotten.

**With Edumaps:** Maintain one central dates column and embed it in all other maps. Change it once, up to date everywhere.

> **What's eliminated:** maintaining multiple copies and contradictory information.

📖 Tutorial: [Embedding columns from other maps](https://www.edumaps.de/1081/1/jfb6vptvgo/0g56y4cjyr)

**Internal training with booking**
**Before:** Registrations arrive by e-mail at one person's desk, who maintains a list and sends rejections when the course is full.

**With Edumaps:** A map with booking boxes. Colleagues book their own places, free spots are visible, and the limit takes care of itself.

> **What's eliminated:** manual list-keeping including the e-mail traffic.

📖 Template: [Internal Professional Development: Staff Registration](https://www.edumaps.de/1242/1/xvb4d3972u9m/zupveigrx1rs)

### 👪 Parents & School Community
Source: https://www.edumaps.de/1016/1/yhm1jwuj0hmi/j7onme4n9ks0#p7036

**Parent-teacher day without paperwork**
**Before:** Handing out slips with preferred times, collecting the responses, resolving collisions by hand, returning confirmations.

**With Edumaps:** Booking boxes with fixed time slots. Parents pick a free slot themselves, and taken times are visible immediately.

> **What's eliminated:** the entire slip return process including the coordination.

📖 Template: [Book parent-teacher day](https://www.edumaps.de/1201/1/kwrjovvptg/pnepv6ot5e)
📖 Tutorial: [Booking System](https://www.edumaps.de/1046/1/mtp976esa8/ee2qawxllh)

**A helper list that fills itself**
**Before:** A helper list in the staff room or a circulating sheet. Duplicate entries, queries, and in the end three cakes are still missing.

**With Edumaps:** Booking boxes with a place limit per task. The list fills itself and shows what is still missing.

> **What's eliminated:** follow-up phone calls and reconciling lists.

📖 Template: [Helper List for the School Festival](https://www.edumaps.de/1241/1/ujnndlw7qz0r/3az7jwg4nf1x)

**Offering parent information in several languages**
**Before:** Important parent information doesn't reach some families, or translations have to be organized at great effort.

**With Edumaps:** One column per language with the same box order. The AI features help with translating, and native speakers proofread.

> **What's eliminated:** organizing external translations for standard information.

📖 Template: [Parent Information Board (Multilingual)](https://www.edumaps.de/1262/1/epqxksvckbct/fjm265gghew2)

### 🎓 Training & Events
Source: https://www.edumaps.de/1016/1/yhm1jwuj0hmi/j7onme4n9ks0#p7037

**Creating certificates of attendance**
A company regularly runs training courses. At the end of the courses, certificates of participation are created in Microsoft Word using a mail merge and then sent manually to each participant.

The employee needed about 5 hours for this process (creating the certificates of participation with Word in 1 hour, sending the emails to 100 participants in 4 hours).

**Time savings with Edumaps:**

> If the employee uses Edumaps, she simply clicks the “Finish course” button at the end of the course, and a certificate of participation is automatically created and sent by email for all participants. – Time savings: 5 hours per course.

📖 Tutorial: [Booking System](https://www.edumaps.de/1046/1/mtp976esa8/ee2qawxllh)

**Organizing barcamps from start to finish**
**Before:** Session planning with pinboards and sticky notes, votes by show of hands, and the documentation is typed up afterwards.

**With Edumaps:** Plan and run the complete barcamp on one map. Session proposals as boxes, voting via poll, the schedule as columns, documentation directly in the session boxes.

> **What's eliminated:** transferring pinboards and sticky notes into digital form.

## 10 Tips for Students: How to Get More Out of Edumaps
Source: https://www.edumaps.de/1367/1/a1h4leuswdoo/k3lr3xufj4xq

### 📱 Stay Organized
Source: https://www.edumaps.de/1367/1/a1h4leuswdoo/k3lr3xufj4xq#p6821

**Follow Your Class Map**
If you follow your class map, you’ll stay up to date without checking every day: homework, dates, changes.

📖 Tutorial: [Follow maps](https://www.edumaps.de/1079/1/vahlwdap0i/6fpa5kwfkr)

**Get Edumaps on Your Phone**
Save the most important maps as bookmarks on your home screen.

Appointments can appear directly on your phone with the calendar widget.

📖 Tutorial: [Calendar as a widget on your phone](https://www.edumaps.de/1088/1/qrrfzf76qh/2vv8ecx0u4)

**Keep Your Own Assignment Planner**
Create a private map for all your tasks: New, Due Today, Done.

Add tasks right after class so you don’t forget anything.

📖 Template: [Homework and Submission Planner](https://www.edumaps.de/1316/1/89o5qghmu3ty/fr8nb75tgiv2)

### 🧠 Learn Better
Source: https://www.edumaps.de/1367/1/a1h4leuswdoo/k3lr3xufj4xq#p6822

**Think First, Then Open**
On practice walls and vocabulary trainers, the solution is in the box content: think of your answer **before** opening the box. That’s the only way to really train.

**Build Your Own Learning Maps**
Vocabulary trainers, study plans before a test, subject summaries: if you build a map yourself, you already learn while creating it.

You can find ready-made templates in the [“Students & University Students” template catalog](https://www.edumaps.de/folder/1042/1/5v0nog237cbg/fyxf6mad8mb3).

**Use Search and Tags**
In busy maps, the tag filter gets you to what you need faster than scrolling: click a tag to show only the matching boxes.

📖 Tutorial: [Using tags and tag filters on a map](https://www.edumaps.de/1100/1/qom3b15q28/swpwzxd9cy)

### 🤝 Work Together
Source: https://www.edumaps.de/1367/1/a1h4leuswdoo/k3lr3xufj4xq#p6823

**Ask Below the Task**
Post questions about the task as a comment directly under the box: then the answer helps everyone, not just you, and doesn’t get lost in the class chat.

**Only Write Where You’re Supposed To**
In shared maps, the rule is: your own column, yes; other people’s boxes, no.

Moved something by accident? Just drag it back or let your teacher know—it happens to everyone.

**Group Work with Clear Columns**
One column per group or one box per person: that way it’s always clear who contributed what, and nothing gets overwritten.

### 🔒 Stay Safe Online
Source: https://www.edumaps.de/1367/1/a1h4leuswdoo/k3lr3xufj4xq#p6824

**Think of Yourself and Others**
Don’t put private information (address, phone number) into shared maps.

Only upload photos of others with their permission: if it could be embarrassing, leave it out.

Your login details are for you only.

📖 Tutorial: [Guide for Students: Opening and Editing Maps and Submitting Materials](https://www.edumaps.de/1007/1/xvzlo8huq4/h4om9t7ny6)

## 10 Tips for Parent Communication with Edumaps
Source: https://www.edumaps.de/1368/1/08m7olvm9uv6/2rrjxr98g6v1

### 🏗️ The Right Framework
Source: https://www.edumaps.de/1368/1/08m7olvm9uv6/2rrjxr98g6v1#p6816

**A Parent Map for Reading Only**
Separate the internal class space from the parent world: the parent map is its own map with a read-only link. This way, you share selectively and nothing internal slips through.

📖 Templates: [Parent & Communication Category](https://www.edumaps.de/folder/1034/1/rhhkozq75ntw/qtdo4hq7m7wt)

📖 Tutorial: [Share Maps with Links](https://www.edumaps.de/1047/1/siajhiablo/fv6nobr4hp)

**QR Code at Parent Evening**
The moment with the highest attention: project the QR code of the parent map on the wall and put it on the information sheet. Within two minutes, all families have access on their phones.

**Clearly Define Channels**
Decide once and communicate it clearly: what goes in the map (dates, information, lists), what is sent by email (personal matters), and what is handled by phone (urgent matters).

This ends the question “Where can I find what?” before it even comes up.

### 📌 Maintain Content
Source: https://www.edumaps.de/1368/1/08m7olvm9uv6/2rrjxr98g6v1#p6817

**The Current Info Principle**
The most important information goes at the top of the first column, and outdated content is deleted instead of moved.

A well-maintained small map beats a complete archive.

**Maintain Dates Only Once**
Maintain the dates column centrally and embed it in other maps: if a date changes, it is correct everywhere.

This means there is no contradiction between the class map and the parent map.

📖 Tutorial: [Embed Columns from Other Maps](https://www.edumaps.de/1081/1/jfb6vptvgo/0g56y4cjyr)

**A Fixed Rhythm Instead of Constant Upkeep**
Write updates to the map every Friday and stick to it: parents will check specifically then instead of looking every day, and you have a predictable 10 minutes instead of constant support.

### 🗳️ Actively Involve Parents
Source: https://www.edumaps.de/1368/1/08m7olvm9uv6/2rrjxr98g6v1#p6818

**Parent-Teacher Conference with Booking**
Use booking boxes for appointments instead of collecting paper slips: parents choose independently, available slots are visible, and you have zero coordination effort.

📖 Template: [Book a Parent-Teacher Conference](https://www.edumaps.de/1201/1/kwrjovvptg/pnepv6ot5e)

📖 Tutorial: [Booking System](https://www.edumaps.de/1046/1/mtp976esa8/ee2qawxllh)

**Volunteer Lists with Slot Counters**
Cakes, booth shifts, accompanying adults – booking boxes with limits show what is still missing: the list fills itself.

📖 Template: [School Festival Volunteer List](https://www.edumaps.de/1241/1/ujnndlw7qz0r/3az7jwg4nf1x)

**Survey Instead of Counting Paper Slips**
Use the survey module for votes (excursion destination, preferred date): real-time results instead of managing returns.

📖 Tutorial: [Checklists](https://www.edumaps.de/1162/1/b69pzgpq3uzu/4372nj9g7afu)

### 🌍 Reach Everyone
Source: https://www.edumaps.de/1368/1/08m7olvm9uv6/2rrjxr98g6v1#p6819

**Think Multilingually**
Offer core information (reporting illness, dates, material lists) in the languages of the parent community: one column per language, with the same order of boxes.

The AI features help with translation. Have native speakers proofread it.

📖 Template: [Multilingual Parent Information Board](https://www.edumaps.de/1262/1/epqxksvckbct/fjm265gghew2)

**Bonus: Use Photos Carefully**
Only with prior consent; if in doubt, show artwork and hands instead of faces. This protects children and you.

## 10 Time-Saving Tips for School Admins
Source: https://www.edumaps.de/1364/1/8pvfad3becai/ulxx7v9emafx

### ⚙️ Set up once, save time forever
Source: https://www.edumaps.de/1364/1/8pvfad3becai/ulxx7v9emafx#p6801

**Enable single sign-on**
With SSO (e.g. via IServ), everyone logs in with their familiar school account: no password resets, no paperwork.

An hour of setup saves support requests every week afterwards.

📖 Tutorial: [Set up single sign-on with IServ](https://www.edumaps.de/1050/1/9p332rdqbb/pi0cqyd7uz)

**Create classes centrally**
Set up users and classes properly once via school administration instead of letting teachers figure it out individually.

📖 Tutorial: [Admin guide: Manage users, classes, and school](https://www.edumaps.de/1008/1/bpk12qmwjr/zdo0glozn4)

**Understand the role model once**
If you assign the teacher and student roles correctly, you save yourself dozens of individual approvals later.

10 minutes of reading that pays off:

📖 Tutorial: [User roles and permissions in Edumaps](https://www.edumaps.de/1045/1/acuyb12uou/u5oziu0rfk)

### 📂 Share instead of making others copy
Source: https://www.edumaps.de/1364/1/8pvfad3becai/ulxx7v9emafx#p6802

**Share one school folder with everyone**
A central folder (e.g. "Our School: Materials and Information"), shared within the school: every teacher can find everything in one place.

📖 Tutorial: [Share folders within the school](https://www.edumaps.de/1126/1/zy498oukoj/4swych5o40)

**Provide checked school templates**
Put your school's best maps (parent evening, class pinboard, weekly plan) into a template folder: new colleagues copy them instead of building from scratch.

Additionally: the [Edumaps template catalog](https://www.edumaps.de/folder/1030/1/dz6c9xqji5h4/bf3pl22ra5vt) with over 200 ready-made maps.

**Use an onboarding map instead of repeated individual introductions**
A welcome map for new teachers answers the same recurring questions (accounts, processes, contacts) once and for all.

📖 Template: [Welcome to the staff (Onboarding)](https://www.edumaps.de/1333/1/yk5av12u7kee/dhcpuy4ptbmi) – in the template catalog under [School organization](https://www.edumaps.de/folder/1033/1/1dsjb6my9nsd/nio9d5tcxqdk)

### 🗓️ Through the school year
Source: https://www.edumaps.de/1364/1/8pvfad3becai/ulxx7v9emafx#p6803

**Plan the school year transition instead of suffering through it**
Invest 30 minutes before the summer holidays: which classes are ending, which maps will be archived, which accounts will expire?

Create a short checklist map for this and reuse it every year.

📖 Tutorial: [Checklists](https://www.edumaps.de/1162/1/b69pzgpq3uzu/4372nj9g7afu)

**Define naming conventions**
A rule like Subject_Class_SchoolYear (e.g. "Math 7a 2026-2027") makes maps searchable and sortable.

Agree on it once with the staff, write it into the onboarding map, done.

📖 Template: [Onboarding new teachers](https://www.edumaps.de/1145/1/mrd1o10ou4yq/3p9psj3iivah)

### 👥 Reduce the workload for the staff
Source: https://www.edumaps.de/1364/1/8pvfad3becai/ulxx7v9emafx#p6804

**Link tutorials instead of training everyone yourself**
For almost every question, there is an [Edumaps tutorial](https://www.edumaps.de/folder/1007/1/imhcphqc26/1guvtxkara).

Link the tutorials section prominently in the school folder and refer people directly to the relevant one when questions come up.

**Internal training with booking function**
Organize micro-training sessions (30 minutes, one topic) via a map with booking boxes: registration runs by itself, and available places are visible.

📖 Template: [Internal training sessions](https://www.edumaps.de/1242/1/xvb4d3972u9m/zupveigrx1rs)

📖 Tutorial: [Booking system](https://www.edumaps.de/1046/1/mtp976esa8/ee2qawxllh)

## 12 Edumaps Tricks That Save Every Teacher an Hour a Week
Source: https://www.edumaps.de/1360/1/p7s7my5x0uic/sbbja6jtj20e

### ⚡ One Box per Student in Seconds
Source: https://www.edumaps.de/1360/1/p7s7my5x0uic/sbbja6jtj20e#p6780

**Quick start with AI:** Instead of creating each box individually, the AI module instantly creates a complete structure for the class.

**Prompt to copy:**

> “Create a separate empty box for each of the following names, using the name as the heading: Anna, Ben, Clara, David, Emil, Finja, ...”

**Suitable for:**
- group work
- feedback rounds
- weekly plans
- portfolio work

**Benefit:**
- All students immediately receive their own workspace.
- The map is prepared in just a few seconds.
- Especially practical with many names or frequently changing groups.

**Key takeaway:** A good prompt saves several minutes of clicking and creates order right away.

### 📚 Ready-Made Templates Instead of a Blank Map
Source: https://www.edumaps.de/1360/1/p7s7my5x0uic/sbbja6jtj20e#p6781

**Don’t start from scratch:** The template catalog offers more than 200 ready-made maps for teaching, organization, and projects.

**How to use templates effectively:**
- choose a suitable template
- import it
- adapt the content
- use it directly

**Typical advantages:**
- the structure is already there
- the design does not need to be rebuilt
- ideas for your own map layouts develop faster

**Especially helpful when:**
- preparation time is short
- trying new teaching formats
- dealing with recurring routines

**Key takeaway:** Templates not only save time when creating maps, they also help make maps clearer and more organized.

### 📱 Put the Map on the Board via QR Code
Source: https://www.edumaps.de/1360/1/p7s7my5x0uic/sbbja6jtj20e#p6784

**A fast start to the lesson:** Every map has a QR code. When it is projected on the board, students can join immediately with a phone or tablet.

**Everyday benefits:**
- no need to dictate a link
- fewer questions about long URLs
- access in just a few seconds

**Especially useful for:**
- the start of a lesson
- spontaneous work phases
- substitute lessons
- open learning settings

**Process at a glance:**

| Step | Action | Benefit |
| --- | --- | --- |
| 1 | Display QR code | everyone sees the access point immediately |
| 2 | Students scan | quick start |
| 3 | Map opens | working time begins right away |

**Key takeaway:** The QR code shortens the start and gets the class to the map without detours.

### ✍️ Participation Without Student Accounts
Source: https://www.edumaps.de/1360/1/p7s7my5x0uic/sbbja6jtj20e#p6785

**Simply work with a write code:** Students can contribute to a map without registering and without logging in.

**This is ideal for:**
- spontaneous collection phases
- brainstorming
- short lesson impulses
- substitute lessons

**Why this saves time:**
- no account creation required
- no password problems
- immediate access for the whole learning group

**Important in class:**
- the entry barrier is low
- even younger classes can manage it quickly
- technical hurdles are greatly reduced

**Brief conclusion:** If things need to move quickly, the write code is often the most practical solution for direct participation in class.

### 🗳️ Quick Voting with Poll Boxes
Source: https://www.edumaps.de/1360/1/p7s7my5x0uic/sbbja6jtj20e#p6786

**Collect live opinions:** Poll boxes make it possible to capture the class’s mood in a short time.

**Examples of polls:**
- next presentation topic
- date of the class test
- project selection
- feedback on the lesson

**Strengths of the feature:**
- results are visible immediately
- everyone can participate easily
- decisions become transparent

**Practical benefit:**

| Use | Question | Benefit |
| --- | --- | --- |
| Planning | Which topic first? | quick decision |
| Feedback | What is still unclear? | direct feedback |
| Organization | Which date works? | better overview |

**Key takeaway:** Poll boxes save discussion time, structure decisions, and make participation visible in class.

### ✅ Checklists for Self-Directed Learning Phases
Source: https://www.edumaps.de/1360/1/p7s7my5x0uic/sbbja6jtj20e#p6787

**Make progress visible:** In checklist boxes, students tick off completed tasks themselves. This makes progress immediately visible without constant checking.

**Especially suitable for:**
- weekly plans
- station work
- learning offices
- homework phases

**Advantages at a glance:**
- students work more independently
- teachers can see the status at a glance
- tasks appear clearer and more organized

**Typical checklist elements:**
- read the task
- complete the material
- check the result
- submit the work

**Key takeaway:** Checklists reduce the teacher’s workload while also promoting responsibility and orientation during longer learning phases.

### 🔁 Duplicate a Map for Parallel Classes
Source: https://www.edumaps.de/1360/1/p7s7my5x0uic/sbbja6jtj20e#p6788

**Prepare once, use multiple times:** Instead of rebuilding the same structure again and again, a finished map can simply be duplicated.

**Typical use cases:**
- parallel classes
- follow-up course in the semester
- next school year
- similar project groups

**This specifically saves:**
- setup time
- design work
- repeated insertion of identical elements

**Useful before duplicating:**
- adjust names
- update dates
- check materials
- review writing permissions

**Key takeaway:** Reusing good maps makes work more efficient and also ensures consistent processes across multiple learning groups.

### 🤖 AI Analysis for a Better Overview
Source: https://www.edumaps.de/1360/1/p7s7my5x0uic/sbbja6jtj20e#p6789

**Evaluate many contributions quickly:** After brainstorming or collection phases, AI can summarize a full map and identify the key points.

**This is especially helpful with:**
- many student contributions
- confusing collections of ideas
- preparing a plenary evaluation
- quick review sessions

**Possible AI results:**
- most important topics
- frequent arguments
- open questions
- useful clusters

**Comparison:**

| Method | Effort | Result |
| --- | --- | --- |
| Read 25 boxes individually | high | slow |
| AI summary | low | quick overview |

**Key takeaway:** AI does not replace pedagogical judgment, but it provides a strong basis for further classroom work in seconds.

### 🧭 Choose the Right Format
Source: https://www.edumaps.de/1360/1/p7s7my5x0uic/sbbja6jtj20e#p6790

**Choosing the format saves restructuring work:** If you use the right map format from the beginning, you work much more efficiently later on.

**Typical formats and uses:**

| Format | Suitable for | Strength |
| --- | --- | --- |
| Pinboard | idea collections | flexible and open |
| Timeline | processes, history | clear sequence |
| Gallery | visual results | strong visual impact |
| Journal | reading texts, documentation | linear and calm |

**Why this matters:**
- content fits the presentation better
- students understand the structure faster
- later changes are smaller

**Key takeaway:** Not every task needs the same view. The right format makes the map easier to understand and saves preparation time.

### ⏱️ Countdown Box for Work Phases
Source: https://www.edumaps.de/1360/1/p7s7my5x0uic/sbbja6jtj20e#p6791

**A timer on the board instead of watching the clock**

A countdown box clearly shows the remaining working time for the whole class.

**Typical use cases:**

- silent work phases
- group work with fixed time
- station changes
- presentations with speaking time

**Benefits in class:**

- everyone sees the time without asking
- work phases end on time
- transitions become calmer and clearer

**Practical process:**

| Step | Action | Benefit |
| --- | --- | --- |
| 1 | Insert countdown into box | time is set |
| 2 | Project the map on the board | everyone sees the timer |
| 3 | Countdown runs out | phase ends without discussion |

**Key takeaway:** A visible countdown structures the lesson almost by itself and saves constant reminders about time.

### 📂 Drag and Drop Files Directly into the Map
Source: https://www.edumaps.de/1360/1/p7s7my5x0uic/sbbja6jtj20e#p6792

The fastest way to get materials into the map: worksheets, images, or PDFs can be dragged directly from the computer into a box, without an upload dialog and without detours.

**This works with:**

- images and photos
- PDF documents
- worksheets
- audio files

**Why this saves time:**

- no clicking through menus
- multiple files at once are possible
- material is immediately available for the class

**Especially practical for:**

- lesson preparation the evening before
- spontaneous material needs during class
- building topic maps with many documents

**Key takeaway:** Drag instead of click — drag and drop is the shortest route from the computer folder to the finished map.

### 📅 Material appears automatically: the display date
Source: https://www.edumaps.de/1360/1/p7s7my5x0uic/sbbja6jtj20e#p6794

**Prepare once, deliver automatically:** Every box can be given a display date. Until then, it remains invisible and then appears automatically, without any further action.

**Typical use cases:**

- Build the entire weekly plan on Sunday, and the daily tasks appear day by day
- Release solutions only after the working time is over
- Advent calendar doors and countdown activities
- Open the stations of a unit one after another

**Why this saves time:**

- Preparation is bundled into one session instead of requiring daily maintenance
- no more "Have I already released this?"
- the map keeps working, even if you are teaching, in a meeting, or out sick

**Process at a glance:**

| Step | Action | Benefit |
| --- | --- | --- |
| 1 | Create boxes for the entire week | Everything prepared in one go |
| 2 | Set the display date for each box | Order is fixed |
| 3 | Boxes appear automatically | The map delivers them automatically |

**Key takeaway:** The display date turns a map into a schedule that runs itself – prepared once, delivered automatically.

## 10 Tips for Collaboration in the Teaching Staff
Source: https://www.edumaps.de/1365/1/8uihdv5wbqhq/07qdz1kp83js

### 🧱 Shared Structures
Source: https://www.edumaps.de/1365/1/8uihdv5wbqhq/07qdz1kp83js#p6806

**Department Folder Instead of Email Attachments**
One shared folder per department: curricula, exams, materials.

New content goes there instead of landing in five different inboxes.

📖 Tutorial: [Sharing folders within the school](https://www.edumaps.de/1126/1/zy498oukoj/4swych5o40)

**One Schedule Column for All Maps**
The school leadership maintains **one** schedule column, and all class and subject maps embed it: if a date changes, it is updated everywhere.

📖 Tutorial: [Embedding columns from other maps](https://www.edumaps.de/1081/1/jfb6vptvgo/0g56y4cjyr)

**Tags Instead of Folder Chaos**
A shared materials pool works with tags (`class7`, `grammar`, `exam`). The tag filter finds in seconds what five subfolders hide.

📖 Tutorial: [Using tags and tag filters on a map](https://www.edumaps.de/1100/1/qom3b15q28/swpwzxd9cy)

### ✍️ Working Together
Source: https://www.edumaps.de/1365/1/8uihdv5wbqhq/07qdz1kp83js#p6807

**Division of Work via Column Groups**
Split large maps (project week, school festival) into column groups: each team maintains its own area without interfering with others.

📖 Tutorial: [Sharing columns](https://www.edumaps.de/1099/1/8c1r73m85c/ly9pqzltsw)

**Team Text for Shared Documents**
Write parent letters, concepts, and minutes together instead of emailing versions back and forth.

📖 Tutorial: [Using Team Text](https://www.edumaps.de/1060/1/oz8ph32tih/gw9fr07zos)

**Comments as a Feedback Channel**
Add feedback on drafts directly as a comment under the box: the response stays with the content, and nothing gets lost in email threads.

### 🔁 Learning from Each Other
Source: https://www.edumaps.de/1365/1/8uihdv5wbqhq/07qdz1kp83js#p6808

**Copying Is Encouraged**
Using a colleague’s lesson map as a starting point (with their permission) beats any empty map. Or copy only specific columns as needed.

📖 Tutorial: [Copying columns from other maps](https://www.edumaps.de/1080/1/qhmxrppkks/qqujv2l8gt)

**Follow Maps**
Anyone who follows the department map or the school leadership map stays informed about changes without having to check actively.

📖 Tutorial: [Following maps](https://www.edumaps.de/1079/1/vahlwdap0i/6fpa5kwfkr)

### 🤝 Making Meetings Easier
Source: https://www.edumaps.de/1365/1/8uihdv5wbqhq/07qdz1kp83js#p6809

**Conference Map Instead of Email Ping-Pong**
Agenda as a map: submit topics in advance as boxes, use the poll module for votes, and record decisions directly.

Meetings become shorter, and the minutes almost write themselves.

📖 Tutorial: [Polls/Votings](https://www.edumaps.de/1086/1/xmgkv25gxf/f3u6hrdh5m)

**Annual Planning as a Shared Timeline**
Exams, trips, conferences, and celebrations on one timeline map: scheduling conflicts become visible before they happen. Alternatively, choose one calendar per box and combine these calendars as needed.

📖 Tutorial: [Calendar for boxes](https://www.edumaps.de/1059/1/1p018vc669/nt5sn3ix90)

## The 10 Most Common Beginner Mistakes and How to Avoid Them
Source: https://www.edumaps.de/1366/1/6xgknv7wxg6d/5zwb54t9olo1

### 🚀 Getting Started
Source: https://www.edumaps.de/1366/1/6xgknv7wxg6d/5zwb54t9olo1#p6811

**Starting with an empty map**
❌ The mistake: Open an empty map and spend an hour tinkering with the structure.

✅ Better: Copy one of the 200+ ready-made maps from the [template catalog](https://www.edumaps.de/folder/1030/1/dz6c9xqji5h4/bf3pl22ra5vt) or use the quick start and only adjust the content.

**Putting everything into one giant map**
❌ The mistake: One map for the whole class, all subjects, the whole year: after four weeks, no one can find anything anymore.

✅ Better: One map per topic or purpose, tied together by a folder. Maps are free, clarity is priceless.

📖 Tutorial: [Using folders](https://www.edumaps.de/1057/1/ruqcqtexz1/qz34252w7n)

**No column structure**
❌ The mistake: 40 boxes underneath each other in a single column.

✅ Better: Columns are the organizing principle of the pinboard: structure by weeks, topics, phases, or groups. Rule of thumb: from 5 boxes onward, a second column is worth it.

### 🏗️ Building the Structure
Source: https://www.edumaps.de/1366/1/6xgknv7wxg6d/5zwb54t9olo1#p6812

**Colors without a system**
❌ The mistake: Every box in a different favorite color: colorful, but meaningless.

✅ Better: Use color to convey meaning: one color per category or status (e.g. green = done, red = important). That way, the map explains itself.

**Uploading videos instead of embedding them**
❌ The mistake: Upload large video files to the map: storage fills up, loading becomes slow.

✅ Better: Embed or link videos from media libraries. Reserve uploads for what only you have: worksheets, your own photos.

📖 Tutorial: [Importing external media](https://www.edumaps.de/1067/1/9blpyaqff9/s3yptn4fgj)

**Solutions visible openly**
❌ The mistake: Practice tasks with the solution directly visible: self-checking becomes ineffective.

✅ Better: Put solutions in separate boxes and protect them with a password or display date: let people think first, then reveal them.

📖 Tutorial: [Box settings](https://www.edumaps.de/1078/1/qbg4lumykj/2eycvzchpw)

### 🔗 Sharing
Source: https://www.edumaps.de/1366/1/6xgknv7wxg6d/5zwb54t9olo1#p6813

**Sending the wrong link**
❌ The mistake: Sending the edit link to all parents: suddenly everyone can change everything.

✅ Better: Check briefly before sharing: read-only link for information, editing rights only where collaboration is desired. When in doubt, test it on yourself first.

📖 Tutorial: [Sharing maps with links](https://www.edumaps.de/1047/1/siajhiablo/fv6nobr4hp)

**Giving students access to everything**
❌ The mistake: The class gets full editing rights for the whole map: boxes disappear, columns move around.

✅ Better: Assign permissions selectively: students write where they are supposed to (e.g. their submission column), the rest stays protected.

📖 Tutorial: [Sharing columns](https://www.edumaps.de/1099/1/8c1r73m85c/ly9pqzltsw)

### 📈 Continuing to Work
Source: https://www.edumaps.de/1366/1/6xgknv7wxg6d/5zwb54t9olo1#p6814

**Maps without names and tags**
❌ The mistake: Titles for new maps like “Test” or “English”. After half a year, your own overview turns into a search game.

✅ Better: Invest 10 seconds when creating it: a descriptive title (Subject_Class_SchoolYear) plus 2 to 3 tags. Search will thank you.

📖 Tutorial: [Using tags and tag filters on a map](https://www.edumaps.de/1100/1/qom3b15q28/swpwzxd9cy)

**Being afraid of breaking something**
❌ The mistake: Out of fear of making mistakes, new functions are never tried.

✅ Better: Before making bigger changes, simply copy the map: the copy is your backup. And create a private sandbox map for experiments, where everything is allowed to go wrong.

## Chapter 1: Admin Menu and First Accounts
Source: https://www.edumaps.de/1132/1/kbh20fr8ldnl/8f05ip0l4ejb

### Contents
Source: https://www.edumaps.de/1132/1/kbh20fr8ldnl/8f05ip0l4ejb#p4585

**Chapter Overview**
The tutorial series includes 12 chapters.

1. [Admin Menu and First Accounts](https://www.edumaps.de/1132/1/kbh20fr8ldnl/8f05ip0l4ejb)
1. [CSV Import and School Year Change](https://www.edumaps.de/1133/1/ph3rivxfdiuc/cap4evh0xh09)
1. [Single Sign-On (SSO) and Duplicate Accounts](https://www.edumaps.de/1134/1/g0vuh2badnof/57pq7b0qqfom)
1. [Sharing and Publishing (My School)](https://www.edumaps.de/1135/1/y4e16np2wb4g/nqyuq9u7e4l5)
1. [Folder Structure for Schools](https://www.edumaps.de/1136/1/u19mvqczdz16/lofyhfj9k0ao)
1. [Booking System (Courses, Parent-Teacher Conference Days)](https://www.edumaps.de/1137/1/7x3v9759bih1/nok6uwt85ky2)
1. [Create Certificates of Participation](https://www.edumaps.de/1138/1/xhhbh8jom7jp/u3r0nx8hxel2)
1. [Padlet Import](https://www.edumaps.de/1139/1/a0e08072rdtm/0iq9v296hvfs)
1. [Lending System for Devices and Materials](https://www.edumaps.de/1140/1/o8gnutdb8wip/uxtepeysdw8v)
1. [Search, Tags and Large Pinboards](https://www.edumaps.de/1141/1/lvr9qypicbif/7z08qiljd93f)
1. [Admin FAQ from Training Sessions](https://www.edumaps.de/1142/1/slvgy1ly540x/jyk55pyndunc)
1. [Practical Examples for School Organization](https://www.edumaps.de/1143/1/tro310ism7ch/jxog9sba7zvy)

### Overview
Source: https://www.edumaps.de/1132/1/kbh20fr8ldnl/8f05ip0l4ejb#p4586

*The first steps.*

**Welcome to the Admin Area**
This pinboard shows the first important steps for school admins in Edumaps.

After this pinboard, you will know where to find the most important admin functions, why data processing agreements are important, how to prepare the letterhead, and how to issue first accounts with login cards and QR codes.

- Manage users and classes
- Prepare accounts for teachers and students
- Issue login cards with QR codes
- Check school-wide basic settings
- Set up data processing agreement and letterhead

**What is Edumaps from an Admin Perspective?**
For schools, Edumaps is a visual workspace for teaching, organization, and collaboration.

Admins ensure that the school can get started in an organized way. This includes user accounts, school-wide settings, folder structures, and access for teachers and students.

**Typical admin tasks:**

- Create teachers and students
- Prepare classes and groups
- Provide materials for the teaching staff
- Structure subject department or project folders
- Support users with problems

**The Most Important Areas in the Menu**
After logging in, you will find the central navigation on the left.

1. **Dashboard:** recently visited maps, your own maps, and quick access.
1. **Maps and Folders:** management of your own and shared folder structure.
1. **Uploads:** your own uploads, uploads from others, and deleted files.
1. **My Area:** personal functions such as calendar, bookings, and tasks.
1. **User Management:** accounts, classes, invitations, and admin actions.
1. **My Account:** account data, school assignment, storage space, and admin functions.

**Tip:** If you are starting fresh, first check **My Account** and then **User Management**.

### Admin Menu and Account
Source: https://www.edumaps.de/1132/1/kbh20fr8ldnl/8f05ip0l4ejb#p4587

*Central settings.*

**Open My Account**
In the **My Account** area, you will find important information about your own account.

There you can see, for example:

- your username
- your role
- the name of your school or institution
- the available storage space
- the number of your own maps
- additional admin functions

For admins, functions appear there that normal teachers or students cannot see.

**Additional Admin Functions**
Admin accounts receive additional management functions in Edumaps.

Depending on the license and role, these include:

- Open user management
- Confirm data processing agreement / DPA
- Edit letterhead
- Invite users
- Create accounts
- Merge accounts
- Delete multiple users

**Note:** If these functions are missing, you are probably not logged in as an admin or the account has not yet been activated as a school admin.

**Check School Assignment**
At the beginning, check whether your account is assigned correctly.

Pay particular attention to these points:

- Is the correct school name displayed?
- Is the account activated as an admin?
- Is there enough storage space available?
- Are there already maps, folders, or uploads?
- Is a real email address stored, or is there still a technical dummy email address?

**If something is wrong:** Contact Edumaps support or your responsible media center.

**Store a Real Email Address**
Admin accounts can also initially be created with a technical dummy email address.

Therefore, check at the beginning in [My Account](https://www.edumaps.de/user/account) whether a real email address is stored for your account.

A real email address is important for:

- resetting passwords via **"Forgot password"**
- important system notices
- notifications from Edumaps
- clear assignment of the admin account
- later communication with the school or support

> **Recommendation:** Always store a real official email address for admin accounts so that password reset, notifications, and support assignment work reliably. – Do **not** store private email addresses!

For student accounts, a dummy email address may be useful. For admins and teachers, a real email address should be used whenever possible.

### DPA and Letterhead
Source: https://www.edumaps.de/1132/1/kbh20fr8ldnl/8f05ip0l4ejb#p4588

*Prepare data protection and official documents.*

**Fill Out Data Processing Agreement / DPA**
The data processing agreement, often abbreviated as **DPA**, is an important data protection step.

With it, the school confirms that Edumaps may process personal data on behalf of the school.

**Steps:**

1. Open **My Account**.
1. Select **Data Processing Agreement**.
1. Enter the school's data.
1. Check the information carefully.
1. Confirm and save the data processing agreement.

**Recommendation:** Complete this step early, before Edumaps is used on a larger scale with teachers and students.

**Why is the DPA Important?**
When using Edumaps, personal data may be processed.

Examples:

- names of teachers
- names of students
- email addresses
- class assignments
- user activities within the platform

The DPA regulates that Edumaps processes this data on behalf of the school.

**Key point:** The DPA is not a teaching topic, but an organizational mandatory step for school use.

**Edit Letterhead**
The letterhead is used for automatically generated documents, for example for certificates of participation after training sessions or courses.

**Steps:**

1. Open **My Account**.
1. Click **Edit Letterhead**.
1. Enter the desired information.
1. Check the name, address, and contact details.
1. Save the letterhead.

**Typical information:** school name, address, telephone number, email address, website, and other official details.

**When Do I Need the Letterhead?**
The letterhead is especially helpful when Edumaps is used for events, training sessions, or bookings.

Example:

- A training course is booked via Edumaps.
- Participants register online.
- After completion of the course, a certificate of participation is created.
- This certificate uses the stored letterhead.

**Tip:** Set up the letterhead before using the booking system for training sessions.

### User Management
Source: https://www.edumaps.de/1132/1/kbh20fr8ldnl/8f05ip0l4ejb#p4589

*Central management of teachers, students, classes, and access.*

**Open User Management**
[User Management](https://www.edumaps.de/users/list) is the central area for all account tasks.

There you will find, among other things:

- [List of all users in the school](https://www.edumaps.de/users/list)
- [Create accounts](https://www.edumaps.de/users/create)
- [Manage classes](https://www.edumaps.de/users/usersets)
- [Invite users](https://www.edumaps.de/users/invite)
- [Merge accounts](https://www.edumaps.de/users/merge)
- [Delete multiple users](https://www.edumaps.de/users/massdelete)
- Remove users from school

**Steps:** Open the menu on the left, go to User Management, and choose the desired function.

**List of All Accounts**
In the user list, you can see your school's accounts.

There you can check:

- which teachers already exist
- which student accounts have been created
- what role a user has
- whether an account belongs to the correct school
- whether a user needs to be edited or removed

**Typical tasks:** search for users, check roles, check classes, edit account data.

**Create Accounts – Three Ways**
In Edumaps, admins can create accounts in several ways.

1. **List of names:** suitable if you want to enter several people directly.
1. **CSV file:** suitable for larger student lists or entire classes.
1. **Without names:** suitable for quick test accounts, prepared access, or anonymous starter accounts.

In this chapter, the focus is first on getting started quickly with **accounts without names**.

**Note:** CSV import is covered in a separate tutorial, because school year changes, class changes, and update imports are important there.

### Accounts Without Names
Source: https://www.edumaps.de/1132/1/kbh20fr8ldnl/8f05ip0l4ejb#p4590

*Prepare access quickly without importing complete name lists first.*

**When Are Accounts Without Names Useful?**
Accounts without names are useful when you want to prepare access quickly.

**Typical situations:**

- test access for teachers
- prepared student accounts
- accounts for a training session
- accounts where names will be added later
- neutral access for an initial start

**Example:** You want to prepare 10 teacher accounts for a short introduction. Then you can create 10 accounts without names and issue the login cards directly.

**Create Accounts Without Names**
**Steps:**

1. Open User Management.
1. Click **Create Accounts**.
1. Select **Without names**.
1. Enter the number of desired accounts.
1. Select the user type, for example teacher or student.
1. Specify whether all should receive the same initial password or individual passwords.
1. Create the accounts.

**Result:** Edumaps creates new accounts with usernames, technical email addresses, and initial passwords.

**Accounts via a List of Names**
If you already have the names, the list of names is the fastest way for small groups.

1. Open User Management
1. Select **Create Accounts**
1. Choose the **List of names** method
1. Enter one name per line (optionally with email and class)
1. Set user type and initial password
1. Create the accounts

**Good for:** individual teachers or small groups. For entire classes, CSV import (Chapter 2) is usually faster.

**Same Password or Individual Passwords?**
When creating the accounts, you can decide whether all users receive the same initial password or whether Edumaps generates individual passwords.

**Same initial password:**

- easier for getting started
- practical for short tests
- less secure

**Individual passwords:**

- more secure
- each account has its own password
- recommended for teachers and older students

**Recommendation:** For real use, individual passwords are better. For short tests, a shared initial password can be more practical.

**Understanding Dummy Email Addresses**
Each account technically requires an email address.

If no real email address is available, Edumaps creates a technical dummy email address.

**Important:**

- The dummy email is not a real personal email address.
- It serves only to create the account technically.
- A real email address can be added later.
- The user can still log in with username and password.

For students, dummy email addresses are often practical if no school email addresses are available.

> Warning: Passwords cannot be reset via ["Forgot password"](https://www.edumaps.de/user/forgot) as long as only a dummy email is available. In this case, the admin must set a new password.

### Login Cards and QR Codes
Source: https://www.edumaps.de/1132/1/kbh20fr8ldnl/8f05ip0l4ejb#p4591

*Secure access data, distribute it, and simplify the first login.*

**Result After Creating the Accounts**
> **Important:** Passwords and QR codes are shown **only directly after creation** and are **no longer stored on the server afterward**.

Save the data as a CSV file (blinking button).

Print the data as a PDF.

> If you do not save the data now, you will have to assign a new password later for each account.

After creating the accounts, Edumaps displays the results table. This typically contains:

- username
- technical or real email address
- initial password
- role
- QR code for the first login

**Important:** Save or print the access data immediately. Initial passwords should not be shared unprotected or stored openly.

**Download CSV File with Access Data**
After creating the accounts, you can download a CSV file.

**Why is this important?**

- The access data is saved.
- You have an overview of username and initial password.
- You can open the **downloaded file** again later.
- A new download from Edumaps is not possible – the data is only issued once.
- You avoid having to reset passwords.

**Warning:** The file contains access data. Store it only in a protected location.

**Display and Print Login Cards**
Login cards are small access cards for users.

They typically contain:

- username
- initial password
- QR code
- short login notice

**Steps:**

1. After creating the accounts, click **Show login cards**.
1. Check the displayed cards.
1. Print the login cards or save them as a PDF.
1. Give each user the matching login card.

**QR Code for the First Login**
The QR code on the login card makes getting started easier.

**How it works:**

1. The user scans the QR code.
1. Edumaps opens the prepared login.
1. The user logs in.
1. Then the user sets their own personal password.
1. The account is activated.

**Note:** The QR code is intended for the first login and should be distributed carefully.

**If Access Data Is Lost**
If access data was not saved or printed after creation, passwords may have to be reset.

**Therefore, the rule is:**

- download the CSV file immediately
- print the login cards immediately or save them as PDF
- store access data securely
- do not leave login cards lying around openly

**Key point:** After creation, save first, then distribute.

### Checklist and FAQ
Source: https://www.edumaps.de/1132/1/kbh20fr8ldnl/8f05ip0l4ejb#p4592

*Typical questions and next step.*

**Checklist for Getting Started**
Complete these points at the beginning:

- Check: Am I logged in as an admin?
- Check: Is the correct school displayed?
- Fill out data processing agreement / DPA
- Check or complete the letterhead
- Open User Management
- Create a few accounts without names as a test
- Download the CSV file with access data
- Display and print login cards
- Test QR code login with a test account

**FAQ: Why Can't I See the Admin Functions?**
Possible causes:

- You are not logged in with the correct account.
- Your account has not yet been activated as an admin.
- You are in a normal teacher or student account.
- The school assignment is still missing.

**Solution:** First check [My Account](https://www.edumaps.de/user/account). If no admin functions appear there, contact Edumaps support or the responsible office at your school.

**FAQ: Do I Have to Enter Real Email Addresses?**
No, not always.

If no real email addresses are available, Edumaps can generate technical dummy email addresses.

This is especially practical for:

- students without their own school email address
- test accounts
- neutral starter accounts
- prepared access

If real email addresses are available, they can of course be used.

**Important for admins:**
Whenever possible, admin accounts should always have a real official email address. Dummy email addresses are primarily intended for students, test accounts, or prepared access.

**FAQ: What Is Better – Login Card or Manual Distribution?**
Login cards are usually the easiest way if many users are supposed to start at the same time.

**Advantages:**

- each user receives their own access data
- QR code makes getting started easier
- fewer typing errors
- suitable for classes and training sessions
- quickly printable

**Recommendation:** Use login cards whenever a group starts using Edumaps together.

**Next Step: CSV Import**
Once the first admin functions are understood, the next step is CSV import.

It covers:

- importing student lists
- creating classes automatically
- adding new students
- updating data during the school year change
- handling identical names and changed email addresses correctly

**Tutorial:** [Edumaps for Admins – Chapter 2: CSV Import and School Year Change](https://www.edumaps.de/1133/1/ph3rivxfdiuc/cap4evh0xh09)

## Chapter 2: CSV Import and School Year Change
Source: https://www.edumaps.de/1133/1/ph3rivxfdiuc/cap4evh0xh09

### Contents
Source: https://www.edumaps.de/1133/1/ph3rivxfdiuc/cap4evh0xh09#p4593

**Chapter Overview**
The tutorial series includes 12 chapters.

1. [Admin Menu and First Accounts](https://www.edumaps.de/1132/1/kbh20fr8ldnl/8f05ip0l4ejb)
1. [CSV Import and School Year Change](https://www.edumaps.de/1133/1/ph3rivxfdiuc/cap4evh0xh09)
1. [Single Sign-On (SSO) and Duplicate Accounts](https://www.edumaps.de/1134/1/g0vuh2badnof/57pq7b0qqfom)
1. [Sharing and Publishing (My School)](https://www.edumaps.de/1135/1/y4e16np2wb4g/nqyuq9u7e4l5)
1. [Folder Structure for Schools](https://www.edumaps.de/1136/1/u19mvqczdz16/lofyhfj9k0ao)
1. [Booking System (Courses, Parent-Teacher Conference Days)](https://www.edumaps.de/1137/1/7x3v9759bih1/nok6uwt85ky2)
1. [Create Certificates of Participation](https://www.edumaps.de/1138/1/xhhbh8jom7jp/u3r0nx8hxel2)
1. [Padlet Import](https://www.edumaps.de/1139/1/a0e08072rdtm/0iq9v296hvfs)
1. [Lending System for Devices and Materials](https://www.edumaps.de/1140/1/o8gnutdb8wip/uxtepeysdw8v)
1. [Search, Tags and Large Pinboards](https://www.edumaps.de/1141/1/lvr9qypicbif/7z08qiljd93f)
1. [Admin FAQ from Training Sessions](https://www.edumaps.de/1142/1/slvgy1ly540x/jyk55pyndunc)
1. [Practical Examples for School Organization](https://www.edumaps.de/1143/1/tro310ism7ch/jxog9sba7zvy)

### Overview
Source: https://www.edumaps.de/1133/1/ph3rivxfdiuc/cap4evh0xh09#p4594

*What the CSV import is about.*

**Goal of this pinboard**
This pinboard explains how school admins can create or update users and classes using a CSV file.

After this pinboard, you will know:

- when CSV import is useful
- which columns a CSV file should contain
- how classes are created automatically
- how to add new students
- how to prepare for a school year change
- which errors occur frequently

**Important:** This pinboard covers import via user lists. Individual test accounts or accounts without names are explained in [Chapter 1: Admin Menu and First Accounts](https://www.edumaps.de/1132/1/kbh20fr8ldnl/8f05ip0l4ejb).

**When is CSV import useful?**
CSV import is useful when many users need to be created or updated at once.

Typical cases:

- new student accounts for a class
- creating several classes at the same time
- preparing for a school year change
- adding new students
- assigning existing students to a new class
- importing teachers or project groups in bulk

**Rule of thumb:** As soon as more than a few accounts need to be created, CSV import is usually faster and cleaner than manual entry.

**Basic principle**
A CSV file is a simple table. Each row represents one user.

Typical columns are:

First name → User's first name
Last name → User's last name
Email → Real or school email address
Class name → Class, group, or course

Edumaps reads this file and creates accounts and classes from it.

**Note:** If a class does not yet exist, it can be created automatically during import.

**Recommended process**
Always proceed in this order when importing:

1. Prepare the CSV file
1. Check the file for clear columns
1. Start the import in Edumaps
1. Check the column mapping
1. Review the import preview
1. Import users
1. Check the result
1. Save login passes or access data

**Tip:** For large lists, first run a small test import with only a few rows.

### Prepare the CSV file
Source: https://www.edumaps.de/1133/1/ph3rivxfdiuc/cap4evh0xh09#p4597

*What the import file should look like.*

**Recommended columns**
Edumaps expects the **full name in one column**, for example `Anna Example`.

If the name is in the form `Last name,First name` (with a comma), use the import function **"Merge first and last name"**. This removes the comma and creates a clear name:

`Example,Anna` → `Anna Example`

> Edumaps always stores only **one** display name per person. Separate columns for first name and last name are not imported.

This structure is therefore suitable for student data:

| Name | Email | Class name |
| --- | --- | --- |
| Anna Example | anna.example@schule.de | 5a |
| Ben Sample | ben.sample@schule.de | 5a |
| Clara Test | clara.test@schule.de | 6b |

For younger students without a real email address, the email column may remain empty depending on the school concept or be filled with school placeholders.

**Important:** Use consistent class names. `5a`, `5A`, and `Class 5a` may be interpreted as different groups.

**Save CSV from Excel or LibreOffice**
If the user list is available in Excel, LibreOffice, or a school administration system, save it as a CSV file.

Make sure of the following:

- a header row with column names
- no empty rows in between
- no merged cells
- no additional headings above the table
- clear class names
- UTF-8 character encoding if umlauts are included

**Tip:** Open the CSV file in a text editor as a test. You should see one row per user.

**Example of a simple CSV file**
A simple CSV file can look like this:

```
Name,Email,Class name
Anna Example,anna.example@schule.de,5a
Ben Sample,ben.sample@schule.de,5a
Clara Test,clara.test@schule.de,6b
```

Depending on the program, a semicolon may be used instead of a comma:

```
Name;Email;Class name
Anna Example;anna.example@schule.de;5a
```

Edumaps recognizes common CSV formats. Still, check the preview before importing.

**Clean up data beforehand**
Before importing, you should clean up the list.

Check the following:

- Are first name and last name separated?
- Are there empty names?
- Are email addresses spelled correctly?
- Are class names consistent?
- Are there duplicate rows?
- Does the file include former students who are no longer at the school?

**Key point:** The cleaner the CSV file, the less follow-up work is needed in Edumaps.

### Carry out the import
Source: https://www.edumaps.de/1133/1/ph3rivxfdiuc/cap4evh0xh09#p4598

*Steps in the admin area.*

**Open CSV import**
Steps:

1. Open **User management**.
1. Select **Create accounts**.
1. Select the **CSV file** method.
1. Upload the CSV file.
1. Check whether the columns were recognized correctly.

Up to **1,500 accounts** can be imported per run. For larger lists, simply work in two runs. The more accounts there are, the longer the matching process takes.

**Note:** If a column is recognized incorrectly, do not cancel the import immediately. First check whether the column can be assigned correctly manually.

**Select role**
During import, you must specify which role the imported users should receive.

Typical roles:

- **Student** for class lists
- **Teacher** for staff lists

**Recommendation:** Import students and teachers separately if both groups should receive different roles.

**Create classes automatically**
If the CSV file contains a `Class name` column, Edumaps can use this column to assign classes.

Example:

| Name | Class name |
| --- | --- |
| Anna Example | 5a |
| Ben Sample | 5a |
| Clara Test | 6b |

Result:

- Anna and Ben are assigned to class `5a`.
- Clara is assigned to class `6b`.
- If the classes do not yet exist, they are created automatically.

> **During update import:** With the checkbox "Create classes again", class assignments are reset according to the CSV – if an old class is missing from the file, the student is removed from it. Without the checkmark, existing assignments remain unchanged.

**Check import preview**
Before the final import, the preview should be checked.

Pay special attention to:

- Are first and last names correct?
- Are email addresses correct?
- Was the class recognized correctly?
- Are all rows being imported?
- Are there warnings about existing users?

**Important:** Warnings are not just a formality. They often show whether existing accounts are being updated or new accounts are being created.

**After the import**
After the import, you should check the result.

Recommended check:

- [Open class](https://www.edumaps.de/users/usersets)
- check the number of users
- review individual samples
- save login passes or access data
- if necessary, inform teachers about completed classes

**Tip:** Briefly document which file was imported and when. This helps during the school year change and with follow-up questions.

### Update import
Source: https://www.edumaps.de/1133/1/ph3rivxfdiuc/cap4evh0xh09#p4599

*Add to or update existing data.*

**Add new students**
You can use the update import to import only new students.

Suitable when:

- individual students are new to the school
- a class is already almost complete
- only a few accounts are missing

Procedure:

1. Prepare a CSV file containing only the new students
1. Import the file
1. Check the class
1. Save access data or issue login passes

**Advantage:** Fast and clear.

**Import a complete current list**
During a school year change, a complete current list is often more useful.

Suitable when:

- many students change classes
- new classes are created
- many students have left the school
- the data from the school administration system has been updated

**Recommendation:** For the school year change, it is better to work with a clean complete list than to make many small manual changes.

**Map class changes**
If students move to a new class, the CSV file should contain the new class name.

Example:

| First name Last name | Email | Class name |
| --- | --- | --- |
| Anna Example | anna.example@schule.de | 6a |

If Anna was previously in `5a`, the update import can assign her to the new class `6a`.

**Important:** After the import, check whether the class assignments are correct. The student should no longer be found in the old class, but only in the new one.

**Changed email addresses**
Email addresses can change, for example with new school domains or corrected spelling.

Check before importing:

- Is the new email address unique?
- Does an account with this email already exist?
- Is the existing user recognized, or would a new account be created?

Click the button "Check all" to show obvious errors. Correct these.

**Warning:** If data is unclear, duplicate accounts can be created. Check the import preview especially carefully.

### Error cases
Source: https://www.edumaps.de/1133/1/ph3rivxfdiuc/cap4evh0xh09#p4600

*Common import pitfalls.*

**Duplicate names**
In schools, there may sometimes be two students with the same name.

Example:

| Name | Class |
| --- | --- |
| Max Müller | 7a |
| Max Müller | 8b |

Here you simply name the second user "Max Müller 2".

> **Important:** Edumaps is designed so that the name must be unique within a school, so that the import works the following school year as well (even if the email address changes).

The student's/teacher's name is therefore the unique feature used for recognition.

**Umlauts and special characters**
If umlauts are displayed incorrectly, the reason is usually the character encoding of the CSV file.

Typical errors:

- `Müller` appears as `MÃ¼ller`
- special characters are replaced
- names with accents are displayed incorrectly

Solution:

- save the CSV file again as **UTF-8**
- check the file in a text editor
- start the import again

**Tip:** LibreOffice is well suited for consciously choosing the encoding when saving.

**Incorrect or inconsistent class names**
Inconsistent class names quickly create confusion.

Examples:

- `5a`
- `5A`
- `Class 5a`
- `05a`

These variants may appear as different classes.

**Define before importing:**

- short names: `5a`, `6b`, `10c`
- or detailed names: `Class 5a`
- but do not mix them

**Empty fields**
Empty fields can be problematic depending on the column.

Especially critical:

- empty first name
- empty last name
- missing class in student lists
- incorrect or duplicate email address

**Recommendation:** Filter the table for empty fields before importing and correct them first.

### School year change
Source: https://www.edumaps.de/1133/1/ph3rivxfdiuc/cap4evh0xh09#p4601

*Recommended procedure.*

**Preparation**
Before the school year change, you should clarify:

- Which classes remain?
- Which classes are renamed?
- Which students leave the school?
- Which students are new?
- Are there new teachers?
- Are real email addresses or dummy addresses being used?

**Tip:** Before major changes, create a current user list as a backup or documentation.

**Recommended process for the school year change**
1. Export the current student list from the school administration system
1. Clean up the CSV file
1. Standardize class names
1. Run a test import with a few rows
1. Run the complete update import
1. Check classes by sample
1. Review old or no longer needed users
1. Issue new login passes only for new users

**Important:** Not all existing users need new access data. Existing accounts can continue to be used.

**Remove old users?**
Users who have left the school should not remain permanently in the active school administration.

Options:

- remove users from classes
- remove users from the school
- delete users if the account is no longer needed

When removed from the school, the account is reset to a **basic account**: neither teacher nor student, no longer assigned to your school. The person's content and login remain, but access to internal school maps is removed.

**Warning:** Check beforehand whether content, maps, or uploads are still linked to the account. If so, the account cannot be deleted. In that case, simply remove the user from the school.

**Follow-up check**
After the school year change, you should check:

- Are the class lists correct?
- Are there unexpected duplicate accounts?
- Are new students present?
- Have former students been removed or cleaned up?
- Can teachers find their classes?
- Does login work with new accounts?

**Key point:** The import is only complete when the classes in Edumaps are practically usable.

### FAQ and next step
Source: https://www.edumaps.de/1133/1/ph3rivxfdiuc/cap4evh0xh09#p4602

*Short answers to common questions.*

**Do I have to upload all students again?**
Not always.

You can either:

- import only new students
- or import a complete current list

**For individual late registrations:** Import only new students.

**For the school year change:** A complete current list is usually more useful.

**What happens to existing accounts?**
Existing accounts do not automatically have to be created again.

Updating is about correctly recognizing existing users and, if necessary, adding to them or reassigning them.

Pay particular attention to:

- **Name** (unique feature)
- email address
- class
- role

**Warning:** If an existing user is not recognized clearly, a duplicate account can be created.

**What is the next step?**
After CSV import and the school year change, the next admin topic is signing in from another platform (single sign-on) and duplicate accounts.

It covers:

- how single sign-on works
- why second accounts sometimes appear
- when accounts should be merged
- how admins can avoid duplicate accounts

**Tutorial:** [Chapter 3: Sign-in via Other Platforms (Single Sign-On) and Duplicate Accounts](https://www.edumaps.de/1134/1/g0vuh2badnof/57pq7b0qqfom)

## Chapter 3: Sign-in via Other Platforms (Single Sign-On) and Duplicate Accounts
Source: https://www.edumaps.de/1134/1/g0vuh2badnof/57pq7b0qqfom

### Contents
Source: https://www.edumaps.de/1134/1/g0vuh2badnof/57pq7b0qqfom#p4603

**Chapter Overview**
The tutorial series includes 12 chapters.

1. [Admin Menu and First Accounts](https://www.edumaps.de/1132/1/kbh20fr8ldnl/8f05ip0l4ejb)
1. [CSV Import and School Year Change](https://www.edumaps.de/1133/1/ph3rivxfdiuc/cap4evh0xh09)
1. [Single Sign-On (SSO) and Duplicate Accounts](https://www.edumaps.de/1134/1/g0vuh2badnof/57pq7b0qqfom)
1. [Sharing and Publishing (My School)](https://www.edumaps.de/1135/1/y4e16np2wb4g/nqyuq9u7e4l5)
1. [Folder Structure for Schools](https://www.edumaps.de/1136/1/u19mvqczdz16/lofyhfj9k0ao)
1. [Booking System (Courses, Parent-Teacher Conference Days)](https://www.edumaps.de/1137/1/7x3v9759bih1/nok6uwt85ky2)
1. [Create Certificates of Participation](https://www.edumaps.de/1138/1/xhhbh8jom7jp/u3r0nx8hxel2)
1. [Padlet Import](https://www.edumaps.de/1139/1/a0e08072rdtm/0iq9v296hvfs)
1. [Lending System for Devices and Materials](https://www.edumaps.de/1140/1/o8gnutdb8wip/uxtepeysdw8v)
1. [Search, Tags and Large Pinboards](https://www.edumaps.de/1141/1/lvr9qypicbif/7z08qiljd93f)
1. [Admin FAQ from Training Sessions](https://www.edumaps.de/1142/1/slvgy1ly540x/jyk55pyndunc)
1. [Practical Examples for School Organization](https://www.edumaps.de/1143/1/tro310ism7ch/jxog9sba7zvy)

### Overview
Source: https://www.edumaps.de/1134/1/g0vuh2badnof/57pq7b0qqfom#p4604

*Why Single Sign-On and duplicate accounts are important.*

**Purpose of this pinboard**
This pinboard explains how Single Sign-On (or “SSO” for short) basically works in Edumaps and why duplicate accounts sometimes occur.

After this pinboard, you will know:

- what SSO means
- how login via external platforms should be understood
- why manual accounts and SSO accounts can conflict
- when accounts should be merged
- how admins can avoid duplicate accounts
- when support should help

**What does Single Sign-On (SSO) mean?**
SSO stands for **Single Sign-On**.

This means:

> A user does not log in directly to Edumaps with a username and password, but via an external platform.

Examples may include:

- Bildungsmediathek NRW
- Edupool
- IServ
- VIDIS
- other school login systems, see [list](https://www.edumaps.de/faq#a244000)

Edumaps then receives information from the external platform about which user has logged in.

**Why is this important for admins?**
SSO simplifies login, but it can also lead to questions.

Typical admin questions:

- Why does a teacher suddenly have two accounts?
- Why are old maps missing after an SSO login?
- Why does an account linking page appear?
- Can a manual account be connected to an SSO account?
- Which account should remain in the end?

**Key point:** SSO solves login problems, but admins need to understand account assignment.

**Typical situation in schools**
Many schools initially start with manually created accounts.

Later, SSO access is added, for example via an educational platform.

Then the following can happen:

1. The teacher already has a normal Edumaps account.
1. The teacher opens Edumaps via the external platform.
1. Edumaps technically **cannot** recognize that both accesses belong to the same person.
1. A second account is created or a link must be confirmed.

This is not an error, but a required protection mechanism.

### Understanding SSO
Source: https://www.edumaps.de/1134/1/g0vuh2badnof/57pq7b0qqfom#p4605

*Understanding login via external platforms.*

**Login via SSO (process)**
When a school uses Edumaps via an external platform (such as Vidis, IServ, Edupool, Bildungsmediathek NRW, …), users log in through that platform.

The process is roughly:

1. The user is on the external platform and clicks the “Edumaps” button or tile.
1. The external platform sends the user to Edumaps and both servers confirm the identity.
1. Edumaps receives the necessary user data.
1. Edumaps checks whether a matching account already exists.
1. The user is signed in or must confirm a link.

**Important:** Edumaps does not determine identity based on the name alone. Names are not unique enough.

> Every platform has its own identifiers!

**Why names are not enough**
A name alone is not enough to safely merge accounts.

Reasons:

- several people can have the same name
- names can be written differently
- first name and last name can be reversed
- umlauts or special characters can differ
- an account may already be connected to another identity

**Example:** Two people are named “Max Müller.” Edumaps must not automatically decide which account belongs to which SSO access.

**Account linking as a security step**
If Edumaps detects a possible connection, an account linking page may appear.

This means:

- Edumaps checks whether the external access belongs to an existing account.
- The user must confirm that it is the correct account.
- For normal accounts, additional confirmation may be required.

**Important:** This page is not an error. It prevents a third-party external login from being accidentally linked to the wrong Edumaps account.

**Shared devices**
In schools, computers, tablets, or browsers are sometimes used by several people.

Risk:

- Teacher A is still logged in to Edumaps.
- Teacher B then opens Edumaps via SSO.
- Without protection, the wrong account could be linked.

That is why Edumaps must be especially careful with account linking.

**Recommendation:** Always log out after use on shared devices.

### Identifying duplicate accounts
Source: https://www.edumaps.de/1134/1/g0vuh2badnof/57pq7b0qqfom#p4606

*How admins can spot the problem.*

**Typical signs**
A duplicate account probably exists if a user reports:

- “My maps have disappeared.”
- “I’m logged in via SSO, but I can’t see anything anymore.”
- “I suddenly have a new empty account.”
- “I can’t find my old folders.”
- “My name appears twice in user management.”

**Check:** Are there two similar accounts in user management with the same or a similar name?

**Manual account and another SSO account**
The most common case:

1. An admin manually created the teacher.
1. The teacher is already working with this account.
1. Later, the teacher uses the SSO of an external platform.
1. Edumaps creates or detects a separate SSO access.

Then two accesses exist:

- old manual account with content
- new SSO account with platform login

The goal is usually to merge both properly.

**Example: Ms. Müller has two accounts**

1. The admin created Ms. Müller manually – her maps are stored there.
1. Later, she logs in for the first time via the Bildungsmediathek. This creates a second, empty SSO account.
1. She reports: “My maps are gone.”

**Solution:** In [Merge accounts](https://www.edumaps.de/users/merge), choose the empty SSO account as the future login and merge the old manual account with the content into it. After that, she logs in via the Bildungsmediathek and finds her maps again.

**What admins should check**
Before merging, admins should check:

- Which account contains the important maps?
- Which account contains uploads?
- Which account will be used for login in the future?
- Is one of the accounts an SSO account?
- Has the user confirmed which account is meant?

**Attention:** Do not delete anything first. Check first, then merge or clean up.

**Not every similar name is a duplicate account**
Similar names do not automatically mean it is the same person.

Examples:

- two teachers with the same last name
- a student and a teacher with a similar name
- old test accounts
- accounts without names or dummy accounts

**Principle:** Only merge accounts if the identity has been clearly confirmed.

### Merging accounts
Source: https://www.edumaps.de/1134/1/g0vuh2badnof/57pq7b0qqfom#p4607

*How to turn two accounts back into one.*

**When should accounts be merged?**
Accounts should be merged if it is clear that:

- both accounts belong to the same person
- one account contains important content
- the other account is the future login access
- the user has confirmed the assignment

**Typical goal:** The user logs in via SSO in the future and still finds all previous maps and content.

**What can be transferred?**
When merging, content and assignments can be transferred from the old account to the target account.

Depending on the system function, this may include:

- own maps
- folders
- uploads
- shared content
- bookings or assignments
- other user data

**Important:** Check beforehand which account should remain.

**Basic process for admins**
Typical process:

1. Open [User management](https://www.edumaps.de/users/list) and then the page [“Merge accounts”](https://www.edumaps.de/users/merge).
1. Determine which account contains the content.
1. Determine which account will be used in the future.
1. Select both accounts accordingly in the dropdowns and check again.
1. Perform the merge.
1. Inform the user to log in again.
1. Have the result checked.

> **Attention:** A merge cannot be undone. Great care is required.

**Which account should remain?**
Usually, the account that will be used for future login should remain.

With SSO, this is often the external platform account.

Questions to help decide:

- How will the person log in in the future?
- Which account is connected to SSO?
- Where is the important content stored?
- Is one account just an empty duplicate account?

**Goal:** One clean main account with all important content and the correct future login method.

### Avoiding duplicate accounts
Source: https://www.edumaps.de/1134/1/g0vuh2badnof/57pq7b0qqfom#p4608

*It is better to work cleanly beforehand.*

**Invite teachers instead of creating them again**
If teachers already have an Edumaps account but are not yet assigned to your school, you can invite them instead of creating them again.

Advantages:

- existing content is preserved
- fewer duplicate accounts
- cleaner school assignment
- less support effort

**Recommendation:** Before creating an account manually, check whether the teacher already has an account.

**Inform users before introducing SSO**
If a school switches to SSO, teachers should be informed in advance.

Short message to the teaching staff:

- use the external platform for login in the future
- do not create new accounts in parallel
- if maps are missing, do not start over, but contact the admin
- check carefully during account linking

> Tell your users that there is an [SSO connector](https://www.edumaps.de/user/sso-connect). Here, SSO can be linked to an already existing account.

**Goal:** Users should not accidentally continue working in the wrong or empty account.

**Do not use test accounts permanently**
Test accounts are practical for training sessions, but they should not be used permanently as personal work accounts.

Problem:

- later there is no real identity
- SSO linking becomes more difficult
- content is stored in anonymous accounts
- school assignment is unclear

**Recommendation:** Clean up test accounts after training sessions or clearly separate them from real user accounts.

**Check user management regularly**
Admins should regularly check the [user list](https://www.edumaps.de/users/list).

Pay attention to:

- duplicate names
- empty or almost empty accounts
- accounts without a clear role
- teachers without school assignment
- old test accounts
- users who no longer belong to the school

**Tip:** After major SSO changes, it is worth specifically checking for duplicate accounts.

### Security and support
Source: https://www.edumaps.de/1134/1/g0vuh2badnof/57pq7b0qqfom#p4609

*When caution is necessary.*

**Why automatic merging would be dangerous**
Automatic merging based only on names can be risky.

Possible consequences:

- content ends up with the wrong user
- a third-party SSO access is linked incorrectly
- data protection problems arise
- a user gets access to someone else’s maps

That is why confirmation and admin review are important.

**When should support be contacted?**
Contact support if:

- it is unclear which account is the correct one
- important content is missing
- several similar accounts exist
- an SSO account seems to be linked incorrectly
- content is missing after a merge
- a school is currently switching to SSO

**Please include:** name of the school, affected user, description of the login method, and if possible no passwords.

**What users can do themselves**
Users can help by:

- logging out on shared devices
- not mixing multiple login methods
- not immediately creating new maps when content is missing
- telling the admin which login method they used
- providing screenshots of error messages

**Key point:** Clarify first, then continue working.

### FAQ and next step
Source: https://www.edumaps.de/1134/1/g0vuh2badnof/57pq7b0qqfom#p4610

*Short answers to typical questions.*

**Is the account linking message during first-time SSO use an error?**
The account linking page is not an error, but a security step. It appears when Edumaps wants to assign an external login to an existing account and must ensure that both really belong to the same person.

This protects users and schools from incorrect links.

The security step only appears if there is already an active login on Edumaps when SSO is used.

**Can an empty SSO account be deleted?**
That depends on the case.

If an empty SSO account was created by accident, the following should first be checked:

- Does it really belong to the same person?
- Should it be the future login account?
- Does content need to be transferred from an old account?

Merging is often better than deleting directly.

**What is the next step?**
After SSO and duplicate accounts, the next key admin topic is:

[Tutorial: Sharing, permissions and “My School”](https://www.edumaps.de/1135/1/y4e16np2wb4g/nqyuq9u7e4l5)

There, admins learn:

- how to share maps and folders securely
- when links make sense
- when classes or groups are better
- how “My School” can be used as an internal school portal

## Chapter 4: Sharing and Publishing Maps & Folders (My School)
Source: https://www.edumaps.de/1135/1/y4e16np2wb4g/nqyuq9u7e4l5

### Contents
Source: https://www.edumaps.de/1135/1/y4e16np2wb4g/nqyuq9u7e4l5#p4611

**Chapter Overview**
The tutorial series includes 12 chapters.

1. [Admin Menu and First Accounts](https://www.edumaps.de/1132/1/kbh20fr8ldnl/8f05ip0l4ejb)
1. [CSV Import and School Year Change](https://www.edumaps.de/1133/1/ph3rivxfdiuc/cap4evh0xh09)
1. [Single Sign-On (SSO) and Duplicate Accounts](https://www.edumaps.de/1134/1/g0vuh2badnof/57pq7b0qqfom)
1. [Sharing and Publishing (My School)](https://www.edumaps.de/1135/1/y4e16np2wb4g/nqyuq9u7e4l5)
1. [Folder Structure for Schools](https://www.edumaps.de/1136/1/u19mvqczdz16/lofyhfj9k0ao)
1. [Booking System (Courses, Parent-Teacher Conference Days)](https://www.edumaps.de/1137/1/7x3v9759bih1/nok6uwt85ky2)
1. [Create Certificates of Participation](https://www.edumaps.de/1138/1/xhhbh8jom7jp/u3r0nx8hxel2)
1. [Padlet Import](https://www.edumaps.de/1139/1/a0e08072rdtm/0iq9v296hvfs)
1. [Lending System for Devices and Materials](https://www.edumaps.de/1140/1/o8gnutdb8wip/uxtepeysdw8v)
1. [Search, Tags and Large Pinboards](https://www.edumaps.de/1141/1/lvr9qypicbif/7z08qiljd93f)
1. [Admin FAQ from Training Sessions](https://www.edumaps.de/1142/1/slvgy1ly540x/jyk55pyndunc)
1. [Practical Examples for School Organization](https://www.edumaps.de/1143/1/tro310ism7ch/jxog9sba7zvy)

### Overview
Source: https://www.edumaps.de/1135/1/y4e16np2wb4g/nqyuq9u7e4l5#p4612

*Share securely and organize across the school.*

**Goal of this pinboard**
This pinboard explains how admins can share maps and folders effectively and how the [My School](https://www.edumaps.de/maps/school) area can be used.

After this pinboard, you will know:

- when a sharing link is enough
- when classes, groups, or individual users are better
- what read permission and edit permission mean
- how password protection is used
- how “My School” works as an internal school portal
- which sharing method fits which situation

**Basic idea:** Not everything should be distributed via open links. For internal school content, targeted sharing is often better.

**Share or publish?**
Two different actions that are often confused:

**Share** = grant access specifically to certain people, classes, or via link. The content otherwise remains private.

**Publish** = the content appears under **“My School”** and is visible to everyone at the school.

> Important: A folder shared via link is **not yet** published. Only “My School” makes it visible school-wide.

**The three most important questions before sharing**
Before sharing a map or folder, clarify three questions:

1. **Who should get access?**
   - public
   - teaching staff
   - individual class
   - individual teacher
   - student group

1. **What should these people be allowed to do?**
   - view only
   - edit
   - add content

1. **How sensitive is the content?**
   - publicly harmless
   - internal to the school
   - personal data
   - only for certain people

The answers determine the right sharing method.

**Comparison of sharing methods**
| Situation | Recommendation |
| --- | --- |
| Public material | Read link |
| Material for teaching staff | Share to group or “My School” |
| Material for a class | Share to class |
| Collaborative editing | targeted edit permission |
| Sensitive content | account requirement, targeted sharing, if needed password |
| School-wide information | “My School” |

**Rule of thumb:** The more sensitive the content, the more targeted the sharing should be.

**Typical admin tasks**
Admins often support schools with these tasks:

- creating folders for subject conferences
- providing a school-wide map for a project day
- sharing collections of materials for teachers
- sharing folders for staff groups for collaboration
- giving students access to teaching materials
- setting password protection for special content
- structuring “My School”

This pinboard shows the basic logic behind it.

### Sharing via link
Source: https://www.edumaps.de/1135/1/y4e16np2wb4g/nqyuq9u7e4l5#p4613

*Fast, but not always suitable.*

**Read link**
A read link allows other people to view a map or folder.

Suitable for:

- public material
- parent information without sensitive data
- sample maps
- freely accessible teaching materials
- quick sharing with external people

**Important:** Anyone who knows the link can access the content (even anonymously). Therefore, do not use read links for sensitive or personal content.

**Edit link**
An edit link allows other people to change content.

Suitable for:

- short collaborative work phases
- workshops
- temporary collections
- working groups without fixed accounts

**Caution:** An edit link is powerful. Anyone with the link can edit content. Use it consciously and not for permanently sensitive school areas.

**When links make sense**
Links make sense when:

- access should be quick
- no account assignment is needed
- content is public or non-critical
- external people are involved
- material should only be read

Links are less suitable when:

- only certain people should have access
- editing permissions are granted permanently
- personal data is included
- the school wants to use clear user groups

**Check link shares regularly**
Admins should occasionally check which maps or folders are accessible via link.

Questions to check:

- Is the link still needed?
- Is the content still current?
- Is the public link still harmless?
- Are there edit links that are no longer needed?
- Should it instead be shared specifically with users?

**Tip:** For permanent internal school materials, “My School” is often better than an individual link.

> If access to a map whose link has already been publicly shared should be prevented, go to the map settings and click “Regenerate map link” under “Protect”. New links will then be generated for this map, and the old links will no longer be valid.

### Sharing with accounts
Source: https://www.edumaps.de/1135/1/y4e16np2wb4g/nqyuq9u7e4l5#p4614

*Targeted access for users, classes, and groups.*

**Share with individual users**
You can share maps or folders specifically with individual users.

Suitable for:

- collaboration with a specific teacher
- sharing with the school admin or subject lead
- targeted feedback
- more confidential content

**Advantage:** Access is tied to the account and not just to a link that can be forwarded.

**Share with classes**
If students are organized into classes, content can be shared directly with a class.

Suitable for:

- teaching materials
- weekly plan
- project map
- homework overview
- learning paths

**Advantage:** New or existing students in the class receive the appropriate access through their class assignment.

**Share with groups or project groups**
In addition to classes, groups or project groups can also be used.

Suitable for:

- clubs
- project weeks
- subject groups
- support groups
- staff working groups
- temporary course groups

**Tip:** Groups are helpful when participants do not correspond exactly to one class.

**Notifications and findability**
When content is shared specifically with users, they should be able to find it again later.

Make sure to:

- use understandable map titles
- name folders meaningfully
- not share too many individual maps without structure
- collect important content in suitable folders
- use “My School” for school-wide content

**Rule of thumb:** Sharing is not just access, but also orientation.

### Reading or editing
Source: https://www.edumaps.de/1135/1/y4e16np2wb4g/nqyuq9u7e4l5#p4615

*Set permissions consciously.*

**Read permission**
With read permission, users can view content but not change it.

Suitable for:

- finished teaching materials
- information for students
- parent information
- school-wide notices
- collections of materials

**Recommendation:** If people do not need to change anything, only grant read permission.

**Edit permission**
With edit permissions, users can change content.

Suitable for:

- joint planning
- subject conference material
- collaborative collections
- project work
- staff folders

**Caution:** Edit permissions should be granted specifically. Too many editors quickly lead to unwanted changes.

**Typical permission mistakes**
Common mistakes:

- sending an edit link instead of a read link
- sharing a map publicly even though it should only be internal
- too many people have edit permissions
- old edit permissions remain active
- content is copied multiple times instead of being maintained together

**Tip:** If there are problems, first check: Who has access and with which permission?

**Permissions matrix**
| Need | Suitable permission |
| --- | --- |
| View only | Read permission |
| Maintain content together | Edit permissions |
| Students should see tasks | Read permission or targeted task function |
| Teaching staff should add material | Edit permission for teachers or group |
| Show a public example | Read link |
| Collect together briefly | temporary edit link |

**Principle:** As much access as necessary, as little edit permission as possible.

### My School
Source: https://www.edumaps.de/1135/1/y4e16np2wb4g/nqyuq9u7e4l5#p4616

*Provide school-wide content centrally.*

**What is My School?**
**My School** is a school-wide area in which important content can be provided for the school.

Suitable for:

- information for the teaching staff
- school-wide collections of materials
- subject conference folders
- project days
- training documents
- internal organization

**Advantage:** Content is not scattered across individual accounts, but stored in one central place.

**Difference from your own area**
Your own area belongs to an individual user.

The [My School](https://www.edumaps.de/maps/school) page belongs to the school structure.

| Own area | My School |
| --- | --- |
| personal maps and folders | school-wide content |
| organized by the user | organized for the school |
| good for your own preparation | good for teaching staff and school organization |
| not automatically a school portal | central shared area |

**Recommendation:** Permanent school materials belong more in “My School” than in private folders of individual teachers.

**Publish content in “My School”**
Typical process:

1. Prepare the folder or map
1. Give the title a clear name
1. Check the content
1. Set publication for “My School” (in the map/folder settings)
1. Test access from a teacher's perspective
1. Inform the teaching staff

**Tip:** Use clear folder names such as `Subject Conferences`, `Project Days`, `Training`, `School Organization`.

**Editing in My School**
For some content, teachers should only read; for other content, they should collaborate.

Examples:

- School information: usually read-only
- Subject conference folder: edit permission for the subject group
- Project day: edit permission for the planning team
- Collection of materials: edit permission for teaching staff or group

**Important:** Grant edit permissions accurately by group and person, and review them regularly.

### Password protection and security
Source: https://www.edumaps.de/1135/1/y4e16np2wb4g/nqyuq9u7e4l5#p4617

*Additional safeguarding.*

**When password protection makes sense**
A password can be an additional layer of protection.

Useful for:

- time-limited work areas
- externally shared content
- more sensitive materials
- training documents only for participants
- maps that should not be freely forwarded

**Important:** Password protection does not replace proper permission management for personal or internal school data.

**Password protection for maps and folders**
If a map or folder should be protected, a password can be set.

Recommendations:

- do not use a trivial password
- share the password separately from the link
- change the password later if needed
- remove protection when it is no longer needed
- for sensitive content, additionally use account-based sharing

**Rule of thumb:** Link plus password is better than just a link, but targeted account sharing is often even cleaner.

**Sensitive content**
For sensitive content, admins should be especially careful.

This includes, for example:

- personal student data
- internal minutes
- non-public school documents
- materials with confidential comments
- content intended only for certain groups

**Recommendation:** If possible, do not work with open links for such content.

**Regular permission review**
At least at the beginning of the school year and after larger projects, the following should be checked:

- Which folders are public?
- Where are there edit links?
- Who has edit permissions?
- Are old project groups still authorized?
- Is school-wide content in the correct area?
- Are there private folders that actually belong in “My School”?

**Tip:** Permission maintenance is part of the admin routine.

### Practical examples
Source: https://www.edumaps.de/1135/1/y4e16np2wb4g/nqyuq9u7e4l5#p4618

*Concrete scenarios for schools.*

**Example: German subject conference**
Goal: The German department collects materials and minutes.

Recommended structure:

- Create folder `German Subject Conference`
- In the folder settings, set “Publish” to “My School”, so all students and teachers have read access to the folder
- German teachers should receive edit permissions; for this, a separate folder share via “Share to group” is necessary (choose edit permissions there). Create the group “German Subject Conference Teachers” beforehand.
- Within the folder, subfolders can be created for year levels or additional topics
- Do not issue open edit links.

**Benefit:** The materials remain easy to find school-wide and are not tied to a single teacher.

**Example: Project day**
Goal: Collect information and work progress for a project day.

Possible structure:

- Map `Project Day 2026`
- Columns for organization, groups, material, process
- Edit permission for the planning team
- Read permission for the teaching staff
- later publication for students or parents under “My School” only with reviewed content

**Tip:** Work internally during planning, then share a cleaned-up read-only version afterwards.

**Example: Staff portal**
Goal: Use “My School” as the central start page for teachers.

Possible areas:

- Current information
- Subject conferences
- Training
- School organization
- Templates
- Media and devices
- Help with Edumaps

**Recommendation:** A few clear main folders are better than many small individual maps.

**Checklist before sharing**
Before each share, briefly check:

- [ ] Who should receive access?
- [ ] Is read permission enough?
- [ ] Is edit permission really necessary?
- [ ] Does it contain personal data?
- [ ] Is a link secure enough?
- [ ] Should the map be shared instead with a class, group, or user?
- [ ] Does the content belong in “My School”?
- [ ] Is a password needed?

**Rule of thumb:** First clarify the target group, then set the sharing method.

### FAQ and next step
Source: https://www.edumaps.de/1135/1/y4e16np2wb4g/nqyuq9u7e4l5#p4619

*Short answers to typical questions.*

**Which is more secure: link or account sharing?**
For public or non-critical content, a link is practical.

For internal school or more sensitive content, account sharing is better because access is tied to specific users, classes, or groups.

**Recommendation:** Public material via link, internal content via targeted sharing.

**Can teachers collaborate in “My School”?**
Yes, if they receive suitable edit permissions.

> If you selected “My School” under “Publish”, you will find a checkbox “Teachers may edit map”. If this is activated, all teachers have edit permissions for this map. Students, however, only have read permissions.

It should be clear:

- Who may read?
- Who may edit?
- Who is responsible for the structure?
- Which content is binding?

**Tip:** For large areas, assign clear responsibilities, for example subject lead or project team.

**What is the next step?**
After permissions management and “My School”, the next topic is:

[Chapter 5: Folder Structure for Schools](https://www.edumaps.de/1136/1/u19mvqczdz16/lofyhfj9k0ao)

## Chapter 5: Folder Structure for Schools
Source: https://www.edumaps.de/1136/1/u19mvqczdz16/lofyhfj9k0ao

### Contents
Source: https://www.edumaps.de/1136/1/u19mvqczdz16/lofyhfj9k0ao#p4620

**Chapter Overview**
The tutorial series includes 12 chapters.

1. [Admin Menu and First Accounts](https://www.edumaps.de/1132/1/kbh20fr8ldnl/8f05ip0l4ejb)
1. [CSV Import and School Year Change](https://www.edumaps.de/1133/1/ph3rivxfdiuc/cap4evh0xh09)
1. [Single Sign-On (SSO) and Duplicate Accounts](https://www.edumaps.de/1134/1/g0vuh2badnof/57pq7b0qqfom)
1. [Sharing and Publishing (My School)](https://www.edumaps.de/1135/1/y4e16np2wb4g/nqyuq9u7e4l5)
1. [Folder Structure for Schools](https://www.edumaps.de/1136/1/u19mvqczdz16/lofyhfj9k0ao)
1. [Booking System (Courses, Parent-Teacher Conference Days)](https://www.edumaps.de/1137/1/7x3v9759bih1/nok6uwt85ky2)
1. [Create Certificates of Participation](https://www.edumaps.de/1138/1/xhhbh8jom7jp/u3r0nx8hxel2)
1. [Padlet Import](https://www.edumaps.de/1139/1/a0e08072rdtm/0iq9v296hvfs)
1. [Lending System for Devices and Materials](https://www.edumaps.de/1140/1/o8gnutdb8wip/uxtepeysdw8v)
1. [Search, Tags and Large Pinboards](https://www.edumaps.de/1141/1/lvr9qypicbif/7z08qiljd93f)
1. [Admin FAQ from Training Sessions](https://www.edumaps.de/1142/1/slvgy1ly540x/jyk55pyndunc)
1. [Practical Examples for School Organization](https://www.edumaps.de/1143/1/tro310ism7ch/jxog9sba7zvy)

### Overview
Source: https://www.edumaps.de/1136/1/u19mvqczdz16/lofyhfj9k0ao#p4621

**Goal of This Pinboard**
This pinboard helps school admins build a sensible folder structure for the school.

After this pinboard, you will know:

- how folders and subfolders are used
- which structure is practical for schools
- how subject conferences and projects are organized
- when a map is better than a folder
- how to avoid uncontrolled growth

**Basic idea:** A good folder structure makes important information easier to find.

**Why Structure Is Important**
Without a clear structure, many individual maps quickly emerge that are difficult to find later.

A good structure helps with:

- teaching materials
- subject conferences
- projects
- training courses
- school organization
- media and device lending
- information for the teaching staff

**Goal:** Teachers should be able to find content without having to search for a long time.

**Folder or Map?**
Use **folders** if you want to collect several maps by topic.

Use **maps** if specific content, tasks, information, or materials should be presented.

Examples:

| Situation | Recommendation |
| --- | --- |
| German department | Folder |
| Collection of materials on fairy tales | Map |
| Project day 2026 | Folder or map |
| Schedule for project day | Map |
| Training courses for teachers | Folder |

### Basic Structure
Source: https://www.edumaps.de/1136/1/u19mvqczdz16/lofyhfj9k0ao#p4622

**Recommended Main Folders**
For many schools, a simple main structure is suitable:

- **Teaching Staff**
- **Subject Areas**
- **Classes and Year Groups**
- **Projects and Events**
- **Training**
- **School Organization**
- **Media and Technology**
- **Templates and Examples**

It is better to start with a few clear folders than with too many subfolders.

**Example: Subject Areas**
A **Subject Areas** folder can contain subfolders such as:

- German
- Mathematics
- English
- Natural Sciences
- Social Sciences
- Art and Music
- Sports
- Languages
- Computer Science

Each subject folder can contain subject conference maps, collections of materials, or teaching examples.

**Example: School Organization**
A **School Organization** folder can contain:

- substitution information
- project days
- parents' evenings
- internal training courses
- media concept
- data protection information
- templates
- checklists

**Note:** Sensitive information should not simply be shared publicly via link.

**Example: Templates**
A **Templates** folder saves a lot of time.

Possible content:

- template for a teaching unit
- template for a project map
- template for parent information
- template for training
- template for a subject conference
- template for booking
- template for lending

Teachers can copy and adapt templates.

### Creating Folders
Source: https://www.edumaps.de/1136/1/u19mvqczdz16/lofyhfj9k0ao#p4623

**Create a New Folder**
Steps:

1. Open the **Maps and Folders** section and click [Folder](https://www.edumaps.de/user/folders).
1. If necessary, switch to the appropriate existing folder.
1. Create a new folder.
1. Give the folder a clear name.
1. Save the folder.

**Tip:** Use understandable names instead of internal abbreviations.

**Using Subfolders Sensibly**
Subfolders are helpful if an area would otherwise become too large.

Example:

- Subject Areas
   - German
   - Mathematics
   - English
- Projects
   - Project day 2026
   - School festival
   - Media week

**Attention:** Too many levels make navigation more difficult.

**Moving Maps into Folders**
If a map is in the wrong area, it can be moved to a suitable folder.

Typical cases:

- A private preparation should go into a subject folder.
- A training map should go into the training folder.
- A template should go into the templates folder.
- A project map should go into the project folder.

> Note: A map can be in any number of folders. In Edumaps, it is **linked**; it is not the physical map itself. Removing a map from a folder also does not delete the map, only the link. The same applies to folders inside folders.

**Recommendation:** Tidy up regularly, especially after project phases.

**Naming Conventions**
Consistent names help with finding things again.

Good examples:

- `German – Subject Conference 2026`
- `Project Day 2026 – Schedule`
- `Class 7a – Learning Materials`
- `Training – AI in the Classroom`
- `Template – Teaching Unit`

Less helpful:

- `New`
- `Test`
- `Material`
- `Map 1`

### Collaboration
Source: https://www.edumaps.de/1136/1/u19mvqczdz16/lofyhfj9k0ao#p4624

**Subject Conference Folder**
A separate folder is particularly useful for subject departments.

Contents can include:

- minutes
- collections of materials
- annual planning
- assessment rubrics
- links and media
- shared teaching projects

**Practical idea:** Each subject department gets a folder and a start map with the most important links.

**Project Groups**
Project groups often need temporary workspaces.

Examples:

- media concept
- school festival
- project week
- Erasmus project
- digitalization team
- exam preparation

After completion, the folder can be moved to a results folder.

**Teaching Staff Area**
A “Teaching Staff Area” folder can bundle central information.

Possible contents:

- homepage for teachers
- training offers
- internal guides
- templates
- frequent links
- contacts
- technical notes

**Important:** Check in advance who is allowed to see and edit this area.

### Keeping Things Organized
Source: https://www.edumaps.de/1136/1/u19mvqczdz16/lofyhfj9k0ao#p4625

**Do Not Put Everything in One Folder**
A single large collection folder quickly becomes confusing.

Better:

- a few clear main folders
- thematic subfolders
- descriptive names
- templates separated from finished content
- archive old projects

**Key idea:** A good structure does not come from many folders, but from clear decisions.

**Archive Instead of Deleting**
Not every old material has to be deleted.

If necessary, create an **Archive** folder.

Suitable for:

- old project days
- completed training courses
- former annual plans
- old templates

This keeps active areas clear without losing content.

**Regular Maintenance**
Plan fixed times to maintain the structure.

Suitable times:

- start of the school year
- mid-year change
- after project weeks
- before major training courses
- before the CSV school year change

Check the following:

- Are folders still up to date?
- Are maps in the right area?
- Is there duplicate content?
- Are old test maps still necessary?

### Checklist
Source: https://www.edumaps.de/1136/1/u19mvqczdz16/lofyhfj9k0ao#p4626

**Start Checklist**
☐ Define main folders for the school
☐ Create subject areas
☐ Create a templates folder
☐ Plan the teaching staff area
☐ Define project folders
☐ Define naming rules
☐ Clarify responsibilities
☐ Remove or archive old test content
☐ Test the structure with some teachers

**Typical Mistakes**
Avoid these mistakes:

- too many subfolders at the beginning
- unclear names such as `Miscellaneous`
- mixing private and school-wide content
- granting editing rights too broadly
- leaving test maps permanently visible
- not defining responsibility for maintenance

**Tip:** Start small and expand the structure as needed.

**Next Step**
Once the folder structure is in place, check the sharing settings. These fit well:

- [Chapter 4: Sharing and Publishing Maps & Folders (My School)](https://www.edumaps.de/1135/1/y4e16np2wb4g/nqyuq9u7e4l5)
- [Chapter 10: Search, Tags, and Large School Pinboards](https://www.edumaps.de/1141/1/lvr9qypicbif/7z08qiljd93f)

This keeps the structure not only neat, but also usable.

**Next step:**

[Chapter 6: Booking System for Courses, Parent-Teacher Meetings, and Training](https://www.edumaps.de/1137/1/7x3v9759bih1/nok6uwt85ky2)

## Chapter 6: Booking System for Courses, Parent-Teacher Conferences, and Training
Source: https://www.edumaps.de/1137/1/7x3v9759bih1/nok6uwt85ky2

### Contents
Source: https://www.edumaps.de/1137/1/7x3v9759bih1/nok6uwt85ky2#p4627

**Chapter Overview**
The tutorial series includes 12 chapters.

1. [Admin Menu and First Accounts](https://www.edumaps.de/1132/1/kbh20fr8ldnl/8f05ip0l4ejb)
1. [CSV Import and School Year Change](https://www.edumaps.de/1133/1/ph3rivxfdiuc/cap4evh0xh09)
1. [Single Sign-On (SSO) and Duplicate Accounts](https://www.edumaps.de/1134/1/g0vuh2badnof/57pq7b0qqfom)
1. [Sharing and Publishing (My School)](https://www.edumaps.de/1135/1/y4e16np2wb4g/nqyuq9u7e4l5)
1. [Folder Structure for Schools](https://www.edumaps.de/1136/1/u19mvqczdz16/lofyhfj9k0ao)
1. [Booking System (Courses, Parent-Teacher Conference Days)](https://www.edumaps.de/1137/1/7x3v9759bih1/nok6uwt85ky2)
1. [Create Certificates of Participation](https://www.edumaps.de/1138/1/xhhbh8jom7jp/u3r0nx8hxel2)
1. [Padlet Import](https://www.edumaps.de/1139/1/a0e08072rdtm/0iq9v296hvfs)
1. [Lending System for Devices and Materials](https://www.edumaps.de/1140/1/o8gnutdb8wip/uxtepeysdw8v)
1. [Search, Tags and Large Pinboards](https://www.edumaps.de/1141/1/lvr9qypicbif/7z08qiljd93f)
1. [Admin FAQ from Training Sessions](https://www.edumaps.de/1142/1/slvgy1ly540x/jyk55pyndunc)
1. [Practical Examples for School Organization](https://www.edumaps.de/1143/1/tro310ism7ch/jxog9sba7zvy)

### Overview
Source: https://www.edumaps.de/1137/1/7x3v9759bih1/nok6uwt85ky2#p4628

**Purpose of this pinboard**
This pinboard explains the [booking system](https://www.edumaps.de/46/1/g37sttnaxh/5qw9iukm7n) in Edumaps.

After this pinboard, you will know:

- which situations bookings are suitable for
- how to prepare a booking box
- how to set date, time, and number of places
- how participants register
- how to manage participant lists
- how to use CSV export and reminders

**Typical scenarios:** training courses, [parent-teacher conferences](https://www.edumaps.de/1054/1/7eki101kaq/g63s9vldb7), project courses, club registrations, and workshops.

**When is the booking system useful?**
The booking system is useful when people need to register bindingly for appointments, courses, or offers.

Examples:

- internal school training
- media center training
- parent-teacher conference appointments
- project courses
- club selections
- workshops
- material introductions
- consultation times

**Advantage:** The participant list is created automatically.

**Basic principle**
A booking in Edumaps is organized via a box.

The box contains:

- title of the offer
- description
- date and time
- maximum number of participants
- booking status
- participant list

Users see a booking button and can register if places are available.

### Prepare booking
Source: https://www.edumaps.de/1137/1/7x3v9759bih1/nok6uwt85ky2#p4629

**Create a booking map**
First, create a map for the purpose of the booking.

Examples of map titles:

- `Training at the Media Center`
- `Parent-Teacher Conference 2026`
- `Project Week – Course Selection`
- `Clubs School Year 2026`
- `Internal School Workshops`

**Tip:** One map can contain several booking boxes.

**Create a booking box**
Create a separate box for each offer.

The box should contain:

- clear title
- short description
- target group
- location or online link
- time period
- preparation notes
- contact person

**Example:** `Workshop: Edumaps for Beginners`

**Activate booking**
Activate the booking function for the box. To do this, open the box settings, click on "Bookings and Calendar," and select "Booking System."

Then check:

- Is the correct date entered?
- Is the time correct?
- Is the number of participants correct?
- Is the description understandable?
- Is it clear who may participate?

**Important:** If possible, test the view once from the user perspective.

**Set date and time**
Enter the appointment so that users can clearly recognize when the event takes place.

Pay attention to:

- date
- start time
- end time or duration in the text
- location
- online participation, if available

**Example:**
`Tuesday, June 23, 2026, 2:00–3:30 PM`

### Places and rules
Source: https://www.edumaps.de/1137/1/7x3v9759bih1/nok6uwt85ky2#p4630

**Limit the number of participants**
For many offers, a limit is useful.

Examples:

- workshop with 20 places
- parent conference slot with 1 place
- project course with 15 places
- device introduction with 8 places

When the maximum number of participants is reached, additional users can no longer register normally.

**Unlimited places**
Not every booking needs a fixed limit.

Unlimited places are suitable for:

- information events
- large online training courses
- lectures
- school-wide briefings
- open question sessions

**Note:** Even with unlimited places, a participant list is created.

**Booking deadline**
In Edumaps, start times can be set for courses, but there is no freely selectable booking deadline. The booking closes automatically **1 hour** after the course begins. This allows latecomers to still register. A course that started more than one hour ago can no longer be booked.

**Close earlier?**

- **Note it in the text:** If you want to define a different booking deadline, write the desired deadline in the box content, e.g. "Registration until 1 day before." This is a note, not a technical lock.
- **Technically lock it:** If booking should no longer be possible, edit the box and click on "Full protection" under "Protect." After that, booking is no longer possible (the box remains visible).

**Multiple appointments**
If there are multiple appointments, create multiple boxes.

Example:

- `Workshop A – Monday 2:00 PM`
- `Workshop B – Tuesday 2:00 PM`
- `Workshop C – Wednesday 2:00 PM`

This keeps each participant list clear.

### Participants
Source: https://www.edumaps.de/1137/1/7x3v9759bih1/nok6uwt85ky2#p4631

**What does the participant see?**
Participants see the information about the offer in the box and a booking button.

Depending on the settings, they see:

- title
- description
- appointment
- available places
- booking button
- their own booking

After registration, the booking also appears in the personal area under ["My Bookings"](https://www.edumaps.de/user/bookings) and can be found directly in the user's own [user calendar](https://www.edumaps.de/user/calendar).

**Make a booking**
**Process for users:**

1. Open the map.
1. Find the appropriate booking box.
1. Read the information.
1. Click the booking button.
1. Confirm the booking.
1. Check the booking in the [personal area](https://www.edumaps.de/user/bookings).

**Tip:** See also [Booking System Tutorial](https://www.edumaps.de/1046/1/mtp976esa8/ee2qawxllh).

**Book with an account or by email**

A booking is possible in two ways:

- **With an account:** Logged-in users book with one click. The booking appears under "My Bookings" and in the personal calendar, they receive the reminder and, after the course ends, the certificate of participation in their personal area.

- **By email:** People without an Edumaps account – for example parents or external participants – enter their name and email address. An account is created automatically in the process. Only then are later cancellation, the reminder before the course starts, sending the certificate of participation, and other Edumaps functions possible.

**My bookings**
Users can find their own bookings in the [personal area](https://www.edumaps.de/user/bookings).

There they can see:

- booked offers
- appointments
- status
- possibly later certificates of participation

This is especially helpful when a person has booked multiple events.

**Remove participants**
The map owner (admin) can remove participants from a booking at any time.

This is necessary in cases of:

- incorrect bookings
- cancellations
- duplicate bookings
- incorrectly assigned users
- limited places

**Note:** Carefully document important changes for official training courses. Inform the person removed from the booking.

### Administration
Source: https://www.edumaps.de/1137/1/7x3v9759bih1/nok6uwt85ky2#p4632

**View participant list**
In the booking box, you can open the participant list. To do this, click on the counter.

The list helps with:

- attendance control
- room planning
- preparation of materials
- communication with participants
- follow-up

**Practice:** Print the list as an attendance sheet for in-person events or export it as CSV.

**Copy participant data**
Participant data can be copied for organizational purposes.

Possible uses:

- prepare email distribution lists
- create attendance sheets
- transfer participants to other systems
- internal evaluation

**Data protection:** Use the data only for the purpose of the event. Use the CSV export.

**Tip:** All participants from all boxes on the map can be exported at once. Click on "Export map" and select "Participants of all bookings (csv)."

**CSV export**
CSV export is practical when the participant list is to be processed further.

Possible uses:

- spreadsheets
- mail merges
- attendance lists
- statistics
- documentation

**Tip:** Export the final list shortly after the event starts.

**Reminders**
Reminders help reduce no-shows.

Every registered participant receives a reminder email for the booked course 24 hours before the course starts.

**Tip:** The description text should also clearly state what participants need to bring or prepare.

### Practical examples
Source: https://www.edumaps.de/1137/1/7x3v9759bih1/nok6uwt85ky2#p4633

**Example: Parent-teacher conference**
If, for example, you need individual time slots for a [parent-teacher conference](https://www.edumaps.de/1054/1/7eki101kaq/g63s9vldb7), enter them in the box titles.

Example:

- `14:00–14:20`
- `14:20–14:40`
- `14:40–15:00`

Set the start time for each box.

Each box receives a participant limit of: **1 place**.

**Note:** For many teachers, a clear folder or column structure may be necessary.

**Example: Training course**
A training box should contain:

- topic
- target group
- date and time
- location or video link
- maximum places
- requirements
- contact person

After the event, the participant list can be exported or used for certificates of participation.

**Example: Project course**
For a project week, each project group can have its own booking box.

Content of the box:

- project title
- short description
- grade level
- maximum number of participants
- required materials
- supervising teacher

This allows students to select projects directly.

### Checklist
Source: https://www.edumaps.de/1137/1/7x3v9759bih1/nok6uwt85ky2#p4634

**Check before publishing**
☐ Map title is clear
☐ Each booking box has a clear title
☐ Date and time are correct
☐ Number of participants is correct
☐ Description is understandable
☐ Target group is named
☐ Location or online link is provided
☐ Test booking has been checked
☐ Participant list can be found

**Typical mistakes**
Avoid these mistakes:

- unclear titles such as `Appointment 1`
- missing time
- incorrect maximum number of participants
- multiple appointments in a single box
- no target group stated
- map link not shared correctly
- booking not tested from the user perspective

**Next step**
If bookings are used for training courses, the next topic is especially important:

[Chapter 7: Automatically create certificates of participation](https://www.edumaps.de/1138/1/xhhbh8jom7jp/u3r0nx8hxel2)

It explains how personalized certificates are created from booked events.

## Chapter 7: Automatically Create Certificates of Participation
Source: https://www.edumaps.de/1138/1/xhhbh8jom7jp/u3r0nx8hxel2

### Contents
Source: https://www.edumaps.de/1138/1/xhhbh8jom7jp/u3r0nx8hxel2#p4635

**Chapter Overview**
The tutorial series includes 12 chapters.

1. [Admin Menu and First Accounts](https://www.edumaps.de/1132/1/kbh20fr8ldnl/8f05ip0l4ejb)
1. [CSV Import and School Year Change](https://www.edumaps.de/1133/1/ph3rivxfdiuc/cap4evh0xh09)
1. [Single Sign-On (SSO) and Duplicate Accounts](https://www.edumaps.de/1134/1/g0vuh2badnof/57pq7b0qqfom)
1. [Sharing and Publishing (My School)](https://www.edumaps.de/1135/1/y4e16np2wb4g/nqyuq9u7e4l5)
1. [Folder Structure for Schools](https://www.edumaps.de/1136/1/u19mvqczdz16/lofyhfj9k0ao)
1. [Booking System (Courses, Parent-Teacher Conference Days)](https://www.edumaps.de/1137/1/7x3v9759bih1/nok6uwt85ky2)
1. [Create Certificates of Participation](https://www.edumaps.de/1138/1/xhhbh8jom7jp/u3r0nx8hxel2)
1. [Padlet Import](https://www.edumaps.de/1139/1/a0e08072rdtm/0iq9v296hvfs)
1. [Lending System for Devices and Materials](https://www.edumaps.de/1140/1/o8gnutdb8wip/uxtepeysdw8v)
1. [Search, Tags and Large Pinboards](https://www.edumaps.de/1141/1/lvr9qypicbif/7z08qiljd93f)
1. [Admin FAQ from Training Sessions](https://www.edumaps.de/1142/1/slvgy1ly540x/jyk55pyndunc)
1. [Practical Examples for School Organization](https://www.edumaps.de/1143/1/tro310ism7ch/jxog9sba7zvy)

### Overview
Source: https://www.edumaps.de/1138/1/xhhbh8jom7jp/u3r0nx8hxel2#p4636

**Goal of This Pinboard**
This pinboard explains how certificates of participation are prepared and generated in Edumaps.

After this pinboard, you will know:

- which prerequisites are necessary
- why the letterhead is important
- how bookings and certificates are connected
- how participants receive their certificate
- which mistakes you should avoid

**Benefit:** Many certificates can be created without manual individual work. This can save you many hours of work.

**When Is This Useful?**
Certificates of participation are especially useful for:

- training courses
- media center events
- in-house teacher training
- workshops
- online courses
- certificate events
- introductions to devices or platforms

**Practical benefit:** Instead of writing each certificate individually, Edumaps can use the booking data and provide them automatically - without additional effort.

**Basic Principle**
Certificates of participation are linked to the booking system.

The process is:

1. Prepare the [letterhead](https://www.edumaps.de/docs?template).
1. Create the event as a booking.
1. Participants register.
1. The event takes place.
1. One hour after the start, the booking closes automatically; the "Finish" button appears.
1. Finish the course manually.
1. Certificates are provided automatically.

**Important:** The data should be checked before the course is completed.

### Prerequisites
Source: https://www.edumaps.de/1138/1/xhhbh8jom7jp/u3r0nx8hxel2#p4637

**Set Up the Letterhead**
The [letterhead](https://www.edumaps.de/docs?template) should be set up before the first event.

It typically contains:

- name of the school or institution
- address
- contact address
- telephone number
- website
- possibly a logo or additional information

**Note:** The letterhead ensures that certificates look official and consistent.

**Use the Booking System**
Certificates of participation generally require an event with a [booking](https://www.edumaps.de/46/1/g37sttnaxh/5qw9iukm7n).

The booking provides:

- participants
- event title
- date
- booking status
- assignment to the course

Without clean booking data, incomplete or incorrect certificates may be created later.

**Check Participant Data**
Check the participant list before completing the event.

Pay attention to:

- correct names
- no test accounts
- no duplicate bookings
- correct participants
- removed cancellations

**Tip:** Remove incorrect bookings before creating the certificates.

**Give the Event a Clear Name**
The event title will later appear on the certificate.

Good titles:

- `Training: Edumaps for Admins`
- `Workshop: AI Language Courses with Edumaps`
- `Introduction to the Lending System`

Unfavorable titles:

- `Test`
- `Course 1`
- `New Box`

### Preparation
Source: https://www.edumaps.de/1138/1/xhhbh8jom7jp/u3r0nx8hxel2#p4638

**Write the Box Content Clearly**
The booking box should contain clear information.

Recommended details:

- topic
- target group
- learning objective
- date and time
- venue
- presenter or contact person
- requirements

**Tip:** Anything that will later be relevant on the certificate should already be clearly named in the event.

**Clarify Participation Conditions**
Edumaps does not automatically check attendance – every registered participant receives a certificate after the course is finished. Therefore, remove non-participants before finishing.

Also define internally when a certificate will be awarded.

Possible rules:

- participation in the entire event
- minimum attendance
- successful participation
- manual review by the organizer

**Important:** Edumaps organizes the certificate. The professional decision about participation lies with the school or institution.

**Run a Test**
Run a test before the first real training session.

Test the following:

- create a booking
- book test participants
- check the participant list
- complete the course
- display the certificate
- check email or retrieval

This helps you identify missing information early.

### Complete the Course
Source: https://www.edumaps.de/1138/1/xhhbh8jom7jp/u3r0nx8hxel2#p4639

**After the Event**
After the event, first check the participant list.

Questions:

- Who was actually present?
- Do participants need to be removed?
- Are any people missing?
- Are the names and data correct?
- Is the event title correct?

Only after that should the event be completed.

**Finish the Course**
When the event is completed, the course can be finished.

The final participant data is then used.

**Warning:** Do not finish the course too early if changes to the participant list are still necessary.

**Provide Certificates**
One hour after the course begins, a "Finish" button appears on the box. Click it and the course will be finished.

This locks the box and all participants receive an email with a link to their personalized certificate of participation.

Participants receive:

- a notification
- access via their personal area
- the option to download

**Practice:** Tell participants where they can find their certificate.

### Participant View
Source: https://www.edumaps.de/1138/1/xhhbh8jom7jp/u3r0nx8hxel2#p4640

**Where Can Participants Find the Certificate?**
Participants can find certificates in the area of their [bookings](https://www.edumaps.de/user/bookings?cert).

There they can see:

- booked events
- completed courses
- available certificates

**Note:** The exact process should be briefly explained in the event or final email.

**What to Do If a Certificate Is Missing?**
If a certificate is missing, check the following:

- Was the person actually registered?
- Has the course already been finished?
- Is the person logged in with the correct account?
- Was the person accidentally removed from the participant list?
- Is there a duplicate account?

For duplicate accounts, [Chapter 3](https://www.edumaps.de/1134/1/g0vuh2badnof/57pq7b0qqfom) may help.

**Wrong Name on the Certificate**
If a name appears incorrectly, the cause is usually the user account.

Check:

- first name and last name
- account used
- duplicate account
- dummy account

Correct the account data if possible before the final completion.

### Quality and Data Protection
Source: https://www.edumaps.de/1138/1/xhhbh8jom7jp/u3r0nx8hxel2#p4641

**Check Official Information**
Regularly check whether the information in the letterhead is up to date.

Especially important:

- school name
- address
- email address
- telephone number
- contact person
- logo or institution details

**Tip:** Check the letterhead before each larger training series.

**Observe Data Protection**
Participant data is personal data.

Please note:

- do not share participant lists unnecessarily
- store CSV files securely
- make certificates accessible only to authorized persons
- delete old exports regularly
- use only necessary data

**Principle:** As little data as possible, as much as necessary.

**Internal Responsibility**
Define who is responsible for certificates.

Possible roles:

- organizer
- school admin
- media center
- training management
- secretariat

**Recommendation:** One person checks the participant list before certificates are generated.

### Checklist
Source: https://www.edumaps.de/1138/1/xhhbh8jom7jp/u3r0nx8hxel2#p4642

**Before the Course**
☐ Letterhead set up
☐ Event title is clear
☐ Booking box filled in correctly
☐ Date and time checked
☐ Target group named
☐ Number of participants defined
☐ Test booking completed
☐ Responsibility clarified

**After the Course**
☐ Participant list opened
☐ Attendance checked
☐ Incorrect bookings removed
☐ Names checked
☐ Event title checked
☐ Course finished
☐ Certificates checked
☐ Participants informed about retrieval

**Typical Mistakes**
Avoid these mistakes:

- letterhead not set up
- event is only called `Test`
- course is finished before checking
- incorrect participants remain in the list
- participants use duplicate accounts
- CSV export is stored insecurely

**Rule of thumb:** First check, then complete.

## Chapter 8: Padlet Import to Edumaps
Source: https://www.edumaps.de/1139/1/a0e08072rdtm/0iq9v296hvfs

### Contents
Source: https://www.edumaps.de/1139/1/a0e08072rdtm/0iq9v296hvfs#p4643

**Chapter Overview**
The tutorial series includes 12 chapters.

1. [Admin Menu and First Accounts](https://www.edumaps.de/1132/1/kbh20fr8ldnl/8f05ip0l4ejb)
1. [CSV Import and School Year Change](https://www.edumaps.de/1133/1/ph3rivxfdiuc/cap4evh0xh09)
1. [Single Sign-On (SSO) and Duplicate Accounts](https://www.edumaps.de/1134/1/g0vuh2badnof/57pq7b0qqfom)
1. [Sharing and Publishing (My School)](https://www.edumaps.de/1135/1/y4e16np2wb4g/nqyuq9u7e4l5)
1. [Folder Structure for Schools](https://www.edumaps.de/1136/1/u19mvqczdz16/lofyhfj9k0ao)
1. [Booking System (Courses, Parent-Teacher Conference Days)](https://www.edumaps.de/1137/1/7x3v9759bih1/nok6uwt85ky2)
1. [Create Certificates of Participation](https://www.edumaps.de/1138/1/xhhbh8jom7jp/u3r0nx8hxel2)
1. [Padlet Import](https://www.edumaps.de/1139/1/a0e08072rdtm/0iq9v296hvfs)
1. [Lending System for Devices and Materials](https://www.edumaps.de/1140/1/o8gnutdb8wip/uxtepeysdw8v)
1. [Search, Tags and Large Pinboards](https://www.edumaps.de/1141/1/lvr9qypicbif/7z08qiljd93f)
1. [Admin FAQ from Training Sessions](https://www.edumaps.de/1142/1/slvgy1ly540x/jyk55pyndunc)
1. [Practical Examples for School Organization](https://www.edumaps.de/1143/1/tro310ism7ch/jxog9sba7zvy)

### Overview
Source: https://www.edumaps.de/1139/1/a0e08072rdtm/0iq9v296hvfs#p4644

**Goal of This Pinboard**
This pinboard explains how existing Padlets can be transferred to Edumaps.

After this pinboard, you will know:

- when the import makes sense
- how to prepare a Padlet
- which sharing setting is required
- how the import works
- what should be checked after the import
- which errors occur frequently

**Goal:** Existing materials should not have to be recreated.

**When Does Padlet Import Make Sense?**
The import makes sense if schools or teachers want to switch from Padlet to Edumaps.

Typical cases:

- transfer existing teaching collections
- back up material collections
- continue using old Padlets
- prepare for a data protection transition
- reduce the workload for colleagues during the changeover

**Important:** After the import, permissions and content should be checked again in Edumaps.

**What Will Be Transferred?**
Depending on the content, different elements will be transferred.

Typical content:

- texts
- links
- images
- files
- structure of the pinboard
- individual posts

**Note:** Very large files, external content, or special functions may have limitations and must be checked after the import.

### Preparation in Padlet
Source: https://www.edumaps.de/1139/1/a0e08072rdtm/0iq9v296hvfs#p4645

**Open Padlet**
First, open the Padlet that is to be imported.

Check:

- Is it the correct Padlet?
- Is all content up to date?
- Are there duplicate or old posts?
- Does it contain sensitive data?
- Should everything really be transferred?

**Tip:** Clean up the Padlet before importing if it contains many old test posts.

**Prepare Sharing**
For the import to be possible, Edumaps must be granted access to the Padlet.

To do this, the Padlet is usually shared for the Edumaps import.

Make sure to:

- choose the correct role
- not assign view-only access if more is required
- review the sharing settings again after the import

**Important:** Only import content for which you have the necessary rights.

**Grant Edumaps Access**
Add Edumaps access in Padlet for the import.

Typical process:

1. Open the Padlet.
1. Open the share or sharing menu.
1. Add the Edumaps address as a collaborator via email service(at)edumaps.de.
1. Select the required role **"Admin"**.
1. Save the changes.

**Note:** If your school has special data protection requirements, coordinate the process internally.

**Copy Link**
Copy the link to the Padlet.

Make sure to:

- copy the full URL
- not use shortened or internal links
- select the correct Padlet
- test the access

The link will then be needed for the import in Edumaps.

### Import in Edumaps
Source: https://www.edumaps.de/1139/1/a0e08072rdtm/0iq9v296hvfs#p4646

**Start Import**
In Edumaps, open the [Padlet import function](https://www.edumaps.de/import/padlet).

Process:

1. Log in to Edumaps.
1. Click **"Create map"** and then choose **"Import"**.
1. In the import dialog, select **"Padlet pinboard"**.
1. Paste the Padlet link.
1. Start the import.
1. Wait for the result.

**Note:** Importing large Padlets may take longer.

**Alternative: Import with Developer Key**
For your own **padlet.org domain** or self-hosted Padlets, inviting service@edumaps.de does not work. In that case, use your own developer key:

1. Open the developer settings in the Padlet dashboard, for example at `example.padlet.org/dashboard/settings/developers`.
1. Click **"Generate API key"**.
1. Copy the Padlet API key.
1. Enter the key in the Edumaps import dialog in the **"Padlet developer key"** field.
1. Paste the link to your Padlet above and click **"Import"**.

> **Note:** You only need the developer key for padlet.org domains or self-hosted instances. For normal padlet.com pinboards, inviting Edumaps as a collaborator/administrator is sufficient (see the previous steps).

**Find the Imported Map**
After the import, a new map is created in Edumaps.

Check:

- title of the imported map
- number of contents
- columns or structure
- media and files
- links
- display on different devices

**Recommendation:** Rename the map clearly after the import.

**Do Not Start the Import Twice**
Do not start the same import multiple times in direct succession.

Otherwise, this may result in:

- duplicate maps
- duplicate content
- unclear versions
- confusion among colleagues

If something is missing, first check the imported map and only repeat the import deliberately.

### Post-Processing
Source: https://www.edumaps.de/1139/1/a0e08072rdtm/0iq9v296hvfs#p4647

**Check Content**
After the import, all content should be reviewed.

Check especially:

- Are texts complete?
- Do all links work?
- Are images displayed?
- Are files available?
- Are videos accessible?
- Are columns and order correct?

**Important:** An import does not replace a content quality check.

**After the Import**
Check the following after the import:

- Who is allowed to see the map?
- Who is allowed to edit it?
- Should the map be moved into a school folder?
- Should it appear under **"My School"**?
- Is a password required?

**Recommendation:** First review imported maps internally and only then share them.

**Assign Folder**
Place the imported map in the appropriate folder.

Examples:

- German department
- project week
- training courses
- templates
- staff
- teaching materials

This ensures the map remains easy to find later.

**Adjust Title and Description**
After the import, the title often needs to be adjusted.

Good titles:

- `German – Fairy Tale Materials Grade 5`
- `Project Week 2026 – Offers`
- `Training – Digital Pinboards`

If needed, add a short introduction box:

- What is it about?
- Who is the map intended for?
- How should it be used?

### Error Cases
Source: https://www.edumaps.de/1139/1/a0e08072rdtm/0iq9v296hvfs#p4648

**Import Does Not Work**
If the import does not work, first check:

- Is the Padlet link correct?
- Does Edumaps have access?
- Has the Padlet been deleted or made private?
- Was the correct role assigned?
- Does the Padlet contain very large files?
- For a padlet.org domain: Was the developer key entered correctly?

If the error remains, contact support with the link and a short description. In any case, send the exact error message as a screenshot.

**Media Missing**
If media are missing, there may be various causes.

Possible reasons:

- file is too large
- file is no longer accessible
- external source blocks access
- rights are missing in the original system
- video is hosted on a platform with access restrictions

Check missing media individually and add them manually if necessary.

**Structure Looks Different**
Padlet and Edumaps are not structured identically.

After the import, it may be necessary to:

- rename columns
- move boxes
- correct the order
- add introduction boxes
- remove old notes

**Goal:** The imported map should be easy to use in Edumaps, not just transferred technically.

**Sensitive Content**
Check before and after the import whether sensitive content is present.

Examples:

- names of students
- private photos
- personal comments
- assessments
- internal information

If such content is no longer needed, remove it before sharing further.

### Organizing the Transition
Source: https://www.edumaps.de/1139/1/a0e08072rdtm/0iq9v296hvfs#p4649

**Inform Colleagues**
A short internal guide helps during the transition.

Explain:

- why importing is being done
- who is allowed to import
- where imported maps should be moved
- how permissions are set
- who helps with questions

**Tip:** Collect successful imported examples in a templates folder.

**Define Quality Standards**
Set a minimum standard for imported maps.

Example:

- clear title
- suitable folder assignment
- introduction box available
- links checked
- permissions checked
- old Padlet notes removed
- sensitive data checked

This makes the transition look clean and professional.

**Check Padlet Sharing After Import**
After a successful import, the Padlet sharing settings should be reviewed again.

Questions:

- Does Edumaps still need access?
- Should the Padlet be archived?
- Should the Padlet sharing be removed?
- Are there school requirements for deletion?

**Note:** The import is only one step in the transition process.

### Checklist
Source: https://www.edumaps.de/1139/1/a0e08072rdtm/0iq9v296hvfs#p4650

**Before the Import**
☐ Opened the correct Padlet
☐ Checked the content
☐ Checked sensitive data
☐ Granted Edumaps access
☐ Copied the full link
☐ Clarified responsibilities
☐ Chosen a suitable import time

**After the Import**
☐ Opened the imported map
☐ Adjusted the title
☐ Checked the content
☐ Checked the media
☐ Tested the links
☐ Reset the permissions
☐ Moved the map to the appropriate folder
☐ Checked the old Padlet sharing

**Typical Errors**
Avoid these errors:

- copying the wrong link
- not granting Edumaps access
- starting the import multiple times
- not checking permissions after the import
- passing on sensitive data without checking
- leaving the imported map in the wrong folder

**Rule of thumb:** Import, check, organize, then share.

## Chapter 9: Lending system for devices and materials
Source: https://www.edumaps.de/1140/1/o8gnutdb8wip/uxtepeysdw8v

### Contents
Source: https://www.edumaps.de/1140/1/o8gnutdb8wip/uxtepeysdw8v#p4651

**Chapter Overview**
The tutorial series includes 12 chapters.

1. [Admin Menu and First Accounts](https://www.edumaps.de/1132/1/kbh20fr8ldnl/8f05ip0l4ejb)
1. [CSV Import and School Year Change](https://www.edumaps.de/1133/1/ph3rivxfdiuc/cap4evh0xh09)
1. [Single Sign-On (SSO) and Duplicate Accounts](https://www.edumaps.de/1134/1/g0vuh2badnof/57pq7b0qqfom)
1. [Sharing and Publishing (My School)](https://www.edumaps.de/1135/1/y4e16np2wb4g/nqyuq9u7e4l5)
1. [Folder Structure for Schools](https://www.edumaps.de/1136/1/u19mvqczdz16/lofyhfj9k0ao)
1. [Booking System (Courses, Parent-Teacher Conference Days)](https://www.edumaps.de/1137/1/7x3v9759bih1/nok6uwt85ky2)
1. [Create Certificates of Participation](https://www.edumaps.de/1138/1/xhhbh8jom7jp/u3r0nx8hxel2)
1. [Padlet Import](https://www.edumaps.de/1139/1/a0e08072rdtm/0iq9v296hvfs)
1. [Lending System for Devices and Materials](https://www.edumaps.de/1140/1/o8gnutdb8wip/uxtepeysdw8v)
1. [Search, Tags and Large Pinboards](https://www.edumaps.de/1141/1/lvr9qypicbif/7z08qiljd93f)
1. [Admin FAQ from Training Sessions](https://www.edumaps.de/1142/1/slvgy1ly540x/jyk55pyndunc)
1. [Practical Examples for School Organization](https://www.edumaps.de/1143/1/tro310ism7ch/jxog9sba7zvy)

### Overview
Source: https://www.edumaps.de/1140/1/o8gnutdb8wip/uxtepeysdw8v#p4652

**Goal of this pinboard**
This pinboard explains how the [lending system](https://www.edumaps.de/1055/1/pec424hul6/wenurto5ez) can be used in Edumaps.

After this pinboard, you will know:

- which items can be lent out
- how a lending map is structured
- how rental items are set up
- how reservations work
- how blocked days and calendar views help
- how loan slips can be used

**Typical use:** iPad cases, projectors, cameras, robotics sets, experimental materials, and media center devices.

**When is the lending system useful?**
The lending system is useful when items need to be reserved or borrowed for a certain period of time.

Examples:

- iPad cases
- laptop carts
- projectors
- cameras
- microphones
- robotics cases
- experiment boxes
- book crates
- VR headsets
- media center materials

**Advantage:** Reservation, overview, and documentation are all in one place.

**Basic principle**
A lending item is displayed in a box.

The box contains:

- name of the item
- description
- availability
- reservation calendar
- usage notes
- lending conditions
- if applicable, loan slip

One map can contain several lending items.

### Preparing the lending map
Source: https://www.edumaps.de/1140/1/o8gnutdb8wip/uxtepeysdw8v#p4653

**Create a lending map**
First, create a map for the lending area.

Examples:

- `School media lending`
- `Media center device lending`
- `Reserve iPad cases`
- `Robotics and technology lending`
- `Borrow experimental materials`

**Tip:** Use columns for categories, for example tablets, projectors, audio, robotics.

**Define categories**
Good categorization makes lending clearer.

Possible columns:

- tablets and laptops
- presentation technology
- audio and video
- robotics and coding
- natural sciences
- other materials

**Recommendation:** Choose categories that match your school's inventory.

**Create an introductory box**
Place a short introductory box at the beginning of the map.

Content:

- Who is allowed to borrow?
- How does the reservation work?
- Where does pickup take place?
- How does the return process work?
- Who is the contact person?
- Which rules apply?

This way, basic questions do not need to be repeated in every item box.

### Create items
Source: https://www.edumaps.de/1140/1/o8gnutdb8wip/uxtepeysdw8v#p4654

**Lending item as a box**
Create a separate box for each lendable item.

The box should contain:

- item name
- short description
- quantity or scope
- accessories
- pickup location
- return note
- contact person
- terms of use

**Example:** `iPad case no. 1: 16 iPads with charging cables`

**Write a good description**
A good description reduces follow-up questions.

Example:

**iPad case no. 1**
16 iPads with charging cables, transport case, and quick guide. Suitable for teaching projects, research, presentations, and collaborative work.

**Pickup:** Media room 1

**Return:** fully charged and with accessories

**List accessories**
List accessories directly in the box.

Examples:

- charging cables
- adapters
- remote control
- bag
- manual
- tripod
- microphone
- spare batteries

**Tip:** An accessory list helps with return and inspection.

**Usage rules**
Usage rules should be short and clear.

Examples:

- handle devices carefully
- report damage immediately
- return all accessories completely
- return devices charged
- reservation only for school purposes
- return at the agreed time

**Note:** The clearer the rules, the fewer conflicts arise later.

### Reservation
Source: https://www.edumaps.de/1140/1/o8gnutdb8wip/uxtepeysdw8v#p4655

**Enable reservation**
Open the box settings. Click on `Bookings and calendar` and activate the `lending system`.

In the settings, you can select the initial view, the blocked days after each lending process, in week view the time span of a day, bookable time slots, and whether school periods should be used instead of clock times.

Then check:

- Is the calendar visible?
- Is the item named correctly?
- Are reservations possible?
- Are the rules understandable?
- Does a test reservation work?

**Recommendation:** Test the process before publishing.

**Select time period**
Users select the desired lending period in the calendar. Activate the initial view (month, week, or day) in the box settings.

Depending on the item, the following may make sense:

- single lesson period (week view)
- full day (month view)
- several days (month view)
- full week (month view)
- project period (week view)

**Tip:** In week and day view, you can define the **reservation duration** under `Bookable time slots` in minutes (e.g. for 2 hours = enter 120 minutes).

**Calendar views**
Calendar views help keep an overview.

Useful are:

- month view for long-term planning
- week view for the school week
- day view for many short loans

**In practice:** For iPad cases, the week view is often especially helpful.

**Blocked days**
You can define blocked days in the settings. Blocked days prevent reservations for the specified number of days after a successful loan.

Suitable for:

- maintenance
- inventory
- repair
- internal use
- transport days

**Example:** A robotics case was borrowed and returned. Two days are needed to sort the parts again and prepare the case.

If you want to block individual calendar days (e.g. a fixed maintenance date), simply book this period yourself as admin. Then other users will no longer be able to reserve that period.

### Administration
Source: https://www.edumaps.de/1140/1/o8gnutdb8wip/uxtepeysdw8v#p4656

**Keep track of all loans**
Admins can check and manage reservations centrally. For this purpose, the [All rental items](https://www.edumaps.de/user/rentals) page is available. It lists all active rental items across all your maps.

The overview shows:

- who borrowed the item
- which period is booked
- which item is affected
- whether overlaps occur
- when return is planned

**Tip:** Check upcoming loans regularly, especially before school holidays.

The [dashboard](https://www.edumaps.de/dashboard) also shows you when loans are coming up.

**A user's loans**
For questions, it is helpful to see the loans of a specific user. Click on the reservation in the calendar or in the timeline ([All rental items](https://www.edumaps.de/user/rentals)).

Typical questions:

- Which devices has the teacher reserved?
- Are there multiple open loans?
- When is the return?
- Which reservation is causing a conflict?

This allows problems to be clarified quickly.

**Change or remove reservation**
Reservations sometimes need to be adjusted. You can do this directly in the calendar (click on the loan, then edit) or under [“All rental items”](https://www.edumaps.de/user/rentals).

Reasons:

- date postponed
- device defective
- incorrect period
- double booking
- user canceled
- item is needed internally

**Note:** Be sure to inform affected users if a reservation is changed.

**Loan slip**
A loan slip can document the handover. You can open it by clicking on the loan in the calendar and then selecting `Loan slip` in the dialog.

The loan slip contains:

- user's name and email
- item
- period
- accessories
- return note (optionally defined in the letterhead or in the box content)
- signature or confirmation

**In practice:** Especially useful for expensive devices or media center lending.

### Practical examples
Source: https://www.edumaps.de/1140/1/o8gnutdb8wip/uxtepeysdw8v#p4657

**Example: iPad case**
Box title: `iPad case no. 1`

Content:

- 16 iPads
- charging cables and transport case
- pickup in the media room
- return fully charged
- reservation possible by day
- contact person: school IT

**Tip:** Add a checklist for return and accessories.

**Example: projector**
Box title: `Mobile projector`

Content:

- projector with HDMI cable
- remote control
- power cable
- transport bag
- suitable for classrooms without fixed technology
- return on the same day

**Note:** List accessories especially carefully.

**Example: robotics case**
Box title: `Robotics case – grades 5 to 8`

Content:

- robotics sets
- manual
- accessory box
- suitable for group work
- reservation possible by week
- introduction recommended

**In practice:** Link directly to an introductory map or manual.

### Checklist
Source: https://www.edumaps.de/1140/1/o8gnutdb8wip/uxtepeysdw8v#p4658

**Before publishing**
☐ Lending map created
☐ Categories defined
☐ Introductory box created
☐ Item boxes created
☐ Accessories described
☐ Rules formulated
☐ Reservation function tested
☐ Blocked days checked
☐ Contact person named

**Regular maintenance**
☐ Mark defective devices
☐ Enter maintenance days
☐ Check old reservations
☐ Update accessory lists
☐ Check pickup location
☐ Monitor return process
☐ Add new devices
☐ Remove items that are no longer available

**Typical mistakes**
Avoid these mistakes:

- mixing several devices unclearly in one box
- not listing accessories
- not naming a return rule
- forgetting blocked days
- skipping the test reservation
- not naming a contact person
- leaving defective devices bookable

**Rule of thumb:** A good description prevents a bad return.

**Next step**
The more devices, items, and maps are created at your school, the more important fast retrieval becomes. That is exactly what the next chapter is about.

[Chapter 10: Structuring Search, Tags, and Large School Pinboards](https://www.edumaps.de/1141/1/lvr9qypicbif/7z08qiljd93f)

There you will learn how to quickly find individual devices or materials using content and box search – such as by device number – and how to keep large school pinboards organized with tags.

## Chapter 10: Structuring Search, Tags, and Large School Pinboards
Source: https://www.edumaps.de/1141/1/lvr9qypicbif/7z08qiljd93f

### Contents
Source: https://www.edumaps.de/1141/1/lvr9qypicbif/7z08qiljd93f#p4659

**Chapter Overview**
The tutorial series includes 12 chapters.

1. [Admin Menu and First Accounts](https://www.edumaps.de/1132/1/kbh20fr8ldnl/8f05ip0l4ejb)
1. [CSV Import and School Year Change](https://www.edumaps.de/1133/1/ph3rivxfdiuc/cap4evh0xh09)
1. [Single Sign-On (SSO) and Duplicate Accounts](https://www.edumaps.de/1134/1/g0vuh2badnof/57pq7b0qqfom)
1. [Sharing and Publishing (My School)](https://www.edumaps.de/1135/1/y4e16np2wb4g/nqyuq9u7e4l5)
1. [Folder Structure for Schools](https://www.edumaps.de/1136/1/u19mvqczdz16/lofyhfj9k0ao)
1. [Booking System (Courses, Parent-Teacher Conference Days)](https://www.edumaps.de/1137/1/7x3v9759bih1/nok6uwt85ky2)
1. [Create Certificates of Participation](https://www.edumaps.de/1138/1/xhhbh8jom7jp/u3r0nx8hxel2)
1. [Padlet Import](https://www.edumaps.de/1139/1/a0e08072rdtm/0iq9v296hvfs)
1. [Lending System for Devices and Materials](https://www.edumaps.de/1140/1/o8gnutdb8wip/uxtepeysdw8v)
1. [Search, Tags and Large Pinboards](https://www.edumaps.de/1141/1/lvr9qypicbif/7z08qiljd93f)
1. [Admin FAQ from Training Sessions](https://www.edumaps.de/1142/1/slvgy1ly540x/jyk55pyndunc)
1. [Practical Examples for School Organization](https://www.edumaps.de/1143/1/tro310ism7ch/jxog9sba7zvy)

### Overview
Source: https://www.edumaps.de/1141/1/lvr9qypicbif/7z08qiljd93f#p4660

**Goal of this pinboard**
This pinboard shows how large Edumaps areas can remain easy to find and clearly organized.

After this pinboard, you will know:

- when search helps
- when **tags** are useful
- how large maps are structured
- how boxes can be found again more easily
- how teaching staff can maintain collections of materials

> [Tags](https://www.edumaps.de/1100/1/qom3b15q28/swpwzxd9cy) are keywords used to mark content so that it can later be found or filtered more easily. In Edumaps, there are two types: tags for an **entire map** and tags for individual **boxes**. The section "Using tags" shows how tags are written in each case.

**Goal:** A lot of content should remain usable without users losing track.

**Problem with large collections**
Over time, school Edumaps areas grow significantly.

Typical problems:

- too many maps
- too many boxes
- unclear titles
- duplicate materials
- old content next to current content
- missing keywords
- long search times

**Solution:** Use clear titles, good folders, search, and tags together.

**Search, tags, or folders?**
Use the tools differently:

| Tool | Good for |
| --- | --- |
| Folders | permanent structure |
| Search | quickly finding known terms |
| Tags | thematic filters within large collections |
| clear titles | orientation at first glance |

**Recommendation:** Do not solve everything with tags. A basic structure remains important.

### Using search
Source: https://www.edumaps.de/1141/1/lvr9qypicbif/7z08qiljd93f#p4661

**Search in folders**
Searching in [folders](https://www.edumaps.de/user/folders) helps you find maps or content more quickly.

Useful for:

- large subject areas
- many project maps
- old training courses
- collections of materials
- staff folders

**Tip:** Good titles significantly improve search quality.

You can also find basic tutorials on folders [here](https://www.edumaps.de/folder/1004/1/mtpjedbr82/jq573vl9a9).

**Search in maps**
In large maps, box search can help you find individual boxes again. To do this, click the search zoom icon at the top right.

Examples:

- inventory or device number (e.g. device no. 35651)
- name of a teacher
- technical term
- topic
- class
- material type
- event

While typing the search term, the boxes are filtered and the search term is highlighted in green within the boxes.

**Practice:** In very large maps, also use tags or tables of contents.

**Search across an entire folder**
You can search not only within a map, but across **all boxes in all maps of a folder**. This is helpful if you do not know which map contains the content.

Typical cases:
- find a device number in the entire lending folder
- search for a material across a subject area
- track down a term across all project maps

This means you do not have to open each map individually.

**Tip:** You can also search on the "My Maps" page for a box in all your maps. Simply enter the search term in the search field.

**Choose search terms deliberately**
To make content findable, important terms should appear in the title or text.

Example:

Instead of: `Material`
Better: `Mathematics – Fractions – Grade 6`

Instead of: `Info`
Better: `Parents' Evening – Media Use – Grade 7`

**Key idea:** If nobody names it, nobody will find it later.

**Keep old content findable**
Old content does not always have to be deleted.

Better:

- move it to archive folders
- add the year to the title
- note the status in the box
- mark old versions

Examples:

- `Project Week 2025 – Archive`
- `Edumaps Training – March 2026`
- `Old template – do not use anymore`

### Using tags
Source: https://www.edumaps.de/1141/1/lvr9qypicbif/7z08qiljd93f#p4662

**What are tags?**
Tags are keywords that can be used to mark content by topic. Tags are always written in lowercase and without spaces. Hyphens are allowed.

In Edumaps, you assign tags in two places (with different notation):

**1. Map tags:** Enter these tags in the map settings under "Tags" in the input field – **without a hash symbol**. This tags the entire map.

Examples: `german`, `grade-5`, `training`

**2. Box tags:** Write these tags **with a hash symbol** directly in the box content or the box title. This tags an individual box.

Examples: `#homework`, `#video`, `#grade7`

Tags are especially helpful when content should belong to several categories at the same time.

**When tags make sense**
Tags make sense when a rigid folder structure is not enough.

Examples:

- A box belongs to German and Grade 6.
- A material fits AI, media education, and training.
- A person is an English teacher and media coordinator.
- A project affects several year groups.

**Advantage:** One piece of content can have several keywords.

**Define tag rules**
Set simple rules so tags do not become chaotic.

Recommendations:

- use only a few main tags
- standardize the spelling
- avoid similar duplicates
- write year groups consistently
- name subjects consistently
- tidy up tags regularly

**Example:** Do not use `math`, `mathematics`, and `maths` at the same time.

**Tip:** With an admin account, you can define tags for your teachers. Go to the ["My Account"](https://www.edumaps.de/user/account) page and enter "Suggested tags" there. These tags will then be shown to teachers as suggestions.

**Example tags for schools**
The following examples are map tags (without a hash).

Possible tag groups:

- **Subjects:** german, mathematics, english, biology
- **Year groups:** grade-5, grade-6, upper-school
- **Format:** video, worksheet, presentation, link
- **Target group:** teachers, students, parents
- **Topic:** ai, media-education, exam, project
- **Status:** template, draft, archive

### Large maps
Source: https://www.edumaps.de/1141/1/lvr9qypicbif/7z08qiljd93f#p4663

**Plan large maps**
Large maps should be planned deliberately.

Questions before setting them up:

- Who uses the map?
- How much content will go into it?
- Which columns does the map need?
- Are there recurring categories?
- Are tags needed?
- Who maintains the map?

**Tip:** Plan the structure first, then add a lot of content.

**Name columns meaningfully**
Column titles should provide orientation.

Good examples:

- Introduction
- Materials
- Tasks
- Examples
- Templates
- Dates
- FAQ
- Archive

Less helpful:

- Column 1
- Miscellaneous
- New
- General

**Use an introduction box**
Place an introduction box at the beginning of large maps.

It should explain:

- the goal of the map
- the target group
- the structure
- important tags
- maintenance notes
- contact persons

**Benefit:** New users understand more quickly how the map is intended to work.

**Tip:** Also create a box "📑 Table of Contents" as the first box on the map. In the box editor, you can add an automatic table of contents via "Modules" and then choose "Table of Contents".

**Archive column**
An archive column can reduce the load on large maps.

Suitable for:

- old dates
- completed tasks
- earlier versions
- no longer current notes
- completed project phases

**Note:** If the archive becomes too large, move old content to a separate archive map.

### Practical examples
Source: https://www.edumaps.de/1141/1/lvr9qypicbif/7z08qiljd93f#p4664

**Introduce the staff**
A map for the staff can use tags. See example:

[Our Staff – Teachers in Profile](https://www.edumaps.de/1212/1/ywmw0cujf7/nqqohuvte2)

Examples:

- Subject: `german`, `english`, `mathematics`
- Role: `class-teacher`, `media`, `counseling`
- Area: `secondary-level-1`, `upper-school`

This allows parents to find contact persons more quickly.

**Collection of materials**
A subject material collection can combine tags.

Examples for boxes:

- `Fractions – Explainer Video – Grade 6`
- `Fairy Tales – Writing Task – Grade 5`
- `Simple Past – Exercise – Grade 7`

Tags:

- `subject`
- `grade`
- `material-type`
- `competency-area`

**Training area**
A training area can become filterable by topic.

Tags:

- `admin`
- `beginners`
- `ai-module`
- `booking-system`
- `lending`
- `data-protection`
- `teaching`

**Practice:** This helps new teachers find suitable introductory materials more quickly.

### Maintenance
Source: https://www.edumaps.de/1141/1/lvr9qypicbif/7z08qiljd93f#p4665

**Responsibilities**
Large collections need maintenance.

Clarify:

- Who may add content?
- Who checks old content?
- Who maintains tags?
- Who archives completed topics?
- Who decides on structural changes?

**Recommendation:** Each large area should have at least one responsible person.

**Tidy up regularly**
Plan regular maintenance points.

Suitable times:

- start of the school year
- change of semester
- end of a project phase
- before training series
- after larger imports

When doing so, check titles, tags, old content, and responsibilities.

**Avoid duplicates**
Duplicate content makes collections confusing.

Avoid:

- uploading the same file multiple times
- several maps with the same purpose
- similar tags
- old and new versions without labeling

**Tip:** Better one good central map than five half-finished parallel maps.

### Checklist
Source: https://www.edumaps.de/1141/1/lvr9qypicbif/7z08qiljd93f#p4666

**Structure check**
☐ Map has a clear purpose
☐ Columns are clearly named
☐ Introduction box available
☐ important terms appear in the title
☐ Tags are consistent
☐ Archive area available
☐ Responsibility is clarified
☐ old content is checked regularly

**Tag check**
☐ few main tags defined
☐ subjects named consistently
☐ year groups written consistently
☐ no duplicates such as `Math` and `Mathematics`
☐ material types are clear
☐ status tags used when needed
☐ tags checked regularly

**Next step**
**Goes well together with**

If your structure grows and content should remain easy to find, combine this pinboard with:

- [Chapter 4: Sharing and Publishing Maps & Folders (My School)](https://www.edumaps.de/135/1/0z6sjd527289/ybkftqwo8wt2)
- [Chapter 5: Folder Structure for Schools](https://www.edumaps.de/1136/1/u19mvqczdz16/lofyhfj9k0ao)

**Next step**

Next tutorial: [Chapter 11: Admin FAQ from Training Sessions](https://www.edumaps.de/1142/1/slvgy1ly540x/jyk55pyndunc)

## Chapter 11: Admin FAQ from Training Sessions
Source: https://www.edumaps.de/1142/1/slvgy1ly540x/jyk55pyndunc

### Contents
Source: https://www.edumaps.de/1142/1/slvgy1ly540x/jyk55pyndunc#p4667

**Chapter Overview**
The tutorial series includes 12 chapters.

1. [Admin Menu and First Accounts](https://www.edumaps.de/1132/1/kbh20fr8ldnl/8f05ip0l4ejb)
1. [CSV Import and School Year Change](https://www.edumaps.de/1133/1/ph3rivxfdiuc/cap4evh0xh09)
1. [Single Sign-On (SSO) and Duplicate Accounts](https://www.edumaps.de/1134/1/g0vuh2badnof/57pq7b0qqfom)
1. [Sharing and Publishing (My School)](https://www.edumaps.de/1135/1/y4e16np2wb4g/nqyuq9u7e4l5)
1. [Folder Structure for Schools](https://www.edumaps.de/1136/1/u19mvqczdz16/lofyhfj9k0ao)
1. [Booking System (Courses, Parent-Teacher Conference Days)](https://www.edumaps.de/1137/1/7x3v9759bih1/nok6uwt85ky2)
1. [Create Certificates of Participation](https://www.edumaps.de/1138/1/xhhbh8jom7jp/u3r0nx8hxel2)
1. [Padlet Import](https://www.edumaps.de/1139/1/a0e08072rdtm/0iq9v296hvfs)
1. [Lending System for Devices and Materials](https://www.edumaps.de/1140/1/o8gnutdb8wip/uxtepeysdw8v)
1. [Search, Tags and Large Pinboards](https://www.edumaps.de/1141/1/lvr9qypicbif/7z08qiljd93f)
1. [Admin FAQ from Training Sessions](https://www.edumaps.de/1142/1/slvgy1ly540x/jyk55pyndunc)
1. [Practical Examples for School Organization](https://www.edumaps.de/1143/1/tro310ism7ch/jxog9sba7zvy)

### Overview
Source: https://www.edumaps.de/1142/1/slvgy1ly540x/jyk55pyndunc#p4668

**Purpose of This Pinboard**
This pinboard collects common admin questions from training sessions and school onboarding.

It helps provide quick answers about:

- admin menu
- user management
- CSV import
- SSO and duplicate accounts
- permissions and sharing
- bookings
- lending
- Padlet import

**Use:** This pinboard can serve as a first support contact point for school admins.

**How This FAQ Can Be Used**
Use this FAQ as:

- internal admin help
- a supplement to training sessions
- a reference for media centers
- a link for new school admins
- a collection of typical support questions

**Tip:** Add school-specific answers in your own boxes or copy suitable questions into your school map.

**Quick Orientation**
The series “Edumaps for Admins” includes 12 chapters. If needed, open the appropriate one directly:

1. [Admin Menu and First Accounts](https://www.edumaps.de/1132/1/kbh20fr8ldnl/8f05ip0l4ejb)
1. [CSV Import and School Year Change](https://www.edumaps.de/1133/1/ph3rivxfdiuc/cap4evh0xh09)
1. [Single Sign-On (SSO) and Duplicate Accounts](https://www.edumaps.de/1134/1/g0vuh2badnof/57pq7b0qqfom)
1. [Sharing and Publishing (My School)](https://www.edumaps.de/1135/1/y4e16np2wb4g/nqyuq9u7e4l5)
1. [Folder Structure for Schools](https://www.edumaps.de/1136/1/u19mvqczdz16/lofyhfj9k0ao)
1. [Booking System (Courses, Parent-Teacher Conference Days)](https://www.edumaps.de/1137/1/7x3v9759bih1/nok6uwt85ky2)
1. [Create Certificates of Participation](https://www.edumaps.de/1138/1/xhhbh8jom7jp/u3r0nx8hxel2)
1. [Padlet Import](https://www.edumaps.de/1139/1/a0e08072rdtm/0iq9v296hvfs)
1. [Lending System for Devices and Materials](https://www.edumaps.de/1140/1/o8gnutdb8wip/uxtepeysdw8v)
1. [Search, Tags and Large Pinboards](https://www.edumaps.de/1141/1/lvr9qypicbif/7z08qiljd93f)
1. [Admin FAQ from Training Sessions](https://www.edumaps.de/1142/1/slvgy1ly540x/jyk55pyndunc)
1. [Practical Examples for School Organization](https://www.edumaps.de/1143/1/tro310ism7ch/jxog9sba7zvy)

### Admin and Account
Source: https://www.edumaps.de/1142/1/slvgy1ly540x/jyk55pyndunc#p4669

**Why Don’t I See Any Admin Functions?**
Possible reasons:

- You are logged in with the wrong account.
- Your account has not yet been enabled as an admin.
- The school assignment is missing.
- You are using a regular teacher account.

First check [My Account](https://www.edumaps.de/user/account). If no admin role is shown there, the admin role for the account must be checked.

**Where Can I Find the Data Processing Agreement?**
Admins can find the [Data Processing Agreement](https://www.edumaps.de/legal/avv) in the account area.

There, the school-related information is completed and the agreement is confirmed.

**Important:** This step should be completed early, before Edumaps is widely used with teachers and students.

**What Is the Letterhead For?**
The [letterhead](https://www.edumaps.de/docs?template) is used for automatically generated documents.

It is especially important for:

- certificates of participation
- training sessions
- courses
- official documents of the school or institution

Check the name, address, and contact details carefully.

### Accounts
Source: https://www.edumaps.de/1142/1/slvgy1ly540x/jyk55pyndunc#p4670

**Do I Have to Use Real Email Addresses?**
Not always.

For students, accounts can also be created with dummy email addresses if no school email addresses are available.

Real email addresses are useful for:

- teachers
- SSO use
- password reset
- official communication

Dummy addresses are practical for prepared student access.

**What Are Accounts Without Names?**
Accounts without names are prepared access accounts.

Suitable for:

- test accounts
- training sessions
- quick student onboarding
- anonymous starter accounts
- adding names later

After creation, login passes or the CSV file should be saved immediately.

**Why Can’t I See Passwords Later?**
Initial passwords are not stored visibly for security reasons. The server only stores a long cryptic sequence of numbers and characters using an algorithm. This means the password cannot be recovered.

Therefore:

- download the CSV file immediately
- print or save login passes immediately
- store access data securely

If access data is lost, new passwords must be set.

**When Should I Delete Users?**
Users should only be deleted or removed if it is clear what should happen to their content.

Check beforehand:

- Does the user have their own maps?
- Does the account really belong to the school?
- Is it a duplicate account?
- Should the user only be removed from the school?
- Are there legal retention obligations?

If in doubt, remove or deactivate first—do not delete too quickly.

### CSV and Classes
Source: https://www.edumaps.de/1142/1/slvgy1ly540x/jyk55pyndunc#p4671

**Do I Have to Upload All Students in the CSV Import?**
That depends on the goal.

For individual new students, a small CSV with only the new people is sufficient.

For a clean school year transition, a complete current list is often more useful.

**Recommendation:** Before larger imports, check the existing structure and define a clear import strategy.

**What Happens If Email Addresses Change?**
If an email address has changed, it must be clearly identifiable which existing account should be updated.

Check especially:

- first name and last name
- class
- previous email
- new email
- possible duplicate accounts

In unclear cases, it is better to check manually.

**What Do I Do If Names Are Identical?**
Identical names can occur in some cases.

Check additional identifiers:

- class
- email address
- username
- note in the account, if used

**Important:** Do not merge blindly if two people have the same name.

**Are Classes Created Automatically?**
If the CSV file contains a class column, classes can be created or updated automatically during import.

Make sure spelling is consistent:

- `7a` instead of alternating between `7A`, `Class 7a`, `7 a`
- no typos
- no unnecessary spaces

Consistent class names avoid duplicates.

### SSO and Duplicate Accounts
Source: https://www.edumaps.de/1142/1/slvgy1ly540x/jyk55pyndunc#p4672

**Why Do Duplicate Accounts Occur?**
Duplicate accounts often occur when a user was first created manually and later another account is created via SSO.

Typical causes:

- different email addresses
- SSO provides a different identifier
- user logs in via another platform
- old account was not yet connected

[Chapter 3](https://www.edumaps.de/1134/1/g0vuh2badnof/57pq7b0qqfom) explains how to handle such cases safely.

**What Does Merging Accounts Mean?**
When merging, two accounts are combined into one meaningful target account.

The goal is usually to:

- keep content
- keep the correct login
- remove the duplicate account
- avoid confusion

Beforehand, it should be checked which account should be used in the future.

**Can I Simply Merge Any Account?**
No. Before merging, it must be clear that both accounts belong to the same person.

Check:

- name
- email address
- school
- SSO access
- existing content
- last login

If unsure, do not merge—clarify first.

**Which Single Sign-Ons Work with Edumaps?**
Depending on the federal state and context, Edumaps can be used via different single sign-ons (SSO) if access has been configured accordingly. A list of all available integrations can be found [here](https://www.edumaps.de/faq#a244000).

Important:

- Users must log in using the correct route.
- Existing manual accounts can cause duplicate accounts.
- In case of problems, it must be checked which account is being used.

For specific login problems, account data and the login route should be checked.

**Note:** If two different platforms are used for SSO, multiple duplicate accounts can also occur.

### Sharing and Permissions
Source: https://www.edumaps.de/1142/1/slvgy1ly540x/jyk55pyndunc#p4673

**Share by Link or Share with a Class?**
A link is quick, but less targeted.

Sharing with a class/group or user is better if access should be controlled.

| Situation | Recommendation |
| --- | --- |
| public information | read-only link |
| staff only | targeted sharing |
| class works with map | share with class |
| sensitive content | account requirement and targeted permissions |

**Read Permission or Edit Permission?**
Read permission means: users can view content.

Edit permission means: users can change content.

Edit permissions should only be granted if collaborative editing is actually intended.

**Tip:** If unsure, grant read permission first.

**What Is My School?**
The [“My School” page](https://www.edumaps.de/maps/school) is a school-wide area for central content.

Suitable for:

- information for staff
- material collections
- school projects
- templates
- internal tutorials

Always check which users are allowed to see or edit the content. Students and teachers have access to “My School”.

**Can I Password-Protect Maps?**
Yes, maps and folders can also be additionally protected if needed.

Password protection is useful for:

- time-limited access
- semi-public materials
- additional security requirements

For sensitive content, targeted sharing with accounts is usually better than a widely shared password.

### Bookings and Lending
Source: https://www.edumaps.de/1142/1/slvgy1ly540x/jyk55pyndunc#p4674

**What Do I Use the Booking System For?**
The booking system is suitable for:

- training sessions
- parent-teacher conferences
- project courses
- club registrations
- workshops
- counseling appointments

It automatically creates participant lists and makes organization easier.

**How Are Certificates of Participation Created?**
Certificates of participation are connected to bookings and completed events.

Important elements are:

- correct letterhead
- clearly defined event
- checked participant list
- course completion

Details can be found in [Chapter 7](https://www.edumaps.de/1138/1/xhhbh8jom7jp/u3r0nx8hxel2).

**What Is the Lending System For?**
The [lending system](https://www.edumaps.de/1140/1/o8gnutdb8wip/uxtepeysdw8v) is intended for reservable items.

Examples:

- iPad cases
- projectors
- cameras
- robotics sets
- experiment materials
- media center devices

Each item should be clearly described and provided with rules.

**Can I Manage Payments or Invoices?**
If payments, sales, or PayPal are to be used, the specific use case must be checked.

For schools, the following are usually more important:

- booking
- participant list
- certificate of participation
- lending
- documentation

Invoice or payment processes should be reviewed separately from an organizational and legal perspective.

### Import and Support
Source: https://www.edumaps.de/1142/1/slvgy1ly540x/jyk55pyndunc#p4675

**How Do I Import Padlets?**
The typical process is:

1. Open Padlet.
1. Grant Edumaps access.
1. Copy the Padlet link.
1. Start the import in Edumaps.
1. Check the imported map.
1. Reassign permissions.
1. Move the map to the appropriate folder.

Details can be found in [Chapter 8](https://www.edumaps.de/1139/1/a0e08072rdtm/0iq9v296hvfs).

**What Should I Tell Support?**
Specific information helps in support cases.

Useful details are:

- affected school
- username or email address
- link to the map
- exact error message
- screenshot
- login route, for example SSO or username
- time of the problem

The more precise the information, the faster help can be provided.

**What Should I Check Myself First?**
Before contacting support, check:

- Am I in the correct account?
- Do I have admin rights?
- Is the correct school assigned?
- Is the map shared correctly?
- Is the user using the correct login route?
- Is there a duplicate account?
- Are permissions or password protection active?

## Chapter 12: Practical Examples for School Organization
Source: https://www.edumaps.de/1143/1/tro310ism7ch/jxog9sba7zvy

### Contents
Source: https://www.edumaps.de/1143/1/tro310ism7ch/jxog9sba7zvy#p4676

**Chapter Overview**
The tutorial series includes 12 chapters.

1. [Admin Menu and First Accounts](https://www.edumaps.de/1132/1/kbh20fr8ldnl/8f05ip0l4ejb)
1. [CSV Import and School Year Change](https://www.edumaps.de/1133/1/ph3rivxfdiuc/cap4evh0xh09)
1. [Single Sign-On (SSO) and Duplicate Accounts](https://www.edumaps.de/1134/1/g0vuh2badnof/57pq7b0qqfom)
1. [Sharing and Publishing (My School)](https://www.edumaps.de/1135/1/y4e16np2wb4g/nqyuq9u7e4l5)
1. [Folder Structure for Schools](https://www.edumaps.de/1136/1/u19mvqczdz16/lofyhfj9k0ao)
1. [Booking System (Courses, Parent-Teacher Conference Days)](https://www.edumaps.de/1137/1/7x3v9759bih1/nok6uwt85ky2)
1. [Create Certificates of Participation](https://www.edumaps.de/1138/1/xhhbh8jom7jp/u3r0nx8hxel2)
1. [Padlet Import](https://www.edumaps.de/1139/1/a0e08072rdtm/0iq9v296hvfs)
1. [Lending System for Devices and Materials](https://www.edumaps.de/1140/1/o8gnutdb8wip/uxtepeysdw8v)
1. [Search, Tags and Large Pinboards](https://www.edumaps.de/1141/1/lvr9qypicbif/7z08qiljd93f)
1. [Admin FAQ from Training Sessions](https://www.edumaps.de/1142/1/slvgy1ly540x/jyk55pyndunc)
1. [Practical Examples for School Organization](https://www.edumaps.de/1143/1/tro310ism7ch/jxog9sba7zvy)

### Overview
Source: https://www.edumaps.de/1143/1/tro310ism7ch/jxog9sba7zvy#p4677

**Goal of This Pinboard**
This pinboard shows concrete practical examples of how schools can use Edumaps for organizational purposes.

After this pinboard, you will have template ideas for:

- staff portal
- subject conferences
- project days
- training courses
- parent evenings
- media lending
- start of the school year
- onboarding new teachers

**Goal:** Admins should not only know the functions, but also directly see meaningful usage scenarios.

**How to Use These Examples**
The examples can serve as templates.

Possible uses:

- recreate them as a map
- copy individual boxes
- adapt the structure to your own school
- show examples in training sessions
- inspire the admin team

**Tip:** Start with a small scenario and gradually expand usage.

**Selection Criterion**
First, choose a scenario that solves a real problem.

Good starting points:

- bundle information for staff
- make training courses bookable
- organize device lending
- collect subject materials
- coordinate a project day

**Not ideal:** Using Edumaps only as storage without a clear structure.

### Staff
Source: https://www.edumaps.de/1143/1/tro310ism7ch/jxog9sba7zvy#p4678

**Practical Example: Staff Portal**
A central map for staff can serve as a start page.

Column idea:

- Current updates
- Dates
- Important links
- Templates
- Training courses
- Contacts
- FAQ

**Benefit:** Teachers can find key information in one place.

> Open and copy this template

[Template: Staff Portal](https://www.edumaps.de/1144/1/8531onzgbokn/3rj7djk7cubn)

**Boxes for the Staff Portal**
Possible boxes:

- Weekly information
- Link to the substitution plan
- Internal school forms
- Media concept
- Training offers
- School IT contacts
- Data protection notes
- Edumaps tutorials
- frequently asked questions

**Tip:** Archive old weekly information regularly.

**Practical Example: New Teachers**
An onboarding map for new teachers saves many individual conversations.

Contents:

- access to Edumaps
- important school folders
- digital tools
- contacts
- copy templates
- subject areas
- booking devices
- internal processes

**Benefit:** New teachers receive a clear starting point.

> Open and copy this template

[Template: Onboarding New Teachers](https://www.edumaps.de/1145/1/mrd1o10ou4yq/3p9psj3iivah)

### Subject Conferences
Source: https://www.edumaps.de/1143/1/tro310ism7ch/jxog9sba7zvy#p4679

**Practical Example: Subject Conference Folder**
Each subject department gets its own folder.

Example structure:

- Start map
- Minutes
- Annual planning
- Teaching materials
- Assessment
- Exams
- Templates
- Archive

**Tip:** A start map explains what is located where.

**Start Map of a Subject Department**
A subject department start map can include:

- current dates
- resolutions
- material collections
- curricula
- assessment rubrics
- links
- contacts
- archive notes

**Advantage:** New and existing teachers can find their way around more quickly.

> Open and copy this template

[Template: Department Committee (Overall Portal)](https://www.edumaps.de/1146/1/4yul6kzwoouz/85g2s5c7uki2)

**Practical Example: Shared Material Collection**
A material collection can be structured by grade level or topic.

Column idea:

- Grade 5
- Grade 6
- Grade 7
- Grade 8
- Exam preparation
- Templates
- Links

Add tags for material type and competency area.

> Open and copy this template

[Template: Material Library for Schools](https://www.edumaps.de/1119/1/u5tfrw2zhv/tfas14nooo)

### Projects
Source: https://www.edumaps.de/1143/1/tro310ism7ch/jxog9sba7zvy#p4680

**Practical Example: Project Day**
A project day map can represent the entire organization.

Column idea:

- Overview
- Project offers
- Rooms
- Groups
- Material
- Schedule
- Results
- FAQ

**Additional option:** Project offers can be connected to the booking system.

> Open and copy this template

[Template: Project Day](https://www.edumaps.de/1147/1/6v72wb50xlqm/8engrvp5aftn)

**Make Project Offers Bookable**
Each project can be created as its own booking box.

Content:

- project title
- description
- supervising teacher
- grade level
- maximum number of participants
- material
- room

Students or teachers can then register directly.

**Practical Example: School Festival**
A school festival map can bundle tasks and information.

Column idea:

- Planning
- Booths
- Helpers
- Rooms
- Technology
- Schedule
- Public relations
- Follow-up

**Tip:** Use an archive column for completed tasks.

### Training Courses
Source: https://www.edumaps.de/1143/1/tro310ism7ch/jxog9sba7zvy#p4681

**Practical Example: Training Portal**
A training portal can bundle all internal and external offers.

Column idea:

- Current offers
- Getting started with Edumaps
- AI and teaching
- Data protection
- Media education
- Recordings
- Certificates of participation

**Benefit:** Teachers can find training courses and materials centrally.

**Training with Booking**
A training box should include:

- title
- target group
- learning objectives
- date and time
- location or video link
- maximum places
- presenter
- certificate of participation

After the event, the participant list can be checked and the course can be completed.

**Practical Example: Self-Paced Course**
A map can also serve as a self-paced course.

Column idea:

- Introduction
- Step 1
- Step 2
- Exercises
- Examples
- Completion
- FAQ

**Suitable for:** Edumaps introduction, AI features, data protection basics, or media education.

### Parents and Students
Source: https://www.edumaps.de/1143/1/tro310ism7ch/jxog9sba7zvy#p4682

**Practical Example: Parent Evening**
A parent evening map can bundle information before and after the event.

Contents:

- topic
- agenda
- presentation
- important links
- FAQ
- contact
- materials for download

**Note:** Set permissions carefully if external parents receive access.

> Open and copy this template

[Template: Parent Meeting](https://www.edumaps.de/1149/1/g5omi2rhyc0a/v939f3vl36sz)

**Practical Example: Class Start Page**
A class start page can provide orientation for students.

Contents:

- weekly plan
- important links
- tasks
- dates
- materials
- rules
- contacts

**Tip:** Define clear rules for collaborative work.

**Practical Example: Exam Preparation**
An exam preparation map can bundle materials.

Column idea:

- Overview
- Topic list
- Explanations
- Exercises
- Solutions
- Schedule
- Questions

**Benefit:** Students can find everything in one place and work independently.

### Media and Technology
Source: https://www.edumaps.de/1143/1/tro310ism7ch/jxog9sba7zvy#p4683

**Practical Example: Media Lending**
A media lending map organizes reservable devices.

Column idea:

- Tablets
- Projectors
- Audio
- Cameras
- Robotics
- Experimental materials
- Rules

Each item gets its own lending box with description and reservation.

> Open and copy this template

[Template: Media Lending](https://www.edumaps.de/1148/1/grqcj490ms2y/ec25ne3oh1uf)

**Practical Example: School IT Help**
A school IT map can collect frequent technical questions.

Boxes:

- Wi-Fi access
- reset password
- Edumaps login
- SSO notes
- device lending
- contacts
- support form

**Benefit:** Fewer recurring individual inquiries.

**Practical Example: Digital Tools**
A map for digital tools can explain which services the school uses.

Contents:

- Edumaps
- learning platform
- email
- video conference
- file storage
- data protection rules
- support channels

**Tip:** Separate roles clearly: teachers, students, parents.

### Getting Started and Expansion
Source: https://www.edumaps.de/1143/1/tro310ism7ch/jxog9sba7zvy#p4684

**First Useful School Map**
If you are just getting started, choose a simple first project.

Good starter projects:

- staff portal
- training overview
- subject department folder
- media lending
- project day
- onboarding new teachers

**Recommendation:** Do not start all scenarios at the same time.

**Create a Pilot Group**
A small pilot group makes getting started easier.

Suitable participants are:

- admin
- media coordinators
- one subject department
- school IT
- training management
- interested teachers

The pilot group tests structure, permissions, and clarity.

**Success Criteria**
After a few weeks, check:

- Can teachers find the content?
- Are fewer questions being asked by email?
- Are permissions set correctly?
- Is the map being maintained?
- Are responsibilities clearly assigned?
- Which boxes are used frequently?

**Goal:** Edumaps should reduce work, not create new disorder.

### Checklist
Source: https://www.edumaps.de/1143/1/tro310ism7ch/jxog9sba7zvy#p4685

**Template Check**
☐ selected a real school problem
☐ target group is clear
☐ map title is unambiguous
☐ columns are named meaningfully
☐ introduction box is available
☐ permissions checked
☐ responsibility clarified
☐ pilot group involved
☐ maintenance date defined

**What to Implement First?**
Priority for many schools:

1. staff portal
1. subject conference structure
1. training bookings
1. media lending
1. project day
1. onboarding new teachers
1. parent evening information

**Tip:** Start where the benefit is immediately visible.

**Matching Subject Chapters**
Combine these practical examples with the matching subject chapters:

- [Folder Structure: Chapter 5](https://www.edumaps.de/1136/1/u19mvqczdz16/lofyhfj9k0ao)
- [Bookings: Chapter 6](https://www.edumaps.de/1137/1/7x3v9759bih1/nok6uwt85ky2)
- [Certificates of Participation: Chapter 7](https://www.edumaps.de/1138/1/xhhbh8jom7jp/u3r0nx8hxel2)
- [Lending: Chapter 9](https://www.edumaps.de/1140/1/o8gnutdb8wip/uxtepeysdw8v)
- [Search and Tags: Chapter 10](https://www.edumaps.de/1141/1/lvr9qypicbif/7z08qiljd93f)

This turns ideas directly into implementable Edumaps structures.

💖 Congratulations. You have now completed all the admin basics.

## Chapter 1: Ready in 20 Minutes: My First Teaching Map
Source: https://www.edumaps.de/1150/1/g8jr7svptf3y/94deafl6eqvx

### Contents
Source: https://www.edumaps.de/1150/1/g8jr7svptf3y/94deafl6eqvx#p5104

**Chapter overview**
The tutorial series contains 12 chapters.

1. [Ready in 20 Minutes: My First Teaching Map](https://www.edumaps.de/1150/1/g8jr7svptf3y/94deafl6eqvx)
1. [Involve Students Without Login Chaos: Link, QR Codes](https://www.edumaps.de/1151/1/9ma8vc5m5hj9/x4wjco54tqcw)
1. [Sharing and Protecting: Read, Edit, Password](https://www.edumaps.de/1152/1/zj2cl4wyqshs/fobxtep4m0rw)
1. [Student Submissions and Feedback: Comments, Likes, Ratings](https://www.edumaps.de/1153/1/5v3mj1zqn4me/nfnk0putwpuo)
1. [Files, iPads and Media: Using Uploads Safely](https://www.edumaps.de/1154/1/u27gjdga2s2v/wj5uoi7gj92v)
1. [Working Together with Colleagues: Maps, Boxes and Material](https://www.edumaps.de/1155/1/tl6levqmlq1f/uuj0al55uifh)
1. [Small Modules with a Big Effect](https://www.edumaps.de/1156/1/bawi5464lnob/6gg59zv3ckiv)
1. [Bookings and Loans: Rooms, Devices and Courses](https://www.edumaps.de/1157/1/pc5c21qsl2hy/pbv2mkwl0mel)
1. [Using AI Sensibly: Maps, Quizzes and Language Courses](https://www.edumaps.de/1158/1/oh7lhgmwx378/m77edo14z2uz)
1. [Import, Export and Server Change: Backing Up Maps](https://www.edumaps.de/1159/1/g11mce3trjt7/70d6omfssffl)
1. [Using Folders Properly: Collecting and Structuring Maps](https://www.edumaps.de/1160/1/ezkvkf9tdcbf/xc4sxd2isnjg)
1. [Public Profile and Following](https://www.edumaps.de/1161/1/xq5431ecrawf/7r3qqj1qst2m)

### Orientation
Source: https://www.edumaps.de/1150/1/g8jr7svptf3y/94deafl6eqvx#p5105

**Welcome: Your first teaching map**
In this pinboard, you will create your first teaching map in Edumaps step by step.

After about 20 minutes, you will have:
- created a new map
- set a title and subtitle
- selected a suitable format
- adjusted the background and font
- edited your first columns and boxes
- saved and checked the map

Tip: It is best to work directly in Edumaps at the same time.

**Orientation after login**
After logging in, you first see your personal workspace. On a computer, the sidebar is on the left.

There you will find the most important areas:

• **Dashboard:** This is where you see current notes, new activities or recently used content.

• **My Maps:** This is where maps are stored that you created yourself or that have been permanently assigned to you.

• **Folders:** Folders help you collect several maps, for example for a subject, a class, a teaching unit or a training course.

• **Received:** This is where you find maps and folders that other people have shared with you.

• **Notifications:** At the top right, you see notices about new shares, comments or activities.

Important: A shared map is not automatically stored under “My Maps”. If another teacher shares a map with you, you will usually first find it under “Received” or via the notification.

Tip: If you want to use a shared map regularly later, place it in a suitable folder.

**What is a map?**
A map is a visual workspace for teaching and organization.

You can use it, for example, to:
- collect materials
- provide assignments
- create weekly plans
- organize links and media
- collect student contributions
- make lesson steps visible

A map/pinboard usually consists of columns and boxes.

**Example for this exercise**
For this introduction, we will create an example teaching map on the topic: “Countries in Europe”

Possible subtitle: “Materials and tasks for Grade 7”

Of course, you can also use your own topic, for example:

- analyzing fairy tales
- reviewing fractions
- pets in primary science
- introduction to the French Revolution
- German weekly plan

### Create a map
Source: https://www.edumaps.de/1150/1/g8jr7svptf3y/94deafl6eqvx#p5106

**Create a new map**
How to start:

1. Open Edumaps.
1. Click “Create map”.
1. Select “New map”.
1. Use “Quick start” for the introduction.

Quick start automatically creates a simple map with three columns and three empty boxes. This is ideal if you do not want to start completely from scratch.

**Quick start, empty map or template?**
There are several ways to create a map.

**1. Quick start**

Good for getting started. Edumaps automatically creates a simple basic structure.

**2. Empty map**

Good if you want to build everything yourself.

**3. Template catalog**

Good if you want to copy and adapt existing examples.

> For this exercise we recommend: Quick start.

**Set title and subtitle**
Give your map a clear title.

Example: “Countries in Europe”

A subtitle helps explain the purpose of the map.

Examples:

- Materials and tasks for Grade 7
- Introduction to the topic of Europe
- Teaching material for geography
- Group work on European countries

Tip: The title should be short. The subtitle may explain more precisely what the map is about.

### Design the map
Source: https://www.edumaps.de/1150/1/g8jr7svptf3y/94deafl6eqvx#p5107

**Choose a suitable map format**
Choose a format that fits your teaching goal.

**Pinboard:**

Good for collections of materials, tasks, links, images and lesson building blocks.

**Timeline:**

Good for chronological processes, sequences and lesson phases.

**Sticker wall:**

Good for free arrangement, brainstorming, collecting ideas and creative tasks.

**Gallery:**

Good for many images, photos or media contributions.

> For this first teaching map we recommend: Pinboard.

**Select a background**
A background makes the map more appealing, but it should not distract from the content.

Options:
- select a ready-made background image
- use your own color
- upload your own image
- blur the background

Tip: Make sure everything remains easy to read. If the background is very busy, use the “blur” option or a simple color.

**Font and readability**
The font should be easy to read.

Pay particular attention to:

- sufficient contrast
- a calm background
- fonts that are not too playful
- clear headings

For primary school or reading support, especially readable fonts can be helpful.

Tip: Design is important, but the content must always remain the focus.

**Add tags**
Tags are keywords for your map. They help you find content again later.

Examples of tags:

- geography
- grade-7
- europe
- material-collection
- teaching
- group-work

Why tags are useful: If you have many maps, you can later **filter by tags** and find your maps faster.

### Build the structure
Source: https://www.edumaps.de/1150/1/g8jr7svptf3y/94deafl6eqvx#p5108

**Understand columns**
Columns give your map a clear structure.

For the example map “Countries in Europe”, the columns could be called:

1. Introduction
1. Materials
1. Tasks
1. Results

Or:

1. Western Europe
1. Northern Europe
1. Southern Europe
1. Eastern Europe

Tip: Use a small number of clear columns. Too many columns make the map confusing.

**Understand boxes**
Boxes are the individual content building blocks of your map.

A box can contain, for example:

- text
- link
- image
- video
- file
- assignment
- comment area
- audio
- checklist

Examples:

- Assignment: Research a country in Europe.
- Link: Map of Europe
- File: Worksheet as PDF
- Image: Flags of European countries

**Edit the first box**
Open an existing box or create a new box.

For example, insert this assignment:

> Assignment:
Choose a country in Europe. Research its capital, language, population and one special feature. Write down your results in bullet points.

Additional task:
Add an image or a flag if you like.

Tip: A good box has a clear heading and a short instruction.

**A simple teaching structure**
Your first map could be structured like this:

**Column “Introduction”**

- What do you already know about Europe?
- Short quiz or impulse image

**Column “Materials”**

- Map of Europe
- Explainer video
- Worksheet

**Column “Tasks”**

- Research a country
- Create a fact sheet
- Compare results

**Column “Results”**

- Student contributions
- Presentations
- shared collection

### Finish
Source: https://www.edumaps.de/1150/1/g8jr7svptf3y/94deafl6eqvx#p5109

**Save and check the map**
Before using the map:

1. Save the map.
1. Open the map once in normal view.
1. Check the title, columns and boxes.
1. Test important links.
1. Check that everything is easy to read.

Tip: Deliberately switch between editing and viewing. This lets you see the map from the users’ perspective.

**Do not publish yet**
For this first exercise, the map does not need to be public yet.

Remember: A new map is initially **not public** on the internet.

Later you can decide whether you want to:
- use the map only yourself
- share it by link
- share it with students
- share it with colleagues
- release it for your own school
- publish it on the internet

Sharing is explained in a separate chapter.

**Mini task: Your first map**
Now create your own first teaching map.

**Task:**

1. Choose a teaching topic.
1. Create a new map with Quick start.
1. Set title and subtitle.
1. Select the “Pinboard” format.
1. Adjust background and font.
1. Add 2 to 4 tags.
1. Give the columns meaningful names.
1. Create or edit at least 3 boxes.
1. Save and test the map.

Goal:
The map does not have to be perfect. What matters is that you have understood the basic structure.

**Common beginner mistakes**
Avoid these typical mistakes:

- Too much content at once: Start with only a few boxes.
- Unclear headings: Each box should be understandable immediately.
- Too busy background: Readability is more important than decoration.
- No tags: Tags help you find things again later.
- Not tested: Open the map once as students or colleagues would see it.

**Done**
You have now created the foundation for your first teaching map.

You can now:
- start a new map
- distinguish between Quick start, empty map and template
- set title and subtitle
- choose a map format
- adjust background and font
- add tags
- edit columns and boxes
- save and check the map

## Chapter 2: Involve Students Without Login Chaos: Link, QR Code, Anonymous or Account?
Source: https://www.edumaps.de/1151/1/9ma8vc5m5hj9/x4wjco54tqcw

### Contents
Source: https://www.edumaps.de/1151/1/9ma8vc5m5hj9/x4wjco54tqcw#p5110

**Chapter overview**
The tutorial series contains 12 chapters.

1. [Ready in 20 Minutes: My First Teaching Map](https://www.edumaps.de/1150/1/g8jr7svptf3y/94deafl6eqvx)
1. [Involve Students Without Login Chaos: Link, QR Codes](https://www.edumaps.de/1151/1/9ma8vc5m5hj9/x4wjco54tqcw)
1. [Sharing and Protecting: Read, Edit, Password](https://www.edumaps.de/1152/1/zj2cl4wyqshs/fobxtep4m0rw)
1. [Student Submissions and Feedback: Comments, Likes, Ratings](https://www.edumaps.de/1153/1/5v3mj1zqn4me/nfnk0putwpuo)
1. [Files, iPads and Media: Using Uploads Safely](https://www.edumaps.de/1154/1/u27gjdga2s2v/wj5uoi7gj92v)
1. [Working Together with Colleagues: Maps, Boxes and Material](https://www.edumaps.de/1155/1/tl6levqmlq1f/uuj0al55uifh)
1. [Small Modules with a Big Effect](https://www.edumaps.de/1156/1/bawi5464lnob/6gg59zv3ckiv)
1. [Bookings and Loans: Rooms, Devices and Courses](https://www.edumaps.de/1157/1/pc5c21qsl2hy/pbv2mkwl0mel)
1. [Using AI Sensibly: Maps, Quizzes and Language Courses](https://www.edumaps.de/1158/1/oh7lhgmwx378/m77edo14z2uz)
1. [Import, Export and Server Change: Backing Up Maps](https://www.edumaps.de/1159/1/g11mce3trjt7/70d6omfssffl)
1. [Using Folders Properly: Collecting and Structuring Maps](https://www.edumaps.de/1160/1/ezkvkf9tdcbf/xc4sxd2isnjg)
1. [Public Profile and Following](https://www.edumaps.de/1161/1/xq5431ecrawf/7r3qqj1qst2m)

### Orientation
Source: https://www.edumaps.de/1151/1/9ma8vc5m5hj9/x4wjco54tqcw#p5111

**What is this about?**
In this pinboard, you will learn how students can work with your Edumaps map quickly and easily.

**Goal:**
Students should be able to open a map, read it or add contributions without the lesson being slowed down by login questions.

After this chapter you will know:
- when students do not need an account
- when a student account is useful
- how links and QR codes work
- which rights you need to set
- which mistakes often happen in class

**The basic question**
Before sharing, ask yourself one simple question:

What should the students do in the map?

Possible answers:
- only read
- open links and materials
- write comments
- upload their own files
- add content together
- work permanently with their own account

The answer determines whether a simple link is enough or whether student accounts make more sense.

**Three typical classroom situations**
**1. Quick start:**

Students open the map via QR code and read materials.

**2. Short participation:**

Students write comments, submit answers or upload an image.

**3. Regular work:**

Students use Edumaps more often, save their own content or work over a longer period with classes/groups.

For situations 1 and 2, a link or QR code is often enough. For situation 3, student accounts are usually more useful.

### Start without an account
Source: https://www.edumaps.de/1151/1/9ma8vc5m5hj9/x4wjco54tqcw#p5112

**When does it work without login?**
Students do not always need their own account.

Working without login is useful when:
- the map is only meant to be read
- students should start quickly via QR code
- only short feedback is collected
- no permanent assignment to student accounts is needed
- the start should be as simple as possible

Example:
You show a QR code on the board. Students scan it and open the map directly.

**Use the map link**
The simplest way is a **link to the map**.

How it works:

1. Open your map.
1. Copy the link to the map.
1. Give the link to the students.
1. Ideally test the link once in a private browser window.

Possible uses:

- in the school portal
- by email
- in the school messenger
- on a learning platform
- as a link on another Edumaps map

**QR code in class**
A QR code is especially practical in class.

Advantages:
- students do not have to type a long address
- getting started is quick
- the code can be shown on the projector
- the code can be printed on a worksheet

Tip:
Keep the QR code visible during the start phase. This allows late students to begin independently.

**Anonymous participation**
Anonymous participation means:

Students can create contributions without logging in with a personal account.

This is good for:

- brainstorming
- anonymous feedback
- quick mood checks
- idea collections
- lesson starters or exit tickets

Pay attention to this:

With anonymous participation, assigning contributions to individual students is only possible to a limited extent.

### Work with an account
Source: https://www.edumaps.de/1151/1/9ma8vc5m5hj9/x4wjco54tqcw#p5113

**When are student accounts useful?**
Student accounts are useful when Edumaps is used regularly.

Typical reasons:

- contributions should be clearly assigned
- students should create their own maps
- tasks should be worked on over a longer period
- classes/groups should be used
- materials should be given to specific student groups
- results should be found again later

Tip:
Do not introduce accounts during a hectic lesson phase. Prepare them in advance.

**Pseudonyms or real names?**
Decide in advance how students should appear in Edumaps.

Possible options:

- real first name and last name
- first name only
- school-internal username
- pseudonym or abbreviation

Important:
Use a consistent rule for the whole class.

Tip:
If students are allowed to post without full names, explain clearly how you will still recognize submissions if this is necessary.

**Prepare classes/groups**
Classes/groups help you manage access for several students at once.

This is useful when:
- the same students should receive several maps
- a class works with Edumaps regularly
- different groups need different materials
- you want to share quickly later

Example:
Create the group “Class 7a” once. Later you can share maps directly with this group instead of selecting each student individually.

### Set rights correctly
Source: https://www.edumaps.de/1151/1/9ma8vc5m5hj9/x4wjco54tqcw#p5114

**Read or edit?**
The most important rights are:

- **Read:** Students can view content, open links and use materials.
- **Edit:** Students can change content, create boxes or help build the map.

For many lessons, read access plus comments is enough.

Tip:
Only give edit rights if students are really supposed to change the map itself.

**Comments as safe participation**
Comments are often the safest way to involve students.

Advantages:
- the map structure stays unchanged
- answers are collected directly at the task
- contributions remain easy to review
- students do not need full editing rights

Example:
A task box asks: “Write your answer as a comment.” Students participate, but the rest of the map stays protected.

**Submit files and media**
If students should submit files or media, check the settings carefully.

Possible submissions:
- photo
- screenshot
- PDF
- audio file
- short video
- presentation

Tip:
Explain exactly what should be uploaded and where. This prevents files from being placed in the wrong box.

**Test before class**
Always test the access before using the map in class.

Check:

1. Does the link open?
1. Does the QR code work?
1. Can students see the right content?
1. Are comments or uploads possible if needed?
1. Are editing rights restricted as intended?

Tip:
Use a private browser window or a second device for testing.

### Practice & troubleshooting
Source: https://www.edumaps.de/1151/1/9ma8vc5m5hj9/x4wjco54tqcw#p5115

**5-minute start in class**
A simple start can look like this:

1. Show the QR code.
1. Students open the map.
1. Everyone reads the first box.
1. Students complete one short task.
1. They write a comment or upload a result.
1. You discuss selected contributions together.

Goal:
Students first learn how to access and use the map before the task becomes more complex.

**Typical mistakes**
Typical mistakes are:

- Link not tested before class.
- QR code is too small or not visible long enough.
- Rights are too restrictive, so students cannot contribute.
- Rights are too open, so students accidentally change the map.
- Students do not know where to write or upload.
- Accounts are introduced without preparation.

Tip:
For the first lesson, keep the workflow very simple.

**Rule of thumb**
Rule of thumb:

For quick classroom use, start with a link or QR code.

For regular work, use accounts and classes/groups.

For student contributions, comments are often safer than full editing rights.

The easier the start is, the more smoothly students can work with the map.

## Chapter 3: Sharing and Protecting: Read, Edit, Password, School, Class/Group
Source: https://www.edumaps.de/1152/1/zj2cl4wyqshs/fobxtep4m0rw

### Contents
Source: https://www.edumaps.de/1152/1/zj2cl4wyqshs/fobxtep4m0rw#p5116

**Chapter overview**
The tutorial series contains 12 chapters.

1. [Ready in 20 Minutes: My First Teaching Map](https://www.edumaps.de/1150/1/g8jr7svptf3y/94deafl6eqvx)
1. [Involve Students Without Login Chaos: Link, QR Codes](https://www.edumaps.de/1151/1/9ma8vc5m5hj9/x4wjco54tqcw)
1. [Sharing and Protecting: Read, Edit, Password](https://www.edumaps.de/1152/1/zj2cl4wyqshs/fobxtep4m0rw)
1. [Student Submissions and Feedback: Comments, Likes, Ratings](https://www.edumaps.de/1153/1/5v3mj1zqn4me/nfnk0putwpuo)
1. [Files, iPads and Media: Using Uploads Safely](https://www.edumaps.de/1154/1/u27gjdga2s2v/wj5uoi7gj92v)
1. [Working Together with Colleagues: Maps, Boxes and Material](https://www.edumaps.de/1155/1/tl6levqmlq1f/uuj0al55uifh)
1. [Small Modules with a Big Effect](https://www.edumaps.de/1156/1/bawi5464lnob/6gg59zv3ckiv)
1. [Bookings and Loans: Rooms, Devices and Courses](https://www.edumaps.de/1157/1/pc5c21qsl2hy/pbv2mkwl0mel)
1. [Using AI Sensibly: Maps, Quizzes and Language Courses](https://www.edumaps.de/1158/1/oh7lhgmwx378/m77edo14z2uz)
1. [Import, Export and Server Change: Backing Up Maps](https://www.edumaps.de/1159/1/g11mce3trjt7/70d6omfssffl)
1. [Using Folders Properly: Collecting and Structuring Maps](https://www.edumaps.de/1160/1/ezkvkf9tdcbf/xc4sxd2isnjg)
1. [Public Profile and Following](https://www.edumaps.de/1161/1/xq5431ecrawf/7r3qqj1qst2m)

### Orientation
Source: https://www.edumaps.de/1152/1/zj2cl4wyqshs/fobxtep4m0rw#p5117

**What is this about?**
In this pinboard, you will learn how to share a map safely and appropriately.

You will learn:

- what sharing means in Edumaps
- which sharing options are available
- when a link is enough
- when password protection or school access makes sense
- how to involve colleagues and students in a targeted way
- how to revoke sharing again

Goal:

You should not share “somehow”, but make a deliberate decision.

**The most important decision**
Before every share, ask yourself:

Who should be able to see or edit the map?

**Possible target groups:**

- only me
- individual colleagues
- individual students
- a class/group
- the whole school
- people with the link
- public on the internet

Then choose the suitable sharing option.

**Distinguish between reading and editing**
Sharing is not just “access yes/no”. It also matters what the person is allowed to do.

- **Read access:** view content, open links, use materials.
- **Edit access:** change content, create boxes, edit the structure.

Tip: Give edit rights only to people who should really work on the map.

### Simple sharing
Source: https://www.edumaps.de/1152/1/zj2cl4wyqshs/fobxtep4m0rw#p5118

**Link to the map**
The link is the fastest way to open a map.

Suitable for:

- students in class
- parent information
- sharing material
- short training sessions
- QR-code use

Important:

A link alone does not automatically mean that everyone may do everything. The configured access rights are decisive.

**Show QR code**
The QR code is especially useful when many people should start at the same time.

Use it:

- on the projector
- printed on a worksheet
- embedded in a presentation
- displayed in the classroom

Tip:

Test the QR code with a smartphone before using it in class.

**Password protection**
A password is useful when a map should be reachable by link, but not completely open.

Suitable for:

- parents’ evenings
- temporary project pages
- material collections for a specific group
- external participants in a training course

Important:

Share link and password clearly and understandably. Without the password, users cannot open the protected map.

### Targeted sharing
Source: https://www.edumaps.de/1152/1/zj2cl4wyqshs/fobxtep4m0rw#p5119

**Share with a user**
You can share a map with individual users in a targeted way.

Suitable for:

- team teaching
- joint lesson preparation
- subject team work
- collegial material collections
- correction or feedback by a colleague

Decide consciously:

Should the colleague only read or also edit?

**Share with class/group**
Classes/groups are useful when several students or teachers should receive the same access.

Advantages:

- you do not need to select every user individually
- access stays easy to manage
- teaching material can be provided in a targeted way
- group work can be prepared

Example:

The map “Europe Project” is shared only with Class 7a.

**Access only for my school**
The setting “Access only for registered users of my school/organization” is useful for internal material.

Suitable for:

- school-internal information
- subject team material
- internal collections
- maps for teachers at the same school

Important:

People outside your school cannot open the map with this setting, even if they have the link.

**Public sharing**
Public sharing means that a map can be visible outside your school.

Suitable for:

- public tutorials
- free teaching materials
- project presentations
- information pages
- examples for colleagues

Not suitable for:

- student data
- internal discussions
- personal photos
- copyrighted material without permission

Tip:
Only publish after a careful check.

### Security & control
Source: https://www.edumaps.de/1152/1/zj2cl4wyqshs/fobxtep4m0rw#p5120

**Check sharing before sending**
Before you send a link, check the sharing settings.

Questions:

- Who can open the map?
- Is a password required?
- Can users only read or also edit?
- Is the map public?
- Are private or internal contents included?

Tip:
Open the map once in a private browser window before sharing the link widely.

**Use edit rights carefully**
Edit rights are powerful.

Users with edit rights may be able to:
- change content
- delete boxes
- move structures
- upload files
- alter tasks

Therefore:
Only give edit rights when real collaboration is intended.

Tip:
For students, comments or submissions are often safer than full edit access.

**Revoke sharing**
Sharing can be changed again later.

You can, for example:
- remove individual users
- remove a class/group
- change edit access to read access
- remove public sharing
- change or remove a password

Tip:
After a project or course, check whether old shares are still needed.

**Avoid private information**
Before sharing, check the content carefully.

Do not share:

- student names unnecessarily
- grades or performance data
- private photos
- internal notes
- passwords
- personal contact details
- material without clarified rights

Tip:
When in doubt, create a copy and remove sensitive information before sharing.

### Decision aid
Source: https://www.edumaps.de/1152/1/zj2cl4wyqshs/fobxtep4m0rw#p5121

**Which sharing option fits?**
Use this rough guide:

- **Only for yourself:** no sharing.
- **Students should read:** link or QR code with read access.
- **Students should comment:** read access plus comments.
- **Students should edit:** edit access only if this is really intended.
- **Colleagues should work together:** share with user/group and edit access.
- **Whole school:** school access.
- **External group:** link plus password.
- **Public material:** public sharing after review.

**Practice task**
Practice the sharing settings with a test map.

**Task:**

1. Open a map.
1. Check the current sharing status.
1. Create a link.
1. Display the QR code.
1. Set read access.
1. Test the link in a private browser window.
1. Think about whether a password would be useful.
1. Remove or adjust the sharing again if needed.

Goal:
You understand which access is active before you send a map to others.

**Rule of thumb**
Rule of thumb:

Share as openly as necessary, but as restrictively as sensible.

Read access is enough for many situations.

Edit access is only for real collaboration.

Always test the link before using it with a class, colleagues or external people.

## Chapter 4: Student Submissions and Feedback: Comments, Likes, Ratings, Surveys
Source: https://www.edumaps.de/1153/1/5v3mj1zqn4me/nfnk0putwpuo

### Contents
Source: https://www.edumaps.de/1153/1/5v3mj1zqn4me/nfnk0putwpuo#p5122

**Chapter overview**
The tutorial series contains 12 chapters.

1. [Ready in 20 Minutes: My First Teaching Map](https://www.edumaps.de/1150/1/g8jr7svptf3y/94deafl6eqvx)
1. [Involve Students Without Login Chaos: Link, QR Codes](https://www.edumaps.de/1151/1/9ma8vc5m5hj9/x4wjco54tqcw)
1. [Sharing and Protecting: Read, Edit, Password](https://www.edumaps.de/1152/1/zj2cl4wyqshs/fobxtep4m0rw)
1. [Student Submissions and Feedback: Comments, Likes, Ratings](https://www.edumaps.de/1153/1/5v3mj1zqn4me/nfnk0putwpuo)
1. [Files, iPads and Media: Using Uploads Safely](https://www.edumaps.de/1154/1/u27gjdga2s2v/wj5uoi7gj92v)
1. [Working Together with Colleagues: Maps, Boxes and Material](https://www.edumaps.de/1155/1/tl6levqmlq1f/uuj0al55uifh)
1. [Small Modules with a Big Effect](https://www.edumaps.de/1156/1/bawi5464lnob/6gg59zv3ckiv)
1. [Bookings and Loans: Rooms, Devices and Courses](https://www.edumaps.de/1157/1/pc5c21qsl2hy/pbv2mkwl0mel)
1. [Using AI Sensibly: Maps, Quizzes and Language Courses](https://www.edumaps.de/1158/1/oh7lhgmwx378/m77edo14z2uz)
1. [Import, Export and Server Change: Backing Up Maps](https://www.edumaps.de/1159/1/g11mce3trjt7/70d6omfssffl)
1. [Using Folders Properly: Collecting and Structuring Maps](https://www.edumaps.de/1160/1/ezkvkf9tdcbf/xc4sxd2isnjg)
1. [Public Profile and Following](https://www.edumaps.de/1161/1/xq5431ecrawf/7r3qqj1qst2m)

### Orientation
Source: https://www.edumaps.de/1153/1/5v3mj1zqn4me/nfnk0putwpuo#p5123

**What is this about?**
In this pinboard, you will learn how students can submit feedback, answers and work results in Edumaps.

It covers:
- comments
- likes
- simple ratings
- surveys
- file and media submissions
- short lesson formats such as exit tickets

Goal:
Your map becomes not only a material collection, but an interactive learning space.

**Which type of participation fits?**
Not every task needs the same type of feedback.

- Short opinion:
Like, yes/maybe/no or survey.

- Short answer:
Comment.

- Longer solution:
Text contribution or file.

- Creative result:
Image, audio, video or presentation.

- Shared collection:
Comments or own boxes, depending on the rights.

**A simple example**
Topic: Countries in Europe

Box: “Choose a European country. Write as a comment:

- capital
- language
- one special feature”

Advantage:
All answers are collected directly at the matching task. The map stays clear.

### Use comments
Source: https://www.edumaps.de/1153/1/5v3mj1zqn4me/nfnk0putwpuo#p5124

**Activate comments**
Comments are very useful for student answers.

Typical use cases:
- collecting prior knowledge
- answering questions
- submitting homework
- writing reflections
- comparing results
- giving feedback

Tip:
Write the comment task directly into the box.

**Good comment tasks**
Good tasks are short and clear.

Examples:
- Write three bullet points.
- Name one example.
- Ask one question about the topic.
- Upload an image and explain it in one sentence.
- Evaluate the statement with a short reason.

Avoid: “Write something about this.” – That is too unclear.

**Comments visible or hidden?**
Depending on the lesson goal, comments can be used differently.

- Visible to everyone:
Good for collecting ideas, discussions and comparison.

- Only for the teacher:
Good for personal feedback, homework or sensitive answers.

Tip:

Decide beforehand whether students should see each other’s answers.

**Evaluate comments**
After submission, comments can be used directly in class.

Options:
- discuss them together
- highlight examples
- collect typical mistakes
- clarify open questions
- transfer results into a new box

Tip:
Plan time for evaluation. Otherwise student contributions quickly become a mere collection box.

### Quick feedback
Source: https://www.edumaps.de/1153/1/5v3mj1zqn4me/nfnk0putwpuo#p5125

**Use likes**
Likes are a quick form of feedback.

Suitable for:
- agreement
- choosing favorites
- marking interesting contributions
- quick activation
- voting without long discussion

Example:
“Read the suggestions from the others. Give a like to one contribution you find especially interesting.”

**Use ratings**
Simple ratings help with quick assessments.

Examples:
- good / medium / poor
- yes / maybe / no
- understood / unsure / not understood

Use:
- check learning progress
- assess difficulty
- adjust lesson pace
- collect feedback after a task

**Create surveys**
Surveys are useful when you want to collect a clear choice.

Examples:
- Which topic should we continue with?
- Which date fits best?
- Which solution do you choose?
- How difficult was the task?

Tip:
Keep surveys short. Too many options make evaluation harder.

**Exit ticket**
An exit ticket is a short reflection at the end of a lesson.

Possible prompts:

- Today I understood ...
- I still have a question about ...
- This was difficult for me ...
- I would like to continue with ...

In Edumaps, an exit ticket can be collected as a comment, rating or short survey.

### Collect submissions
Source: https://www.edumaps.de/1153/1/5v3mj1zqn4me/nfnk0putwpuo#p5126

**Submit files**
Students can submit files when a result cannot be written directly as a short comment.

Examples:
- worksheet as PDF
- presentation
- text document
- spreadsheet
- photo documentation

Tip:
Write clearly which file format is expected and where the file should be uploaded.

**Images and photos**
Images are useful for practical or creative results.

Examples:
- photo of a worksheet
- experiment result
- drawing
- poster
- screenshot
- product from group work

Pay attention to:
- image quality
- privacy
- recognizable people
- copyright
- file size

**Audio and video**
Audio and video submissions can be useful in many subjects.

Examples:
- speaking exercise in language lessons
- short explanation
- experiment documentation
- reading aloud
- presentation recording

Tip:
Keep recordings short and give a clear time limit.

**Keep submissions clear**
Submissions quickly become confusing if the task is too open.

Helpful rules:

- one box per task
- clear title
- precise submission instruction
- expected file type
- deadline if needed
- short feedback phase

Tip:
For larger assignments, use several boxes instead of collecting everything in one place.

### Practice & lesson ideas
Source: https://www.edumaps.de/1153/1/5v3mj1zqn4me/nfnk0putwpuo#p5127

**Lesson idea: collect prior knowledge**
Use a comment box at the start of the lesson.

Example:

Topic: Europe

Task:
“What do you already know about Europe? Write three keywords as a comment.”

Then you can:
- sort answers
- pick up misconceptions
- introduce the topic
- connect to student knowledge

**Lesson idea: group work**
A map can support group work well.

Example:

Each group works on one European country.

Each group submits:
- a short fact sheet
- one image or flag
- one interesting fact
- one source link

Result:
All group results are collected in one shared map.

**Lesson idea: check learning progress**
Use a rating or survey to check learning progress quickly.

Examples:

- I understood today’s topic.
- I can explain the difference.
- I still need help.
- The task was easy / okay / difficult.

Use the results to decide whether you continue, repeat or give additional help.

**Avoid common mistakes**
Avoid these mistakes:

- Task is too unclear.
- Students do not know where to submit.
- Comments are visible although answers should be private.
- Too many media files are uploaded without structure.
- There is no time to evaluate the submissions.
- Rights are too open or too restrictive.

Tip:
Start with a small, clearly structured feedback task.

**Rule of thumb**
Rule of thumb:

Use comments for short answers.

Use likes and ratings for quick feedback.

Use files and media for larger or creative results.

Every submission should have a clear place and a clear instruction.

## Chapter 5: Files, iPads and Media: Using Uploads Safely
Source: https://www.edumaps.de/1154/1/u27gjdga2s2v/wj5uoi7gj92v

### Contents
Source: https://www.edumaps.de/1154/1/u27gjdga2s2v/wj5uoi7gj92v#p5128

**Chapter overview**
The tutorial series contains 12 chapters.

1. [Ready in 20 Minutes: My First Teaching Map](https://www.edumaps.de/1150/1/g8jr7svptf3y/94deafl6eqvx)
1. [Involve Students Without Login Chaos: Link, QR Codes](https://www.edumaps.de/1151/1/9ma8vc5m5hj9/x4wjco54tqcw)
1. [Sharing and Protecting: Read, Edit, Password](https://www.edumaps.de/1152/1/zj2cl4wyqshs/fobxtep4m0rw)
1. [Student Submissions and Feedback: Comments, Likes, Ratings](https://www.edumaps.de/1153/1/5v3mj1zqn4me/nfnk0putwpuo)
1. [Files, iPads and Media: Using Uploads Safely](https://www.edumaps.de/1154/1/u27gjdga2s2v/wj5uoi7gj92v)
1. [Working Together with Colleagues: Maps, Boxes and Material](https://www.edumaps.de/1155/1/tl6levqmlq1f/uuj0al55uifh)
1. [Small Modules with a Big Effect](https://www.edumaps.de/1156/1/bawi5464lnob/6gg59zv3ckiv)
1. [Bookings and Loans: Rooms, Devices and Courses](https://www.edumaps.de/1157/1/pc5c21qsl2hy/pbv2mkwl0mel)
1. [Using AI Sensibly: Maps, Quizzes and Language Courses](https://www.edumaps.de/1158/1/oh7lhgmwx378/m77edo14z2uz)
1. [Import, Export and Server Change: Backing Up Maps](https://www.edumaps.de/1159/1/g11mce3trjt7/70d6omfssffl)
1. [Using Folders Properly: Collecting and Structuring Maps](https://www.edumaps.de/1160/1/ezkvkf9tdcbf/xc4sxd2isnjg)
1. [Public Profile and Following](https://www.edumaps.de/1161/1/xq5431ecrawf/7r3qqj1qst2m)

### Orientation
Source: https://www.edumaps.de/1154/1/u27gjdga2s2v/wj5uoi7gj92v#p5129

**What is this pinboard about?**
In this pinboard, you will learn how to use files and media in Edumaps safely and sensibly.

By the end, you will know:

- which file types are suitable for teaching
- how to upload files into boxes
- how to insert images, videos and links
- what to consider with iPads and Apple files
- how to provide media clearly for students

The goal is not to collect as many files as possible.

The goal is to provide materials in a way that students can find and use them quickly.

**Typical classroom situations**
Files and media help in many situations:

- provide a worksheet as PDF
- link an explainer video
- show an impulse image at the start
- use an audio recording for languages
- upload a presentation for students
- collect results as photos
- create a link list on a topic

Example:
A map about “Countries in Europe” contains a map, a worksheet, a short explainer video and a box for student contributions.

**Basic rule: Less is often better**
A good teaching map does not contain as much material as possible, but well-selected material.

Check every file:
- Do students really need this file?
- Is the filename understandable?
- Is the file up to date?
- Is it clear what students should do with it?

Tip:
Always provide files together with a short instruction.

### Upload files
Source: https://www.edumaps.de/1154/1/u27gjdga2s2v/wj5uoi7gj92v#p5130

**Insert a file into a box**
How to proceed:

1. Open a box in edit mode.
1. Select the upload function.
1. Upload the file from your device.
1. Add a short explanation.
1. Save the box.

Example text in the box:

“Download the worksheet and complete tasks 1 to 3.”

**Suitable file formats**
For teaching, these formats are especially useful:

- PDF for worksheets
- JPG or PNG for images
- MP3 or M4A for audio
- MP4 for short videos
- DOCX for editable texts
- PPTX for presentations
- XLSX for tables

Tip:
PDF is usually the safest choice when students should only read or print the file.

**Name files meaningfully**
Good filenames reduce follow-up questions.

Unfavorable:
- document_new_final2.pdf
- scan001.pdf
- worksheet.pdf

Better:
- Europe_Worksheet_CountryProfile.pdf
- German_Grade7_FairyTales_Features.pdf
- Math_Fractions_Exercises_1.pdf

Tip:
Use topic, grade and purpose in the filename.

**Use drag & drop**
When working on a computer, you can insert many files directly into the box editor by drag & drop.

This means that you drag the file from your file manager directly into the appropriate box or upload area.

This is especially practical for:
- PDFs
- images
- screenshots
- individual teaching materials

Tip:
Organize files on your computer first so you can work faster.

### Insert media
Source: https://www.edumaps.de/1154/1/u27gjdga2s2v/wj5uoi7gj92v#p5131

**Use images**
Images are useful for introductions, visualization and student results.

Examples:

- photo of an experiment
- writing impulse image
- map in geography
- diagram in mathematics
- artwork for analysis

Pay attention to:

- good readability
- suitable image size
- image rights
- whether people are recognizable

**Insert links**
Links are useful when material already exists online.

Examples:
- educational media library
- video platform
- online exercise
- article
- map service
- quiz page

Tip:
Add a short explanation to every link. Students should know why they should open it.

**Use videos sensibly**
Videos can support learning well, but they should not simply fill time.

Before inserting a video, ask:

- What should students pay attention to?
- How long is the video?
- Should students answer questions while watching?
- Is the source reliable?
- Is the video suitable for the age group?

Tip:
Short videos with a clear task usually work better than long videos without guidance.

**Record or upload audio**
Audio is useful in language lessons and for explanations.

Examples:
- listening exercise
- pronunciation example
- reading aloud
- explanation by the teacher
- student recording

Tip:
Keep audio recordings short and write what students should listen for.

### iPad & Apple files
Source: https://www.edumaps.de/1154/1/u27gjdga2s2v/wj5uoi7gj92v#p5132

**Working with iPads**
Edumaps can also be used on iPads.

Useful workflows:
- take a photo and upload it
- create a screenshot and submit it
- open a PDF
- record audio
- work with links and media

Tip:
Test the workflow once on an iPad before using it with a whole class.

**Pages, Numbers and Keynote**
Apple files such as Pages, Numbers and Keynote are not always easy to open on all devices.

Recommendation:
Export these files before uploading if possible.

Useful export formats:
- Pages → PDF or DOCX
- Numbers → PDF or XLSX
- Keynote → PDF or PPTX

Tip:
If students use different devices, PDF is often the safest format.

**Photos and screenshots from the iPad**
Photos and screenshots from iPads are practical for submissions.

Examples:
- photo of a worksheet
- screenshot of an app result
- photo of an experiment
- image of a group result

Pay attention to:
- file size
- visible personal data
- recognizable people
- image quality

Tip:
Students should check photos before uploading them.

### Practice & mistakes
Source: https://www.edumaps.de/1154/1/u27gjdga2s2v/wj5uoi7gj92v#p5133

**Mini task: Create a material box**
Create a box with a file or media item.

**Task:**

1. Choose a teaching topic.
1. Create a box called “Material”.
1. Upload a PDF or image.
1. Add a short instruction.
1. Add a link if useful.
1. Save and test the box.

Goal:
Students should immediately understand what the material is and what they should do with it.

**Avoid typical mistakes**
Avoid these mistakes:

- Too many files in one box.
- Unclear filenames.
- No instruction for the material.
- Very large files.
- Formats that students cannot open.
- Links not tested.
- Images with unclear rights or private content.

Tip:
Every file should have a clear purpose.

**Checklist before use**
Before using files and media in class, check:

- Is the material needed?
- Is the filename clear?
- Is the format suitable?
- Is there a short instruction?
- Do links work?
- Are image and media rights clarified?
- Can students open the file on their devices?
- Is the map still clear?

If all points fit, the material is ready for classroom use.

## Chapter 6: Working Together with Colleagues: Sharing Maps, Boxes and Material
Source: https://www.edumaps.de/1155/1/tl6levqmlq1f/uuj0al55uifh

### Contents
Source: https://www.edumaps.de/1155/1/tl6levqmlq1f/uuj0al55uifh#p5134

**Chapter overview**
The tutorial series contains 12 chapters.

1. [Ready in 20 Minutes: My First Teaching Map](https://www.edumaps.de/1150/1/g8jr7svptf3y/94deafl6eqvx)
1. [Involve Students Without Login Chaos: Link, QR Codes](https://www.edumaps.de/1151/1/9ma8vc5m5hj9/x4wjco54tqcw)
1. [Sharing and Protecting: Read, Edit, Password](https://www.edumaps.de/1152/1/zj2cl4wyqshs/fobxtep4m0rw)
1. [Student Submissions and Feedback: Comments, Likes, Ratings](https://www.edumaps.de/1153/1/5v3mj1zqn4me/nfnk0putwpuo)
1. [Files, iPads and Media: Using Uploads Safely](https://www.edumaps.de/1154/1/u27gjdga2s2v/wj5uoi7gj92v)
1. [Working Together with Colleagues: Maps, Boxes and Material](https://www.edumaps.de/1155/1/tl6levqmlq1f/uuj0al55uifh)
1. [Small Modules with a Big Effect](https://www.edumaps.de/1156/1/bawi5464lnob/6gg59zv3ckiv)
1. [Bookings and Loans: Rooms, Devices and Courses](https://www.edumaps.de/1157/1/pc5c21qsl2hy/pbv2mkwl0mel)
1. [Using AI Sensibly: Maps, Quizzes and Language Courses](https://www.edumaps.de/1158/1/oh7lhgmwx378/m77edo14z2uz)
1. [Import, Export and Server Change: Backing Up Maps](https://www.edumaps.de/1159/1/g11mce3trjt7/70d6omfssffl)
1. [Using Folders Properly: Collecting and Structuring Maps](https://www.edumaps.de/1160/1/ezkvkf9tdcbf/xc4sxd2isnjg)
1. [Public Profile and Following](https://www.edumaps.de/1161/1/xq5431ecrawf/7r3qqj1qst2m)

### Orientation
Source: https://www.edumaps.de/1155/1/tl6levqmlq1f/uuj0al55uifh#p5135

**Why work together?**
Edumaps is useful not only for teaching with students, but also for collaboration within the staff.

For example, you can:

- collect materials together
- prepare teaching units
- coordinate tasks for parallel classes
- document training content
- prepare parents’ evenings
- organize subject team work

The advantage:
Everyone works in one **central place** and keeps the structure in view.

**Three forms of collaboration**
There are several ways to work together with Edumaps.

1. Edit one map together
Good for subject teams, teams and projects.

1. Copy content
Good when everyone needs their own version.

1. Embed content
Good when central content should remain up to date in several places.

This pinboard explains the differences.

**Example: subject team map**
A subject team map could be structured like this:

- Column 1: Grade 5
- Column 2: Grade 6
- Column 3: Materials
- Column 4: Assessments
- Column 5: Agreements

Each teacher can add their own materials or use existing boxes.

### Edit together
Source: https://www.edumaps.de/1155/1/tl6levqmlq1f/uuj0al55uifh#p5136

**Share a map with colleagues**
If several teachers should work on the same map, share the map with edit rights.

Typical steps:

1. Open the map.
1. Open the sharing function.
1. Select user or group.
1. Grant edit rights.
1. Briefly explain what the map is for.

Tip:
Grant edit rights deliberately. Not every person needs write access.

**Read or edit?**
Before sharing, consider:

Read access is enough when colleagues should only view or use materials.

Edit access is useful when colleagues should:

- add new boxes
- update tasks
- upload files
- maintain shared lists
- correct content

Tip:
For larger teams, clear agreements are important: Who edits which column?

**Set shared rules**
A shared map works better with simple rules.

Examples:

- Every box gets a clear heading.
- Materials are sorted by grade level.
- Outdated content is marked or deleted.
- New tasks are added with a date.
- Important notes are placed at the top.

Tip:
Create an info box called “How we work with this map”.

### Copy & embed
Source: https://www.edumaps.de/1155/1/tl6levqmlq1f/uuj0al55uifh#p5137

**Copy box**
When you copy a box, a separate new version is created.

This is useful when you want to:

- adapt material
- change a task for your class
- reuse a template
- work independently of the original

Important:
Changes to the original do not affect the copy.

**Embed box**
When embedding, the content remains connected to the original box.

This is useful when central content should stay the same in several places.

Examples:

- central school rules
- shared assignment
- current weekly plan
- subject team information
- link list

Important:
When the original changes, the embedded display changes automatically as well.

**Practical example: Control one central task in several student maps**
Embedding is especially helpful when a task should appear in several places but remain centrally up to date.

**Example:**

A teacher creates one central task box for a project.

This box is embedded in several class maps.

If the deadline, link or instruction changes, the teacher edits only the original box.

All embedded versions are updated automatically.

This prevents different versions of the same task from circulating.

**Copy or embed?**
Use this rule:

**Copy** when each teacher needs their own editable version.

**Embed** when the same content should remain centrally controlled.

Examples:

- Worksheet adapted for one class → copy
- Official information for all classes → embed
- Personal lesson variant → copy
- Current weekly assignment in several maps → embed

Tip:
Discuss in the team which content should be copied and which should remain central.

**Copy map**
A complete map can also be copied.

This is useful when:

- a template should be reused
- a teaching unit should be adapted
- a colleague wants their own version
- a map should be developed further independently

Important:
A copied map is an independent version. Later changes in the original do not automatically appear in the copy.

### Organization
Source: https://www.edumaps.de/1155/1/tl6levqmlq1f/uuj0al55uifh#p5138

**Material collection in the staff**
A shared material collection helps avoid duplicate work.

Possible columns:

- Grade levels
- Topics
- Worksheets
- Media
- Links
- Assessments
- Good examples

Tip:
Use clear titles and tags so colleagues can find material again later.

**Team map for projects**
For projects, a team map can bundle all important information.

Possible content:

- timeline
- tasks
- responsibilities
- files
- meeting notes
- links
- results

Tip:
Add a box at the top with current next steps.

**Avoid versions**
Many teams lose time because several versions of the same material circulate.

Edumaps can help by:

- collecting material centrally
- using embedded boxes for central content
- making the latest version visible
- reducing email attachments
- documenting agreements

Tip:
For official or repeatedly used content, use a central source instead of many copies.

### Practice
Source: https://www.edumaps.de/1155/1/tl6levqmlq1f/uuj0al55uifh#p5139

**Mini task: Plan a staff map**
Plan a map for collaboration in your team.

**Task:**

1. Choose a topic, for example a subject team or project.
1. Decide which columns are needed.
1. Create an info box with rules.
1. Decide who gets read access.
1. Decide who gets edit access.
1. Choose one box that could be embedded elsewhere.

Goal:
The map should support collaboration instead of creating more confusion.

**Typical mistakes**
Typical mistakes are:

- Too many people get edit rights.
- No one knows who maintains which content.
- Copies are made although central content would be better.
- Embedded boxes are edited without understanding the effect.
- Old material is not marked.
- The map has no clear structure.

Tip:
Start with a small, well-structured team map.

**Checklist for team maps**
Before a team map is used, check:

- Is the purpose clear?
- Are the columns understandable?
- Are rights set correctly?
- Is there an info box with rules?
- Are important materials easy to find?
- Is central content embedded where useful?
- Is someone responsible for maintenance?

A good team map saves time because everyone knows where current material is stored.

## Chapter 7: Small Modules with a Big Effect: Structure Edumaps Faster
Source: https://www.edumaps.de/1156/1/bawi5464lnob/6gg59zv3ckiv

### Contents
Source: https://www.edumaps.de/1156/1/bawi5464lnob/6gg59zv3ckiv#p5140

**Chapter overview**
The tutorial series contains 12 chapters.

1. [Ready in 20 Minutes: My First Teaching Map](https://www.edumaps.de/1150/1/g8jr7svptf3y/94deafl6eqvx)
1. [Involve Students Without Login Chaos: Link, QR Codes](https://www.edumaps.de/1151/1/9ma8vc5m5hj9/x4wjco54tqcw)
1. [Sharing and Protecting: Read, Edit, Password](https://www.edumaps.de/1152/1/zj2cl4wyqshs/fobxtep4m0rw)
1. [Student Submissions and Feedback: Comments, Likes, Ratings](https://www.edumaps.de/1153/1/5v3mj1zqn4me/nfnk0putwpuo)
1. [Files, iPads and Media: Using Uploads Safely](https://www.edumaps.de/1154/1/u27gjdga2s2v/wj5uoi7gj92v)
1. [Working Together with Colleagues: Maps, Boxes and Material](https://www.edumaps.de/1155/1/tl6levqmlq1f/uuj0al55uifh)
1. [Small Modules with a Big Effect](https://www.edumaps.de/1156/1/bawi5464lnob/6gg59zv3ckiv)
1. [Bookings and Loans: Rooms, Devices and Courses](https://www.edumaps.de/1157/1/pc5c21qsl2hy/pbv2mkwl0mel)
1. [Using AI Sensibly: Maps, Quizzes and Language Courses](https://www.edumaps.de/1158/1/oh7lhgmwx378/m77edo14z2uz)
1. [Import, Export and Server Change: Backing Up Maps](https://www.edumaps.de/1159/1/g11mce3trjt7/70d6omfssffl)
1. [Using Folders Properly: Collecting and Structuring Maps](https://www.edumaps.de/1160/1/ezkvkf9tdcbf/xc4sxd2isnjg)
1. [Public Profile and Following](https://www.edumaps.de/1161/1/xq5431ecrawf/7r3qqj1qst2m)

### Orientation
Source: https://www.edumaps.de/1156/1/bawi5464lnob/6gg59zv3ckiv#p5141

**What are modules?**
Modules provide additional functions. They can help structure a map better.

They help, for example, with:

- orientation
- navigation
- task control
- feedback
- organization
- faster use in class

This pinboard shows small modules that are immediately useful even for beginners.

**Why small modules matter**
Even a few modules can improve a map significantly.

Examples:
- A table of contents makes large maps clearer.
- A QR code makes classroom access easier.
- A checklist makes work steps visible.
- A tag overview helps users find things again.
- A popup can show important notes directly.

Tip:
Use modules purposefully, not decoratively.

**Basic rule for beginners**
Start with only a few modules.

Recommendation for the beginning:

1. Table of contents
1. QR code
1. Checklist
1. Popup message
1. Tag overview

When these work reliably, you can try additional modules.

### Orientation
Source: https://www.edumaps.de/1156/1/bawi5464lnob/6gg59zv3ckiv#p5142

**Table of contents**
A table of contents helps users find their way around large maps faster.

It is especially useful for:

- long teaching units
- weekly plans
- material collections
- training maps
- project maps

Tip:
Place the table of contents as high as possible in the map, ideally as the first box in the first column.

**When does a map need a table of contents?**
A table of contents is worthwhile when:

- the map contains many boxes
- students should jump quickly to tasks
- colleagues are looking for material
- the map serves as an online course
- several columns are organized by topic

For very small maps, a table of contents is usually not necessary.

**Tag overview**
A [tag overview](https://www.edumaps.de/1100/1/qom3b15q28/swpwzxd9cy) shows which keywords are used in a map or collection.

This helps with:

- material collections
- large folders
- many teaching topics
- finding content again later

Examples of tags:

- grade-7
- geography
- europe
- group-work
- exercise

**Set headings deliberately**
Modules work better when the map has clear titles and box headings.

Good box titles:

- Assignment: Country profile
- Material: Map of Europe
- Result: Our collection
- Help: How to research

Unfavorable box titles:

- Box 1
- Task
- Material
- Important

Tip:
The heading should immediately explain the purpose of the box.

### Access
Source: https://www.edumaps.de/1156/1/bawi5464lnob/6gg59zv3ckiv#p5143

**QR code**
A QR code is ideal when students should access a map quickly.

Possible uses:

- show QR code on the board
- print QR code
- place QR code on a worksheet
- use QR code for station work
- use QR code at parents’ evening

Tip:
Test the QR code once with a smartphone.

**Short link or QR code?**
Short link and QR code serve the same goal: faster access.

**Short link** is useful when:
- users work on a computer
- the link is sent digitally
- the address should be typed manually

**QR code** is useful when:
- students use tablets or phones
- many users start at the same time
- the link is shown on a board or printed

Tip:
Often it is best to provide both.

**Popup message**
A popup message can show important information directly when opening the map.

Suitable for:

- welcome note
- important instruction
- deadline
- safety notice
- short explanation of the workflow

Tip:
Use popup messages sparingly. If everything pops up, nothing feels important anymore.

### Tasks
Source: https://www.edumaps.de/1156/1/bawi5464lnob/6gg59zv3ckiv#p5144

**Checklist**
A checklist makes work steps visible.

Suitable for:

- independent work
- weekly plans
- project work
- station work
- preparation tasks

Example:

- Read the task.
- Open the material.
- Complete the worksheet.
- Upload the result.
- Write one reflection sentence.

Tip:
Use checklists for processes that students should complete step by step.

**Countdown**
A countdown can make remaining time visible.

Useful for:

- work phases
- deadlines
- station changes
- presentation preparation
- short challenges

Tip:
Use time pressure carefully. A countdown should support orientation, not create unnecessary stress.

**Link as button**
A link can be displayed as a button to make it more visible.

Suitable for:

- start tutorial
- open worksheet
- join video conference
- open quiz
- submit result

Tip:
Use button links for the most important actions, not for every link.

**Info box**
An info box helps to highlight important information.

Examples:

- “Read this first”
- “Important deadline”
- “Help for task 2”
- “Rules for group work”
- “What to do when finished”

Tip:
Keep info boxes short. They should guide, not replace the full task.

### Practice
Source: https://www.edumaps.de/1156/1/bawi5464lnob/6gg59zv3ckiv#p5145

**Mini task: Improve a map**
Improve an existing map with small modules.

**Task:**

1. Open a map with several boxes.
1. Add a table of contents.
1. Add or check the QR code.
1. Create a small checklist for one task.
1. Add tags if useful.
1. Check whether a popup message is really necessary.

Goal:
The map should become easier to navigate and use.

**Which modules fit which goal?**
A rough guide:

- Faster access → QR code or short link.
- Better orientation → table of contents.
- Better finding → tags and tag overview.
- Clearer workflow → checklist.
- Important note → popup or info box.
- Visible time → countdown.
- Important action → link as button.

Tip:
Start with the goal, not with the module.

**Typical mistakes**
Typical mistakes are:

- Too many modules at once.
- Modules are used only as decoration.
- Table of contents is placed too low.
- Headings are unclear, so modules are less useful.
- Popup messages are too long.
- Checklists contain too many steps.

Tip:
A good module makes the map simpler, not more complicated.

## Chapter 8: Bookings and Loans: Organizing Rooms, Devices and Courses
Source: https://www.edumaps.de/1157/1/pc5c21qsl2hy/pbv2mkwl0mel

### Contents
Source: https://www.edumaps.de/1157/1/pc5c21qsl2hy/pbv2mkwl0mel#p5146

**Chapter overview**
The tutorial series contains 12 chapters.

1. [Ready in 20 Minutes: My First Teaching Map](https://www.edumaps.de/1150/1/g8jr7svptf3y/94deafl6eqvx)
1. [Involve Students Without Login Chaos: Link, QR Codes](https://www.edumaps.de/1151/1/9ma8vc5m5hj9/x4wjco54tqcw)
1. [Sharing and Protecting: Read, Edit, Password](https://www.edumaps.de/1152/1/zj2cl4wyqshs/fobxtep4m0rw)
1. [Student Submissions and Feedback: Comments, Likes, Ratings](https://www.edumaps.de/1153/1/5v3mj1zqn4me/nfnk0putwpuo)
1. [Files, iPads and Media: Using Uploads Safely](https://www.edumaps.de/1154/1/u27gjdga2s2v/wj5uoi7gj92v)
1. [Working Together with Colleagues: Maps, Boxes and Material](https://www.edumaps.de/1155/1/tl6levqmlq1f/uuj0al55uifh)
1. [Small Modules with a Big Effect](https://www.edumaps.de/1156/1/bawi5464lnob/6gg59zv3ckiv)
1. [Bookings and Loans: Rooms, Devices and Courses](https://www.edumaps.de/1157/1/pc5c21qsl2hy/pbv2mkwl0mel)
1. [Using AI Sensibly: Maps, Quizzes and Language Courses](https://www.edumaps.de/1158/1/oh7lhgmwx378/m77edo14z2uz)
1. [Import, Export and Server Change: Backing Up Maps](https://www.edumaps.de/1159/1/g11mce3trjt7/70d6omfssffl)
1. [Using Folders Properly: Collecting and Structuring Maps](https://www.edumaps.de/1160/1/ezkvkf9tdcbf/xc4sxd2isnjg)
1. [Public Profile and Following](https://www.edumaps.de/1161/1/xq5431ecrawf/7r3qqj1qst2m)

### Orientation
Source: https://www.edumaps.de/1157/1/pc5c21qsl2hy/pbv2mkwl0mel#p5147

**What is this about?**
With Edumaps, schools can not only collect teaching material, but also organize [bookings and borrowing](https://www.edumaps.de/folder/1008/1/3jvlkvhghz/zn2tsd9yng).

Typical examples:

- book iPad cases
- borrow projectors
- reserve rooms
- offer training courses
- manage consultation times
- coordinate project dates

This pinboard explains the basic idea using simple school examples.

**Three typical scenarios**
1. Course booking
Students or teachers register for an appointment or course.

1. Device loan
A device is booked for a specific period.

1. Room or appointment booking
A room or time slot is reserved.

The right structure depends on what exactly should be organized.

**When is booking worthwhile?**
Booking functions are worthwhile when several people use the same inventory or the same appointments.

Examples:

- there are only a few devices
- rooms are limited
- courses have participant limits
- appointments should not be assigned twice
- a participant list is needed

For simple information, a normal map without booking is often enough.

### Course booking
Source: https://www.edumaps.de/1157/1/pc5c21qsl2hy/pbv2mkwl0mel#p5148

**Understand course booking**
Course booking is suitable when people should register for **one offer**.

Examples:

- extracurricular activity
- training session
- workshop
- learning office
- support course
- parent consultation time

Usually important:

- date
- time
- location
- participant limit
- short description

**Create a course box**
A course box should clearly describe what can be booked.

**Example:**

Title:
Workshop: First steps with Edumaps

Content:
In this workshop, you create your first map and learn the most important functions.

Date:
Tuesday, 2:00 to 3:30 p.m.

Participant limit:
20 people

**Set participant limit**
A participant limit prevents overbooking.

This is especially important for:

- rooms with limited seats
- courses with supervision ratios
- devices with limited quantity
- workshops that require material

Tip:
Write in the course description whether there is a waiting list or alternative dates.

**Use participant list**
The participant list helps with organization.

You can use it to check:

- Who has registered?
- Is the course full?
- Who is still missing?
- Who needs more information?

Example:
Before a training session, the list can be used to prepare the room or provide materials.

### Loans
Source: https://www.edumaps.de/1157/1/pc5c21qsl2hy/pbv2mkwl0mel#p5149

**Organize device loans**
Edumaps is especially suitable for device loans when several teachers access the same inventory.

Examples:

- iPad cases
- laptops
- projectors
- document camera
- microphones
- experiment kits

Every device or device set should have a clear name.

**Good loan description**
A loan box should contain all important information.

**Example:**

Title:
iPad Case 1

Content:
Contains 15 iPads, charging cables and transport case. Please return complete and charged after use.

Notes:
• Pick-up in the media room
• Return by the end of the school day
• Report damage immediately

**Example: Loan iPad cases or Lego kits**
A simple device loan in Edumaps can be structured like this.

**Example:**

The school wants to lend one iPad case and one Lego kit.

Possible boxes:

- iPad Case 1
- iPad Case 2
- Lego Kit Robotics
- Projector Media Room
- Document Camera

Each box describes:
- what is included
- where it is picked up
- when it must be returned
- who is responsible

Tip:
Use clear names so users do not book the wrong item.

**Set time periods**
For loans, the time period is important.

Possible rules:

- booking by lesson period
- booking for a whole day
- booking for several days
- return by a fixed time
- no booking during maintenance

Tip:
Write the rules directly into the loan description so everyone understands the process.

**Avoid double bookings**
A booking system helps prevent the same device or room being reserved twice.

Important:
The booking rules must match the real school process.

Clarify:

- Can one person book several devices?
- How far in advance may users book?
- Can bookings be cancelled?
- Who resolves conflicts?
- What happens if something is not returned?

Tip:
For the start, use simple rules. Complicated systems are used less reliably.

### Organization
Source: https://www.edumaps.de/1157/1/pc5c21qsl2hy/pbv2mkwl0mel#p5150

**School loan as collection map**
For larger inventories, a collection map is useful.

Possible columns:

- iPads
- laptops
- presentation technology
- rooms
- experiment kits
- notes and rules

Tip:
Place the most important rules at the top of the map.

**Use calendar view**
A calendar view helps when bookings are tied to dates and times.

Useful for:

- room bookings
- consultation times
- courses
- device loans with time slots
- project days

Tip:
Check regularly whether the calendar still reflects the real availability.

**Clarify responsibilities**
Every booking system needs clear responsibility.

Clarify:

- Who maintains the map?
- Who checks bookings?
- Who updates descriptions?
- Who handles damage or missing items?
- Who helps users with questions?

Tip:
Without a responsible person, booking maps quickly become outdated.

### Practice
Source: https://www.edumaps.de/1157/1/pc5c21qsl2hy/pbv2mkwl0mel#p5151

**Mini task: Plan a loan map**
Plan a simple loan map for your school.

**Task:**

1. Choose one inventory area, for example iPads.
1. List the available items.
1. Define clear names for the boxes.
1. Write pick-up and return rules.
1. Decide who may book.
1. Decide who is responsible.
1. Test the booking process with one example.

Goal:
The process should be understandable without additional explanation.

**Typical mistakes**
Typical mistakes are:

- Devices are not named clearly.
- Return rules are missing.
- The participant or booking limit does not match reality.
- Nobody is responsible for maintenance.
- Old bookings are not checked.
- The process is too complicated.

Tip:
Start with one small loan area before organizing everything at once.

**Checklist before start**
Before using a booking or loan map, check:

- Are all items or courses clearly named?
- Are dates and time periods understandable?
- Are limits set correctly?
- Are pick-up and return rules written down?
- Is the responsible person named?
- Has the process been tested?
- Do users know where to find the map?

A good booking map saves questions because the rules are visible directly in the map.

## Chapter 9: Using AI Sensibly: Creating Maps, Quizzes and Language Courses
Source: https://www.edumaps.de/1158/1/oh7lhgmwx378/m77edo14z2uz

### Contents
Source: https://www.edumaps.de/1158/1/oh7lhgmwx378/m77edo14z2uz#p5152

**Chapter overview**
The tutorial series contains 12 chapters.

1. [Ready in 20 Minutes: My First Teaching Map](https://www.edumaps.de/1150/1/g8jr7svptf3y/94deafl6eqvx)
1. [Involve Students Without Login Chaos: Link, QR Codes](https://www.edumaps.de/1151/1/9ma8vc5m5hj9/x4wjco54tqcw)
1. [Sharing and Protecting: Read, Edit, Password](https://www.edumaps.de/1152/1/zj2cl4wyqshs/fobxtep4m0rw)
1. [Student Submissions and Feedback: Comments, Likes, Ratings](https://www.edumaps.de/1153/1/5v3mj1zqn4me/nfnk0putwpuo)
1. [Files, iPads and Media: Using Uploads Safely](https://www.edumaps.de/1154/1/u27gjdga2s2v/wj5uoi7gj92v)
1. [Working Together with Colleagues: Maps, Boxes and Material](https://www.edumaps.de/1155/1/tl6levqmlq1f/uuj0al55uifh)
1. [Small Modules with a Big Effect](https://www.edumaps.de/1156/1/bawi5464lnob/6gg59zv3ckiv)
1. [Bookings and Loans: Rooms, Devices and Courses](https://www.edumaps.de/1157/1/pc5c21qsl2hy/pbv2mkwl0mel)
1. [Using AI Sensibly: Maps, Quizzes and Language Courses](https://www.edumaps.de/1158/1/oh7lhgmwx378/m77edo14z2uz)
1. [Import, Export and Server Change: Backing Up Maps](https://www.edumaps.de/1159/1/g11mce3trjt7/70d6omfssffl)
1. [Using Folders Properly: Collecting and Structuring Maps](https://www.edumaps.de/1160/1/ezkvkf9tdcbf/xc4sxd2isnjg)
1. [Public Profile and Following](https://www.edumaps.de/1161/1/xq5431ecrawf/7r3qqj1qst2m)

### Orientation
Source: https://www.edumaps.de/1158/1/oh7lhgmwx378/m77edo14z2uz#p5153

**What can AI do in Edumaps?**
The AI module can help create first teaching materials quickly.

Examples:

- generate a topic map
- create a quiz
- prepare a language course
- formulate tasks
- structure texts
- collect lesson ideas

Important:
AI creates a draft. Professional and didactic review remains the teacher’s responsibility.

**When is AI especially helpful?**
AI is especially helpful when you need a quick starting point.

Examples:

- introduction to a new topic
- revision quiz
- differentiated task ideas
- language exercise
- material collection
- structure for a teaching unit
- cover lesson in an unfamiliar subject

Tip:
Use AI not as a finished solution, but as a work accelerator.

**Basic rule: Check, shorten, adapt**
After every AI generation, you should do three things:

1. **Check**
Are the contents factually correct?

1. **Shorten**
Is the map clear enough?

1. **Adapt**
Does the content fit your class, level and lesson goal?

A good AI map usually emerges through editing.

### Good prompts
Source: https://www.edumaps.de/1158/1/oh7lhgmwx378/m77edo14z2uz#p5154

**What is a good prompt?**
A prompt is the work instruction for the AI.

A good prompt contains:

- topic
- subject
- grade level
- target group
- desired format
- length
- difficulty level
- special notes

The more precise the prompt, the more usable the result.

**Example: Topic map**
Example prompt:

> Create a pinboard for Geography Grade 7 on the topic “Countries in Europe”. The map should contain an introduction, a material collection, three assignments and a results column. The language should be simple and suitable for students. Use short boxes and concrete tasks.

This prompt is good because subject, grade, topic, structure and style are specified.

**Example: Quiz**
Example prompt:

> Create a short quiz for Grade 6 students on the topic “European capitals”. It should contain 10 questions, each with 4 answer options and one correct solution. The questions should be mixed: easy and medium.

Tip:
Check all solutions afterwards.

Important:
For quiz creation with evaluation, it is best to use the “Create map” option and select “Quiz”.

**Example: Language course**
Example prompt:

> Create a short beginner language course on the topic “Ordering in a café” in French. The target group is Grade 7 students. It should include important words, simple dialogues, short exercises and a small review.

Tip:
Adapt vocabulary and level to your learning group.

Important:
For language course creation with evaluation, it is best to use the “Create map” option and select “Language course”.

### Create map
Source: https://www.edumaps.de/1158/1/oh7lhgmwx378/m77edo14z2uz#p5155

**Generate an AI map**
How to work with an AI map:

1. Define the topic.
1. Write the prompt.
1. Let AI generate the map.
1. Read the result.
1. Delete unsuitable boxes.
1. Add missing content.
1. Improve the structure.
1. Test the map.

Important:
Not every automatically generated box has to remain.

**Live workflow: From a topic to a teaching unit**
With the AI assistant, a first topic can quickly become a draft for a teaching unit.

**Example:**

You want to create a teaching unit on the topic “Countries in Europe”.

**Step 1: Enter topic**
First formulate the topic, subject and grade level.

Example:
Create a teaching map for Geography Grade 7 on the topic “Countries in Europe”.

**Step 2: AI creates a map**
The AI creates a first structure with columns, boxes, tasks and possible lesson steps.

Important:
The map is a draft, not finished teaching material.

**Step 3: Adapt level**
Check whether language and tasks fit the learning group.

Possible editing:

- formulate more simply
- make it understandable for Grade 5
- explain technical terms
- make tasks more challenging
- add help boxes

**Step 4: Shorten texts**
AI often writes too much.

Shorten:

- long explanations
- repeated information
- unclear tasks
- unnecessary boxes

**Step 5: Add tasks**
Add concrete instructions.

Examples:

- Research one country.
- Create a fact sheet.
- Compare two countries.
- Present your result in the group.

**Step 6: Search and add media**
Add suitable media yourself, for example:

- map
- image impulse
- PDF worksheet
- link to an educational media library
- short video

**Step 7: Generate quiz**
A quiz can be created for review or activation.

Check:
- Are the questions correct?
- Is there exactly one correct answer?
- Does the difficulty fit?

**Step 8: Professional review**
Check the whole map before using it in class.

Pay attention to:
- factual accuracy
- language level
- lesson goal
- copyright
- data protection

**Step 9: Share**
Only after review should you share the map with the class or subject team.

**Suitable topics**
AI works especially well with clearly defined topics.

Examples:

- Countries in Europe
- Fractions: basic review
- Fairy tales: features
- The water cycle
- Simple English dialogues
- Safety rules in the lab

Less suitable are vague prompts such as:

- Make something about history.
- Create a good lesson.
- Give me material.

Tip:
The clearer the task, the better the draft.

**Post-editing**
Post-editing is part of working with AI.

Check:

- Are all facts correct?
- Are tasks clear?
- Are texts too long?
- Is the structure logical?
- Are examples suitable?
- Are there missing steps?
- Does the language fit the age group?

Tip:
Delete generously. A shorter, clearer map is often better than a large AI draft.

**Add media**
AI can suggest content, but you should select media deliberately.

Possible additions:

- images
- PDF worksheets
- videos
- links
- audio files
- maps
- diagrams

Important:
Check copyright, source quality and suitability for the age group.

Tip:
Use media only when it supports the lesson goal.

### Check quality
Source: https://www.edumaps.de/1158/1/oh7lhgmwx378/m77edo14z2uz#p5156

**Fact check**
AI can make factual mistakes.

Check especially:

- dates
- names
- numbers
- definitions
- maps
- historical events
- scientific explanations
- legal or data protection information

Tip:
For important content, compare with reliable sources or subject materials.

**Didactic check**
A technically correct map is not automatically a good lesson.

Check:

- Is the learning goal clear?
- Are the tasks feasible?
- Is the order logical?
- Is there enough support?
- Is there differentiation?
- Are results secured?

Tip:
AI can help with ideas, but the teacher decides the didactic structure.

**Data protection and personal data**
Do not enter personal student data into AI prompts.

Avoid:

- full names
- grades
- health data
- private conflicts
- personal feedback
- internal school data
- confidential documents

Tip:
Formulate prompts generally. Example: “Create a task for Grade 7” instead of entering real student information.

### Practice
Source: https://www.edumaps.de/1158/1/oh7lhgmwx378/m77edo14z2uz#p5157

**Mini task: Your own AI map**
Create a small AI draft.

**Task:**

1. Choose a teaching topic.
1. Write a precise prompt.
1. Generate an AI map.
1. Delete at least one unsuitable box.
1. Shorten at least one text.
1. Add one own task.
1. Check one factual statement.
1. Save the revised version.

Goal:
You learn to use AI as a starting point and then adapt the result.

**Prompt template**
Use this template:

> Create a map for [subject] in Grade [grade level] on the topic “[topic]”. The target group is [description]. The map should contain [desired columns/sections]. Use [simple/detailed/challenging] language. Include [number] concrete tasks and [type of result]. The map should be suitable for a lesson of [duration].

Example:

> Create a map for Geography in Grade 7 on the topic “Countries in Europe”. The map should contain introduction, materials, tasks and results. Use simple language and three concrete tasks.

**Typical mistakes**
Typical mistakes are:

- Prompt is too vague.
- AI result is used without checking.
- Texts are too long.
- Too many boxes are kept.
- Difficulty level does not fit the class.
- Incorrect facts are not noticed.
- Personal data is entered into the prompt.

Tip:
AI saves time only if you review and edit the result.

**Done**
You now know how to use AI sensibly in Edumaps.

You can:
- write better prompts
- generate first map drafts
- create quiz and language course ideas
- check and shorten AI results
- adapt content to your class
- add media deliberately
- avoid data protection problems

Next step:
Create a small map and test it in a real teaching situation.

## Chapter 10: Import, Export and Server Change: Backing Up and Transferring Maps
Source: https://www.edumaps.de/1159/1/g11mce3trjt7/70d6omfssffl

### Contents
Source: https://www.edumaps.de/1159/1/g11mce3trjt7/70d6omfssffl#p5158

**Chapter overview**
The tutorial series contains 12 chapters.

1. [Ready in 20 Minutes: My First Teaching Map](https://www.edumaps.de/1150/1/g8jr7svptf3y/94deafl6eqvx)
1. [Involve Students Without Login Chaos: Link, QR Codes](https://www.edumaps.de/1151/1/9ma8vc5m5hj9/x4wjco54tqcw)
1. [Sharing and Protecting: Read, Edit, Password](https://www.edumaps.de/1152/1/zj2cl4wyqshs/fobxtep4m0rw)
1. [Student Submissions and Feedback: Comments, Likes, Ratings](https://www.edumaps.de/1153/1/5v3mj1zqn4me/nfnk0putwpuo)
1. [Files, iPads and Media: Using Uploads Safely](https://www.edumaps.de/1154/1/u27gjdga2s2v/wj5uoi7gj92v)
1. [Working Together with Colleagues: Maps, Boxes and Material](https://www.edumaps.de/1155/1/tl6levqmlq1f/uuj0al55uifh)
1. [Small Modules with a Big Effect](https://www.edumaps.de/1156/1/bawi5464lnob/6gg59zv3ckiv)
1. [Bookings and Loans: Rooms, Devices and Courses](https://www.edumaps.de/1157/1/pc5c21qsl2hy/pbv2mkwl0mel)
1. [Using AI Sensibly: Maps, Quizzes and Language Courses](https://www.edumaps.de/1158/1/oh7lhgmwx378/m77edo14z2uz)
1. [Import, Export and Server Change: Backing Up Maps](https://www.edumaps.de/1159/1/g11mce3trjt7/70d6omfssffl)
1. [Using Folders Properly: Collecting and Structuring Maps](https://www.edumaps.de/1160/1/ezkvkf9tdcbf/xc4sxd2isnjg)
1. [Public Profile and Following](https://www.edumaps.de/1161/1/xq5431ecrawf/7r3qqj1qst2m)

### Orientation
Source: https://www.edumaps.de/1159/1/g11mce3trjt7/70d6omfssffl#p5159

**Why import and export are important**
Import and export help you back up maps, transfer them or reuse them in other systems.

Typical situations:
- back up a map
- use a map on another Edumaps server
- import content from another tool
- use material in Moodle
- archive data for later

This pinboard gives an overview of the most important options.

**Terms briefly explained**
**Export:**
You save content from Edumaps as a file or output format.

**Import:**
You load content from a file or another system into Edumaps.

**JSON:**
Structured exchange format for Edumaps maps.

Important:
Not every format can fully represent all functions.

**Clarify expectations**
Import and export are practical, but not always perfect.

Possible limits:
- layout may differ
- special functions may not be transferred
- embedded content may be missing
- links must be checked
- access rights are not always transferred

Tip:
After every import, check the entire map once.

### Export
Source: https://www.edumaps.de/1159/1/g11mce3trjt7/70d6omfssffl#p5160

**Export a map**
An export is useful when you want to back up or transfer a map.

Typical steps:

1. Open the map.
1. Choose the export function.
1. Select the suitable format.
1. Save the file.
1. Store the file safely.

Tip:
Name export files with date and topic. Edumaps suggests a suitable filename for JSON export.

Example:
2026-06-24_Europe_Grade7.json

**JSON export**
JSON (Text-based data exchange format for storing and transferring structured data.) is especially suitable for exchange between Edumaps systems.

Advantages:
- map structure is preserved
- columns and boxes can be transferred
- good for backups
- good for server changes within Edumaps

Tip:
Do not change JSON files manually unless you know the structure exactly.

**PDF, image or HTML**
Some export formats are mainly intended for viewing.

**PDF:**
Good for printing or archiving.

**Image:**
Good for previews or documentation.

**HTML:**
Good for a static output or offline use.

Important:
These formats are usually not as suitable for later editing as JSON.

**Moodle export**
A Moodle export can help reuse content in a learning platform.

Useful when:
- your school uses Moodle
- materials should also be available there
- courses are organized outside Edumaps

Tip:
After importing into Moodle, check whether links, media and tasks appear correctly.

### Import
Source: https://www.edumaps.de/1159/1/g11mce3trjt7/70d6omfssffl#p5161

**Import a map**
During import, a map from a file or another system is transferred into Edumaps.

Typical steps:

1. Open the import function.
1. Select the file.
1. Start the import.
1. Check the new map.
1. Review title, columns and boxes.
1. Test links and media.

Important:
The imported map should be checked before it is used in class.

**Import from another Edumaps server**
If a map should be moved from another Edumaps server, JSON is usually the best format.

Example:
A map from one state or school server should be used on another Edumaps server.

Steps:
- export JSON on the old server
- save the file
- import JSON on the new server
- check the imported map
- adjust links if needed

Important:
Server-specific links, permissions or embedded content may need to be checked.

### Special cases
Source: https://www.edumaps.de/1159/1/g11mce3trjt7/70d6omfssffl#p5162

**Padlet import**
A Padlet import can help transfer existing collections.

Useful when:
- material already exists in Padlet
- a school wants to switch systems
- existing boards should not be rebuilt completely

Important:
Not every Padlet element can be transferred perfectly. Layout, media or special functions may differ.

Tip:
After import, clean up the structure and shorten unnecessary content.

**Tutory import**
Tutory material can be reused in Edumaps depending on the available export format.

Useful when:
- worksheets should be collected in a map
- material should be combined with links or media
- students should access everything from one place

Tip:
After import, check whether formatting, links and tasks are still understandable.

**What does not always work**
Some things do not always transfer completely.

Examples:
- complex layouts
- interactive elements
- external embeds
- access rights
- passwords
- comments
- user-specific data
- some media files

Tip:
Treat import as a starting point, not as a finished result.

### Practice
Source: https://www.edumaps.de/1159/1/g11mce3trjt7/70d6omfssffl#p5163

**Mini task: Back up a map**
Back up one of your maps.

**Task:**

1. Open a test map.
1. Export it as JSON.
1. Save the file with date and topic.
1. Optionally export a PDF for viewing.
1. Check where the file is stored.
1. If possible, test the import with a copy.

Goal:
You know how to create a backup before making major changes.

**Checklist after import**
After importing a map, check:

- Is the title correct?
- Are all columns present?
- Are all boxes understandable?
- Do links work?
- Are media files displayed?
- Is the layout still readable?
- Are access rights correct?
- Are passwords or protected areas set correctly?
- Does the map need cleanup?

Tip:
Never share an imported map before checking it.

**Typical mistakes**
Typical mistakes are:

- Export file is not stored safely.
- JSON file is changed manually.
- Imported map is shared without checking.
- Links point to the old server.
- Layout differences are overlooked.
- Access rights are assumed instead of checked.
- Old material is imported without cleanup.

Tip:
Use import and export deliberately, especially before server changes or larger edits.

## Chapter 11: Using Folders Properly: Collecting, Structuring and Providing Maps
Source: https://www.edumaps.de/1160/1/ezkvkf9tdcbf/xc4sxd2isnjg

### Contents
Source: https://www.edumaps.de/1160/1/ezkvkf9tdcbf/xc4sxd2isnjg#p5164

**Chapter overview**
The tutorial series contains 12 chapters.

1. [Ready in 20 Minutes: My First Teaching Map](https://www.edumaps.de/1150/1/g8jr7svptf3y/94deafl6eqvx)
1. [Involve Students Without Login Chaos: Link, QR Codes](https://www.edumaps.de/1151/1/9ma8vc5m5hj9/x4wjco54tqcw)
1. [Sharing and Protecting: Read, Edit, Password](https://www.edumaps.de/1152/1/zj2cl4wyqshs/fobxtep4m0rw)
1. [Student Submissions and Feedback: Comments, Likes, Ratings](https://www.edumaps.de/1153/1/5v3mj1zqn4me/nfnk0putwpuo)
1. [Files, iPads and Media: Using Uploads Safely](https://www.edumaps.de/1154/1/u27gjdga2s2v/wj5uoi7gj92v)
1. [Working Together with Colleagues: Maps, Boxes and Material](https://www.edumaps.de/1155/1/tl6levqmlq1f/uuj0al55uifh)
1. [Small Modules with a Big Effect](https://www.edumaps.de/1156/1/bawi5464lnob/6gg59zv3ckiv)
1. [Bookings and Loans: Rooms, Devices and Courses](https://www.edumaps.de/1157/1/pc5c21qsl2hy/pbv2mkwl0mel)
1. [Using AI Sensibly: Maps, Quizzes and Language Courses](https://www.edumaps.de/1158/1/oh7lhgmwx378/m77edo14z2uz)
1. [Import, Export and Server Change: Backing Up Maps](https://www.edumaps.de/1159/1/g11mce3trjt7/70d6omfssffl)
1. [Using Folders Properly: Collecting and Structuring Maps](https://www.edumaps.de/1160/1/ezkvkf9tdcbf/xc4sxd2isnjg)
1. [Public Profile and Following](https://www.edumaps.de/1161/1/xq5431ecrawf/7r3qqj1qst2m)

### Orientation
Source: https://www.edumaps.de/1160/1/ezkvkf9tdcbf/xc4sxd2isnjg#p5165

**What is a folder?**
A [folder](https://www.edumaps.de/1057/1/ruqcqtexz1/qz34252w7n) collects several maps in one shared place.

This is helpful when you have several related maps.

Examples:

- teaching unit
- subject team material
- training course
- weekly plans
- collection for a class
- public tutorial series

> A map is the individual workspace. A folder bundles several maps (and also folders).

**Map or folder?**
> **Map:** Good for a single topic, one task, one lesson or one material collection.

> **Folder:** Good for several maps that belong together.

**Example:**

Folder: Geography Grade 7

Maps inside:

- Europe introduction
- Country profiles
- Climate in Europe
- EU basics
- Revision quiz

**When is a folder worthwhile?**
A folder is worthwhile when:

- you have several maps on one topic
- students should work through a whole series
- colleagues should find material by chapters
- tutorials should be available in order
- a course consists of several sections

For only one map, a folder is usually not necessary.

### Create folders
Source: https://www.edumaps.de/1160/1/ezkvkf9tdcbf/xc4sxd2isnjg#p5166

**Create a new folder**
How to start:

1. Open the area for your maps or folders.
1. Select “Create folder”.
1. Enter a clear title.
1. Add a description if needed.
1. Add suitable maps.

Tip:
The folder title should immediately show who the folder is for and what it is about.

**Good folder titles**
Good titles are clear and concrete.

Examples:

- Geography Grade 7: Europe
- German Grade 5: Fairy Tales
- Media education: Safe on the internet
- Edumaps for Beginners
- Mathematics subject team
- Weekly plans Class 4a

Unfavorable:

- Material
- Collection
- Teaching
- New

**Use description**
A short description helps users understand the purpose of the folder.

Example:
This folder contains all maps for the teaching unit “Europe” for Grade 7. The maps can be used one after another or individually.

Tip:
Also write which grade, subject or time period the folder is intended for.

### Structure
Source: https://www.edumaps.de/1160/1/ezkvkf9tdcbf/xc4sxd2isnjg#p5167

**Sort maps sensibly**
The order of maps should follow the learning path.

Example:

1. Introduction
1. Basics
1. Practice
1. Deepening
1. Results
1. Revision

For tutorials:

1. Create first map
1. Share
1. Involve students
1. Files and media
1. Use AI

Tip:
Numbers in the title can help with longer series.

**Folder as online course**
A folder can function like a small **online course**.

Each map is a chapter.

Example:
Folder: Edumaps for Beginners

Chapters:

1. First teaching map
1. Share with students
1. Collect submissions
1. Use files
1. Use AI
1. Back up maps

Tip:
Add an overview map at the beginning if the course has many chapters.

**Folder for subject teams**
Folders are useful for subject teams when several maps belong together.

Examples:

- curriculum material
- lesson examples
- shared worksheets
- exam preparation
- media links
- project ideas

Tip:
Agree on naming rules so the folder does not become a loose file dump.

**Not too many levels**
Folders can contain maps and sometimes further folders.

But:
Too many levels make orientation difficult.

Better:
- few clear folders
- meaningful titles
- short descriptions
- consistent order

Tip:
If users need to click too often, the structure is probably too deep.

### Sharing
Source: https://www.edumaps.de/1160/1/ezkvkf9tdcbf/xc4sxd2isnjg#p5168

**Share folder**
A folder can be shared so that others can access several maps at once.

Useful for:

- classes
- colleagues
- training participants
- public tutorial series
- school-internal collections

Important:
Check whether the maps inside the folder also have suitable access rights.

**Folder for students**
A folder for students is useful when a series should be worked through.

Examples:

- weekly plan folder
- project folder
- learning path
- revision course
- topic series

Tip:
Make the order clear and explain where students should start.

**Folder for colleagues**
A folder for colleagues can bundle material clearly.

Examples:

- subject team collection
- training material
- templates
- school organization
- project documentation

Tip:
Write a short description of how the folder should be used and who maintains it.

### Practice
Source: https://www.edumaps.de/1160/1/ezkvkf9tdcbf/xc4sxd2isnjg#p5169

**Mini task: Plan a folder**
Plan a folder for several related maps.

**Task:**

1. Choose a topic with at least three maps.
1. Decide on a clear folder title.
1. Write a short description.
1. Determine the order of the maps.
1. Decide who should access the folder.
1. Check whether a start map is useful.

Goal:
The folder should make orientation easier, not add another layer of confusion.

**Typical mistakes**
Typical mistakes are:

- Folder title is too general.
- Too many unrelated maps are collected.
- The order is unclear.
- The description is missing.
- Maps inside the folder have unsuitable access rights.
- Too many subfolders are created.
- Old maps are not removed or marked.

Tip:
Use folders only when they actually create structure.

**Checklist for good folders**
A good folder should meet these points:

- clear title
- short description
- suitable maps
- logical order
- clear target group
- correct access rights
- not too many levels
- regular maintenance

If these points are fulfilled, a folder helps users find and use maps more easily.

## Chapter 12: Public Profile and Following: Deliberately Controlling Visibility
Source: https://www.edumaps.de/1161/1/xq5431ecrawf/7r3qqj1qst2m

### Contents
Source: https://www.edumaps.de/1161/1/xq5431ecrawf/7r3qqj1qst2m#p5170

**Chapter overview**
The tutorial series contains 12 chapters.

1. [Ready in 20 Minutes: My First Teaching Map](https://www.edumaps.de/1150/1/g8jr7svptf3y/94deafl6eqvx)
1. [Involve Students Without Login Chaos: Link, QR Codes](https://www.edumaps.de/1151/1/9ma8vc5m5hj9/x4wjco54tqcw)
1. [Sharing and Protecting: Read, Edit, Password](https://www.edumaps.de/1152/1/zj2cl4wyqshs/fobxtep4m0rw)
1. [Student Submissions and Feedback: Comments, Likes, Ratings](https://www.edumaps.de/1153/1/5v3mj1zqn4me/nfnk0putwpuo)
1. [Files, iPads and Media: Using Uploads Safely](https://www.edumaps.de/1154/1/u27gjdga2s2v/wj5uoi7gj92v)
1. [Working Together with Colleagues: Maps, Boxes and Material](https://www.edumaps.de/1155/1/tl6levqmlq1f/uuj0al55uifh)
1. [Small Modules with a Big Effect](https://www.edumaps.de/1156/1/bawi5464lnob/6gg59zv3ckiv)
1. [Bookings and Loans: Rooms, Devices and Courses](https://www.edumaps.de/1157/1/pc5c21qsl2hy/pbv2mkwl0mel)
1. [Using AI Sensibly: Maps, Quizzes and Language Courses](https://www.edumaps.de/1158/1/oh7lhgmwx378/m77edo14z2uz)
1. [Import, Export and Server Change: Backing Up Maps](https://www.edumaps.de/1159/1/g11mce3trjt7/70d6omfssffl)
1. [Using Folders Properly: Collecting and Structuring Maps](https://www.edumaps.de/1160/1/ezkvkf9tdcbf/xc4sxd2isnjg)
1. [Public Profile and Following](https://www.edumaps.de/1161/1/xq5431ecrawf/7r3qqj1qst2m)

### Orientation
Source: https://www.edumaps.de/1161/1/xq5431ecrawf/7r3qqj1qst2m#p5171

**What is this about?**
Edumaps can be used not only privately or within a school. Content can also be made **publicly visible** or followed by other users.

This pinboard explains:

- when public visibility makes sense
- what a [public profile](https://www.edumaps.de/1087/1/qerwrf9nfe/o1gpolryps) can do
- what following means
- how notifications help
- what you should check before publishing

**Private, school-internal or public?**
Before every publication, decide who should be able to see the map.

- **Private:**
Only you work on the map.

- **School-internal:**
The map is intended for people at your school or organization.

- **Public:**
The map may be visible outside the school.

Tip:
Start privately and publish only after checking.

**When is public useful?**
Public maps are useful when content should deliberately be shared.

Examples:

- free teaching materials
- tutorial series
- training material
- project presentations
- information pages
- example maps for colleagues

Not suitable for public maps:

- student data
- internal agreements
- unpublished performance results
- private photos
- copyrighted material with unclear rights

### Profile
Source: https://www.edumaps.de/1161/1/xq5431ecrawf/7r3qqj1qst2m#p5172

**Understand public profile**
A public profile can make selected maps or folders visible.

This is helpful when you want to provide material permanently.

Examples:

- tutorial collection
- own templates
- subject materials
- media center offers
- training materials

Tip:
A profile looks more professional when titles, descriptions and preview images are maintained.

**What belongs on a profile?**
Suitable content is content that is understandable for others.

**Good profile content:**

- finished teaching materials
- well-structured templates
- public instructions
- training maps
- general information maps

**Not suitable:**

- unfinished tests
- internal notes
- student work with names
- material without clarified rights

**Profile as showcase**
A public profile is like a showcase.

Pay attention to:

- clear titles
- short descriptions
- current content
- consistent structure
- few, good examples

Tip:
Better publish five very good maps than twenty unfinished ones.

### Following
Source: https://www.edumaps.de/1161/1/xq5431ecrawf/7r3qqj1qst2m#p5173

**What does following mean?**
When users follow a map or a [profile](https://www.edumaps.de/1087/1/qerwrf9nfe/o1gpolryps#follow), they can more easily stay informed about new or changed content.

This is useful for:

- regularly updated materials
- training series
- weekly plans
- public collections
- media center offers

Tip:
Following is especially useful for content that changes repeatedly.

**Follow a map**
Following a map is useful when you want to keep observing its development.

Examples:

- a weekly plan is updated regularly
- a training map is expanded
- a project page receives new results
- a material collection grows over time

Tip:
Follow only maps that are really relevant to you. Otherwise notifications quickly become too many.

**Follow users or profiles**
Following a user or profile is useful when someone regularly publishes relevant material.

Examples:

- media center
- trainer
- subject expert
- school account
- tutorial profile

Tip:
A good public profile helps others decide whether following is worthwhile.

### Notifications
Source: https://www.edumaps.de/1161/1/xq5431ecrawf/7r3qqj1qst2m#p5174

**Understand notifications**
Notifications can point out new or changed content.

They help users notice updates without checking everything manually.

Typical notifications:

- new share
- new comment
- changed content
- new material
- activity in followed content

Tip:
Use notifications as orientation, but do not rely on them as the only communication channel for important information.

**Not every change is important**
If too many changes are reported, notifications quickly lose their value.

Therefore:

- update content deliberately
- avoid unnecessary small changes in public material
- write clear titles
- summarize major changes if useful
- remove outdated content

Tip:
For important updates, write a clear note in the map itself.

**Keep current content visible**
Public or followed content should be maintained.

Check regularly:

- Are links still working?
- Is the material still current?
- Are descriptions understandable?
- Are outdated maps marked?
- Are preview images appropriate?
- Is the profile still tidy?

Tip:
A public profile is not a storage room, but a curated selection.

### Practice
Source: https://www.edumaps.de/1161/1/xq5431ecrawf/7r3qqj1qst2m#p5175

**Mini task: Check publication**
Check a map before publishing it.

**Task:**

1. Choose a finished map.
1. Check whether it contains personal data.
1. Check links and media rights.
1. Improve title and description.
1. Decide whether it belongs on a public profile.
1. Test the map in normal view.
1. Publish only if all points are clear.

Goal:
Public visibility should be a deliberate decision.

**Checklist before public sharing**
Before public sharing, check:

- Is the content finished enough?
- Is the target group clear?
- Are student data removed?
- Are image and media rights clarified?
- Are links working?
- Are titles and descriptions understandable?
- Is internal information removed?
- Is the map useful for people outside your school?

If one point is unclear, keep the map private or school-internal for now.

**Typical mistakes**
Typical mistakes are:

- Map is published too early.
- Student names or private information remain visible.
- Copyright is not checked.
- Profile contains too many unfinished maps.
- Old content is not removed.
- Users follow content that is no longer maintained.
- Important changes are not communicated clearly.

Tip:
Publish less, but publish carefully.

**Done**
You now know how to control public visibility more deliberately.

You can:
- distinguish between private, school-internal and public
- prepare a public profile
- decide what belongs on a profile
- understand following and notifications
- check maps before publishing
- avoid typical risks

This completes the beginner tutorial series.

Tip:
Use the chapters as a reference and return to individual topics whenever needed.

## 🚀 1. Getting Started with Edumaps for Teachers (20 min)
Source: https://www.edumaps.de/1371/1/4f5041a1exls/7jypgyr81rne

### 👋 Welcome & Sign-In
Source: https://www.edumaps.de/1371/1/4f5041a1exls/7jypgyr81rne#p6889

**👋 Welcome to Edumaps!**
Great to have you working with Edumaps!

This map guides you through the most important functions in about **20 minutes** - at your own pace, no in-person training needed.

**How it works:**

- Work through each column box by box.
- Tick off completed steps in the checklists.
- Your ticks are visible only to you - every teacher has their own progress.

> Tip: This map is itself a perfectly normal Edumaps pinboard. Everything you see here, you can build yourself afterwards.

**✅ Checklist: First Steps**
Tick off what is done:

[Checklist: Signed in via your school login (single sign-on) or by email / Opened your profile and checked your display name / Viewed the start page and found My Maps / Bookmarked this onboarding map]

- Go to: [My Account](https://www.edumaps.de/user/account) (profile)
- Go to: [My Maps](https://www.edumaps.de/user/maps)

### 🗺️ Your First Map
Source: https://www.edumaps.de/1371/1/4f5041a1exls/7jypgyr81rne#p6890

**🗺️ How Your First Map Comes Together**
A **map** is your digital pinboard. It consists of **columns** and **boxes**.

**First map:**

1. Open the menu and click **New Map**.
1. Choose "Empty Map".
1. Set a format: pinboard, stickerwall, timeline, gallery, or journal.
1. Enter a title.
1. Save the map - done.

**First column:**

1. Click **New Column**.
1. Give the column a title.

**Creating and filling your first box:**

1. Click **New Box**.
1. Give the box a title. Save.
1. Click the orange pencil icon.
1. Enter text in the box editor.
1. Format the text (e.g. make it bold or insert a list).
1. Upload images, videos, audio, and other files.
1. Insert a link on a line of its own so the automatic link preview appears.

> You can switch a map's format at any time - try it out.

**✅ Checklist: My First Map**
[Checklist: Created a new map in pinboard format / Created and named a column / Filled a box with text and formatting / Uploaded an image or a file / Inserted a link and saw the preview]

### 🤝 Sharing & Collaboration
Source: https://www.edumaps.de/1371/1/4f5041a1exls/7jypgyr81rne#p6891

**🤝 Sharing Without Hurdles**
The heart of Edumaps: students need **no account of their own** to participate.

**Two kinds of links:**

- **Read link:** recipients can view the map
- **Write link:** recipients can create and edit boxes

**How to share:**

1. Open the share dialog in your map.
1. Choose Read or Edit.
1. Copy the link, show it as a QR code, or send it directly.

Individual **boxes** can be shared too - handy when you only want to hand out a single task.

> The QR code is perfect for the projector: the class scans it and everyone is in.

**✅ Checklist: Sharing Practiced**
[Checklist: Created a read link and tested it in a private window / Created a write link / Displayed a QR code / Shared a single box / Understood: reading and editing are separate links]

### 🎓 For the Classroom
Source: https://www.edumaps.de/1371/1/4f5041a1exls/7jypgyr81rne#p6892

**🎓 Modules for the Classroom**
Boxes can do more than text and images:

- **Poll:** votes directly in the box, live results
- **Checklist:** task lists to tick off - each person has their own progress (like in this map!)
- **Quiz:** questions with evaluation
- **Comments and likes:** can be enabled per box

**Don't start from scratch:**

The template catalog contains over **200 ready-made templates** - from teaching units to parents' evenings to class trips. Pick a template, adapt it, done.

[Templates on Edumaps](https://www.edumaps.de/folder/1030/1/dz6c9xqji5h4/bf3pl22ra5vt)

**✅ Checklist: Classroom Features**
[Checklist: Copied a template from the catalog / Created a poll in a box / Inserted your own checklist / Enabled comments for a box / Tried out a quiz]

- Go to: [Templates](https://www.edumaps.de/folder/1030/1/dz6c9xqji5h4/bf3pl22ra5vt)

### 🏫 School Organization
Source: https://www.edumaps.de/1371/1/4f5041a1exls/7jypgyr81rne#p6893

**🏫 Working Together at Your School**
Edumaps is built for schools:

- **Classes and groups:** share maps with specific learning groups instead of handing out links one by one.
- **Staff:** edit maps together with colleagues - ideal for conferences, project weeks, and school development.
- **School login:** you sign in through the system set up at your school (single sign-on), no extra password.

**Ideas for getting started with your colleagues:**
- A digital notice board for the staff room
- A materials collection per subject department
- Organizing the next project week

**✅ Checklist: Everyday School Life**
[Checklist: Created or found a class or group / Shared a map with a group / Edited a map together with a colleague / Noted an idea: what will I use Edumaps for first?]

- Go to: [Manage Classes & Groups](https://www.edumaps.de/users/usersets)

### 🎉 Done & Next
Source: https://www.edumaps.de/1371/1/4f5041a1exls/7jypgyr81rne#p6894

**🎉 Done - You're Ready to Go!**
All checklists ticked? Then you now know the most important functions of Edumaps.

**What's next:**

- Browse the [template catalog](https://www.edumaps.de/folder/1030/1/dz6c9xqji5h4/bf3pl22ra5vt).
- You can find your ticked checklists any time under [My Checklists](https://www.edumaps.de/user/likes?check) in your profile.
- The [tutorials](https://www.edumaps.de/folder/1007/1/imhcphqc26/1guvtxkara) on Edumaps explain every function step by step.
- The [FAQ](https://www.edumaps.de/faq) answers hundreds of questions.

**Questions?**

Our team is happy to help - use our [support contact](https://www.edumaps.de/contact).

> Enjoy Edumaps - and have a great start to the school year!

**💡 Bonus: Reusing This Map**
Copy this map for your school:

- Copy the map and adapt the content.
- Add a column with school-specific rules or contact persons.
- New colleagues simply get the read link to the map.

This turns the onboarding into a lasting reference for your staff.

## ✅ 2. Polls, Checklists & Tasks (20 min)
Source: https://www.edumaps.de/1372/1/27mdriim1xz0/04o7tvkcq3y2

### 📊 Polls
Source: https://www.edumaps.de/1372/1/27mdriim1xz0/04o7tvkcq3y2#p7039

**📊 Polls: Votes in Any Box**
With the [poll module](https://www.edumaps.de/1086/1/xmgkv25gxf/f3u6hrdh5m) you add a vote to any box - for scheduling, student feedback, parent surveys, or ratings.

**How to set up a poll:**

1. Open one of your maps in edit mode.
1. Open the box editor of a box and click **Modules**.
1. Choose **Poll**.
1. Choose **single choice** or **multiple choice**.
1. Adjust the prefilled options - done.

**Good to know:**

- A box may contain only **one** poll.
- Registered users **and** anonymous visitors can vote.
- Clicking the checkbox again removes your own vote.
- As the map owner, click a vote counter to see who voted for what.

> ⚠️ Don't change a poll once votes have been cast - otherwise the existing votes shift to the wrong options.

All details in the tutorial:

[Tutorial: Poll module for votes](https://www.edumaps.de/1086/1/xmgkv25gxf/f3u6hrdh5m)

**🗳️ Try It Right Here!**
This box contains a real poll. **Cast your vote:**

> What would you use polls for first?

[Poll: Scheduling with colleagues / Feedback from students / Parent survey / Rating teaching materials / Something else entirely]

**✅ Checklist: Polls**
Tick off what you have tried:

[Checklist: Voted in the box above / Inserted your own poll in the box editor / Understood single choice and multiple choice / Opened the voting list via the counter as map owner / Discovered the "My Votes" page]

- Page [My Votes](https://www.edumaps.de/user/likes?poll)

### ☑️ Checklists
Source: https://www.edumaps.de/1372/1/27mdriim1xz0/04o7tvkcq3y2#p7040

**☑️ Checklists: Tasks to Tick Off**
With the [checklist module](https://www.edumaps.de/1162/1/b69pzgpq3uzu/4372nj9g7afu) you create task lists to tick off - for weekly plans, packing lists, station learning, can-do lists for self-assessment, or courses like this one.

**How to set up a checklist:**

1. Open the box editor for a box.
1. Click **Modules** and choose **Checklist**.
1. Enter the items; add more with **Add item**.
1. Change the order by dragging the handle on the left.
1. Confirm with **Done** - the placeholder `CHECK1` appears in the box content.

**The difference to a poll:**

- With a **poll**, the overall result of all votes matters
- With a **checklist**, your own progress counts - each person has their own state
- Anonymous visitors can tick items too; clicking again removes the tick

> ⚠️ Don't change the order or number of items of an active checklist - otherwise ticks that are already set may shift.

All details in the tutorial:

[Tutorial: Checklists](https://www.edumaps.de/1162/1/b69pzgpq3uzu/4372nj9g7afu)

**✅ Checklist: Checklists Mastered**
This checklist is also your exercise:

[Checklist: Understood: a checklist shows your own progress, a poll shows the overall result / Inserted your own checklist via Modules / Added items and re-sorted them with the handle / Set a tick and removed it again / Opened the My Checklists page in your profile]

- Page [My Checklists](https://www.edumaps.de/user/likes?check)

### 📥 Tasks
Source: https://www.edumaps.de/1372/1/27mdriim1xz0/04o7tvkcq3y2#p7041

**📥 Tasks: Assigning and Tracking Boxes**
With the [task module](https://www.edumaps.de/1095/1/2kk68kgef7/nook74wcsd) you turn any box into a trackable task - with status, priority, due date, and assignment to a user. Ideal for project management, class duties, or distributing work among colleagues.

**How to assign a task:**

1. In edit mode, open the box settings via the three dots.
1. Choose **Assign task**.
1. Set a **status** (Open, In Progress, Stalled, Query, Done, Archive).
1. Optional: set a **priority** (Low, Medium, High), a **due date**, and the recipient's **username**.
1. Save - the recipient receives a notification and write access to the map.

**Good to know:**

- Without a user entered, the task applies to yourself.
- The central overview of all received, assigned, and own tasks is on the [Tasks page](https://www.edumaps.de/user/tasks).
- Tasks with a due date automatically appear in the [user calendar](https://www.edumaps.de/user/calendar), and via iCalendar link also in Google or Apple Calendar.
- Once priorities are set, a task filter appears at the top left of the map.

> Tip for wrapping up: the recipient sets the status to Done, you receive a notification and can check the result. Then you can archive the task - it disappears from the task list and the calendar.

All details in the tutorial:

[Tutorial: Tasks](https://www.edumaps.de/1095/1/2kk68kgef7/nook74wcsd)

**✅ Checklist: Tasks**
Select what you have already done:

[Checklist: Assigned a task to one of your boxes via the box settings / Set a status and a priority / Entered a due date / Opened the Tasks page with the overview table / Found the task in the user calendar / Set a task to Done and then archived it]

- Page [My Tasks](https://www.edumaps.de/user/tasks)

### 🎉 Done
Source: https://www.edumaps.de/1372/1/27mdriim1xz0/04o7tvkcq3y2#p7042

**🎉 Course Completed!**
All checklists ticked? Then you have now mastered the three interactive core modules of Edumaps.

**Quick recap:**

- A **poll** asks: what does everyone think?
- A **checklist** asks: what have I completed?
- A **task** asks: who does what by when?

**What's next:**

- You can find your progress any time under [My Checklists](https://www.edumaps.de/user/likes?check).
- You find more [self-paced courses here](https://www.edumaps.de/folder/1043/1/q47n36dspsjj/z8jwh0oagu79).

> Good luck using them in your classroom!

## 🤝 3. Sharing & Collaboration in Depth (30 min)
Source: https://www.edumaps.de/1373/1/k6wusni0km1i/ut9poyyz8k4m

### 🎯 Targeted Sharing
Source: https://www.edumaps.de/1373/1/k6wusni0km1i/ut9poyyz8k4m#p7044

**🎯 Teachers Edit, Students Read – No Anonymous Access**
You know the read link and the write link from the introduction. Now you combine both deliberately - the most common real-world case:

- colleagues should **edit**
- all students should **read**
- anonymous users should have **no access**

**Here's how:**

1. Open the map share dialog via the blue share button.
1. Choose **Edit** and enable the checkbox **Access for registered users only** - this link goes to your colleagues.
1. Open the dialog again, choose **Read** without the checkbox - this link goes to the class.

Individual boxes can be shared the same way: click the three dots on the box, then choose **Link to box**.

Matching tutorials:

- [Sharing maps with links](https://www.edumaps.de/1047/1/siajhiablo/fv6nobr4hp)
- [Sharing a single box](https://www.edumaps.de/1082/1/c968s4u3fmp7/dow0gnvczk1m)

**✅ Checklist: Shared with Purpose**
[Checklist: Created an edit link for registered users only / Created a read link without login requirement / Shared a single box with others]

### 🧩 Sharing Columns
Source: https://www.edumaps.de/1373/1/k6wusni0km1i/ut9poyyz8k4m#p7045

**🧩 Sharing Columns: Reading and Writing Mixed**
The most powerful sharing tool: one link that defines which columns are shown and which access right applies per column (read or edit).

**Here's how:**

1. Click the blue share button and choose **Share columns**.
1. Click **Create new link**.
1. Click the columns: the **first click** means read, the **second click** edit, the **third click** removes the rights again.
1. Then click **Next**, give the link a title, and optionally enable the login requirement.
1. Finally click **Create link** and copy the link or the QR code – done.

Tip: You can edit existing column links at any time - students keep the same link, only the rights change. Handy for weekly plans: unlock one more column each week without handing out new links.

[Tutorial: Sharing columns](https://www.edumaps.de/1099/1/8c1r73m85c/ly9pqzltsw)

**✅ Checklist: Sharing Columns**
[Checklist: Created a column link with mixed rights / Displayed the QR code of the column link / Changed an existing link afterwards / Understood: the link stays the same, only the rights change]

### 👥 Classes & School
Source: https://www.edumaps.de/1373/1/k6wusni0km1i/ut9poyyz8k4m#p7046

**👥 Distributing to Classes and the Whole School**
Instead of sending links one by one, distribute maps directly to your learning groups:

**Sharing with a group or class:**

1. Click the blue share button, then **Share map to class**.
1. Pick the group in the dropdown and set access to **Read map** or **Edit map**.
1. Recipients find the map on their [Received page](https://www.edumaps.de/user/received).

So group 1 can edit and group 2 can only read - simply share twice with different groups and different rights.

**For all staff and all students:**

In the map settings under **Publish**, choose **My School (read)**. The map then appears for everyone on the [My School](https://www.edumaps.de/maps/school) page - without distributing any link.

[Tutorial: Sharing maps within your school](https://www.edumaps.de/1125/1/mlreg4cxu7/w4fgav3s7p)

**✅ Checklist: Classes & School**
[Checklist: Distributed a map to a class via "Share map to class" / Gave different groups different rights / Published a map via the "My School" release / Opened the "My School" page and found the map]

### 📁 Folders
Source: https://www.edumaps.de/1373/1/k6wusni0km1i/ut9poyyz8k4m#p7047

**📁 Folders: Collect, Distribute, Search**
Folders contain **references to maps** - the map stays where it is and can be saved in any number of folders at the same time. Other users' maps too.

**The key moves:**

- Create a new folder on the [My Folders](https://www.edumaps.de/user/folders) page.
- Add a map: inside the folder via **Add map**, by map link, or directly from an open map via the map menu with **Add to folder**.
- Folders can also be saved **inside folders** - for structures by subject, class, or school year.
- Every folder can be password-protected, released for **My School**, or placed in your public profile.

> **The insider tip:** The folder search scans **all boxes of all maps** in the folder. Collect your department's maps in one folder and find any material in seconds.

[Tutorial: Using folders](https://www.edumaps.de/1057/1/ruqcqtexz1/qz34252w7n)

**✅ Checklist: Folders**
[Checklist: Created your own folder / Added a map to a folder via the map menu / Added another user's map or folder to your own folder / Tried the content search inside the folder / Saved a folder inside another folder]

### 🎉 Done
Source: https://www.edumaps.de/1373/1/k6wusni0km1i/ut9poyyz8k4m#p7048

**🎉 Course Completed!**
You now command the full sharing repertoire: targeted links, column groups with mixed rights, distribution to classes, school release, and folder structures.

**Quick recap:**

- **Link** for everyone outside
- **Group/class** for your learning groups
- **My School** for the whole building
- **Folders** for collecting and finding

> With that, most sharing questions disappear from daily routine - and from the staff room.

## ✨ 4. AI Modules in Practice (30 min)
Source: https://www.edumaps.de/1374/1/bdxy72ll0hns/zr104gna5kx6

### ✨ Topic Map by Prompt
Source: https://www.edumaps.de/1374/1/bdxy72ll0hns/zr104gna5kx6#p7050

**✨ Creating a Whole Map with AI**
With the AI module you create a complete topic map in seconds: you describe the topic, and the AI builds columns and boxes with content.

**Here's how:**

1. Click **New Map** and choose one of the AI options: "Topic Map", "From Text", "Language Course", or "Quiz".
1. Describe your topic - the more specific, the better.
1. Review and accept the result, then edit everything as usual.

**Prompt tips for good results (topic map):**

- Name the grade and subject: "for grade 7, biology"
- Specify a structure: "with 5 columns: introduction, basics, in depth, exercises, quiz"
- Request a format: "with sample tasks and solutions as spoilers"

> The AI delivers the rough build; your professional review remains essential - especially for facts and task solutions.

All AI tutorials with sample prompts are collected in the tutorial folder:

[Tutorials: AI modules](https://www.edumaps.de/folder/1009/1/20cgo0k6cm/yk7g4geadt)

**✅ Checklist: Topic Map**
[Checklist: Created a topic map with an AI prompt. / Wrote a prompt with grade, subject, and column structure. / Reviewed the result and refined a box.]

### ❓ Quizzes & Boxes with AI
Source: https://www.edumaps.de/1374/1/bdxy72ll0hns/zr104gna5kx6#p7051

**❓ Generating Quizzes and Individual Boxes**
AI helps not only with whole maps but also with the small stuff:

🧠 **Quiz with AI**:

Describe the topic and difficulty; the AI creates multiple-choice questions with evaluation. Ideal as a lesson closer or for self-assessment.

📦 **New boxes with AI:**

You can create individual boxes or change existing content - shorten, simplify, translate, turn into tasks.

📊 **AI analysis of the map:**

With the map analysis you as the teacher can evaluate the content of a map - for example, to summarize student contributions on a working map.

> Note: With all AI functions, the map content is transmitted to the AI service for processing. Edumaps shows you a privacy notice for this - do not enter any personal data in AI requests.

**✅ Checklist: Quizzes & Boxes**
[Checklist: Created a quiz with AI and played through it yourself. / Created a new box with AI. / Changed an existing box with AI (e.g. translated it). / Tried the AI analysis of a map.]

### 🔊 Language & Read-Aloud
Source: https://www.edumaps.de/1374/1/bdxy72ll0hns/zr104gna5kx6#p7052

**🔊 Language Courses and Text-to-Speech**
💬 **Language course with AI:**

Edumaps creates complete language courses with lessons, vocabulary, and exercises - in around 60 language combinations. Ideal for second-language support and foreign language teaching.

🔊 **Text-to-speech:**

Any text can be read aloud in a natural voice. Select the text in the box editor, choose **Modules** and then **Text-to-speech**, set the language, done.

Example:

Je pense que le ciel est beau.

Visitors to the map see a play button and hear the text with natural pronunciation - perfect for pronunciation practice, dictations, and accessible materials.

**✅ Checklist: Language**
[Checklist: Made a text readable with text-to-speech. / Tried different languages for reading aloud. / Created or viewed an AI language course. / Noted an idea for your own classroom.]

### 🎉 Done
Source: https://www.edumaps.de/1374/1/bdxy72ll0hns/zr104gna5kx6#p7053

**🎉 Course Completed!**
You now know the AI tools of Edumaps: topic maps, quizzes, box editing, analysis, language courses, and text-to-speech.

**Quick recap:**

- **The AI builds** the rough draft
- **You check** the subject matter
- **Your class benefits** from the time gained

> Exactly these modules set Edumaps apart from classic pinboard tools - give them a serious try in your next lesson prep.

## 🎨 5. Designing Maps Like a Pro (30 min)
Source: https://www.edumaps.de/1375/1/m5mpe69wjl91/z9zkelw4723t

### 🖋️ Formatting
Source: https://www.edumaps.de/1375/1/m5mpe69wjl91/z9zkelw4723t#p7055

**🖋️ The Syntax That Saves Time**
> All the important inputs can be activated with the editor toolbar. Sometimes typing them directly is faster, though. The following is for advanced users.

The box editor supports a fast Markdown-like syntax. The essentials:

- `**bold**` and `*italic*`
- `- ` for lists, `--` for numbered lists
- `> ` for quotes and note boxes
- `# Heading` and `## Subheading`
- `---` for divider lines
- `{Linked text}{https://...}` for text links
- `{#Button text}{https://...}` turns any link into a clickable **button**

**The underrated ones:**

- `?? Text` creates a **spoiler** - perfect for solutions to unfold
- `[word]{explanation}` creates a tooltip (This is a tooltip.) for explaining terms
- `// note` is only visible in edit mode - for your own annotations
- `{word}{#0000FF}` colors text (if you don't know hex codes, use the editor toolbar)

The complete reference:

[Tutorial: Inputs and formatting in the box editor](https://www.edumaps.de/1003/1/e9o5ybwc3p/z960xa7v6r)

**✅ Checklist: Formatting**
[Checklist: Set bold, a list, and a quote via syntax / Hid a solution as a spoiler / Created a tooltip for a technical term / Inserted a hidden note with two slashes]

### 🎨 Design Elements
Source: https://www.edumaps.de/1375/1/m5mpe69wjl91/z9zkelw4723t#p7056

**🎨 Text Fields, Arrows, and Movable Images**
Instead of columns and boxes, you can also use the map format **"Stickerwall"**. Only this map format offers the following free design elements:

- **Text fields:**
Freely placeable labels, ideal for diagrams.
- **Arrows:**
With arrows you can show connections - for process diagrams, family trees, and concept maps.
- **Movable images:**
Position images freely on the map, for example for matching exercises.

On **pinboards** you can use further helpful elements for navigation:

- **Anchor links (jump marks):**
With anchors, your visitors jump straight to a specific box - this is how tables of contents and guided learning paths are built. That is exactly how the start button of this course works, by the way.
- **Automatic content overview:**
In the box editor under **Modules** you will find the option **Content overview**. It generates a complete table of contents of all boxes in one go.

All design tutorials in the folder "Basics & Editing":

[Tutorials: Basics & Editing](https://www.edumaps.de/folder/1001/1/abc5c81aun/wjstjzxouu)

**✅ Checklist: Design**
[Checklist: Placed a text field freely on a map (stickerwall). / Set two arrows and uploaded a movable image. / Set an anchor link to a box (pinboard). / Generated an automatic content overview (pinboard).]

### ⚙️ Settings & Speed
Source: https://www.edumaps.de/1375/1/m5mpe69wjl91/z9zkelw4723t#p7057

**⚙️ Map, Column, and Box Settings**
The three settings levels at a glance:

- **Map settings:**
Map background, font, format (pinboard, timeline, stickerwall, gallery, journal), releases.
- **Column settings:**
Title, color, annotations, protection, visibility.
- **Box settings:**
Label, color, visibility, collapsing, protection, comments, likes, ratings, calendar and bookings.

> 🔑 Each level can be protected with a password.

**Tip:** Work faster with keyboard shortcuts:  The editor knows shortcuts for the most common actions - a look at the [shortcut tutorial](https://www.edumaps.de/1084/1/4ztrw5fusl/3ggshiv0nr) pays off with daily use.

**✅ Checklist: Settings**
[Checklist: Changed the map background and format / Set column colors and a column annotation / Collapsed one box and protected another / Enabled comments or likes for a box / Tried three keyboard shortcuts]

### 🎉 Done
Source: https://www.edumaps.de/1375/1/m5mpe69wjl91/z9zkelw4723t#p7058

**🎉 Course Completed!**
Using the elements presented here, your maps will look professional.

**Quick recap:**

- **Syntax** saves time.
- **Spoilers and tooltips** make materials interactive.
- **Arrows and text fields** make connections visible.
- **Anchor links** guide through the map.

> The fastest way to pro level: build your next teaching material entirely in Edumaps instead of a word processor.

## 📦 6. Imports & Exports (15 min)
Source: https://www.edumaps.de/1376/1/131t2t3iqodb/dy7seythnwm3

### 📥 Imports
Source: https://www.edumaps.de/1376/1/131t2t3iqodb/dy7seythnwm3#p7060

**📥 Bringing Content into Edumaps**
Via the sidebar **Create Map**, choose **Import** to reach all import routes:

- **Edumaps file (json):**
Any exported map can be imported again - swap maps with colleagues or adopt templates.

- **Map from another Edumaps server:**
Paste the map link, done - all files are transferred.

- **Padlet board:**
Existing Padlets are imported directly, media included: https://www.edumaps.de/import/padlet

- **Tutory collection:**
Adopt worksheets and collections from Tutory directly

> Note for switchers: TaskCards unfortunately offers no export function, so importing from TaskCards is not possible. Padlet users, on the other hand, move over completely in a few clicks (see [Padlet import](https://www.edumaps.de/import/padlet)).

[Tutorial: Importing content as new maps](https://www.edumaps.de/1065/1/bck6c6wbih/hdop3a0fq8)

**✅ Checklist: Imports**
[Checklist: Found and opened the import dialog. / Exported an Edumaps file (json) and imported it again. / Viewed the Padlet import page.]

### 📤 Exports
Source: https://www.edumaps.de/1376/1/131t2t3iqodb/dy7seythnwm3#p7061

**📤 Getting Content out of Edumaps**
Your content belongs to you - the map export makes that concrete. In edit mode, via the three dots of the map menu and **Export map**, you reach among others:

- **Offline map (html):**
The map as a standalone website including files - ideal for archiving.
- **Edumaps file (json):**
The complete exchange format for backup and sharing.
- **Moodle course (mbz):**
Your map as an importable Moodle course.
- **Image file (png):**
Like a photo of the pinboard you built.
- **PDF document (pdf):**
For printing and filing.
- **Participant lists (csv):**
For bookings on the map.

> For schools this is a data protection argument: all content and data can be exported into various formats at any time.

[Tutorial: Exporting maps](https://www.edumaps.de/1066/1/1pub713maq/ticgrlk5gg)

**✅ Checklist: Exports**
[Checklist: Opened the export dialog in the map menu / Exported a map as JSON / Tried another export, e.g. PDF or HTML / Understood: exports preserve your own content permanently]

### 🎉 Done
Source: https://www.edumaps.de/1376/1/131t2t3iqodb/dy7seythnwm3#p7062

**🎉 Course Completed!**
**Quick recap:**

- **Import** brings existing content in - including from Padlet and Tutory.
- **Export** hands everything back out - JSON, Moodle, HTML, PDF.

> If you can import and export, you are never locked in. Among school platforms, that is not a given.

## 📅 7. Booking System & Rentals (30 min)
Source: https://www.edumaps.de/1377/1/5egb2ot5agdf/afpw47wlozaf

### 📅 Booking System
Source: https://www.edumaps.de/1377/1/5egb2ot5agdf/afpw47wlozaf#p7064

**📅 Boxes Become Bookable Courses**
With the [booking system](https://www.edumaps.de/1046/1/mtp976esa8/ee2qawxllh) any box becomes a bookable course - for training sessions, parent-teacher days, workshops, or events.

**How to enable bookings:**

1. Open the box settings and choose **Calendar and bookings**
1. Enable the **Booking system** option
1. Set the start time, optionally a maximum number of participants and a price
1. Save the box - the Book button appears on the box

**Good to know:**

- Registered users **and** anonymous visitors can book - the latter directly with name, institution, and email
- Participants automatically receive a **reminder email 24 hours** before the course starts
- You see the participant list in edit mode via the counter on the box, exportable as **CSV** - per course or for all courses of a map
- Booked dates appear in the participants' user calendars

[Tutorial: Booking system](https://www.edumaps.de/1046/1/mtp976esa8/ee2qawxllh)

**✅ Checklist: Booking System**
[Checklist: Enabled the booking system for a test box. / Set a start time and a maximum number of participants. / Made a booking yourself. / Opened the participant list via the counter. / Exported the participant list as CSV.]

### 🎓 Certificates
Source: https://www.edumaps.de/1377/1/5egb2ot5agdf/afpw47wlozaf#p7065

**🎓 Finishing a Course and Sending Certificates of Participation**
The wrap-up turns a booking into a real training event:

**How the course wrap-up works:**

1. After the course ends, you as the course leader see a **Finish button** instead of the Book button.
1. In the dialog you can open a **preview of the certificate of participation**.
1. With **Finish course**, all participants automatically receive an email with the link to their certificate.
1. Participants also find their certificates under [My Bookings](https://www.edumaps.de/user/bookings).

**Customizing the certificate:**

- On the [Edit letterhead](https://www.edumaps.de/docs?template) page you store your institution's logo, address, and footer
- With a divider line `---` at the end of the box content you define a **short description** that appears on the certificate instead of the full course text

> This turns every self-paced course and every in-person event into a documented training with an official certificate.

**✅ Checklist: Certificates**
[Checklist: Finished a test course. / Viewed the preview of the certificate of participation. / Set up your own letterhead with a logo. / Defined a short description with a divider line.]

### 📦 Rental System
Source: https://www.edumaps.de/1377/1/5egb2ot5agdf/afpw47wlozaf#p7066

**📦 Renting Out Devices, Rooms, and Media**
With the [rental system](https://www.edumaps.de/1055/1/pec424hul6/wenurto5ez) every box gets a reservation calendar - for device lending, room booking, or media kits.

**How to enable rentals:**

1. Box settings, **Calendar and bookings**, then **Rental system**.
1. Choose the calendar view: **month** for day-based, **week or day** for hour-based booking.
1. As a special feature for schools there is the **school periods** mode instead of clock times.
1. Optionally set **blocked days** after each rental, e.g. for device checks.

**For everyday lending:**

- Only you as the lender see the borrowers' names; others just see "booked".
- The [All rental items](https://www.edumaps.de/user/rentals) page shows all devices and reservations in one timeline; there you can also enter dates yourself or book on behalf of others.
- For each reservation you can print a **rental slip** with your letterhead and sign it.
- With **bulk booking** (map extras), users book several devices at once.

[Tutorial: Rental system](https://www.edumaps.de/1055/1/pec424hul6/wenurto5ez)

**✅ Checklist: Rental System**
[Checklist: Enabled the rental system for a test box. / Chose a calendar mode and also viewed school periods. / Made a reservation from a user's perspective. / Opened the All rental items page. / Displayed a rental slip.]

### 🛒 Sales & Payments
Source: https://www.edumaps.de/1377/1/5egb2ot5agdf/afpw47wlozaf#p7067

**🛒 Sales Module and PayPal**
In addition to booking there is the **sales module**: boxes become orderable products - for learning materials, tickets, school merchandise, or meal orders.

**How to enable sales:**

- Enable it under **Calendar and bookings**, option **Sales**.
- Optionally set a quantity and a price.
- Buyer lists work like participant lists, including CSV export.

**Payments via PayPal:**

- For courses and products you can set a price that is paid directly via PayPal.
- You see incoming payments on the [Received payments](https://www.edumaps.de/user/payments) page.
- You store your PayPal address under [My Account](https://www.edumaps.de/user/account).

> ⚠️ The PayPal payment function is available only to premium customers on the main server www.edumaps.de.

[Tutorial: Sales module](https://www.edumaps.de/1009/1/o4xh876aqd/7gt9m53bn7)

**✅ Checklist: Sales**
[Checklist: Enabled the sales module for a test box. / Played through a purchase from a user's perspective. / Opened the buyer list.]

### 🎉 Done
Source: https://www.edumaps.de/1377/1/5egb2ot5agdf/afpw47wlozaf#p7068

**🎉 Course Completed!**
You now command the complete booking and rental infrastructure.

**Quick recap:**

- **Booking** for dates and courses
- **Certificate** for the official proof
- **Rental** for devices and rooms
- **Sales** for products and orders

> For media centers this course is half the operating manual: the training catalog, device lending, and certificates of participation can be organized entirely with Edumaps - without using any other tools.

## 🛠️ 8. Edumaps for Admins (30 min)
Source: https://www.edumaps.de/1378/1/fo9b4us9o2p7/ptx85bfkr2jp

### 🔑 Admin Basics
Source: https://www.edumaps.de/1378/1/fo9b4us9o2p7/ptx85bfkr2jp#p7070

**🔑 Checking Your Account, DPA, and Letterhead**
As the school admin, you lay the foundation before your colleagues start.

**First, check under My Account:**

- Is the correct school shown and are you enabled as an admin?
- Is a **real work email address** stored? Without it, no password reset works. – Important: use functional email addresses, not private ones!
- Do the admin functions appear ([List of all accounts](https://www.edumaps.de/users/list), [Create accounts](https://www.edumaps.de/users/create), [Invite users](https://www.edumaps.de/users/invite))?

**Data processing agreement (DPA):**

Under [My Account](https://www.edumaps.de/user/account) and [Data Processing Agreement (DPA)](https://www.edumaps.de/legal/avv) you enter your school's details and confirm. The DPA is the mandatory organizational step for data protection - take care of it early, before Edumaps is used widely.

**Letterhead:**

Under [Edit letterhead](https://www.edumaps.de/docs?template) you store your logo, address, and contact details - the basis for certificates of participation and rental slips.

The detailed tutorial series with 12 chapters:

[Edumaps for Admins - Chapter 1](https://www.edumaps.de/1132/1/kbh20fr8ldnl/8f05ip0l4ejb)

**✅ Checklist: Admin Basics**
[Checklist: Checked school assignment and admin rights under My Account / Stored a real work email address / Filled in and confirmed the data processing agreement / Set up the letterhead with logo and address]

### 👤 Creating Accounts
Source: https://www.edumaps.de/1378/1/fo9b4us9o2p7/ptx85bfkr2jp#p7071

**👤 The Three Ways to Accounts**
In the [user management](https://www.edumaps.de/users/list) under [Create accounts](https://www.edumaps.de/users/create) there are three ways:

1. **List of names:**
One name per line, optionally with email and class - the fastest way for small groups.
1. **CSV file:**
For whole classes and the school year rollover, with update import.
1. **Without names:**
Neutral accounts in any quantity - ideal for test accounts and prepared classes.

**The password decision:**

The same starting password for short tests, **individual passwords** for real operation.

**Understanding dummy emails:**

Accounts without a real email get a technical dummy address. Important: password reset via [Forgot password](https://www.edumaps.de/user/forgot) does not work with it - the admin then has to set a new password for the account manually in the [list of all accounts](https://www.edumaps.de/users/list).

**✅ Checklist: Accounts**
[Checklist: Opened the user management and viewed the user list / Created test accounts without names / Created accounts from a list of names / Understood what dummy email addresses mean]

### 🎫 Securing Credentials
Source: https://www.edumaps.de/1378/1/fo9b4us9o2p7/ptx85bfkr2jp#p7072

**🎫 Login Passes, QR Codes, and the Golden Rule**
> ⚠️ **The golden rule:** Passwords and QR codes are shown **only right after creation** and are not stored on the server afterwards. Save first, then distribute!

**Right after creation:**

1. **Download the CSV file** (flashing button) - your only backup of the credentials.
1. **Show login passes** and print them as a PDF - small cards with username, starting password, and QR code.
1. Hand each user their matching login pass.

**First login via QR code:** Scan, sign in, set your own password - done. Especially for younger classes the smoothest way.

> If credentials do get lost, you as the admin set new passwords - hence: save the CSV immediately.

**✅ Checklist: Credentials**
[Checklist: Saved the CSV file with credentials right after creation. / Displayed the login passes and saved them as a PDF. / Tried the QR code login with a test account. / Stored the credentials in a protected place.]

### 🏫 Classes & Outlook
Source: https://www.edumaps.de/1378/1/fo9b4us9o2p7/ptx85bfkr2jp#p7073

**🏫 Managing Classes and the Next Steps**
In the user management under ["Manage classes & groups"](https://www.edumaps.de/users/usersets) you create learning groups, which are then available to your teachers as ["predefined classes"](https://www.edumaps.de/users/usersets-admin).

That means teachers can subscribe to these predefined classes and also distribute maps to them.

**More admin tools:**

- **CSV import with school year rollover**
- **Single sign-on** and handling duplicate accounts
- **Merging accounts** and **deleting multiple users**
- **Folder structures** for departments and year groups

See: [Guide for admins: managing users, classes, and your school](https://www.edumaps.de/1008/1/bpk12qmwjr/zdo0glozn4)

The complete 12-part admin series also covers the booking system, certificates, Padlet import, and rentals - each chapter as its own map.

[Edumaps for Admins – Step by Step](https://www.edumaps.de/folder/1022/1/dqjte8pcqe6r/sj6cchzgiq87)

**✅ Checklist: Classes & Outlook**
[Checklist: Created a class or group. / Assigned an account to a class. / Bookmarked chapter 2 of the admin series for the CSV import. / Starter kit complete: DPA, letterhead, accounts, login passes, classes.]

### 🎉 Done
Source: https://www.edumaps.de/1378/1/fo9b4us9o2p7/ptx85bfkr2jp#p7074

**🎉 Course Completed!**
> ✔️ Your school is ready to go.

**Quick recap:**

- **Check first** (account, DPA, letterhead)
- **Then create** (accounts, classes)
- **Save immediately** (CSV, login passes)
- **Then distribute** (QR codes to staff and classes)

> Tip: Right at the start, hand your colleagues the course ["Getting Started with Edumaps for Teachers (20 min)"](https://www.edumaps.de/1371/1/4f5041a1exls/7jypgyr81rne) - then Edumaps explains itself.

## 🎒 9. Edumaps for Students (15 min)
Source: https://www.edumaps.de/1379/1/5okgu3nkfusc/kvu52z3wt6sa

### 🚀 Your Start
Source: https://www.edumaps.de/1379/1/5okgu3nkfusc/kvu52z3wt6sa#p7076

**🚀 Signing In and Setting Up Your Account**
Welcome to Edumaps! Here you work with your class on digital pinboards - the **maps**.

**How to set up your account:**

1. Sign in with your username and password (or scan the QR code on your login pass).
1. Open the ["My Account"](https://www.edumaps.de/user/account) page - there you can see your school.
1. Follow the prompt **Set up account**: choose an email and your own password.
1. Confirm the link in the email you receive.

> Your email address helps you reset your password yourself if you ever forget it.

**Here's how you find maps:**

Your teacher sends you a link or shows you a QR code. You can also find your school's maps under [My School](https://www.edumaps.de/maps/school).

**✅ Checklist: Your Start**
[Checklist: Signed in and set up your account. / Confirmed your email address. / Opened a map via link or QR code. / Found the My School maps page.]

### ✍️ Taking Part
Source: https://www.edumaps.de/1379/1/5okgu3nkfusc/kvu52z3wt6sa#p7077

**✍️ Working on Maps and Handing In Material**
A **pinboard** consists of columns with boxes. There are also **timelines** and **stickerwalls** with freely arranged boxes.

**What you can do on maps (if your teacher enables it):**

- Create your own boxes and write texts
- Upload images, audio recordings, and files
- Vote in polls and tick off checklists
- Rate boxes if your teacher has enabled ratings

**Handing in solutions:**

Via a box's **comments** you hand in your solution directly - as text, image, audio, or file. Your teacher can set it so only they see your submission.

**Uploads:**

You will find all your uploads under ["Upload Manager"](https://www.edumaps.de/uploads). You see new comments as a notification at the top right, which takes you to the ["New activities"](https://www.edumaps.de/notifications) page.

**✅ Checklist: Taking Part**
[Checklist: Created your own box. / Uploaded an image or a file. / Handed in a solution as a comment. / Found the "Upload Manager" page.]

### 🎉 Done
Source: https://www.edumaps.de/1379/1/5okgu3nkfusc/kvu52z3wt6sa#p7078

**🎉 Done - You Know Your Way Around!**
> That's all you need to get started.

**Quick recap:**

- **A link or QR code** opens the map.
- **Boxes** are your workspace.
- **Comments** are where you hand things in.

> By the way: only you can see your ticks in this course's checklists - each person has their own progress. Have fun with Edumaps!

## Template catalog
Source: https://www.edumaps.de/folder/1030/1/dz6c9xqji5h4/bf3pl22ra5vt

**1. Teaching & Learning Materials**
- [Career Guidance: Internship & Application](https://www.edumaps.de/1294/1/jofoledzvw8k/505rea3hk2wx)
- [Class Pinboard of Class ...](https://www.edumaps.de/1343/1/hque8toxz831/a0lgdiomv7d0)
- [Class Quiz Show (Points Duel)](https://www.edumaps.de/1339/1/wfl4l63xwbw4/s24a4ue1zbpr)
- [Class Rules & Class Council](https://www.edumaps.de/1336/1/gx0tzt9zo3pd/a4pw7vjfw10c)
- [Digital Escape Room](https://www.edumaps.de/1282/1/bmicksdy1iox/78x8pzww4ret)
- [Document an Experiment](https://www.edumaps.de/1290/1/ascff58tfm63/ssn49dv5a92p)
- [English Vocabulary Trainer (Unit Structure)](https://www.edumaps.de/1277/1/2d5b405ava2y/rupkp0wuexz5)
- [Explainer Video Collection: ...](https://www.edumaps.de/1285/1/g8d3vkyg3aba/kj1ugkfjxois)
- [Exploration Tour / Rally with Stations](https://www.edumaps.de/1184/1/5f5b9darf2ki/f5hstds34jmn)
- [Fact File Templates (Animal, Country, Person)](https://www.edumaps.de/1289/1/3fybs6jyttue/64gb9jksb0rk)
- [Feedback & Reflection Board for Schools](https://www.edumaps.de/1120/1/14efy030i2/klzfdhd14v)
- [Final Exam Preparation: Subject ...](https://www.edumaps.de/1293/1/ofz8yikzen3f/32fjrv00q80b)
- [Getting-to-Know-You Quiz: How Well Do You Know Each Other?](https://www.edumaps.de/1341/1/r3zaqyeufxb9/s1z7z65gajjp)
- [Homework Central (Class)](https://www.edumaps.de/1103/1/hi398brhdr/x8p4quot99)
- [Interactive Whiteboard (Shared Session)](https://www.edumaps.de/1197/1/pns63u03d5pm/jcfmbwhai200)
- [Learning Map: Topic ...](https://www.edumaps.de/1292/1/1cdyjfy9wdmp/p88m5ps7fqhc)
- [Learning Stations / Learning Buffet](https://www.edumaps.de/1281/1/9q43q0l2ypie/yxaa0t49ehd8)
- [Maths Practice Wall with Self-Check: ...](https://www.edumaps.de/1288/1/kak0pjxzeym8/a9lwm2lhu2vr)
- [My Portfolio](https://www.edumaps.de/1284/1/oobz6mti4z5m/wburpsodehb6)
- [Natural Sciences: Experiments & Protocols](https://www.edumaps.de/1111/1/1ly7tya03m/qplyep7x34)
- [Plan a Presentation: From Idea to Delivery](https://www.edumaps.de/1280/1/02eiuljbusnf/jktnawjlkm1l)
- [Planning a Teaching Unit (with AI Support)](https://www.edumaps.de/1352/1/r9jjxm38suzz/gh0m690auc8e)
- [Poetry Analysis Step by Step](https://www.edumaps.de/1287/1/wbnnqu1m2cww/y0ur1r31020r)
- [Prepare a Book Presentation](https://www.edumaps.de/1279/1/1ipb1beyi9ab/1wk9fnhpe62n)
- [Prepare a Debate](https://www.edumaps.de/1291/1/7cho18is6m5m/f7rlpg7l7g3j)
- [Questions and Answers / Interview](https://www.edumaps.de/1185/1/wa8ajpbo66wi/qc4doev19rpr)
- [Quiz with multiple-choice questions](https://www.edumaps.de/1123/1/wg1u1wqmh6/g1w1tc1sd5)
- [Read Aloud & Audio - Examples for dictation, foreign languages, exercises](https://www.edumaps.de/1370/1/k6t1mcx2htej/mg6iqfexxa7v)
- [Reading / Literature Circle](https://www.edumaps.de/1109/1/lq6qmkpla0/q0plng6d8h)
- [Reading Journal for ...](https://www.edumaps.de/1278/1/6r9q542qxmbz/bkby1qxmnve0)
- [Secondary I Weekly Plan (Week of DD.MM.)](https://www.edumaps.de/1342/1/p34m7rbkecp0/ldn6wzi8d30q)
- [Spooky Stories Wall (Halloween)](https://www.edumaps.de/1355/1/vqyaowz99uhu/ypzqczhiqcb2)
- [Substitute Lesson Without Preparation](https://www.edumaps.de/1337/1/9lemxppqo6wx/iwjt9tqxruvo)
- [Teaching Unit / Sequence (4–8 Weeks)](https://www.edumaps.de/1102/1/h9xu9z2nba/iyqm40r1mz)
- [Training Series / Tutorial Course](https://www.edumaps.de/1193/1/0i5fldhddu4j/jdl0rwyixf8k)
- [True or False? (Quiz Template)](https://www.edumaps.de/1340/1/j3fl36k11o13/76wpk9ovrov4)
- [Vocabulary & Grammar Trainer](https://www.edumaps.de/1110/1/befpu8je55/win14xn95n)
- [Weekly Plan for ... (Week Beginning ...)](https://www.edumaps.de/1283/1/c6l31gxa5ebl/idrslsawjkgl)
- [Writing an Essay: My Writing Plan](https://www.edumaps.de/1286/1/ltsg8ivwzoyx/spe9pcawz38y)

**2. Projects & Collaboration**
- [Concept Board](https://www.edumaps.de/1186/1/4s94fjukyfjc/oq69c74wvw3i)
- [Coordinate a Student Exchange / Erasmus+](https://www.edumaps.de/1301/1/rjohfdkiirz8/4vgjisijgmtz)
- [Create a Yearbook / Graduation Newspaper](https://www.edumaps.de/1298/1/4ous30cd5rla/gf3uhu14od92)
- [File Storage (Cloud Storage as a Map)](https://www.edumaps.de/1183/1/jh3hd03p34oh/glgdofm5vxcg)
- [Group Work Organizer: Roles & Tasks](https://www.edumaps.de/1108/1/23hxyjvoje/siw7psnimw)
- [Kanban Board (professional)](https://www.edumaps.de/1202/1/ix3khvrl7v/1stfayl89z)
- [Kanban Board (simple)](https://www.edumaps.de/1058/1/rg0jec4yyp/omh8yttvjf)
- [Plan a Research Paper / Seminar Paper](https://www.edumaps.de/1296/1/gjup2kcopjes/qj2j1x9y2b3h)
- [Plan and Publish a Podcast](https://www.edumaps.de/1191/1/l9tgedcideq2/bid5kos4um8y)
- [Project Management Pinboard for Student Projects](https://www.edumaps.de/1107/1/r6qjdjzsun/ousoxclwju)
- [Retrospective After the Project](https://www.edumaps.de/1302/1/o98ltoq0axob/6ptibwdc18bu)
- [School Newspaper (Editorial Board)](https://www.edumaps.de/1297/1/0btu63il8czk/luei1vo3mwkt)
- [Scrum for Student Projects (Simplified)](https://www.edumaps.de/1295/1/7cbg4y8dvkee/kvi2bwbtlfiv)
- [Sponsored Run / Organise a Social Project](https://www.edumaps.de/1300/1/p5pb2pxlouwe/69end61la7ig)
- [Theater / Musical Production](https://www.edumaps.de/1299/1/f8pd2g9fkl0c/wt6v7e3iagbr)

**3. School Organisation & Administration**
- [All-Day School: Activities & Groups](https://www.edumaps.de/1329/1/bqrnb9v4486b/jfnvid30f909)
- [Crisis & Emergency Plan (Staff, Read-Only)](https://www.edumaps.de/1330/1/rznxkemsgaxt/cc17i1ucxt9b)
- [Curriculum Mapping (Standards → Teaching)](https://www.edumaps.de/1105/1/19hkainhv5/aobi3mgzqq)
- [Department Committee (Overall Portal)](https://www.edumaps.de/1146/1/4yul6kzwoouz/85g2s5c7uki2)
- [Department Inventory List ...](https://www.edumaps.de/1327/1/4c0hdgejjte7/q71udcpto785)
- [Differentiation & Support Planning](https://www.edumaps.de/1112/1/ewxpzppwqk/urjt1ah3xu)
- [Digital Notice Board / Daily Information](https://www.edumaps.de/1334/1/zo90lo6jh9xe/ncr0lqh8rdpo)
- [Education Center Home Page ...](https://www.edumaps.de/1351/1/izusd49278d7/8zydzc2os4it)
- [Extracurricular Activities Overview & Registration (School Year 20../20..)](https://www.edumaps.de/1240/1/u34uaxwhbx33/mmjcnikny8cu)
- [Faculty / Staff Work](https://www.edumaps.de/1116/1/ymdhclwt0n/dcyb7e3goy)
- [Helper List for the School Festival on DD.MM.](https://www.edumaps.de/1241/1/ujnndlw7qz0r/3az7jwg4nf1x)
- [Info Point via QR Code (Notice)](https://www.edumaps.de/1192/1/hpfi3bhj4l1i/de6xnrso4b85)
- [Internal Professional Development: Staff Registration](https://www.edumaps.de/1242/1/xvb4d3972u9m/zupveigrx1rs)
- [Material Library for Schools](https://www.edumaps.de/1119/1/u5tfrw2zhv/tfas14nooo)
- [Media Lending](https://www.edumaps.de/1148/1/grqcj490ms2y/ec25ne3oh1uf)
- [New Teacher Onboarding](https://www.edumaps.de/1145/1/mrd1o10ou4yq/3p9psj3iivah)
- [Observation & Teacher-Training Plan](https://www.edumaps.de/1331/1/2byxacrjk5mt/trshxgok9mn9)
- [Organise School Enrolment](https://www.edumaps.de/1325/1/dtssrc3revyx/3i06c2rw85eq)
- [Organizing an Open Day](https://www.edumaps.de/1354/1/k8b6kizb19n1/xwwaluop7vco)
- [Plan a School Festival (Organisation Team)](https://www.edumaps.de/1324/1/fa79ajgnezxz/b03upjq0tefu)
- [Planning a Field Trip / School Excursion](https://www.edumaps.de/1115/1/sln6c9ypzj/dgo50xcdno)
- [Planning a Project Week (with Sign-Up)](https://www.edumaps.de/1353/1/kzuko3fdlv80/s9c1njxhoztk)
- [Prepare Report Conferences](https://www.edumaps.de/1326/1/k6vchjnjjtzc/chhl53vitsla)
- [Project Day](https://www.edumaps.de/1147/1/6v72wb50xlqm/8engrvp5aftn)
- [School Development (Steering Group)](https://www.edumaps.de/1332/1/2m60u7cbkkh2/572x645h41rn)
- [School Exam & Test Plan](https://www.edumaps.de/1104/1/heoupcibuw/gj3g4qc5ky)
- [Seating Plan Class ...](https://www.edumaps.de/1335/1/4wewu41suw75/zd4rotaf1si5)
- [St. Martin / Planning the Lantern Festival](https://www.edumaps.de/1356/1/j767nhl9jgye/gb2i13fvwgvz)
- [Staff Portal](https://www.edumaps.de/1144/1/8531onzgbokn/3rj7djk7cubn)
- [Student Council (Working Board)](https://www.edumaps.de/1328/1/6chgz95uu2u5/zxfqkeo4v5ek)
- [Substitute Teacher Folder](https://www.edumaps.de/1106/1/aup85i1bgg/0ftiqtvoih)
- [Support/Development Plan Documentation (Team View)](https://www.edumaps.de/1113/1/r6ddxy9p8b/58f72ut1zl)
- [Support Board (Help and FAQ)](https://www.edumaps.de/1195/1/a6ywqdkgev09/tapf5flyxp31)
- [Training Tracker](https://www.edumaps.de/1117/1/7bl0vjlfd2/z2zung2qso)
- [Welcome to the Team (Onboarding New Teachers)](https://www.edumaps.de/1333/1/yk5av12u7kee/dhcpuy4ptbmi)

**4. Parents & Communication**
- [After Year 4: Transition to Secondary School](https://www.edumaps.de/1260/1/0w2ed17xz2ze/yz88msiuqvai)
- [Book a Parents' Consultation Day at …](https://www.edumaps.de/1201/1/kwrjovvptg/pnepv6ot5e)
- [Class Fund (Transparent Overview)](https://www.edumaps.de/1257/1/oy4vfnt9igar/s7enqpjiq6kh)
- [Class Trip to ... (Information for Parents)](https://www.edumaps.de/1261/1/2pstskuv0ys6/5kf0yorgznpy)
- [Class Worry Box](https://www.edumaps.de/1338/1/43u3zgmh3ka2/7372xh9sd042)
- [Daycare Group Pinboard: Group ...](https://www.edumaps.de/1357/1/crl15rlwf5g5/prd14m93qp8i)
- [Feedback from Parents](https://www.edumaps.de/1263/1/dxv9c9kg60f1/wcmyx7mbor2f)
- [From Preschool to Primary School (Parent Information)](https://www.edumaps.de/1259/1/rcxq4nkb9giu/go1akoelqevs)
- [Info Point via QR Code (Notice)](https://www.edumaps.de/1192/1/hpfi3bhj4l1i/de6xnrso4b85)
- [Newsletter as a Map (Issue Month/Year)](https://www.edumaps.de/1189/1/017h9w44mxt5/olab1uctra9e)
- [Parent Conference Day](https://www.edumaps.de/1054/1/7eki101kaq/g63s9vldb7)
- [Parent Council / School Parent Council (Working Board)](https://www.edumaps.de/1256/1/zmjiyf3ns9j6/feggw3aycc4r)
- [Parent FAQ: Procedures at Our School](https://www.edumaps.de/1264/1/ln8z9hwctpu3/h7v24y9r9ty6)
- [Parent Info for Summer Camp (All Info in One Place)](https://www.edumaps.de/1381/1/68ldkswf06b2/kscltzv6xcao)
- [Parent Information Board (Multilingual)](https://www.edumaps.de/1262/1/epqxksvckbct/fjm265gghew2)
- [Parent Information Pinboard (read only)](https://www.edumaps.de/1114/1/g540gpkv2t/19lc7ohyp4)
- [Parent Meeting](https://www.edumaps.de/1149/1/g5omi2rhyc0a/v939f3vl36sz)
- [School-Start Checklist (Year 1)](https://www.edumaps.de/1258/1/86tbfv0h3w94/1yjwok6drdpk)
- [Settling In at Daycare (Parent Information)](https://www.edumaps.de/1358/1/ibt1gngn9w3k/nuz2br8w1o9t)
- [Welcome to Our School (Information Pack for New Families)](https://www.edumaps.de/1255/1/dazen51t5y4q/cjjmte1iqndk)

**5. Calendar & Time Management**
- [Advent Calendar (24 Doors)](https://www.edumaps.de/1232/1/nhbc38wrpq4p/4wf5vv8mse4j)
- [Cafeteria Menu for the Week (DD.MM. to DD.MM.)](https://www.edumaps.de/1239/1/45vaemsw6ctj/e5ij6rce09pe)
- [Class Birthday Calendar](https://www.edumaps.de/1231/1/qaiwsrmqpqp6/7oatgpc8hhrq)
- [Classroom Duties Plan](https://www.edumaps.de/1234/1/84zjnw3bk7cw/vt0wmlwkmyww)
- [Countdown Wall: ... Days Until ...](https://www.edumaps.de/1235/1/78fwpy08s9j7/bijo6dn9yfet)
- [Month with 30 days](https://www.edumaps.de/1017/1/1luahvc9x6/4rqo8f3tty)
- [Rent & Book Rooms (with Calendars)](https://www.edumaps.de/1362/1/o4av34fh4518/p7yjmpb7guwr)
- [Room Occupancy Schedule: Room ... (Week ...)](https://www.edumaps.de/1238/1/ywk7dhimfh7m/7wdtr7u7hsor)
- [School-wide Calendar + Duty Plan](https://www.edumaps.de/1118/1/allh6jaany/u7s6wjm9de)
- [School Holiday Calendar 20../20..](https://www.edumaps.de/1230/1/7avrzh7w5h0q/xk2oal1gyal1)
- [Semester Planner for Teachers](https://www.edumaps.de/1237/1/ap3noqyyfj68/84rwl0g87av1)
- [Study Plan Before a Test (2 Weeks)](https://www.edumaps.de/1236/1/16c1pdhpzmil/04vqfbztxhw7)
- [Timetable / Weekly Calendar](https://www.edumaps.de/1010/1/yqui7zkfkw/xow0kpo5uo)
- [Upper Secondary Exam & Submission Schedule](https://www.edumaps.de/1233/1/htmij4z1ivra/bjz2p9vpokyo)
- [Weekly Lesson Plan (1 Teacher) – Pinboard](https://www.edumaps.de/1101/1/eg76ai739f/fviw98dbgu)
- [Weekly Plan for Teachers (with Checklists)](https://www.edumaps.de/1361/1/w1ittjqqfqnx/s85c66acqag0)
- [Weekly plan for ... in the subject ... (week ...)](https://www.edumaps.de/1203/1/wbjc2azeqj/j7kfllspgz)
- [Work Schedule (4 Weeks)](https://www.edumaps.de/1034/1/jwgjb1dybn/tfutcyufqq)
- [Year with 365 days (Pinboard)](https://www.edumaps.de/1048/1/asowgm3zdt/vc0hvh30z5)
- [Year with 365 days (Timeline)](https://www.edumaps.de/1049/1/uk07uinqwz/l81dflot3p)

**6. Photo, media & gallery walls**
- [Art Gallery of Class ...](https://www.edumaps.de/1304/1/npqqfmfaz9dy/6ki7vjpto6g3)
- [Before-and-After Gallery](https://www.edumaps.de/1307/1/gz6knabjlqwc/5ciqchtdgqaz)
- [Class Trip to ...: Our Photo Album](https://www.edumaps.de/1303/1/syp8g8tf4n2z/br4sr72huu6b)
- [Free Media (Creative Commons and Public Domain)](https://www.edumaps.de/1013/1/pw7cfy2fsn/q6phi25vlm)
- [Graduating Class of 20..: Our Memory Wall](https://www.edumaps.de/1306/1/zhg7nbgc7ikj/cxe3vjhw259q)
- [Mood Board](https://www.edumaps.de/1188/1/bfdm47upek5y/h6z2awv874bt)
- [Our Class Recipe Gallery](https://www.edumaps.de/1308/1/rowni3t9yrjw/lermxk7x018t)
- [Overview of popular Dog Breeds (Gallery)](https://www.edumaps.de/1020/1/zf3f59t4cr/va2e0leryf)
- [Overview of popular Dog Breeds (Gallery Photo Mode)](https://www.edumaps.de/1021/1/am9zxcjnlo/sixoz3b3wq)
- [Overview of popular Dog Breeds (Stickerwall)](https://www.edumaps.de/1022/1/uf1hsqjpwf/eg0pednqvx)
- [Photo Wall (minimalistic)](https://www.edumaps.de/1018/1/o484dyf7pf/4k3dmkxg78)
- [Photo Wall with Like Feature (Hearts)](https://www.edumaps.de/1024/1/pjrcvjk5tf/bxvusjbgai)
- [This Is Me: Our Getting-to-Know-You Wall](https://www.edumaps.de/1305/1/nnfjuslgdy47/272u3d7e1mnz)

**7. Pupils & Students**
- [Semester Planner (Semester ...)](https://www.edumaps.de/1317/1/g5yj6mwb7vfc/j213wsae6oix)
- [Plan the Exam Period](https://www.edumaps.de/1318/1/cqplvdtvm7gk/cyck438ejw05)
- [Part-Time Job & Finances at a Glance](https://www.edumaps.de/1321/1/sa5c1cnykv7v/hlrt7s2ly54n)
- [Organise a Study Group](https://www.edumaps.de/1319/1/6fu8bvmhkcvq/m4gg1ar7x3l7)
- [My Homework & Submission Planner](https://www.edumaps.de/1316/1/89o5qghmu3ty/fr8nb75tgiv2)
- [Learn a Language: My Self-Study Plan](https://www.edumaps.de/1322/1/r8wmoe697jz9/pawxr9t1shvf)
- [First-Year Student Checklist: Start University Well](https://www.edumaps.de/1323/1/ukpucayss9k6/352crkamnndj)
- [Application Tracker (Apprenticeship, University, Job)](https://www.edumaps.de/1320/1/e23rzc5sbggh/q12a707mhyi3)

**8. Private & Everyday Life**
- [Coordinating a Search Operation (Missing Person)](https://www.edumaps.de/1194/1/yjqzqqwxtnye/alnndkc0m22m)
- [Where Is What? (Documenting Storage Locations)](https://www.edumaps.de/1181/1/yy881mnp9w0a/nbri1t2errgf)
- [Blog as a Map](https://www.edumaps.de/1182/1/y4jc792bfbfg/oyafuw42uala)
- [Bookmark Manager (Link Collection)](https://www.edumaps.de/1187/1/rf6he5bjpkvi/1fkkrloo6i99)
- [Swap Board (Offering / Looking For)](https://www.edumaps.de/1196/1/931tmctf569a/znddlbomdil8)
- [Notes Board (Personal Notes)](https://www.edumaps.de/1190/1/a1w9a3abt5hq/q8bsj1u7oe8v)
- [Plan Christmas](https://www.edumaps.de/1274/1/r3upqustdpjs/zxxulyomoydg)
- [Plan a Wedding](https://www.edumaps.de/1266/1/uv2jukmng4gc/g5jkup2tpv5l)
- [Plan a Move (Checklist & Timeline)](https://www.edumaps.de/1265/1/4lnxsk91nus1/hdixvw08me4f)
- [Plan a Children's Birthday Party](https://www.edumaps.de/1267/1/3zbnujkoiph5/qnhvelv4d3j5)
- [Our Recipe Collection](https://www.edumaps.de/1271/1/9i5ore6p8gr3/dolxwxyl5sch)
- [Our Family Tree](https://www.edumaps.de/1276/1/6n958yptythe/st3jx005s1pw)
- [My Goals & Bucket List](https://www.edumaps.de/1273/1/pnpgil14w3li/5cdoro9f9yat)
- [Holiday Planning](https://www.edumaps.de/1268/1/3p9k3th8zud8/yed9gozr04uf)
- [Garden Year Planner](https://www.edumaps.de/1272/1/0ndaj4gn3z7q/cxe039wqka55)
- [Family Weekly Planner](https://www.edumaps.de/1269/1/roldbog6t6bv/fqi1te3u803z)
- [Cleaning & Household Rota (Shared Flat or Family)](https://www.edumaps.de/1270/1/46f6p4ewv63b/416i31c3yioi)
- [Baby Preparation & Essentials](https://www.edumaps.de/1275/1/ozst14wo6zc0/i2t7jkew0hit)

**9. Sports & Tournaments**
- [Break-Time League / Class Tournament](https://www.edumaps.de/1315/1/8p2emr7rpxcn/k3ufyn7cpk8l)
- [Collecting Money: Tournament / Team Trip](https://www.edumaps.de/1344/1/6fon1gfdfaqv/d1kjhva5mqdb)
- [Consent Forms & Documents (Return Board)](https://www.edumaps.de/1350/1/9fnjodl7k1c0/bm5xlxt2vkps)
- [Knockout Tournament Bracket (8 Teams)](https://www.edumaps.de/1309/1/ybcjbmep01sr/bsvcdhx0b4po)
- [League Table (Round-Robin)](https://www.edumaps.de/1310/1/ev770fjw2k5r/wo9umpfyzsxj)
- [Matchday Organisation & Squad](https://www.edumaps.de/1314/1/6lszpfegr579/l9seitrypaou)
- [Materials & Inventory Management (Club)](https://www.edumaps.de/1348/1/5vsjize6q8jv/7uxihcfqk46c)
- [Members & Contributions Management (Status Board)](https://www.edumaps.de/1349/1/85uorr8ypp13/ycgk0f4sc187)
- [Organise the Federal Youth Games](https://www.edumaps.de/1311/1/v1nqwgd6i580/legurrjsky49)
- [Organizing the Season Finale / Club Celebration](https://www.edumaps.de/1347/1/yujf4p433x5h/hsu8rxafc038)
- [Plan a Sports Festival / Games Day](https://www.edumaps.de/1312/1/01d1q0i0kqhj/fj00y8rxk9kp)
- [Sportswear & Jersey Ordering](https://www.edumaps.de/1346/1/mouio5b9y2ai/1l5qmg3cfyx2)
- [Team ... Season Plan (Season 20../..)](https://www.edumaps.de/1313/1/qp0gm9n28ynh/ap0ma998uyu6)
- [Team Trip / Tournament Abroad](https://www.edumaps.de/1359/1/y4hgpzckjs6o/yj2hmfw97tsk)
- [Tournament Center: Boxing 🥊](https://www.edumaps.de/1210/1/3m07tijah8/uejip2oad2)
- [Tournament Center: Soccer ⚽](https://www.edumaps.de/1211/1/x8qbihzqoz/e9mu5tk8e3)
- [Weekly Training Plan (DD.MM. to DD.MM.)](https://www.edumaps.de/1345/1/vszfoq4c0fcb/rxjaq28ong5a)

**10. Diagrams & Charts**
- [Associagram](https://www.edumaps.de/1033/1/lww8g68g7u/7gk06ot6a7)
- [Cladogram](https://www.edumaps.de/1032/1/k20it353o6/4o4yzp7422)
- [Concept Map](https://www.edumaps.de/1254/1/gx342scrl2kq/qm4jqoovm6qw)
- [Cycle Diagram](https://www.edumaps.de/1253/1/j68tqt1sgey1/8kavcqtgxdkm)
- [Decision Tree](https://www.edumaps.de/1029/1/o7ggslp1kf/iky010eohx)
- [Example: Empathy Map](https://www.edumaps.de/1037/1/nxrg30nz12/uq05rkcbsm)
- [Example: Evaluation with coordinate system (scatter plot)](https://www.edumaps.de/1038/1/9uk5q1qc63/q4y8spwk7c)
- [Family Tree](https://www.edumaps.de/1027/1/8k3betudld/nmr12uuesz)
- [Fishbone Diagram (Cause and Effect)](https://www.edumaps.de/1248/1/pj070mk4zpco/ecdi6u0l3jh5)
- [Flowchart](https://www.edumaps.de/1244/1/oiqlyprrys3t/g5fyr20xid2z)
- [KWL Table (Know, Want, Learned)](https://www.edumaps.de/1250/1/1uuzfobhlj3j/5an4dz87y3zd)
- [Mind Map](https://www.edumaps.de/1243/1/hjzr2g2l9t2g/wovjqe947v2r)
- [Organisation Chart](https://www.edumaps.de/1249/1/n6or5df42rfp/78mfbfnjloyc)
- [Parse Tree](https://www.edumaps.de/1031/1/n2axp4lizn/jrvatmro1p)
- [Placemat (Group Work)](https://www.edumaps.de/1251/1/7q6jmgun3pn5/hdaou5e95bl5)
- [Pros and Cons Table](https://www.edumaps.de/1252/1/mppv954dyy5z/p8osiw9wjt1j)
- [Quadrant Map / Chart](https://www.edumaps.de/1036/1/7oroyunsfw/8ocdr7ql3i)
- [SWOT Analysis](https://www.edumaps.de/1245/1/iv4yjlv1wro9/wq6djkn43r5q)
- [Timeline](https://www.edumaps.de/1247/1/a5q8pfzxerra/7wkgu1978inh)
- [Tree Diagram](https://www.edumaps.de/1030/1/g4icad2qaa/5njpir6uw3)
- [Venn Diagram (Comparison)](https://www.edumaps.de/1246/1/p44bt8wol05m/sv9ggp9nhm4g)

**11. Maps (geographic)**
- [City Quiz Germany (geographical map)](https://www.edumaps.de/1069/1/3520w5a0ne/d174l0etuh)
- [City Quiz Switzerland (geographical map)](https://www.edumaps.de/1070/1/ib48gfbdm7/v7qy6yej34)
- [Tour on Map “Culinary Journey”](https://www.edumaps.de/1051/1/iajb8i8w2j/kpcinyrpgz)
- [Zoom into Maps of Germany](https://www.edumaps.de/1052/1/mowmivk3i3/6h6h7slvr4)

**12. Examples & Inspiration**
- [Brainstorming with Text Labels](https://www.edumaps.de/1025/1/nrcdyod6yo/wdsv6kzs6m)
- [Digital Curriculum Vitae (CV) on Edumaps](https://www.edumaps.de/1090/1/gn7fvfhc14/b6oevm2z38)
- [Draw cuboids with labels](https://www.edumaps.de/1035/1/2enxva9fq2/b020dsdemb)
- [How Music Schools Are Using Edumaps](https://www.edumaps.de/1089/1/7q7pfuwvqp/zl18v93yb5)
- [How Primary Schools Are Using Edumaps](https://www.edumaps.de/1091/1/wfhwto23cs/gijxg5c8cq)
- [Mathematics Quotes and Sayings](https://www.edumaps.de/1019/1/jm16nsu7lq/4svqlba5zc)
- [Our Faculty – Portraits of Teachers](https://www.edumaps.de/1212/1/ywmw0cujf7/nqqohuvte2)
- [Poll with Votes](https://www.edumaps.de/1085/1/blgrb3finn/ste4pd0w1i)
- [Restaurant Menu with Prices](https://www.edumaps.de/1039/1/t6n47f1tac/ytl5fiac3p)
- [Second World War - Timeline](https://www.edumaps.de/1023/1/sfuej3hnii/6jamjoojas)
- [Sort fractions on the number line](https://www.edumaps.de/1044/1/2slqx7koui/m73cr9jsrh)
- [Table of Contents with Anchor Links](https://www.edumaps.de/1053/1/v02a2muunq/e0wf3lp7ma)
- [Weekly Schedule for Primary School](https://www.edumaps.de/1011/1/l264ny59nd/p26109lvv4)