4.5 Tutorial: Export of Maps
Edumaps
1
Steps to Export
-
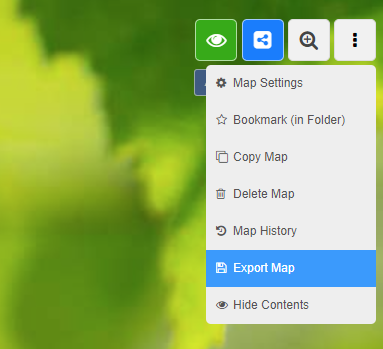
For the export, proceed as follows:
-
Click on the three dots at the top right in edit mode and select "Export map".
-
The following dialog will then open:
-
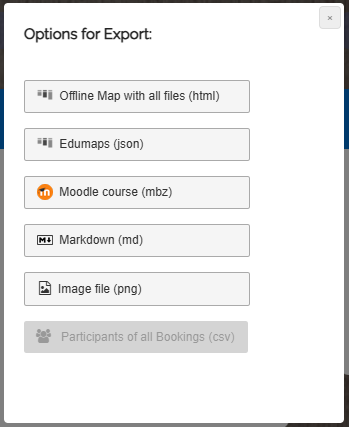
Select the desired option here.
-
⚙ export
2
Offline Map with all files (html)
-
With the export option “Offline Map with all files (html)” you can download your entire map and make it available offline.
-
Here, in addition to the HTML, all files are provided.
-
The download is available as a ZIP file.
-
In addition to the HTML and your files, the ZIP file also contains an Edumaps JSON export file.
-
⚙ htmlexport
3
Edumaps File (json)
-
By default, any map can be exported as a JSON file.
-
This file can be imported on any Edumaps server and will create a new map.
-
Click on “Edumaps (json)” and the JSON file will be generated.
-
-
If you import the file on another Edumaps server, an attempt will be made to transfer all files from this map to the new server.
-
⚙ json
4
Moodle Course (mbz)
-
It is possible to export a map with all its contents directly as a Moodle course.
-
To do this, click on “Moodle course (mbz)” and a Moodle course file will be generated.
-
This Moodle course is structured according to the setup of your map and can be imported into Moodle.
-
In Moodle, you can then directly import the MBZ file as a course using the “Restore course” function.
-
⚙ moodle