3.2 Embed external Boxes
Edumaps Tutorial EdumapsIntroduction
-
✔️ By embedding boxes from other maps, you can make individual boxes centrally available on many other maps.
-
✔️ If you update a box, it will be updated in all embedded locations. This allows you to make information widely available - with just one change to one box.
-
Embedding is possible with just a few clicks. Here we briefly show you how to proceed.
1
Embed external Boxes (Part 1/4)
-
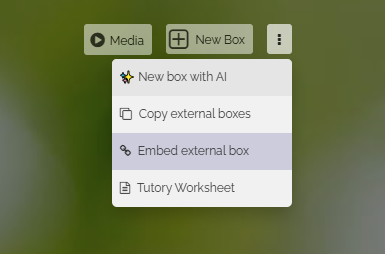
To embed an external box from another map, click on the three dots to the right of the "New Box" button. A dropdown will then open. Select "Embed External Box" from there.
-
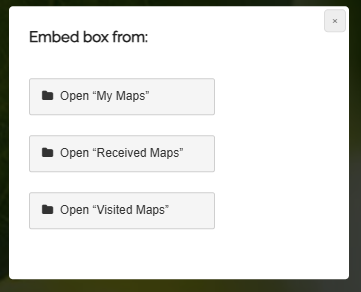
Clicking on it will display the following selection, where you can search for boxes:
-
You can choose:
-
In fact, you can also embed boxes into your map from all other pages that list maps.
2
Embed external Boxes (Part 2/4)
-
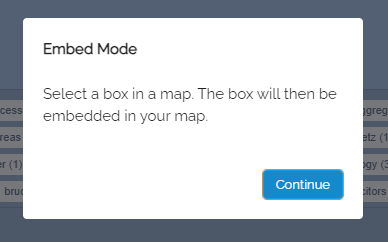
By selecting the page such as “My Maps” you will be redirected to the corresponding page. There you will see the note that you are now in the embedding mode.
-
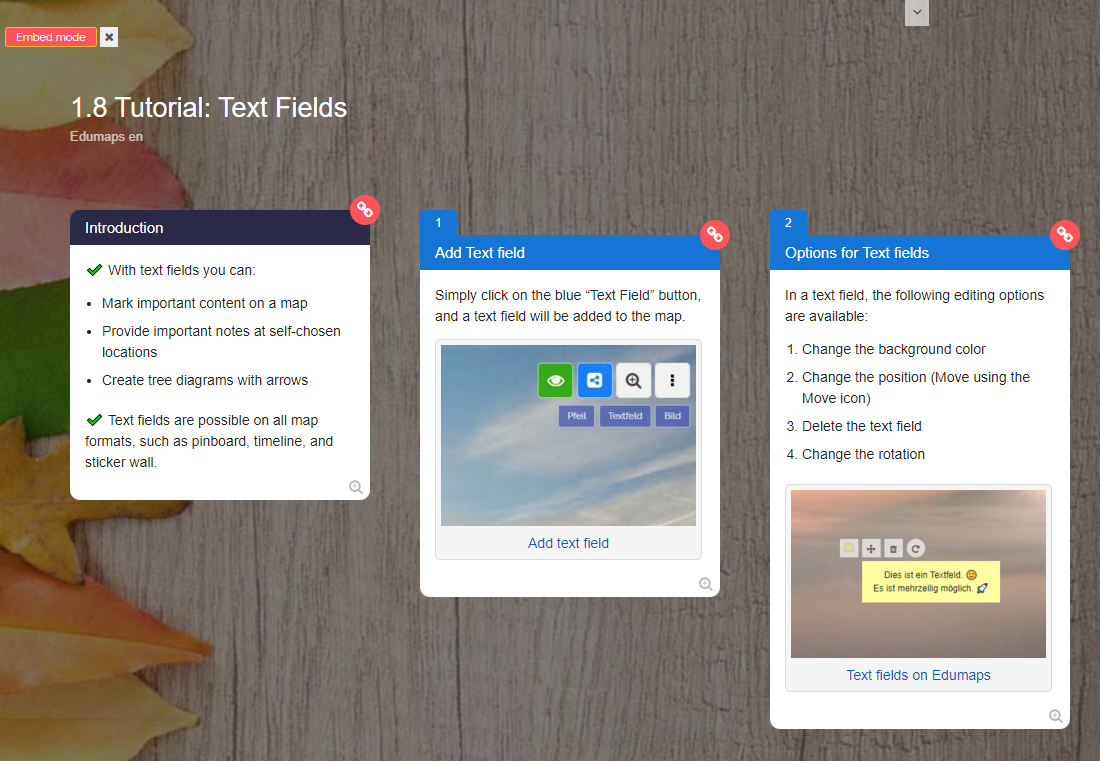
Now open a map from the map list.
-
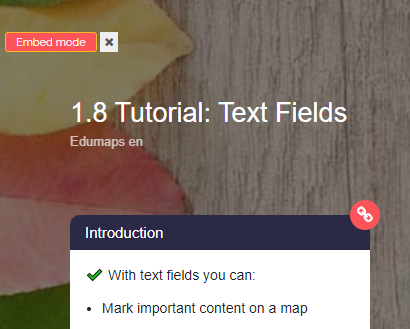
In the map view, you can recognize the active embedding mode by the red-white link symbols on the boxes as well as the small red banner “Embedding Mode” at the top left.
-
Simply click on a red-white link symbol, then the following query appears:
-
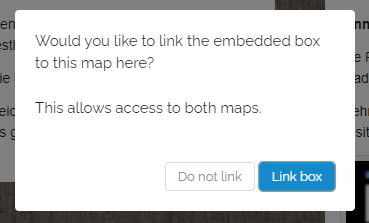
Do you want to link the box to be embedded to this map here? This allows access to both maps.
-
Confirm with “Do not link” or “Link box”.
-
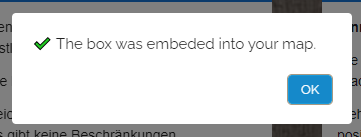
Now the corresponding box will be automatically embedded in your map.
-
Now you will be redirected back to your map.
3
Embed external Boxes (Part 3/4)
-
The embedded box is now recognized by a small icon at the top right of the box.
-
If you have chosen "Link", you can call up the source map. If you have chosen "Do not link", the link to the source map remains hidden.
-
Edit Mode
-
Please note that embedded boxes are treated differently in edit mode. Their content is protected and cannot be edited.
-
Additionally, you can only move and delete embedded boxes.

4
Embed external Boxes (Part 4/4)
-
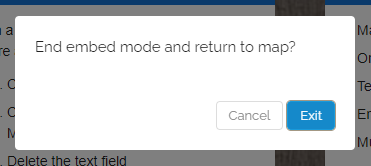
If you want to exit embed mode, you can click on the red banner "Embed Mode" at the top left. This will end the embed mode and you will return to your map.
-

5
Tip: Embedding of Tables of Contents
-
You can make the tables of contents of multiple maps available centrally on one map, allowing quick access to the respective boxes of the other maps.
-
- Create a central map.
- Embed the box containing the table of contents of the other map there.
- By embedding it, the anchor links within the box are modified so that they point directly to the other map.
-
This way, you can build a navigation structure with multiple levels.
-
⚙ tip1
6
Tip: Embedding in lending
-
For renting, you can create a central map with all your devices (boxes). You can then create separate maps in which you embed selected boxes from the central map.
-
These boxes also remain active in the other maps and can be reserved there as well.
- Embedded boxes are also taken into account when using cumulative reservations.
-
⚙ tip2