

4.12 Translate Maps
Edumaps Tutorial EdumapsIntroduction
-
✔️ With the translation feature you make your map available in additional languages within seconds.
-
✔️ The translations live on the same map, no copies are created. Readers choose the language via the language selector at the top of the map.
-
✔️ More than 60 languages are available, up to 5 languages per map.
-
✔️ The feature is included in the Premium plan and in school licences. (Use cases can be found at the bottom of this map.)
1
Menu entry Translate ᴬᴵ
-
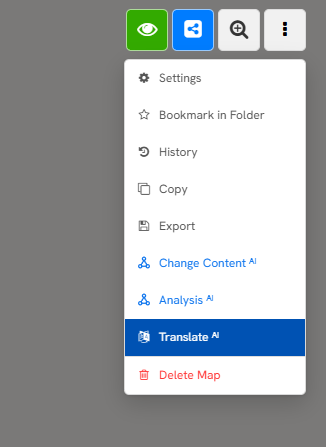
- Open a map for which you have editing rights.
- Open the map dropdown at the top right.
- Choose “Translate ᴬᴵ”.
2
Dialog: choose languages
-
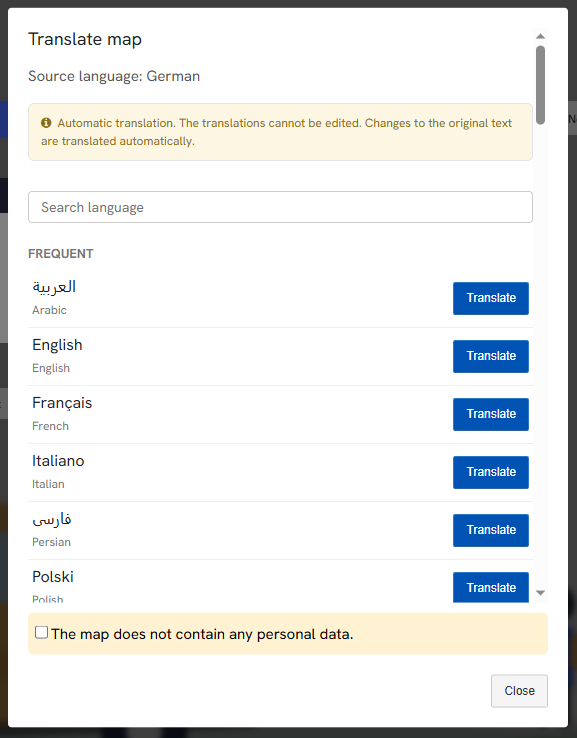
The dialog “Translate map” opens and shows the detected source language.
-
- Confirm at the bottom of the dialog that the map contains no personal data.
- Find the target language in the list or via the search field.
- Click “Translate” next to the language. Repeat this for further languages, up to 5 per map.
-
Note: For the translation the contents of the map are sent to the AI module. Please make sure the map contains no personal data (names, grades, addresses).
3
View the translation
-
Depending on the size of the map, the translation takes a few seconds.
-
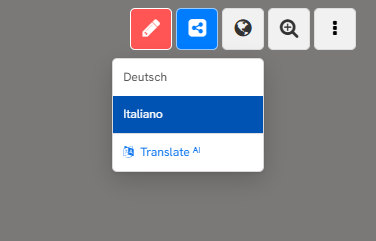
Afterwards a language selector (globe icon) appears at the top of the map, listing the source language and all translated languages. Readers can switch the language there at any time. The original map remains unchanged.
4
Share a translated map
-
Share the map as usual via the normal map link. Readers whose browser language matches a translation see that translation automatically.
-
To set a specific language, append the language code to the address, for example /fr for French or /uk for Ukrainian. Readers can still switch the language at any time via the language selector (globe icon).
-
Note that the map must have been translated into that language first; only then does appending a language code to the link work.
6
Translations stay up to date
-
If you change texts in the map later, the translations are updated automatically. There is no need to translate again. The translated versions themselves cannot be edited; always make corrections in the original.
-
Note: The translation is done by the AI module. Briefly check technical terms and task instructions in the target languages before sharing the map with learners.
7
Edit translations
-
The automatic translations cannot be edited directly.
-
If you want to adapt a language version, for example to correct technical terms or rephrase tasks for a learning group, create an independent copy in that language:
-
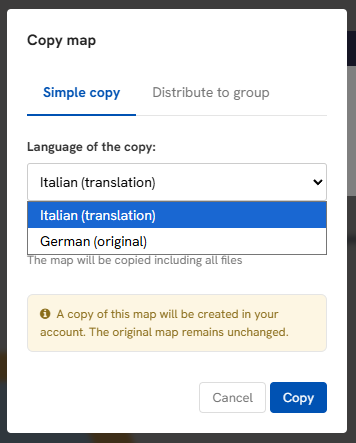
- Open the map dropdown at the top right and choose “Copy”.
- Under “Language of the copy” choose the translation you want, for example “French (translation)”.
- Click “Copy”.
-
The copy is a normal map in the chosen language that you can edit freely. It is no longer connected to the original; later changes to the original are not carried over.
-
Tip: Link the edited copy in a box of the original map so that learners can find both versions.
Example 1
Newly arrived students and language learners
-
Provide worksheets and explanations additionally in the students' home language, for example Arabic, Ukrainian or Turkish.
-
Learners read the content in their own language first and then switch to the version in the language of instruction. They understand the subject matter and learn the subject vocabulary at the same time.
-
⚙ examples