2 / 3
1
Creating IServ-SSO for Edumaps
-
For Edumaps:
-
As a school admin in IServ:
-
-
Step 1
Open the IServ administration panel. Then: Administration - System - Single Sign On. -
-
Step 2
+ Add - Add OAuth-Client -
-
-
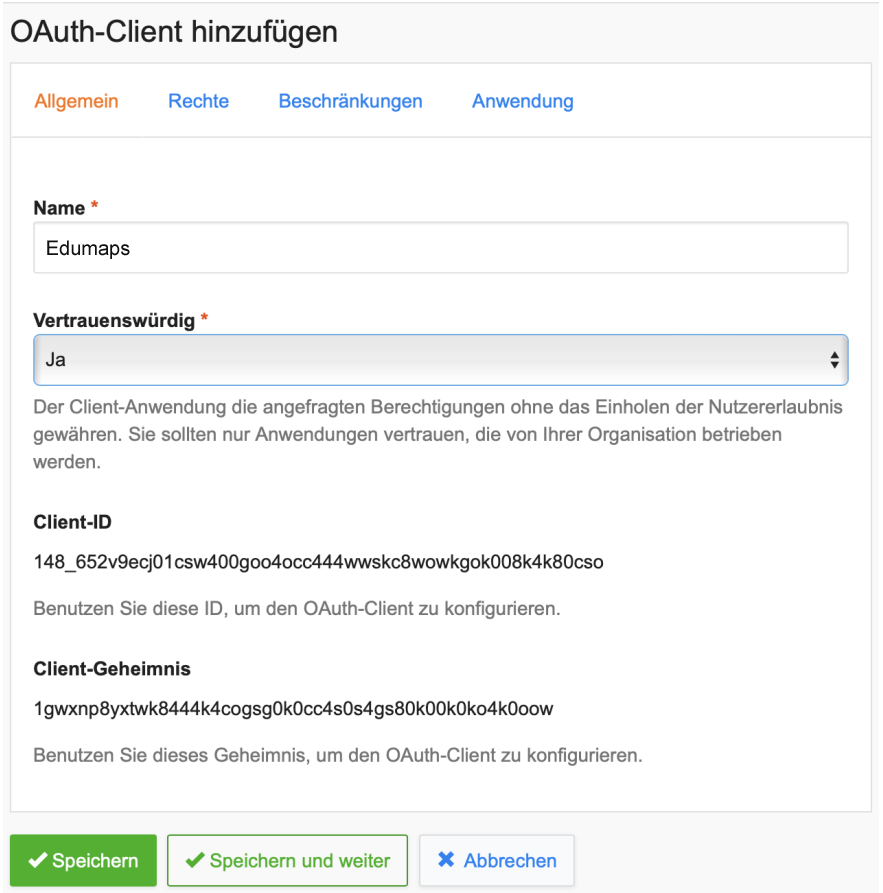
Step 3
Copy the Client ID and Client Secret. -
-
Step 4
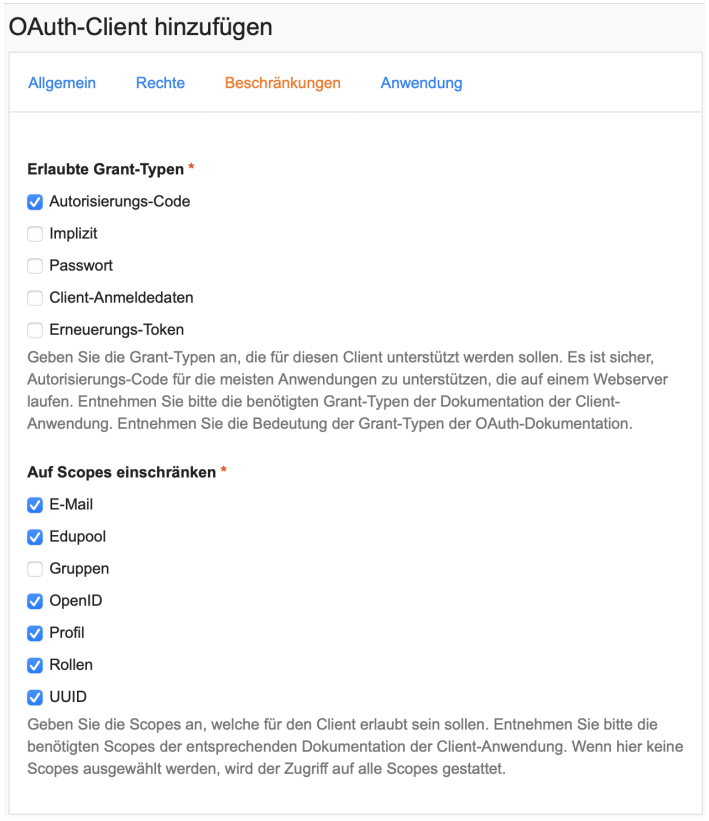
Click the "Restrictions" tab and activate the scopes there. -
-
-
Step 5
Click the "Application" tab and add "Redirect URIs" withhttps://www.edumaps.de/sso/iserv(must correspond to your server, so replacewwwwith, e.g.,heorndsornrw). Then save. -
-
Step 6
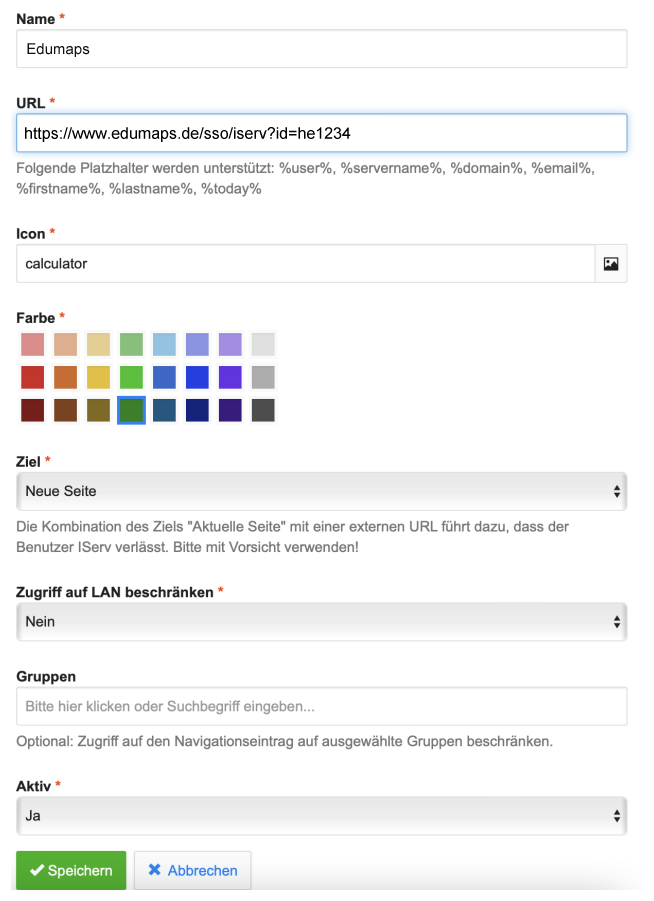
Create a WebModule - Administration - System - Navigation - click + Add - and fill it out as seen in the screenshot - important! Replace he1234 with the username of your Edumaps admin account. Then save! -
-
Make sure to enter the correct Edumaps server here. Instead of "www", use "he", "nds", "nrw", etc.
-
-
Step 7
Switch to Edumaps. Log in with your admin account. -
Go to "My Profile". There you will find a button "Create Single Sign-On". Click on it.
-
Now enter the IServ-SSO data:
-
- URL of your IServ server: e.g.,
https://yourschool-iserv.de(without "/iserv/auth" etc.) - Client ID
- Client Secret
- URL of your IServ server: e.g.,
-
Done.