

1.3 Inputs and Formatting in Box Editor
Edumaps Tutorial Edumaps📑 Table of Contents
-
- Editor Bar
- Formatting at a glance
- Empty Lines between Elements
- Line breaks vs. new lines
- Half line spacing
- Make words bold or italic
- Strikethrough and underline words
- Simple List
- Numbered List
- Create an indented list
- Indent Text
- Text indent with two levels
- Create Quotes
- Multi-line Quotes
- Links with Thumbnails
- Link with thumbnail and custom text
- Set text link (without thumbnail)
- Link text with upload
- Use your own thumbnail
- Links within Text
- Link certain Text
- Link as Button
- Labels for Images and Links
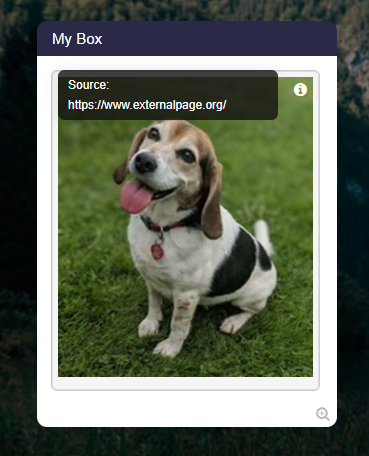
- Info-Icon at Upload (image/PDF)
- Code Formatting
- Use of Latex
- Superscripts and Subscripts
- Hidden Notes in Boxes
- Spoilers
- Timed Spoiler
- Text Color
- Background Color for Text
- Headlines
- Subheadlines
- Special Headlines
- Horizontal Dividing Line
- Font Sizes
- Checkboxes
- Tooltips for Words (Popups)
- Conduct Polls
- Generate QR Codes
- Popup Message
- Insert Countdown
- Create Tables
- Automatic List of Contents
- Text to Speech
- Interactive Checklist
- Create a Quiz
- Tag Filter
- Markdown
1
Editor Bar
-
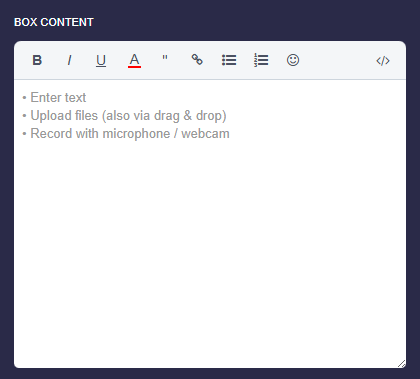
If you are working the first time with the editor, then the editor bar will help you to format the text.
-
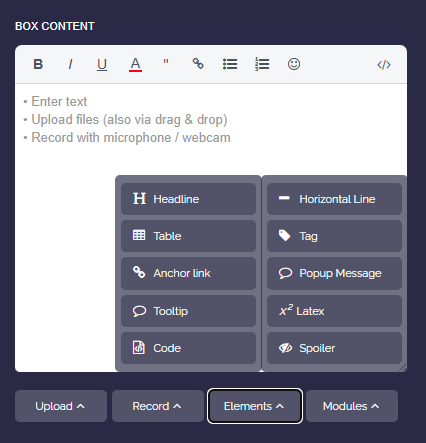
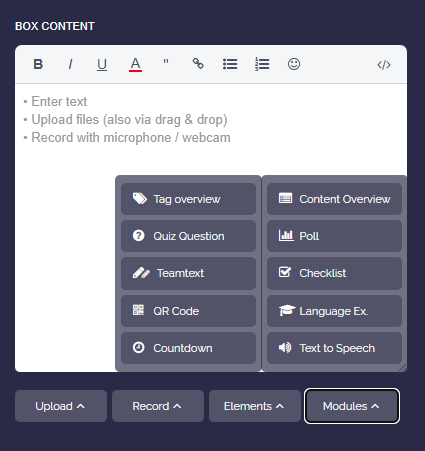
Also note the other elements and modules in the lower section.
3
Empty Lines between Elements
-
Elements (photos, videos, links) have to be divided by empty lines.
-
A contiguous text is recognized as one element, even though it continues on the next line.
-
Example:
My text with
line break-
My text with
line break -
⚠️ If we want to attach an image/video or a file, we have to insert a blank line in between. Otherwise the link belongs to the previous text.
-
❌ Wrong:
My text with
line break
New content here-
✔️ Correct with new line in between:
My text with
line break

New content here
4
Line breaks vs. new lines
-
Line breaks are rendered exactly as they are in the text editor.
-
If you set a new line (with an empty line in front of it), then this counts as a new paragraph.
-
However, if you just type Enter in the text editor and break the text, the text in the view is also broken.
-
For example, the following input is displayed with line break:
-
It follows
a new line.
5
Half line spacing
-
Sometimes a simple line break is too tight and an empty line is too wide. For spacing in between, place a tilde
~at the end of the line. -
The text wraps and additionally gets half a line of spacing.
-
📝 Input:
My text here ~
The text continues-
Practical for poems and song lyrics: If the last line of a paragraph ends with
~, the spacing to the next paragraph is also increased by half a line. -
Note: In lists, tables, and code blocks, the tilde has no effect and is displayed normally.
26
Use of Latex
-
Latex as a block with surrounding dollar signs:
-
$$ \int \limits_{2}^{\infty} + \frac{1}{2}·x^{45+y+{\alpha} } $$
-
Set Latex inline with \( 5x+2^x = 12 \) and continue writing. This can be used multiple times within a sentence \( x^2 \) and \( x^3 \).
-
-
📝 Input:
$$ \int \limits_{2}^{\infty} + \frac{1}{2}·x^{45+y+{\alpha} } $$

Set Latex inline with \( 5x+2^x = 12 \) and continue writing. This can be used multiple times within a sentence \( x^2 \) and \( x^3 \).-
Note: For latex inside text labels, always use inline latex with
\( … \)and not block latex. -
⚙ latex
28
Hidden Notes in Boxes
-
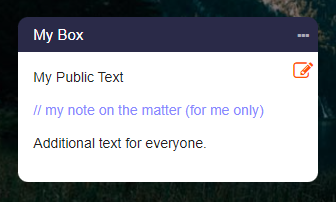
You can add your own notes when you are in edit mode.
-
These notes are hidden in the map view.
-
Simply put two slashes
//at the beginning of the line. -
The line will not be displayed in the map view.
-
⚙ notes

31
Text Color
-
Words can be colored in any color.
-
Example: This is a blue word.
-
-
📝 Input:
This is a {blue word}{#0000FF}.-
-
To do this, you need to know RGB color codes:
-
en.wikipedia.org LINK
-
Examples of RGB color codes:
-
- red FF0000
- green 00FF00
- blue 0000FF
- gray 888888
- light grey CCC
- maroon 800000
- yellow FFFF00
- olive 808000
- lime green 00FF00
- dark green 008000
- teal 008080
- navy blue 000080
- aqua 00FFFF
- fuchsia FF00FF
- violet 800080
-
⚙ hexcolor
-
⚙ textcolor
32
Background Color for Text
-
You can give any word or text a background color of your choice. To assign a background color, just add another hash
#after the color code to an already colored word. -
Example: This is a green word and the next one is a red word.
-
📝 Input:
This is a {green word}{#CCFFCC#} and the next one is a {red word}{#FFA1A5#}.-
-
Colors are specified using RGB color codes. Examples of RGB color codes:
Red #FF0000 | Green #00FF00 | Blue #0000FF -
⚙ backgroundcolor
37
Font Sizes
-
You can set the font size differently for individual words.
-
You can increase the font size and decrease the font size of words as follows:
<tiny>Tiny Text</tiny>
<small>Small Text</small>
<big>Big Text</big>-
Changing the font size can be used in map titles, column titles, box titles and box contents.
-
⚙ fontsizes
38
Checkboxes
-
Checkboxes are easy to create using Markdown syntax.
-
Example:
-
- ☑ First Element
- ☑ Second Element
- ☑ Third Element
-
-
📝 Input:
[x] First Element
[ ] Second Element
[x] Third Element-
-
💖 In edit mode, you can click on the checkboxes within a box to check or uncheck them. The state of the checkboxes is saved in the box content.
-
✔️ Tip: In the box editor, use “Modules” and select the “Checklist” module, which is easier to use.
-
⚙ checkboxes
39
Tooltips for Words (Popups)
-
If you want to explain a certain word, a so-called "tooltip" is suitable for this, which displays an explanation as soon as the user moves the mouse over the word or clicks on the word on a mobile device.
-
Example:
-
An Ocelot is not an Axolotl.
-
-
📝 Input:
An [ocelot]{The ocelot is a species of carnivore native to Central and South America.} is not an [axolotl]{The axolotl is an aquatic tailed amphibian}.-
-
⚠️ Tooltips may only consist of plain text and may not contain any links or uploads.
-
⚙ tooltips
40
Conduct Polls
- If you want to conduct a survey, where you specify the selectable options, you can use the poll module.
-
You can find it in the dropdown under “Poll”.
-
The poll must be enclosed within tags, for example:
-
📝 Input:
<poll>
Option A
Option B
Option C
</poll>-
⚙ poll
41
Generate QR Codes
-
If you want to generate a QR code, you can use the dropdown in the box editor and select “QR Code”.
-
Enter the text or link that should be hidden behind the QR code.
-
The QR code is generated dynamically immediately. You can change the text at any time. The QR code is updated instantly.
-
-
📝 Input:
{qrcode:My secret text}-
⚙ qrcodes
42
Popup Message
-
If you want to display an important message to the visitor of your map, you can use the "Popup Message" for this purpose.
-
Click on the dropdown in the box editor and select "Popup Message". Now, enter your text.
-
The text will be displayed as a popup dialog in the map view when someone visits your map.
-
📝 Input:
&&msg:Hello my friends!&&-
⚙ popup
43
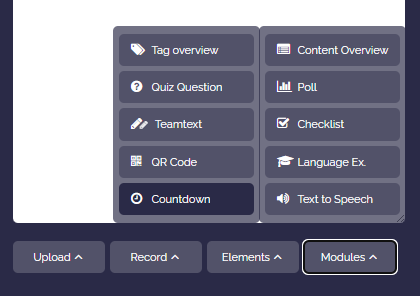
Insert Countdown
44
Create Tables
-
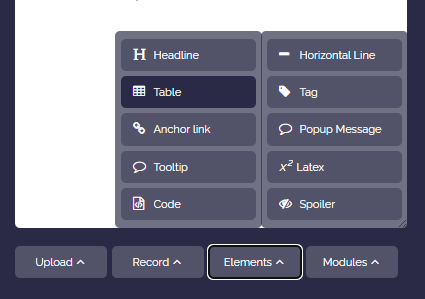
You can insert a table template via the box editor. Click “Elements” and then “Table”.
-
Example:
-
Head 1 Head 2 Head 3 A1 A2 A3 B1 B2 B3 -
📝 Input:
||| Head 1 | Head 2 | Head 3
|| A1 | A2 || A3
|| B1 | B2 | B3-
The table header begins with three vertical bars
|||. Each new table row must begin with||. -
-
Simple Alternative:
-
If it is a small table, you can enter it directly by inputting the table as a code block. This requires setting 3 backticks (`), then the table content, and then 3 backticks again.
-
Example:
Head 1     | Head 2     | Head 3
Content A  | Content B  | ...
1235678 | 9012345 | ...-
However, this requires manual formatting.
-
⚙ tables
45
Automatic List of Contents
-
You can automatically create a table of contents for all boxes on your map.
-
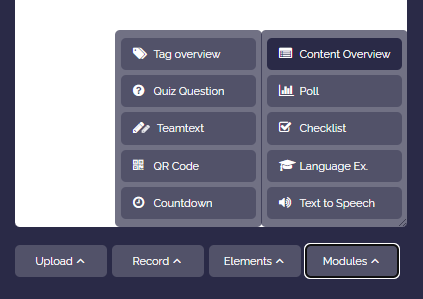
To do this, open the box editor, click “More”, then “Layout”, and select “List of contents”.
-
A complete table of contents will then appear with a link to each box.
-
⚙ contentslist
46
Text to Speech
-
With the “Text-to-Speech” option, you can have any text read aloud in a natural voice.
-
Highlight the text, click on “More”, select “Interactive” and then “Text-to-Speech”. You will be asked to choose the audio language.
-
The language is then defined inside the audio tag.
-
Examples:
-
Je pense que le ciel est beau et paisible.
-
I like to play football, basketball and chess.
-
Пусть в твоём дне будет больше света, чем забот.
-
-
📝 Input:
<audio-fr>Je pense que le ciel est beau et paisible.</audio>-
⚙ tts
47
Interactive Checklist
- If you want to give your students a task list to tick off, you can use the “Checklist” module. You can find it in the box editor under “Modules”.
-
Unlike simple checkboxes, the interactive checklist saves progress for each user. Each student ticks off their own items without changing the box content.
-
📝 Input:
<check>
Read task 1
Fill out worksheet
Upload result
</check>- 💖 An overview of all your checklists with your progress can be found on the “My Checklists” page.
-
-
Hint: As the map owner, you can see in edit mode which users have ticked off which items.
48
Create a Quiz
-
If you want to integrate a comprehension question directly into a box, you can use the “Quiz” module. You can find it in the box editor under “Modules”.
-
You define a question and several answer options and mark the correct answer. The students choose an option and immediately receive feedback on whether the answer is correct or incorrect.
-
📝 Input:
<quiz>
How many legs does a spider have?
6
#8
10
</quiz>
49
Tag Filter
-
You can set a tag within a box. To do this, place a hash sign
#directly before a term. -
Example: done school
-
Multiple tags are also possible.
-
If you click on a tag, only the boxes containing this tag will be displayed. All other boxes will be hidden.
-
If you click the same tag again, the filter will be removed and all boxes will be shown again.
-
Note: A tag consists of one word (without spaces). Periods, hyphens, and underscores within the word are allowed but should be avoided.
-
Tip: You can also link to a map in a way that, when the map link is opened, only boxes with your selected tag are shown. To do this, append to the end of the link:
?tag=mytag(replacing "mytag" accordingly). -
-
📝 Input:
#mytag-
-
See also:
-
⚙ tagfilter
50
Markdown
-
Our editor supports most of the Markdown syntax.
- Article about Markdown (Wikipedia).
-
If you have written your documents with Markdown, you can copy and paste their contents directly into our editor.
-
You can display the Markdown syntax by using the dropdown in the box editor and selecting “Syntax on/off”.
-
⚙ markdown