

6.1 Checklists
Edumaps Tutorial Edumaps
1
Examples of Checklists
-
Here are some examples of applications of checklists:
-
- Tick off homework and weekly plan tasks
- Packing list for the school trip
- Materials list for lessons
- Work through the steps of an experiment step by step
- Preparation for a report or presentation
- Submission checklist for project work
- Self-check of learning goals (can-do lists)
- Station learning: mark completed stations
- Organize classroom duties
- Confirm safety rules in the lab
- Checklist for planning school events
- School enrollment checklist for parents
- To-do list before exams
- Checklist for returning school books
- Onboarding new colleagues
2
Set Up a Checklist
-
You can insert a checklist into a box very easily.
-
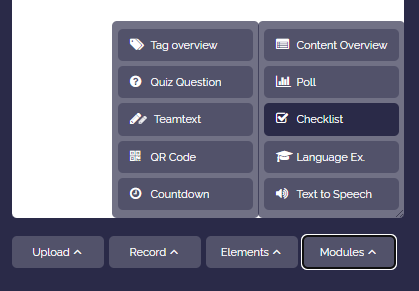
To do this, open the box editor and click "Modules". In the dropdown, select "Checklist".
-
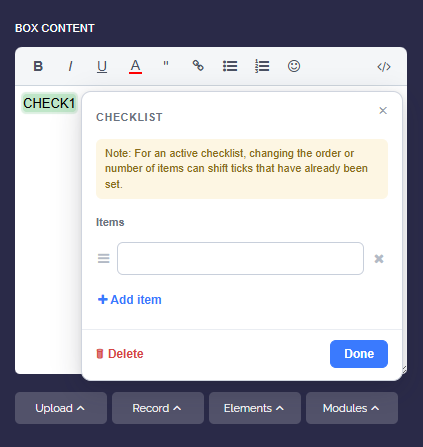
Enter the checklist items. Use "Add item" to add more entries. You can change the order by grabbing an item using the handle on the left and moving it.
-
Click "Done" to apply the checklist. In the box content, the placeholder
CHECK1appears, representing the checklist.
4
Everyone ticks off their own checkmarks
-
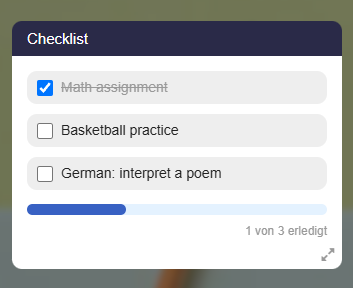
Checkmarks are individual for each person. If student A checks off an item, student B does not see that checkmark. Each user only sees their own checkmarks on the map.
-
This allows the whole class to work with the same checklist without checking off items for one another. As the map owner, you can use the checkmark counter to see who has checked off which item (see section “Display the List of All Checkmarks”).
-
Checking off – Who and how?
-
- Registered users as well as anonymous visitors can check off items.
- Items are checked off by clicking the checkbox of the respective entry.
- If you click an active checkbox again, the checkmark is removed.
- ⚠️ Anonymous checkmarks are tied to the respective device. A user account is required for checking off items across devices.
5
Display the List of All Checkmarks
-
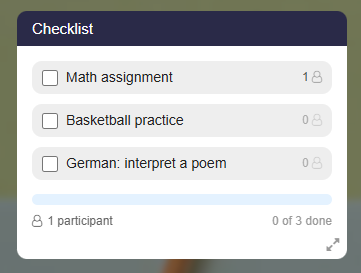
As the map owner, you can view all checkmarks that have been set by clicking one of the checkmark counters:
-
Teacher and admin accounts also have access to the checkmark list. Student accounts do not.
-
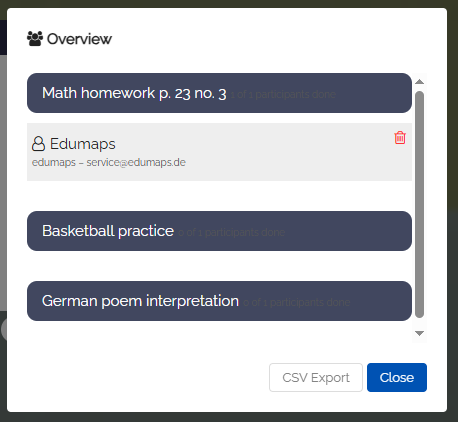
The list of all checkmarks looks like this, for example:
6
Remove Checkmarks
-
You can remove checkmarks at any time by clicking one of the checkmark counters. A list of all checkmarks for the entry will then appear.
-
For the respective user, there is a remove icon on the right:
7
Overview "My Checklists"
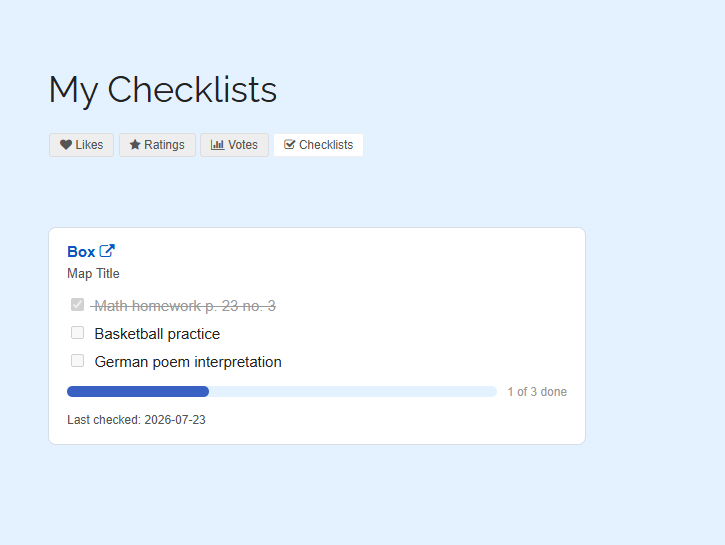
- On the page "My Checklists", each user can see which checklists they have participated in and which entries they have checked off.
-
There, you can open the checklists again.
8
Try it
-
Tick off the entries easily - only you can see your checkmarks:
-
-
Tip: Then open the page “My Checklists” - there you will find your checkmarks again.
9
Yes-No Mode
-
In addition to simply ticking items off, there is a Yes/No mode. Each item can then be answered with ✓ (yes), ✗ (no), or left unanswered.
-
How to enable this mode:
-
- Create a checklist in the box editor using the checklist dialog, or edit an existing one
- Select Yes/No in the dialog
- Save; the items now show the counts for ✓ and ✗ next to the checkbox
-
The results show how many participants answered yes, answered no, or have not yet answered each item. Ideal for can-do checklists and self-assessments, because an unchecked box no longer automatically means "no".
-
Yes or No?
-
One click selects yes, a second selects no, and a third clears the answer.
-