1.1 Tutorial: Overview of essential Features
edumapsMaps
1
Create Map / Edit Map
-
If you create a new map, Edumaps will help you to build the map step by step:
-
1. Specification of basic data such as title, background
2. Create column
3. Create box in column
4. Fill the box with content -
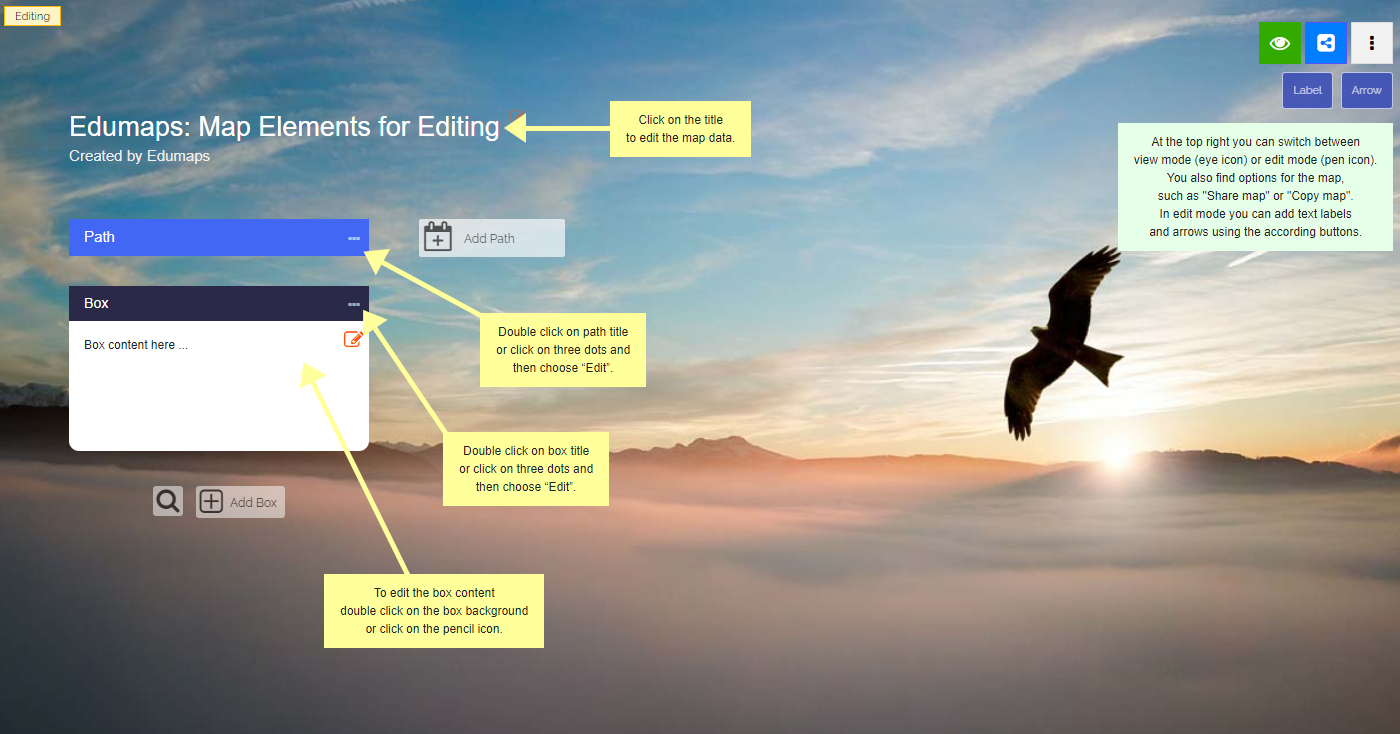
The following screenshot shows how a map (pinboard) looks like.
-
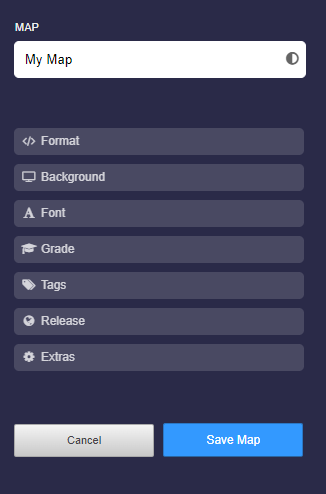
There are several options you can specify:
-
- Map title
- Map format
- Background
- Font
- Grade
- Tags
- Release
- Extras
2
Map Formats
-
Pinboard
-
The pinboard consists of columns. Each column contains boxes.
-
Multiple columns are positioned side by side.
-
-
Timeline
-
The columns are horizontally arranged (“rows”). The boxes are arranged from left to right.
-
Multiple columns are positioned below each other.
-
-
Stickerwall
-
The boxes are freely arranged. There are no columns.
-
-
❤️ Changing from one map format to another map format is possible at any time.


3
Share Map
-
Options for sharing a Map:
-
- Link to Map
- Share with Class
- Share with User
- Share Column Group
- See Tutorial: Sharing Maps with Access Rights

4
6
7
Export Map / Import Map
-
Export Options:
-
- Export map as a JSON file or CSV file
- Export to Moodle as an MBZ file (Moodle course)
- Export map as a static HTML package including all files of the map
-
Import Options:
-
- Import map from JSON file or CSV file
- Import from Padlet
- Import from Tutory collection
-
You can also save a map by creating a copy of the map using “Copy Map”.
8
Map History
-
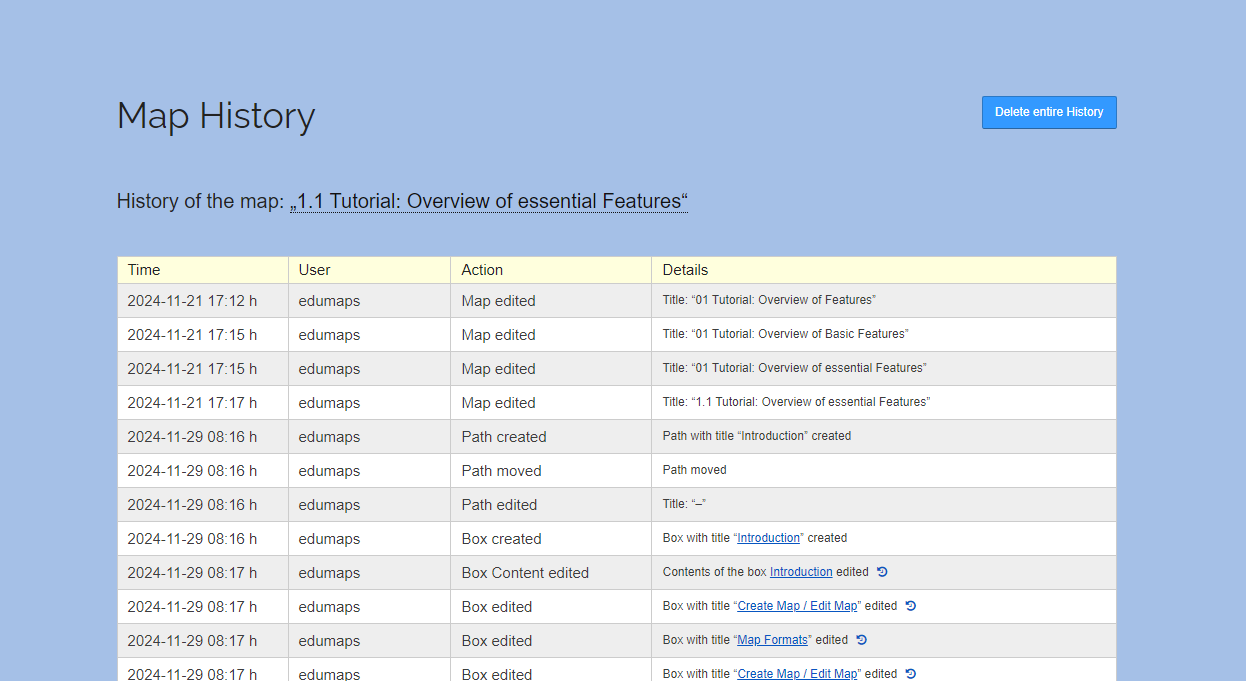
For each map it is recorded which user made which changes. In the so-called “Map History” you can view all changes and see who has contributed to your map.
-
To view the map history, go in edit mode and click on the three dots in the top right corner. Then select “Map History” from the dropdown. A page will open that looks like this:
-
The individual entries are linked so that you can open each changed element directly.
-
By clicking on the time icon you can open the revision history for each box.
-
If you want to delete the entire history, click on the "Delete entire History" button at the top right.
Columns and Boxes
1
Columns
-
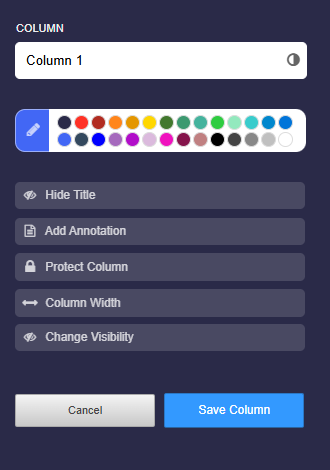
The column settings contains the following options:
-
- Title of column
- Color of column title
- Hide title
- Add annotation
- Protect column
- Show column contents from
- Hide column in view
2
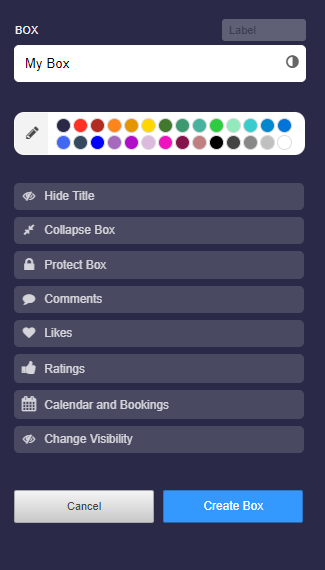
Boxes
-
The box settings contains the following options:
-
- Label
- Title
- Color of Box
- Hide Title
- Collapse Box
- Protect Box
- Comments
- Likes
- Ratings
- Calendar and Bookings
- Change Visibility
3
Input options for Boxes
-
In addition to uploads, the following inputs are possible directly in each box:
-
- Enter Latex:
\( \frac{1}{2} + x^{45y} + \sum \limits_{1}^{5} xy\)
- Enter Latex:
-
- Code as a block or as inline code, such as
y = 2*x
- Code as a block or as inline code, such as
-
- Superscripts and subscripts in the text: x^{2}
-
- Bold and italics: This is bold and this is italic.
-
- Thousands of Emojis, such as 😀 😇 😍
-
- See Tutorial: Inputs and Formatting in Box Editor
4
5
Likes, Ratings and Votings
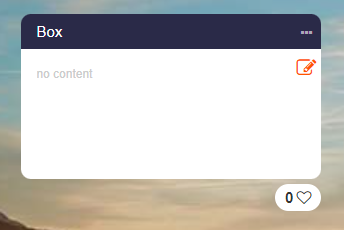
-
If you activate the Likes in the box settings, a small heart with a counter appears directly below the box:
-
-
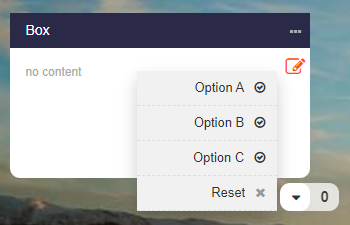
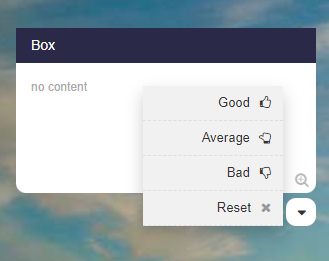
If you activate the Ratings in the box settings, you have several options:
-
- Assessment (Good | Average | Bad)
- Answer (Yes | Maybe | No)
- Voting (Option A | Option B | Option C)
-
The rating appears as a dropdown below the box.
-
In edit mode you can click on the counter to see the names of the users who have voted.
6
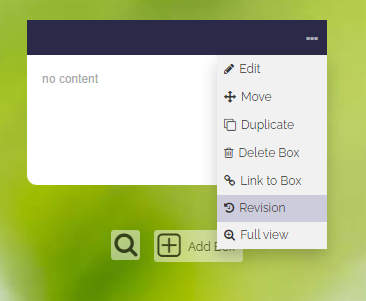
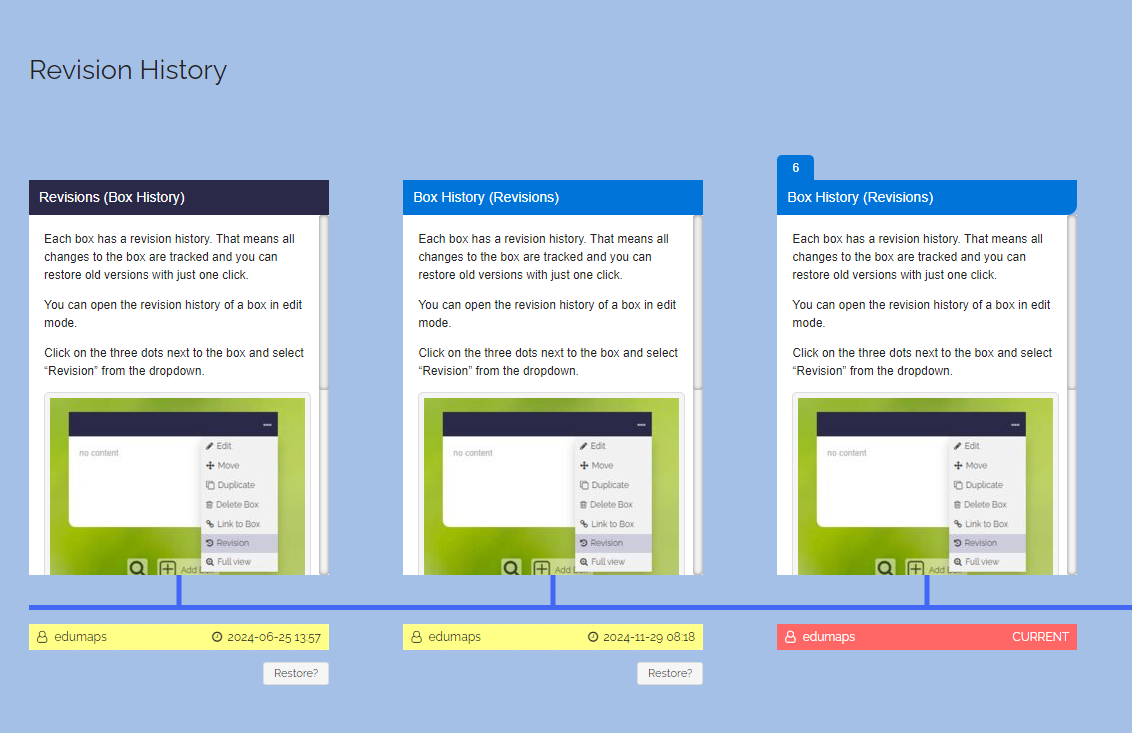
Box History (Revisions)
-
Each box has a revision history. That means all changes to the box are tracked and you can restore old versions with just one click.
-
You can open the revision history of a box in edit mode.
-
Click on the three dots next to the box and select “Revision” from the dropdown.
-
Then you can see the different versions of the box over time. These are displayed in a timeline.
-
You can restore any version by clicking on the “Restore” button located below each box version.
Uploads
1
Uploads into Boxes
-
- Upload any media files (jpg, png, gif, mp3, mp4, ...)
- Easy uploading by drag & drop
- It is possible to insert an image (e.g. screenshot) from the clipboard with
CTRL + V - Preview of pdf, docx, xlsx, pptx, ... with just one click
- Microphone and webcam recordings are possible in every box
- All files are stored on the server in compliance with data protection and protected from third parties.
-
See also:
2
Manage Uploads
-
Overview of all your uploads including display of your free storage:
- See Tutorial: Upload Manager
Feedback of Students
1
Ratings of Boxes
-
For each box a drop down can be activated that the students can use to gauge their understanding.
-
There are three types of ratings:
-
1. Assessment (get feedback on how the contents of a box is rated)
2. Answer (yes/maybe/no - make a poll)
3. Voting (get feedback on which option A, B or C is preferred)
2
Comments
-
Comments can be activated for each box.
-
With the help of the comment function, discussions can be held or students can submit their solutions (directly to the teacher).
-
In the comments the following inputs are possible:
-
- Text input
- Image uploads
- Audio recordings
- Uploads of media files
-
Comments can be set to be only visible to the teacher or to anyone viewing the map.
-
All comments (including uploads) can be deleted by the teacher with just one click.
-
-
💖 Notifications about new comments are displayed directly on to the top right of the Edumaps website.
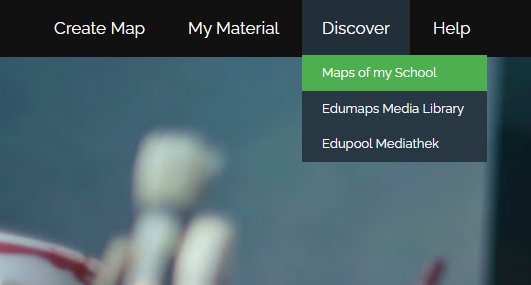
Discover Maps
1
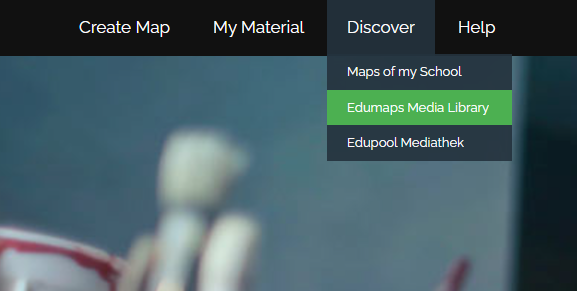
Media Libraries
-
Through the main menu, you can find the Edumaps Media Library and, if available, the Edupool Media Library.
- Link: https://www.edumaps.de/search
-
The Edupool Media Library provides the media licensed by your media center.
- Link: https://www.edumaps.de/search/media
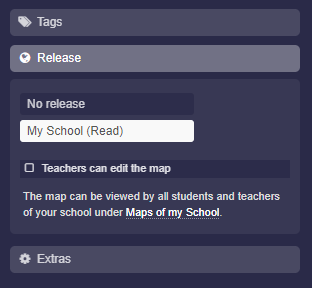
2
Maps of my School
-
You can unlock any map for your school with a teacher account and an admin account.
-
The map can then be found through the main menu.
-
On the “Maps of my School” page, all teachers, students, and the admin can find all the released maps.
Users
1
Types of Accounts
-
- Admin and Superadmin
- Teacher
- Student
- Standard (and individual customers)
- See also Tutorial: User Roles on Edumaps
2
3
Rights of Admin Accounts (Schools)
-
- Create student accounts
- Create teacher accounts (admin account only)
- Create classes and assign students as you wish (also multiple times)
- Assigning to another group is possible when changing classes
- See Tutorial for Admins on Edumaps
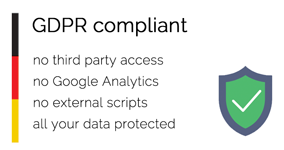
Data Privacy
1
Server
-
- Server in Germany
- Server operator is a German company (Hetzner)
- Technical and organizational measures: Hetzner
2
3
Protected Data
-
- Data transmission on the Internet via SSL (HTTPS)
- Principle of data economy, i. e. Edumaps stores as little data as possible about the user
- each user has full transparency as to what data is stored about him/her
- the data can be removed at any time by the user himself/herself
- Data is protected from the outside, no access by third parties