
2.4 Share a Single Box
Edumaps Tutorial EdumapsIntroduction
1
Open the share dialog
-
Open your map in edit mode.
-
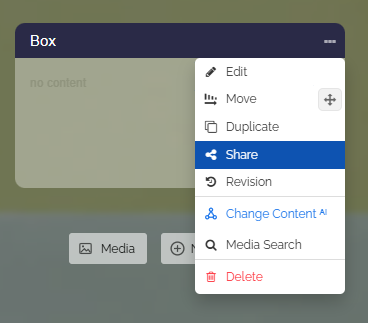
Click the three dots on the desired box and select “Share” in the dropdown.
-
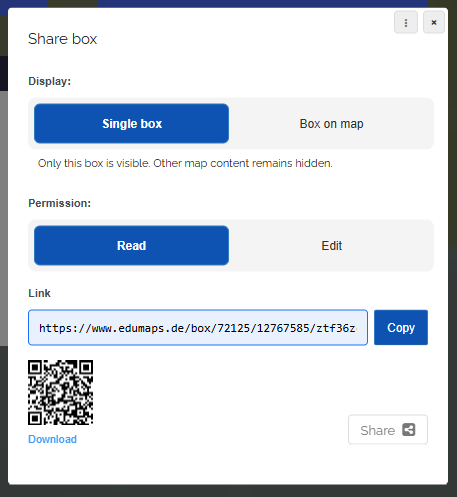
The “Share box” dialog opens with the following options:
-
- Display: “Single box” or “Box on map”
- Permission: “Read” or “Edit”
- Link with copy button
- QR code for download
- Share button
2
Display: Single box or Box on map
-
Under “Display” you define what the recipient sees when opening the link.
-
1. Single box
-
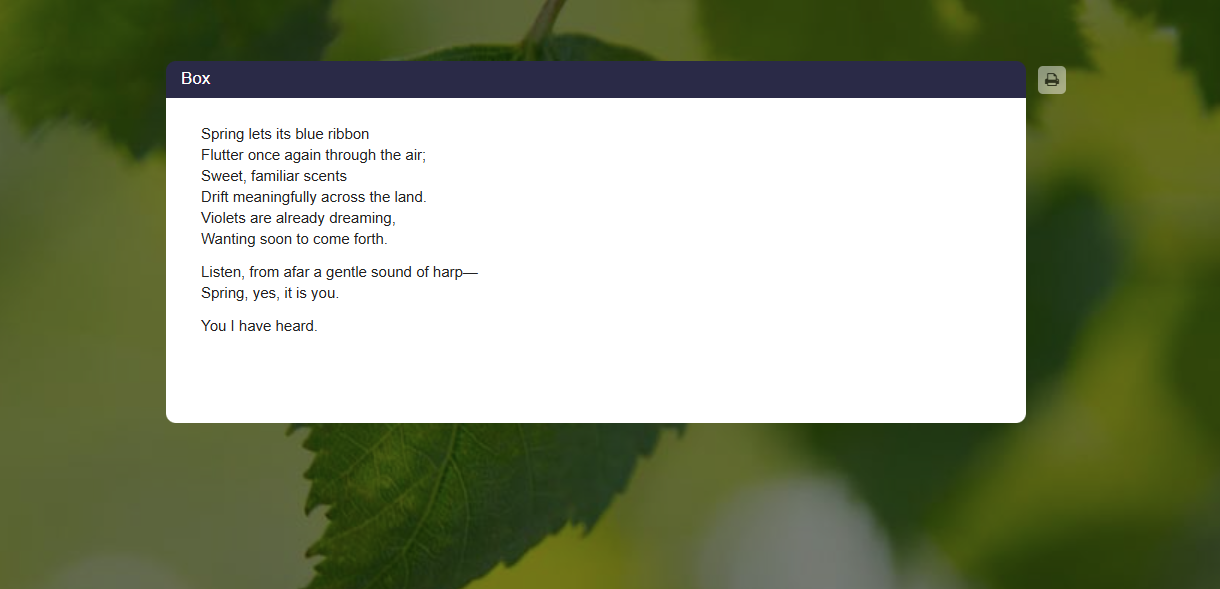
Only this box is visible. All other contents of the map remain hidden.
-
This option is suitable when the recipient should focus on this one box only, for example for submissions or individual tasks.
-
-
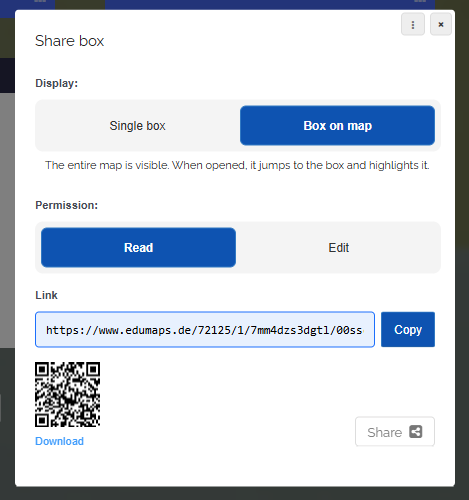
2. Box on map
-
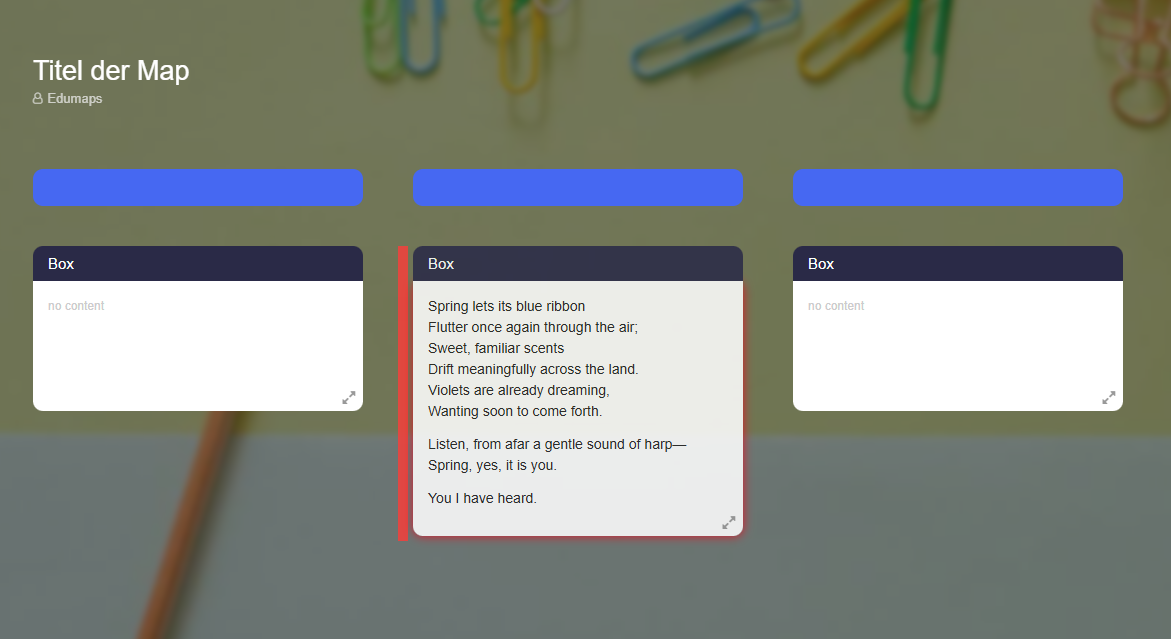
The entire map is visible. When opened, the view jumps to the box and the box is highlighted.
-
This option is suitable when you want to draw attention to a specific box while the recipient keeps the context of the whole map.
3
Permission: Read or Edit
-
Under “Permission” you define what the recipient is allowed to do with the box.
-
1. Read
-
The recipient can view the box and its contents but cannot change anything.
-
2. Edit
-
The recipient can change the content of the box and add their own content (texts, uploads).
-
Note: The permission applies to this box only. The recipient does not receive editing rights for other boxes or the map.
4
Copy link, QR code, and share button
-
Copy link
-
Click the “Copy” button to copy the box link to the clipboard. Then distribute it via your usual communication channel.
-
QR code
-
The dialog automatically generates a QR code for the link. Your students can conveniently scan it with a phone or tablet.
-
Click “Download” to save the QR code as an image, for example for a worksheet or a presentation.
-
Share button
-
Clicking “Share” opens your device's share menu (on smartphones and tablets). This way you send the link directly to an app such as email or messenger.
5
What does the recipient see?
-
With “Single box”:
-
The recipient sees only the shared box in a dedicated view. All other columns and boxes of the map remain hidden.
-
With “Box on map”:
-
The recipient sees the entire map. When opened, the view automatically scrolls to the shared box and the box is highlighted.
6
Scenario: Homework submission
-
With a shared single box you set up a private submission in just a few steps:
-
- Create a box with the assignment.
- In the box settings, enable “Comments” and select “Only me”.
- Share the box with display “Single box” and permission “Read”.
-
Your students open the link, see only the assignment, and submit their solution as a comment, with text, photo upload, or audio recording.
-
Since the comments are set to “Only me”, only the teacher sees the submissions. The students do not see each other's solutions.
7
Scenario: Group work
-
Assign each student or each group their own box:
-
- Create one box per student or group (for example with the name in the box title).
- Share each box individually with display “Single box” and permission “Edit”.
- Distribute each link to the respective student or group.
-
Each student works focused in their own box without seeing the other boxes.
-
As the teacher, you see all edits arrive on your map combined and in real time.
8
Notes
-
- If you want to bundle several boxes with different rights in one link, place each box in its own column and use sharing with column groups.
-
- If a box should remain protected from editing when sharing the whole map, use the “Protect box” option, see box settings.