

2.5 Distribute a Map to a Group: Everyone Gets Their Own Copy
Edumaps Tutorial EdumapsIntroduction
1
When to Use What? Sharing or Distributing
-
Sharing and distributing solve different tasks:
-
Function Result Suitable for Share with Group Everyone works on one shared map Collections, brainstorming, class pinboard Share a Single Box Everyone works on one map, each in their own box Submissions, group work with overview Distribute to Group Everyone gets their own copy of the entire map Weekly plans, practice maps, portfolios - 📖 Tutorials: Sharing Maps with Links and Sharing a Single Box
2
Prerequisite: Class or Group
- To distribute a map, you need a class or group on Edumaps with your students as members.
- Tip: The admin can create classes centrally. All teachers can then adopt them under Prepared Classes/Groups.
3
Distribute a Map to a Group
-
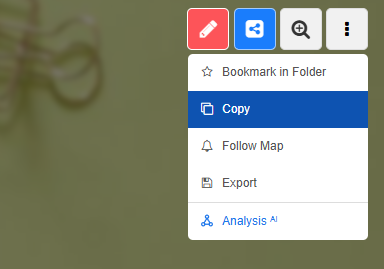
Open your map and click on the three dots in the top right corner.
-
-
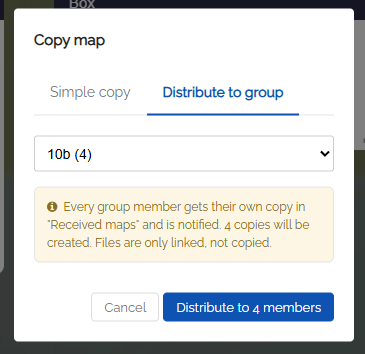
Select "Copy" in the dropdown and click "Distribute to Group" in the dialog that opens.
-
Select the desired class or group in the dropdown and confirm.
-
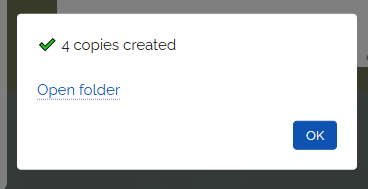
A separate copy of the map is then created automatically for every member of the group.
-
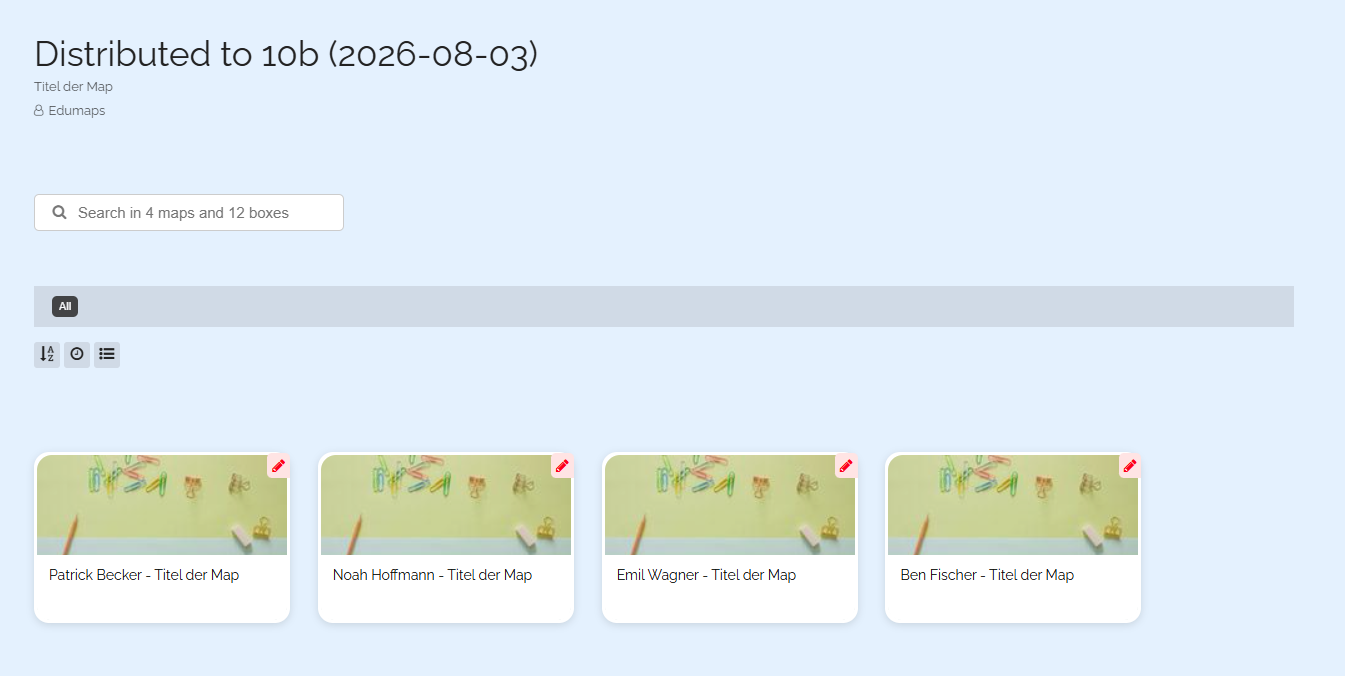
Click "Open Folder" to go directly to the newly created folder containing all map copies.
-
Each copied map carries the name of the recipient (student) in the map title.
4
What Do the Recipients Get?
-
Every member of the group is assigned their own copy of the map.
-
- You as the teacher are the owner of every copied map.
- The recipient receives access to their map (editing rights). They find the map in their personal area under "Received".
- The recipient receives a notification on Edumaps.
- Every recipient edits only their own copy. The maps of other students are not visible to them.
5
Copies Are Independent of the Original
-
The distributed copies are independent maps.
-
If you change the original later, the copies that were already distributed remain unchanged. The copies do not receive any updates from the original.
-
Exception: Embedded Content
- If a column or box from another map was embedded in the map before distributing, this embedding remains active in the copies as well. The embedded content continues to show the current state.
-
Tip: This lets you combine both deliberately. Fixed content (tasks, material) belongs directly in the map. Continuously maintained content (e.g. dates) should be embedded as a column before distributing, then it stays up to date in all copies.
-
📖 Tutorial: Embed External Columns
📖 Tutorial: Embed External Boxes
6
Distributing to the Same Group Again
-
You can distribute the same map to the group again at a later time.
-
This creates new copies. Existing copies are not overwritten and not updated.
-
A new folder containing the copies is created as well.
-
Tip: Adjust the map title before distributing again (e.g. "Weekly Plan Week 34" instead of just "Weekly Plan") so the recipients can tell their copies apart.
7
Typical Use Cases
-
Weekly Plan
-
Every student checks off the tasks in their own copy and keeps track of their personal progress.
-
Practice Map
-
Distribute exercises with checklist or quiz boxes. Everyone practices at their own pace without seeing the results of others.
-
Portfolio
-
Distribute a prepared portfolio structure. Every student fills their copy with their own content over the school year.
8
Notes
-
- Via the automatically created folder you can open each student copy individually.
-
- You find all created copies under "My Maps". Each recipient only has access to their own map. You as the teacher are the owner of all maps.
-
- You can manage or delete the copies centrally via the folder, since all maps belong to you.
-
- If you want to see your students' work directly on your own map, use Sharing a Single Box or Sharing Columns instead. There, all edits arrive directly on your map.
-
- If everyone should work together on one map, use the blue Share button in the top right corner and select "Share with Group", see Sharing Maps with Links.