5.4 Calendar for Boxes
Edumaps Tutorial EdumapsIntroduction
-
✔️ The calendar system provides you with a powerful tool for various scenarios.
-
- A separate calendar can be activated for each box.
- Calendars can be subscribed to and will then appear in the personal calendar.
- Calendars can be embedded into other calendars.
- Every user has their own calendar. See the page “My Calendar” and Tutorial “Personal Calendar”.
📑 Table of Contents
-
- Applications of the box calendar
- Activate the calendar
- Settings for calendar view
- Calendar view with time slots
- Calendar view with school lessons
- Reading or editing the calendar
- Sharing the calendar
- Edit the map but give calendar read-only rights
- Overview of all events below the calendar
- Create events
- Create events with repetitions
- Edit events
- Delete event
- Notification for new event entries by others
- Subscribe to calendar
- Embed calendar into another box calendar
- Embed in external calendars such as Apple and Google
1
Applications of the box calendar
-
You can assign each box its own calendar in which you can enter events/appointments.
-
Areas of application include:
-
- School and lesson planning (timetables, exam dates)
- Birthday calendar
- Training plans and game dates (for clubs)
- Event planning for workshops, celebrations, etc.
- Project management (milestones)
- Community projects (for neighbors, communities)
- Opening hours and bookings (museums, theaters, restaurants, etc.)
- Tip: For lending items and renting rooms, you can use the lending system.
-
⚙ applications
2
Activate the calendar
-
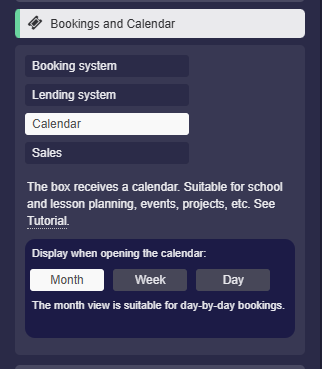
To enable the calendar for a box, open the box settings and click on “Bookings and Calendar” and then “Calendar”.
-
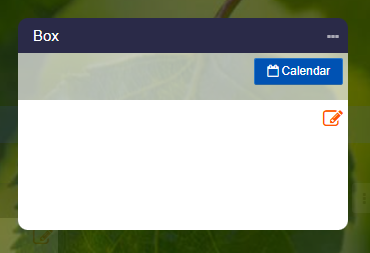
A “Calendar” button will then appear on the box.
-
⚙ activate
3
Settings for calendar view
-
For the calendar you have the following settings.
-
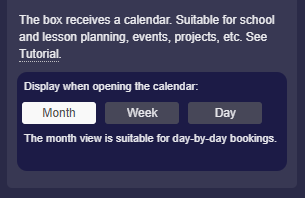
The “Display when first opening the calendar” determines the calendar view for the visitor.
-
The following modes are available:
-
- Month (for daily entries)
- Week (for hourly entries)
- Day (for hourly entries)
-
⚙ settings
4
Calendar view with time slots
-
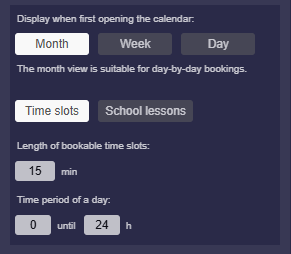
By default, the "Time slots" mode is active, which corresponds to a familiar calendar with clock times.
-
Here you will find the following settings:
-
- “Length of bookable timeslots”: Specified in minutes – for example,
60means that you cannot book less than 1 hour.
- “Length of bookable timeslots”: Specified in minutes – for example,
-
- “Time period of a day”: Set start time and end time – for example,
8to16means the days are shown only from 8:00 to 16:00.
- “Time period of a day”: Set start time and end time – for example,
-
⚙ timeslots
5
Calendar view with school lessons
-
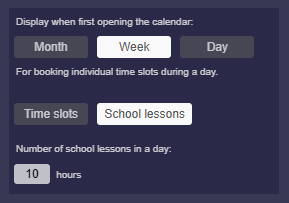
Instead of "Time slots", you can also choose the "School lessons" mode. Each day will then be divided into a number of numbered school lessons rather than clock times.
-
Enter the “Number of school lessons in a day” to specify how many lessons the day should have.
-
⚙ schoollessons
6
Reading or editing the calendar
-
If registered users open your map with editing rights, they can also enter events in the calendar.
-
This makes collaborative use of different calendars possible.
-
If users only have read access rights, they also only have read access to the calendar. Only the map owner can make changes to the calendar at any time.
-
Anonymous users cannot edit the calendar. Every user must be logged in.
-
⚙ readedit
7
Sharing the calendar
-
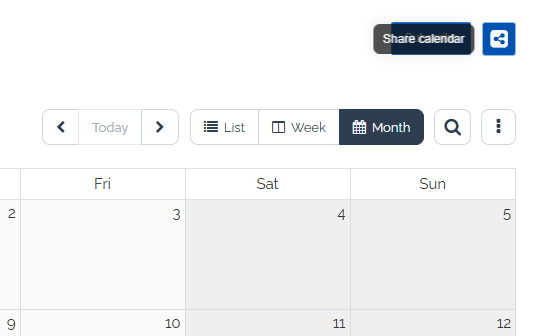
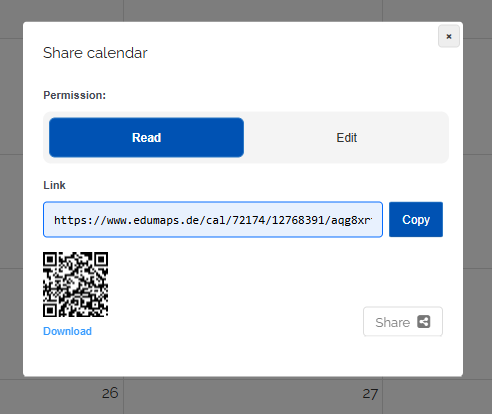
You can share each calendar separately, either with read access or edit access.
-
To do this, click the blue Share button in the top right.
-
You can now set Reading or Editing and receive the corresponding link.
9
Overview of all events below the calendar
-
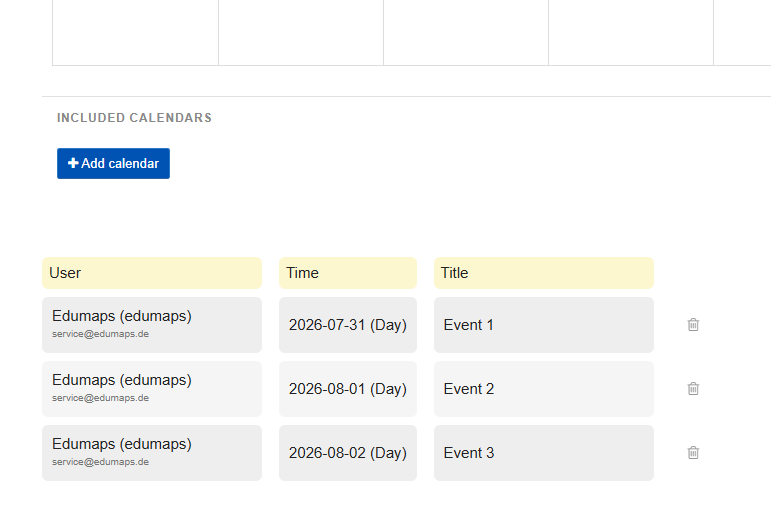
As the map owner, you will find the list of all events in each calendar below the calendar.
-
⚙ overview
10
Create events
-
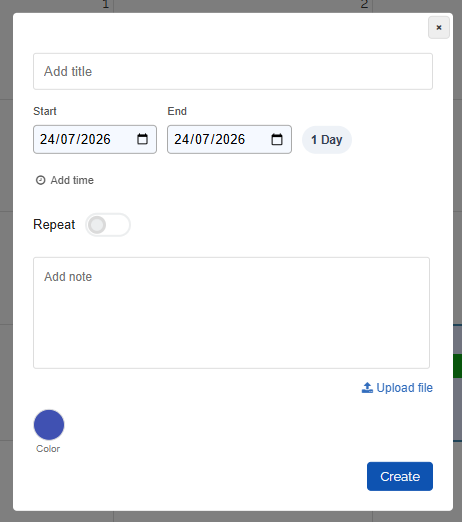
You can add events simply by clicking in the calendar or by selecting a time period with the mouse.
-
Change the times as desired. Add the title and a description. Optionally choose a different color.
-
You can also set repetitions for the event.
- You can also upload any number of files. You will then find the files on the “My Uploads” page.
-
⚙ create
11
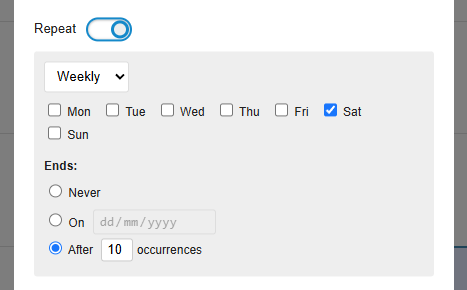
Create events with repetitions
-
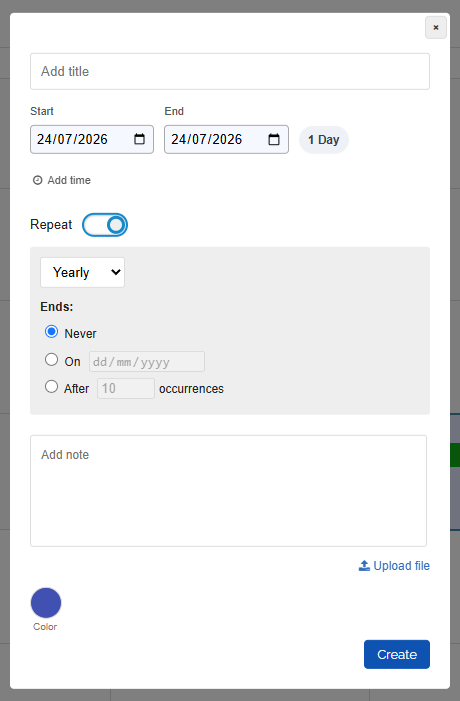
You can also create an event with repetitions so that it appears regularly at the specified times.
-
Types of repetitions:
-
- Daily
- Weekly
- Monthly
- Yearly
12
Edit events
-
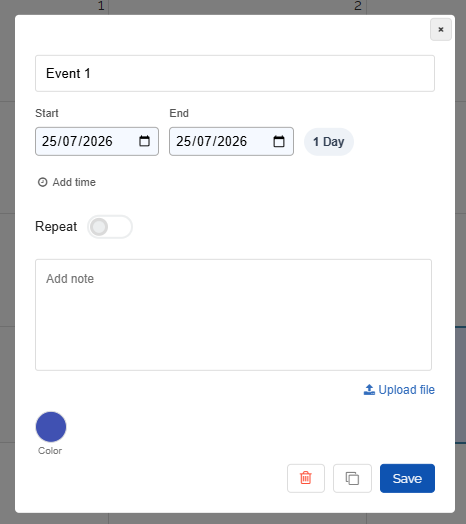
Click on the event, then a dialog for editing will open:
-
Event times can also be changed directly in the calendar with the mouse:
-
1. Move the event - hold the mouse button down on the event and drag it to the new time slot.
-
2. Event length - move the mouse to the bottom edge of the event. Grab the bottom edge (hold the mouse button down) and change the length.
-
Datei „Shorten or extend event time“ wurde gelöscht.
13
Delete event
-
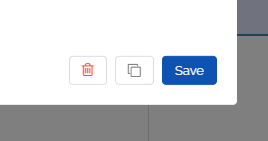
You can delete events by clicking directly on the event and selecting the delete icon next to the Save button.
-
Alternatively, you can delete the event in the events list below the calendar by clicking on the trash can icon.
-
⚙ delete
14
Notification for new event entries by others
-
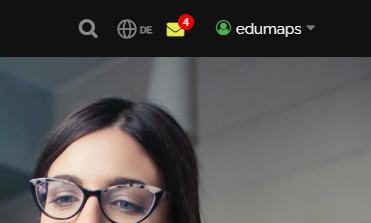
If a third party adds an event to your calendar, you will receive a notification. This notification appears in the top right corner of the website.
- Clicking the notification icon opens the page with all notifications . The newly entered events are listed there.
15
Subscribe to calendar
- Each box calendar can be subscribed to by logged-in users. All events will then appear on the personal page “My Calendar”.
-
The tutorial shows how subscribing works and how to cancel a subscription:
16
Embed calendar into another box calendar
-
You can embed any number of box calendars into another box calendar - for example, to create a central school calendar that brings together all class calendars. Changes in the source calendars are automatically applied.
-
The tutorial shows all steps, how embedded events are displayed, and further examples of use:
17
Embed in external calendars such as Apple and Google
-
You can embed any box calendar into external calendars such as Google and Apple calendars.
-
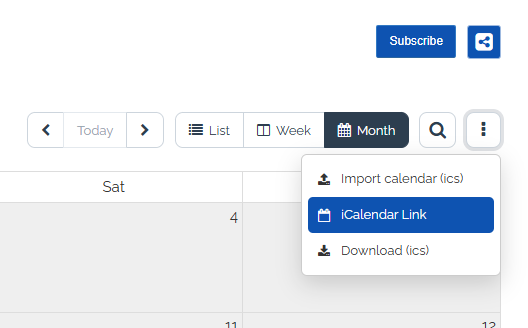
As the owner of the map, you will find an “iCalendar Link” below the calendar.
-
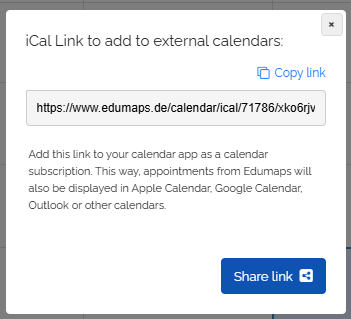
Click on it, and the iCalendar link will be displayed.
-
Copy the link and integrate it into your Apple or Google calendar.
-
-
If you would like to have your calendar as a widget on your smartphone's home screen, you can use this tutorial:
-
⚙ external